|
Author
|
Message
|
|
capelo
|
|
|
Group: Forum Members
Last Active: 6 Years Ago
Posts: 279,
Visits: 4.5K
|
Ted (4/5/2020)
Assuming that the crankshaft gear is in the zero position and if targeting for 4-6° of camshaft advance, then you will need to remove and reinstall the crankshaft timing gear so it is in the 4° retard keyway. Be extremely cautious when removing both timing gears in that you do not pry on the pins and instead push the gears forward by prying only on the flats on the chain. Prying on the pins will force the pins forward and cause the chain links to come loose later. Once you have the gears and chain reinstalled in the new position, then recheck both the intake and exhaust lobe centerline numbers and verify that the camshaft is sitting in the 5° advanced position. If it is, you are good to go once you have insured that both the cam thrust and cam gear retaining bolts are properly tightened. Before removing the degree wheel from the engine, put the crankshaft in the TDC position so that the timing cover, timing pointer, and damper can be installed to verify that the TDC on the damper aligns correctly with the pointer. If it doesn’t, then tweak the pointer so it aligns with the TDC mark on the damper. Thanks for the help, I take note and keep moving forward as indicated 👍
|
|
|
|
|
capelo
|
|
|
Group: Forum Members
Last Active: 6 Years Ago
Posts: 279,
Visits: 4.5K
|
I have already moved the distribution chain to the mark of R4 and after the test on admission it gives these data:
58 ° ATDC and 152 ° ATDC which added and divided by two give me 105 ° subtracted from the 110 ° result in 5 °.
Measuring 0.050 "in both intake and exhaust, it is 8th before TDC and 53rd before BDC.
Would this be correct to move on?
|
|
|
|
|
Ted
|
|
|
Group: Administrators
Last Active: 6 hours ago
Posts: 7.6K,
Visits: 206.0K
|
Your numbers look good. If you want to check yourself and/or the camshaft, you can also check the number six cylinder without removing the degree wheel. TDC is the same for both #1 and #6 cylinders. Being as it's an Iskenderian camshaft, I would be comfortable with the numbers off of the #1 cylinder and moving forward if not wanting to pursue this to the next level.
While I typically do not have any issues with the camshaft lifter bank angle when using the Isky camshafts, in a sixteen month period here at the shop I did have three camshafts by other manufacturers that were ground on the wrong lifter bank angle. These can only be found by degreeing in the camshaft by checking cylinders on opposite banks and comparing the numbers. Up to one degree difference between the banks would be tolerable but anymore than that will have you doing further checking. When I find camshafts ground on the incorrect lifter bank angles, I simply send them back to the manufacturer.
  Lorena, Texas (South of Waco) Lorena, Texas (South of Waco)
|
|
|
|
|
capelo
|
|
|
Group: Forum Members
Last Active: 6 Years Ago
Posts: 279,
Visits: 4.5K
|
Do you use any sealant here? 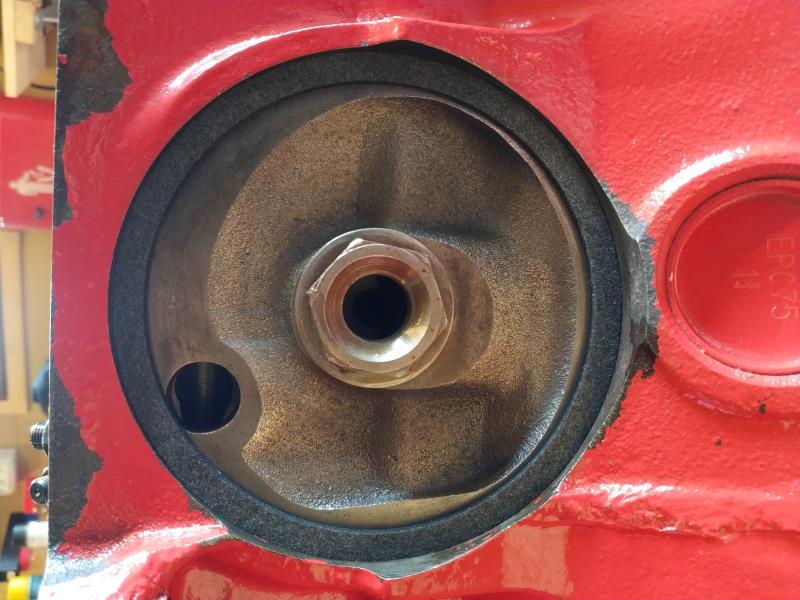
|
|
|
|
|
capelo
|
|
|
Group: Forum Members
Last Active: 6 Years Ago
Posts: 279,
Visits: 4.5K
|
Ted (4/5/2020)
Your numbers look good. If you want to check yourself and/or the camshaft, you can also check the number six cylinder without removing the degree wheel. TDC is the same for both #1 and #6 cylinders. Being as it's an Iskenderian camshaft, I would be comfortable with the numbers off of the #1 cylinder and moving forward if not wanting to pursue this to the next level.
While I typically do not have any issues with the camshaft lifter bank angle when using the Isky camshafts, in a sixteen month period here at the shop I did have three camshafts by other manufacturers that were ground on the wrong lifter bank angle. These can only be found by degreeing in the camshaft by checking cylinders on opposite banks and comparing the numbers. Up to one degree difference between the banks would be tolerable but anymore than that will have you doing further checking. When I find camshafts ground on the incorrect lifter bank angles, I simply send them back to the manufacturer. I keep moving forward thanks 👍
|
|
|
|
|
Ted
|
|
|
Group: Administrators
Last Active: 6 hours ago
Posts: 7.6K,
Visits: 206.0K
|
capelo (4/6/2020)
Do you use any sealant here? 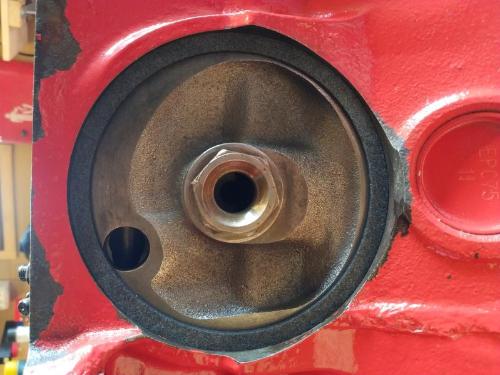 No sealant is required for the gasket. Are you using a spin on oil filter? If so, then the nut you show in the picture is not correct for the spin on oil filter plate.
Lorena, Texas (South of Waco)
|
|
|
|
|
capelo
|
|
|
Group: Forum Members
Last Active: 6 Years Ago
Posts: 279,
Visits: 4.5K
|
Ted (4/6/2020)
capelo (4/6/2020)
Do you use any sealant here? No sealant is required for the gasket. Are you using a spin on oil filter? If so, then the nut you show in the picture is not correct for the spin on oil filter plate. this is what i'm going to use 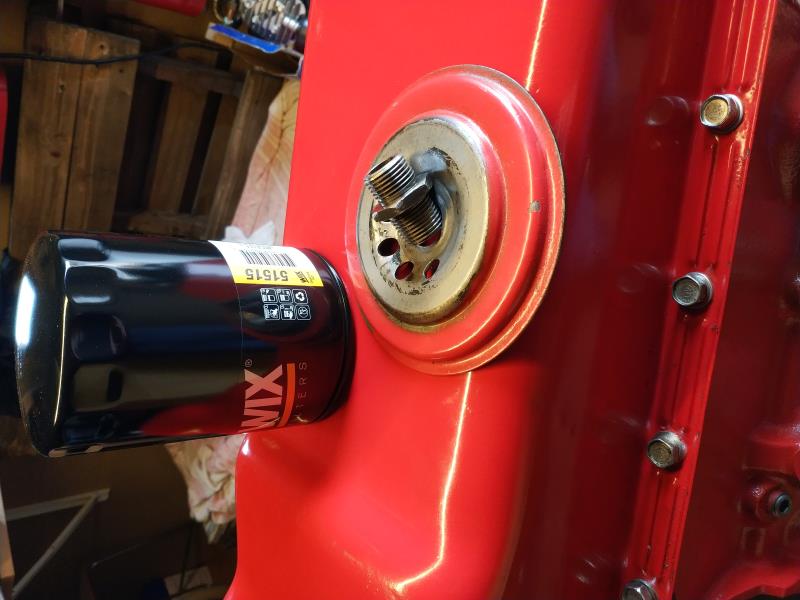
|
|
|
|
|
Joe-JDC
|
|
|
Group: Forum Members
Last Active: 2 hours ago
Posts: 784,
Visits: 22.9K
|
I would suggest removing the paint where the oil filter rubber seal will sit when the filter is installed. If you don't, when you go to remove the filter the first time, it will be stuck to the paint and nearly impossible to remove. You may wind up using a punch, or a long screwdriver to stick into the filter to get it off. Punching a hole in the filter will make a mess that can be avoided by removing the paint now. Been there done that. Joe-JDC
JDC
|
|
|
|
|
capelo
|
|
|
Group: Forum Members
Last Active: 6 Years Ago
Posts: 279,
Visits: 4.5K
|
Joe-JDC (4/6/2020)
I would suggest removing the paint where the oil filter rubber seal will sit when the filter is installed. If you don't, when you go to remove the filter the first time, it will be stuck to the paint and nearly impossible to remove. You may wind up using a punch, or a long screwdriver to stick into the filter to get it off. Punching a hole in the filter will make a mess that can be avoided by removing the paint now. Been there done that. Joe-JDC Thanks for the advice, that part will be free of paint 👍
|
|
|
|
|
capelo
|
|
|
Group: Forum Members
Last Active: 6 Years Ago
Posts: 279,
Visits: 4.5K
|
|
|
|
|