|
Author
|
Message
|
|
Daniel Jessup
|
|
|
Group: Forum Members
Last Active: 3 days ago
Posts: 2.0K,
Visits: 131.1K
|
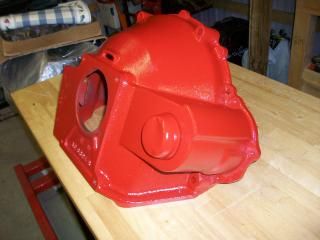
Spent a few hours today with the trusty sandblaster and the front end. I was surprised at how well my air compressor held up. I didn't blast continuously and would try to let the air compressor "catch up" from time to time, but I was happy with how it did and happy with the results. I also blasted a bellhousing - the pressure pot made QUICK work of that piece and the engine paint turned out nice. I only have about 5 to 6 hours on the pressure pot sandblaster I got from Tractor Supply a while back but I am not impressed with how quickly the "stopper"? is wearing out on the deadman's valve. The sand has worn away the tip on the closer (not just the ceramic tip - that is another story) but the top piece that slides over the tip - that piece is so wore out that the blaster now will leak air when the spring loaded lever is completely closed. I guess it is cheaply made. If there is anyone out there that has any good suggestions on a quality tip/closer I would appreciate it. I am going to look at TP tools. I have one of their Blast Cabinets and have used glass beads for 10 years now. I reckon I have spent countless hours using that gun and have only had to replace the nozzle about 3 times. I know sand is more abrasive, but come on... 6 hours????  Maybe I should take some close up shots of the tip just to show the erosion that has happened pretty quickly. Maybe I should take some close up shots of the tip just to show the erosion that has happened pretty quickly.
Next up - disassemble the front end so that I can paint the frame and separately blast the pieces in the cabinet. I have new rubber for up front and I have new Aerostar coils as well. I did locate a split sheet metal surround for the steering column and shifter column, and I have started preparing the 56 column and other shifter parts for painting. I also have those hood hinges about ready for topcoat.
If you have been wondering where some of the time goes for projects like these and why it has been a while since my last post, at times my wife gets me side-tracked on things like this.
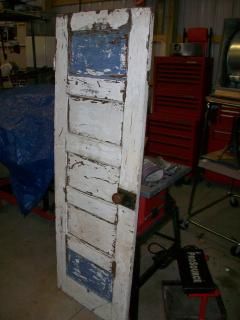
She found this door today at an Apple Harvest Festival about an hour away from us. "It was only $10," she gloated as I unloaded the thing from the van. "Where do you want me to put this?" I asked, knowing what she would say.... "Oh, just put it in the garage, honey."  And so the buffet the garage has been on for the past several months continues. I have never seen a garage hold more crap.... let's see - all the camping gear, outdoor gear, snowtubing and snowboarding toys for the kiddos, gardening supplies (yep - I likes me my peppers, padre!), woodworking tools and table saw, several golf bags, bicycles, fireworks, MY grill/smoker, etc. And my wife laughed when I originally told her we needed a 60x40 instead of a 40x24. What was it she said, "How much room do you need for crying out loud?" And so the buffet the garage has been on for the past several months continues. I have never seen a garage hold more crap.... let's see - all the camping gear, outdoor gear, snowtubing and snowboarding toys for the kiddos, gardening supplies (yep - I likes me my peppers, padre!), woodworking tools and table saw, several golf bags, bicycles, fireworks, MY grill/smoker, etc. And my wife laughed when I originally told her we needed a 60x40 instead of a 40x24. What was it she said, "How much room do you need for crying out loud?"
Maybe I'll just take the latest project she found and put it in the bedroom!  I'm sure that would fly! I'm sure that would fly!
Daniel JessupLancaster, California aka "The Hot Rod Reverend" 
check out the 1955 Ford Fairlane build at www.hotrodreverend.com
|
|
|
|
|
Daniel Jessup
|
|
|
Group: Forum Members
Last Active: 3 days ago
Posts: 2.0K,
Visits: 131.1K
|
|
|
|
|
|
lyonroad
|
|
|
Group: Forum Members
Last Active: 11 Years Ago
Posts: 703,
Visits: 3.1K
|
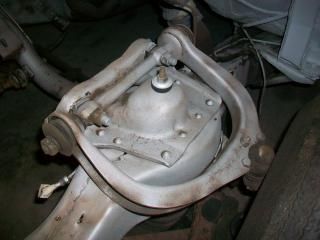
Daniel Jessup (10/8/2014)
Does anyone know why Ford had to put these shims in the FRONT of the Lower A Arm pivot point? I am wondering if they have anything to do with alignment (like the shims used on the Upper A Arm) or is this just something that Ford used because the crossmembers were never square? I don't think they have anything to do with alignment but I could be wrong on that.... I plan to put them back in because they were there when I disassembled the arm. 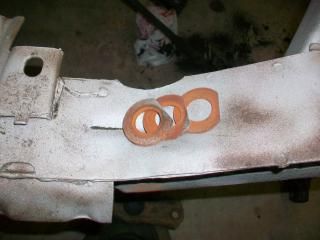 Daniel, I am pretty sure they have something to do with the alignment. A few months ago markmontereybay (I think) posted that he was able to increase the caster on his Tbird by moving the shims around. I replaced mine with the horseshoe shaped shims so I can pull them out, put them back or move them around later. Nice looking family. Oops somehow I lost your quote.
Mark
1956 Mercury M100
1955 Ford Fairlane Club Sedan
Delta, British Columbia
|
|
|
|
|
Daniel Jessup
|
|
|
Group: Forum Members
Last Active: 3 days ago
Posts: 2.0K,
Visits: 131.1K
|
|
|
|
|
|
lyonroad
|
|
|
Group: Forum Members
Last Active: 11 Years Ago
Posts: 703,
Visits: 3.1K
|
Daniel, I took a small diameter drill bit (can't remember the exact size) and drilled as many holes as I could through the rubber. Eventually I could push enough rubber out that the outer part of the bushing came of. Then you can work on the inner sleeve. I think I used a die grinder ans a small cut off wheel to cut a groove in the inner piece and force it off. Here is how I put the new bushings on. I made a bunch of thick aluminum washers from scrap and disassembled a large three jaw puller. 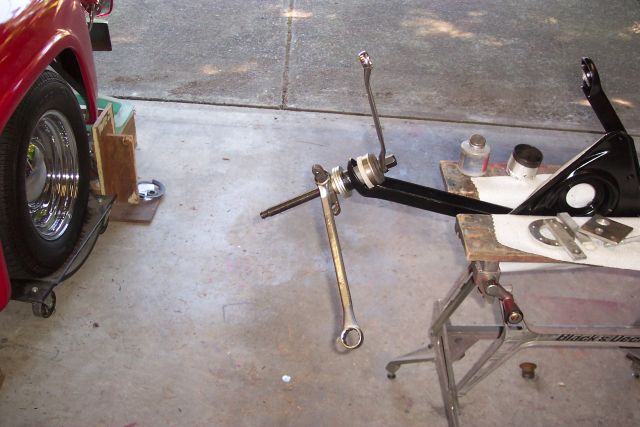 Mark
Mark
1956 Mercury M100
1955 Ford Fairlane Club Sedan
Delta, British Columbia
|
|
|
|
|
glrbird
|
|
|
Group: Forum Members
Last Active: Last Year
Posts: 616,
Visits: 7.1K
|
Daniel
I have used an air chizel before to rip the bushing from back to front so it wil colapse and just push it out.
Gary Ryan San Antonio.TX.
|
|
|
|
|
Daniel Jessup
|
|
|
Group: Forum Members
Last Active: 3 days ago
Posts: 2.0K,
Visits: 131.1K
|
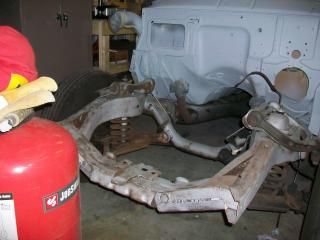
Fellas thanks for the advice and ideas. I too decided to push out the inner bushing/sleeve by heating up the rubber (some of it was so worn it had just about disintegrated!) and just yanking it with a pair of pliers. After that I cut a deep groove in the ID of the metal bushing to get me started and then just simply tapped them out. One of them I obviously separated. It was not too difficult to say the least and now I can go ahead and blast those arms and then paint them up pretty. I barely nicked the edge of the ID on the arms, but I don't think it is going to be any big deal. Looks like those were the original bushings on the car. 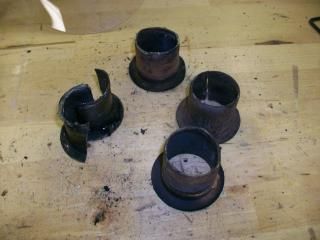 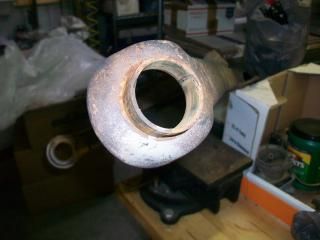 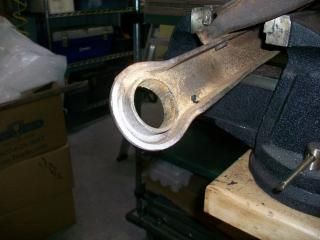 Mark, I like that idea. I will have to see if I have a screw assembly long/large enough to press the new bushings in there. Gary, I don't know why I didn't think of the air chisel! duh! That would have sped up the process for sure.
Daniel JessupLancaster, California aka "The Hot Rod Reverend"
check out the 1955 Ford Fairlane build at www.hotrodreverend.com
|
|
|
|
|
Daniel Jessup
|
|
|
Group: Forum Members
Last Active: 3 days ago
Posts: 2.0K,
Visits: 131.1K
|
|
|
|
|
|
Ted
|
|
|
Group: Administrators
Last Active: Yesterday
Posts: 7.6K,
Visits: 206.0K
|
Daniel Jessup (10/21/2014)
You can see the photos (looking from the firewall) I only need a few plates welded in and we are good to go. Could I get another crossmember from a repro shop? Replacement ‘54-56 crossmembers are available from Goodell Fabrications. 11986 S. 267th E. Avenue Coweta, OK 74429 Ph: 918-636-7071 Pricing is $299.95 postpaid.
  Lorena, Texas (South of Waco) Lorena, Texas (South of Waco)
|
|
|
|
|
Daniel Jessup
|
|
|
Group: Forum Members
Last Active: 3 days ago
Posts: 2.0K,
Visits: 131.1K
|
|
|
|
|