Profile Picture

55 Ford Fairlane Refresh and Driver Resto Blog Begins!

Posted By Daniel Jessup 10 Years Ago
You don't have permission to rate!
Author
Message
beachbumrod
Posted 8 Years Ago
View Quick Profile
Hitting on all eight cylinders

Hitting on all eight cylinders (6 reputation)Hitting on all eight cylinders (6 reputation)Hitting on all eight cylinders (6 reputation)Hitting on all eight cylinders (6 reputation)Hitting on all eight cylinders (6 reputation)Hitting on all eight cylinders (6 reputation)Hitting on all eight cylinders (6 reputation)Hitting on all eight cylinders (6 reputation)Hitting on all eight cylinders (6 reputation)

Group: Forum Members
Last Active: 8 Years Ago
Posts: 2, Visits: 2
Nice plan, I am not that involved in mine yet but do have it on the road. 
Daniel Jessup
Posted 8 Years Ago
View Quick Profile
Supercharged

Supercharged (3.8K reputation)Supercharged (3.8K reputation)Supercharged (3.8K reputation)Supercharged (3.8K reputation)Supercharged (3.8K reputation)Supercharged (3.8K reputation)Supercharged (3.8K reputation)Supercharged (3.8K reputation)Supercharged (3.8K reputation)

Group: Forum Members
Last Active: 4 hours ago
Posts: 2.0K, Visits: 118.8K
Great! do you have a photo or two to put up on the website forum here? I would like to see it.

Daniel Jessup

Lancaster, California

aka "The Hot Rod Reverend" w00t
check out the 1955 Ford Fairlane build at www.hotrodreverend.com


Daniel Jessup
Posted 8 Years Ago
View Quick Profile
Supercharged

Supercharged (3.8K reputation)Supercharged (3.8K reputation)Supercharged (3.8K reputation)Supercharged (3.8K reputation)Supercharged (3.8K reputation)Supercharged (3.8K reputation)Supercharged (3.8K reputation)Supercharged (3.8K reputation)Supercharged (3.8K reputation)

Group: Forum Members
Last Active: 4 hours ago
Posts: 2.0K, Visits: 118.8K
Got back from being out of town and just had to get in the garage for some therapy. I decided to remove all of the trim (save the rear bumper and the windshield/glass trim) so I could begin the body work and paint process.

Some photos and some questions for you fellas that have more experience than I ...

First up, the doors. The passenger door is the "worst" of the two but won't require much. I am going to treat some of the rust on the inside cavity and then paint inside, making sure that the drain holes are good.


Next, a wonderful find... the previous owner decided to hold each of the Fairlane Crowns on the doors with this goo :eek: Must be pretty good stuff. After 25 years or so they never fell off!


All of the upper window openings have rust like this:


That will be fun.

Of course we had a slew of clips and fasteners to deal with but I've gotta ask a question from this photo


Which one is original? I assume the one on top that is "square" right? The other one (like some of the other clips) simply broke off in my hand when I gave a gentle tug on the SS trim pieces.

And then how about this? Check out the paint - serious crow's feet pattern going on. This paint job is about 25 years old but the white is in serious trouble like this all the way around the car. The red is in excellent shape and looks like it could have been painted 3 years ago. What gives?


I went ahead and took 120 to a patch of the white paint on the rear quarter panel just to see, then I took it to 400. I cleaned it with thinner and this is what it looked like still, although you could not physically feel any crow's feet you can still see them.


Can I paint over this if I knock it down with something as serious as 120 and then maybe follow up with my 2K primer surfacer?

Daniel Jessup

Lancaster, California

aka "The Hot Rod Reverend" w00t
check out the 1955 Ford Fairlane build at www.hotrodreverend.com


Daniel Jessup
Posted 8 Years Ago
View Quick Profile
Supercharged

Supercharged (3.8K reputation)Supercharged (3.8K reputation)Supercharged (3.8K reputation)Supercharged (3.8K reputation)Supercharged (3.8K reputation)Supercharged (3.8K reputation)Supercharged (3.8K reputation)Supercharged (3.8K reputation)Supercharged (3.8K reputation)

Group: Forum Members
Last Active: 4 hours ago
Posts: 2.0K, Visits: 118.8K
Sometimes while working on this project I like to take some time out and do something to a sub-assembly or rebuild a few items to get some sense of "completion". This can be a carburetor, a set of rocker arms, oil pump, and the latest was just another rendition of a wall clock for the office.


This one was a little more challenging in setting the clock in the cavity because of the eyebrow trim, but it turned out nice and I like it.

Ridiculous price on those new Chrome Headlight Eyebrows - I am embarrassed to even say.

Daniel Jessup

Lancaster, California

aka "The Hot Rod Reverend" w00t
check out the 1955 Ford Fairlane build at www.hotrodreverend.com


Daniel Jessup
Posted 8 Years Ago
View Quick Profile
Supercharged

Supercharged (3.8K reputation)Supercharged (3.8K reputation)Supercharged (3.8K reputation)Supercharged (3.8K reputation)Supercharged (3.8K reputation)Supercharged (3.8K reputation)Supercharged (3.8K reputation)Supercharged (3.8K reputation)Supercharged (3.8K reputation)

Group: Forum Members
Last Active: 4 hours ago
Posts: 2.0K, Visits: 118.8K
Last night I did some "testing" with two forms of paint removal on the White Tutone where the crow's feet is all showing up. The first was a simple heat gun and razor blade scraper.


It took me over an hour to move that far along with that method, but it was a "no muss, no fuss" way - simply sweep up the chips on the floor. I was concerned over the idea of heating the paint being so close to the Red Tutone which is in excellent shape. Once I got through those layers you could see where the paint had followed this idea - FoMoCo primer, FoMoCo Sea Sprite Green, ? FoMoCo primer? and FoMoCo? White, then aftermarket primer, aftermarket White. How did Ford do their Tutones? Were all bodies painted a solid color and then if doing a Tutone car the white was painted over afterwards? All of the FoMoCo paint is really on there and really stable - no problems except for the few small places I am going to deal with where there is rust pitting.

Next was brushing on "Klean Strip" - it took me an hour and a half to get only this far. :confused:


A few items of observation:

1. It took THREE applications to get the paint removed from where you see the beginning photo to the ending photo, and even at the ending photo there was some sanding with 60 grit done just to clean it up.
2. The aftermarket White Tutone with the crows feet came up as fast as you please. With all of those cracks in the surface it took no time at all. Within 5 minutes it was bubbling up and peeling.
3. The original FoMoCo paint is some tough stuff. Even after following paint stripper manufacturer's directions to the letter it still did not remove all layers after THREE applications.
4. What I had feared about the seepage of paint stripper down to the Red Tutone was true. It eventually worked its way under the paint and ate into it a tick.
5. There is an obvious mess on the floor - Rolleyes

Next up is get out the 7" disk electric sander and go to town. It will be interesting though to see how much dust I kick up here in my little "harry homeowner" garage that is not made for this type of work. :eek::eek:

I also have a DA I can try, but I think that will yield the same results as the electric sander.

I do know this - it might be best to remove the white Tutone from the fenders (in storage right now) by using my sandblaster. Not sure of what it would take to get that done on the entire body - I really don't have a place to do that here and the fender will be fun enough as it is. I guess the neighborhood will have to deal with the black dust cloud coming out of the Hot Rod Reverend's house!! BigGrin

Daniel Jessup

Lancaster, California

aka "The Hot Rod Reverend" w00t
check out the 1955 Ford Fairlane build at www.hotrodreverend.com


Daniel Jessup
Posted 8 Years Ago
View Quick Profile
Supercharged

Supercharged (3.8K reputation)Supercharged (3.8K reputation)Supercharged (3.8K reputation)Supercharged (3.8K reputation)Supercharged (3.8K reputation)Supercharged (3.8K reputation)Supercharged (3.8K reputation)Supercharged (3.8K reputation)Supercharged (3.8K reputation)

Group: Forum Members
Last Active: 4 hours ago
Posts: 2.0K, Visits: 118.8K
Ummmmm, ok after a little more "testing" I think we have a winner, winner, chicken dinner! :p


That took what.... 5 minutes if that? But check out that dust! It's everywhere. We will keep moving along here and see what we can do today. Rolleyes

Daniel Jessup

Lancaster, California

aka "The Hot Rod Reverend" w00t
check out the 1955 Ford Fairlane build at www.hotrodreverend.com


Daniel Jessup
Posted 8 Years Ago
View Quick Profile
Supercharged

Supercharged (3.8K reputation)Supercharged (3.8K reputation)Supercharged (3.8K reputation)Supercharged (3.8K reputation)Supercharged (3.8K reputation)Supercharged (3.8K reputation)Supercharged (3.8K reputation)Supercharged (3.8K reputation)Supercharged (3.8K reputation)

Group: Forum Members
Last Active: 4 hours ago
Posts: 2.0K, Visits: 118.8K
More photos... it did not take too long to get this done, but boy the mess! It looks like I am going to have to start pulling the car outside and take care of this mess in the driveway where I can hose down the dust. The surface on the sheet metal continues to look pretty good. Why the white tutone when "crow's feet" after all those years I am not sure.


Got to put the column and steering wheel back on first!

Daniel Jessup

Lancaster, California

aka "The Hot Rod Reverend" w00t
check out the 1955 Ford Fairlane build at www.hotrodreverend.com


ian57tbird
Posted 8 Years Ago
View Quick Profile
Supercharged

Supercharged (1.1K reputation)Supercharged (1.1K reputation)Supercharged (1.1K reputation)Supercharged (1.1K reputation)Supercharged (1.1K reputation)Supercharged (1.1K reputation)Supercharged (1.1K reputation)Supercharged (1.1K reputation)Supercharged (1.1K reputation)

Group: Forum Members
Last Active: Last Month
Posts: 488, Visits: 20.9K
Be careful. The heat from the disk sanding can buckle panels and you will find yourself filling areas that may have been straight before. I prefer a composite disk that is an open plastic structure with an abrasive in it. The disk I am talking about removes the paint but does not score the steel surface easily, preserving the factory metal. Which ever disk is used you should take care not to heat it or it will distort.
Daniel Jessup
Posted 8 Years Ago
View Quick Profile
Supercharged

Supercharged (3.8K reputation)Supercharged (3.8K reputation)Supercharged (3.8K reputation)Supercharged (3.8K reputation)Supercharged (3.8K reputation)Supercharged (3.8K reputation)Supercharged (3.8K reputation)Supercharged (3.8K reputation)Supercharged (3.8K reputation)

Group: Forum Members
Last Active: 4 hours ago
Posts: 2.0K, Visits: 118.8K
Thanks for the tip...I do move the head of the sanding disk around quite a bit so as not to build up too much heat in one place. The grit is 80 also.

Daniel Jessup

Lancaster, California

aka "The Hot Rod Reverend" w00t
check out the 1955 Ford Fairlane build at www.hotrodreverend.com


Daniel Jessup
Posted 8 Years Ago
View Quick Profile
Supercharged

Supercharged (3.8K reputation)Supercharged (3.8K reputation)Supercharged (3.8K reputation)Supercharged (3.8K reputation)Supercharged (3.8K reputation)Supercharged (3.8K reputation)Supercharged (3.8K reputation)Supercharged (3.8K reputation)Supercharged (3.8K reputation)

Group: Forum Members
Last Active: 4 hours ago
Posts: 2.0K, Visits: 118.8K
The dog days of summer...

I did strip the quarter panel of the old white paint and spray primer on it to do a test of appearance, mil thickness of the paint, etc. I am very happy with what I am seeing although i did reduce the topcoat a tick too much.


The test square of white paint looks yellow in the photo but it doesn't look that way in person. It is the Wimbledon White Ford paint code from the 60s Mustangs, kind of an off white I guess. The garage is going to be a mess for a while! And the garage is the way the entire family enters/exits the house each day. I think I am going to try to pull the car out side when I do the stripping, paint and block sand inside, etc. We will see how that works with momma! BigGrin

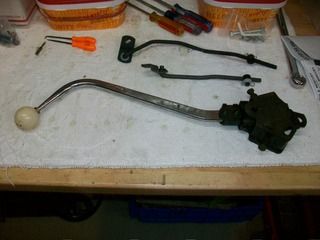
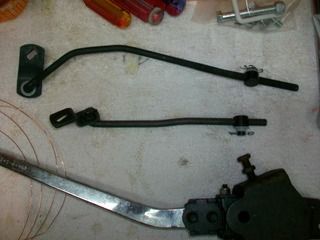
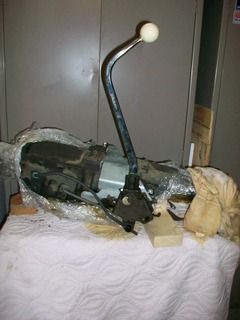
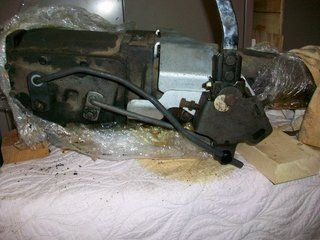
Last night I did reinstall the steering column and dummy shaft - the shifter is on the floor but I didn't want a hole there where the old column shift was at and I didn't want to leave it on there either.


First, I laid out all of the column parts and the two seals that need to go on the column before you place it on the steering gear assembly. I used some masking tape to keep from scuffing things up on the new paint, but I wasn't perfect I can tell you that. Note the orientation of the large rubber seal - it needs to be oriented correctly. The photo is showing the FIREWALL side of the seal. Obviously I will need to cut a hole for the clutch release rod - We will wait until it all mounted up to do that but it should be pretty straightforward.


Don't forget that felt oil baffle that goes inside the steering column. Here it is pictured up top but it needs to go down to the bottom where you will tighten the tube to the steering gear.


Before installing the steering wheel, make sure you place the white plastic bushing around the steering shaft - this bushing goes rests between the shaft and that bearing in the cup of the column tube. If you look closely in the photo above where the spring is shown in the cup you will find that small bushing in place. Here is the part number...


One last item to mention... After working on that steering wheel for a loooooooong time would you believe it fell off of the paint rack? TWICE! It cracked again and of course is dinged up. I hate to say it but for now since I need to move the car in and out and start getting this body work done I just gave up and installed it. It looks good in the photo - but trust me - IT AIN'T :mad:

I will locate another one and have it ready for after the car is repainted.

Daniel Jessup

Lancaster, California

aka "The Hot Rod Reverend" w00t
check out the 1955 Ford Fairlane build at www.hotrodreverend.com


Reading This Topic


Site Meter