|
Author
|
Message
|
|
Rono
|
|
|
Group: Forum Members
Last Active: 2 Years Ago
Posts: 1.3K,
Visits: 80.0K
|
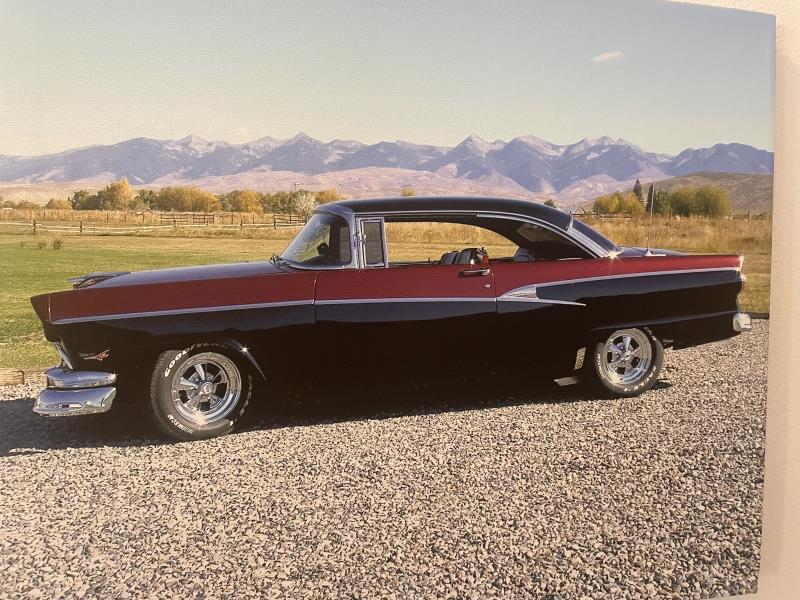
Daniel; That would be very helpful if I knew which bolts went into the coolant jacket and which did not. I the two long top bolts that go through the water pump and timing cover may not be blind holes, so I planned on putting some sealant on them. I am looking at all bolts closely as they come out to to see if they were sealed or not. BTW, I did have a crank damper come apart during the Dyno of my 56 Customline motor and sent it down to the Damper Doctor. They were great and fast. I hope they still are if I need to send this crank damper down to them which I probably will do regardless. Ted; maybe we can use this picture of my Customline as my signature line. 
 Ron Lane, Meridian, ID Ron Lane, Meridian, ID
|
|
|
|
|
Ted
|
|
|
Group: Administrators
Last Active: 2 days ago
Posts: 7.5K,
Visits: 205.9K
|
Signature picture swapped out. I have a soft spot for those Customline Victorias as I had one of those when I graduated from High School.
  Lorena, Texas (South of Waco) Lorena, Texas (South of Waco)
|
|
|
|
|
DANIEL TINDER
|
|
|
Group: Forum Members
Last Active: 2 days ago
Posts: 1.7K,
Visits: 154.3K
|
Rono (12/29/2022)
Daniel; That would be very helpful if I knew which bolts went into the coolant jacket and which did not. I the two long top bolts that go through the water pump and timing cover may not be blind holes, so I planned on putting some sealant on them. I am looking at all bolts closely as they come out to to see if they were sealed or not. BTW, I did have a crank damper come apart during the Dyno of my 56 Customline motor and sent it down to the Damper Doctor. They were great and fast. I hope they still are if I need to send this crank damper down to them which I probably will do regardless. Ted; maybe we can use this picture of my Customline as my signature line.  I have an old EarlyBird article about plugging all those holes with sealed/cut-off/scribed bolt ends, so parts can be removed in future without fluid spills. I never did it since I just knew some future owner would install the longer OEM bolts and run into trouble. Unfortunately, the author wasn’t overly specific re: all the specific locations. BTW: I just installed the latest gen. water pump & Chris’s modified T-Bird spacer. I used so much #2 sealer on the gaskets, enough squeezed out to seal the bolt heads. It was an interesting experience polishing off the timing cover casting flash first with the engine/cover in the car. Couldn’t t have managed it if the radiator wasn’t removed. I actually had to look through the grill to continually check my progress.
6 VOLTS/POS. GRD. NW INDIANA
|
|
|
|
|
Rono
|
|
|
Group: Forum Members
Last Active: 2 Years Ago
Posts: 1.3K,
Visits: 80.0K
|
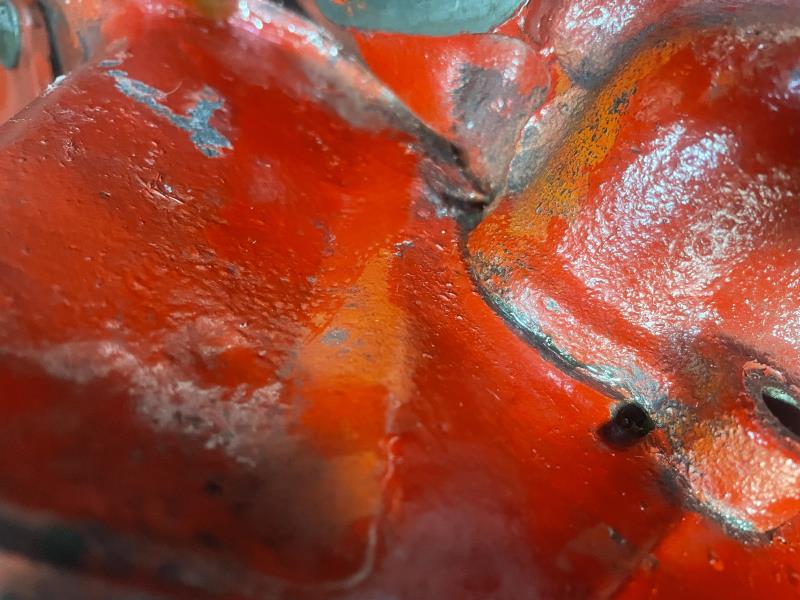
So now the damper has been removed and all the bolts are out of the timing cover. One question is are there any tricks in getting the cover off the block? I've been using a block of wood and a heavy hammer to try and get it to move with no luck. Also, discovered this little "hole" on the block mating surface to the timing cover on the driver's side by the upper cover bolt hole that has started leaking a little coolant now. WHAT? A new gasket should seal it but never noticed it before.Casting flaw? This is a ECZ 312 block. 
 Ron Lane, Meridian, ID Ron Lane, Meridian, ID
|
|
|
|
|
Rono
|
|
|
Group: Forum Members
Last Active: 2 Years Ago
Posts: 1.3K,
Visits: 80.0K
|
Ted; I do not have a T Bird manual and really don't understand the process of centering the crankshaft snout using the PVC pipe. I measured the I.D. of the new seal to be about 1.800". (The crank damper is boxed up ready to be mailed to Damper Doctor for rebuild so I couldn't measure it.) So do I use a piece of PVC pipe with close to that for the O.D. and then measure somehow the distance between the crankshaft snout and the inside of the PVC pipe? Never tried to center the timing cover before. Thanks,
 Ron Lane, Meridian, ID Ron Lane, Meridian, ID
|
|
|
|
|
Ted
|
|
|
Group: Administrators
Last Active: 2 days ago
Posts: 7.5K,
Visits: 205.9K
|
|
|
|
|
|
Rono
|
|
|
Group: Forum Members
Last Active: 2 Years Ago
Posts: 1.3K,
Visits: 80.0K
|
Thanks ted! I really appreciate the info!
 Ron Lane, Meridian, ID Ron Lane, Meridian, ID
|
|
|
|
|
Daniel Jessup
|
|
|
Group: Forum Members
Last Active: 8 hours ago
Posts: 2.0K,
Visits: 131.0K
|
If it helps, I used stout angle iron to extend the line of the oil pan rail of the block so that the timing cover would line up.
Daniel JessupLancaster, California aka "The Hot Rod Reverend" 
check out the 1955 Ford Fairlane build at www.hotrodreverend.com
|
|
|
|
|
Rono
|
|
|
Group: Forum Members
Last Active: 2 Years Ago
Posts: 1.3K,
Visits: 80.0K
|
|
|
|
|