|
By Rono - 4 Years Ago
|
|
Merry Christmas Everyone! So this winter we've decided to do a power steering conversion on our 56 Ranch Wagon using Borgeson components. A closer examination of the crank dampener where the accessory pulley will mount shows a moderate amount of oil around the steady rest, most likely from the timing cover seal.I could look the other way and just bolt on the accessory pulley and be done, but it is a moderate amount of oil. I've done seal replacements several times in the past, but never with the engine in the car. I know it can be done, hopefully without dropping the oil pan, but any words of wisdom you may have would be appreciated.
|
|
By Daniel Jessup - 4 Years Ago
|
|
Not too difficult to do at all - but the timing cover has to be removed since the seal is installed from the inside of the timing cover itself. It can certainly be removed and the seal replaced without dropping the pan. Usually the timing cover gasket kits come with the front portion of the oil pan gasket anyway.
|
|
By Rono - 4 Years Ago
|
|
Thanks Daniel, I thought that was the case. I'll remove the radiator and hopefully I will have enough room to use my puller to get the dampener off without having to take the grille out or anything like that..
|
|
By Daniel Jessup - 4 Years Ago
|
I don't know how much it will help, but I did a camshaft swap this past year while the engine sat in the car the entire time. (This was because of space constraints and I was just not in a position to pull the engine like I normally would.) During that simple E4 install, I took some video and I also wrote up a blog post or two about the experience. A buddy of mine and I had a good time in the garage with all of that. At any rate, I easily made a copy of one of KR Wilson's installation tools on that damper. Maybe that can help in some way.
Links
https://www.hotrodreverend.com/post/1955-ford-part-110-camshaft-upgrade-in-car-part-1
https://www.hotrodreverend.com/post/1955-ford-part-112-camshaft-upgrade-in-car-part-2
|
|
By Florida_Phil - 4 Years Ago
|
While you have the front cover off, check the balancer where the seal rides to see if it has a groove cut in it. Over the years these engines have been in service, the seal can actually cut down into the metal of the balancer and a new seal won't fix the leak. Harmonic balancer repair sleaves are available.
I love the Hot Rod Reverand's website and videos. Merry Christmas to all!!
|
|
By Rono - 4 Years Ago
|
Thanks! I have used those "speedy Sleeves" before and I suspect there will be wear on the crank pulley there. I was also wondering if you only snug the bolts on the timing cover until the crank damper is fully seated with the new seal in place so that it will center itself? Maybe this is not necessary but I thought I would ask.
|
|
By paul2748 - 4 Years Ago
|
That is what I did the last time I installed the front cover.
Rono (12/25/2022)
Thanks! I have used those "speedy Sleeves" before and I suspect there will be wear on the crank pulley there. I was also wondering if you only snug the bolts on the timing cover until the crank damper is fully seated with the new seal in place so that it will center itself? Maybe this is not necessary but I thought I would ask.
|
|
By DANIEL TINDER - 4 Years Ago
|
|
FYI: In case you don’t have a special tool, I believe there is a T-Bird restoration manual (?) page depicting how a piece of standard PVC pipe can be used to install the seal.
|
|
By Ted - 4 Years Ago
|
Simply ensure that the bottom oil pan gasket flange on the timing cover is parallel with the gasket flange on the block. If using anything (ie. PCV pipe) other than the factory tool to align the cover so it’s centered with the crankshaft snout, the weight of the timing cover will have the seal automatically off center. While this creates a scenario where the snout is not centered with the seal, the oil pan gasket sealing areas on the cover and block will also be misaligned with each other.
|
|
By DANIEL TINDER - 4 Years Ago
|
While we’re on the subject of timing covers: I can’t find a cut-away view anywhere of the coolant/pump space inside the cover. Do either of the top pump bolt heads need sealer?
Going through all my accumulated Y-Block/T-Bird literature, I find what is apparently missing, is a detailed list/diagram of all the specific bolts that intersect either coolant or oil spaces. Likely a good future Y-Block Magazine article (?).
P.S. Is it my imagination, of did I once read something about installing the water pump higher to avoid pulley interference?
|
|
By Rono - 4 Years Ago
|
Daniel;
That would be very helpful if I knew which bolts went into the coolant jacket and which did not. I the two long top bolts that go through the water pump and timing cover may not be blind holes, so I planned on putting some sealant on them. I am looking at all bolts closely as they come out to to see if they were sealed or not. BTW, I did have a crank damper come apart during the Dyno of my 56 Customline motor and sent it down to the Damper Doctor. They were great and fast. I hope they still are if I need to send this crank damper down to them which I probably will do regardless.
Ted; maybe we can use this picture of my Customline as my signature line.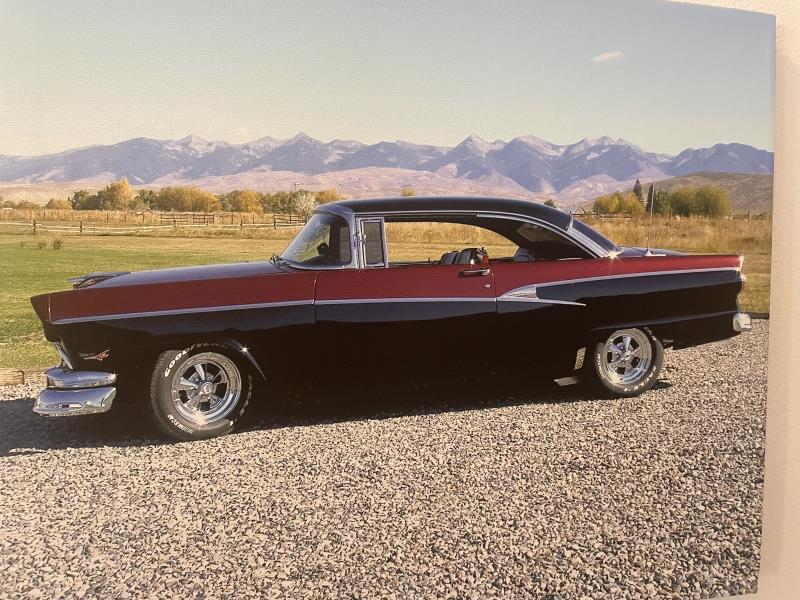
|
|
By Ted - 4 Years Ago
|
|
Signature picture swapped out. I have a soft spot for those Customline Victorias as I had one of those when I graduated from High School.
|
|
By DANIEL TINDER - 4 Years Ago
|
Rono (12/29/2022)
Daniel; That would be very helpful if I knew which bolts went into the coolant jacket and which did not. I the two long top bolts that go through the water pump and timing cover may not be blind holes, so I planned on putting some sealant on them. I am looking at all bolts closely as they come out to to see if they were sealed or not. BTW, I did have a crank damper come apart during the Dyno of my 56 Customline motor and sent it down to the Damper Doctor. They were great and fast. I hope they still are if I need to send this crank damper down to them which I probably will do regardless. Ted; maybe we can use this picture of my Customline as my signature line. 
I have an old EarlyBird article about plugging all those holes with sealed/cut-off/scribed bolt ends, so parts can be removed in future without fluid spills. I never did it since I just knew some future owner would install the longer OEM bolts and run into trouble. Unfortunately, the author wasn’t overly specific re: all the specific locations.
BTW: I just installed the latest gen. water pump & Chris’s modified T-Bird spacer. I used so much #2 sealer on the gaskets, enough squeezed out to seal the bolt heads. It was an interesting experience polishing off the timing cover casting flash first with the engine/cover in the car. Couldn’t t have managed it if the radiator wasn’t removed. I actually had to look through the grill to continually check my progress.
|
|
By Rono - 3 Years Ago
|
So now the damper has been removed and all the bolts are out of the timing cover. One question is are there any tricks in getting the cover off the block? I've been using a block of wood and a heavy hammer to try and get it to move with no luck. Also, discovered this little "hole" on the block mating surface to the timing cover on the driver's side by the upper cover bolt hole that has started leaking a little coolant now. WHAT? A new gasket should seal it but never noticed it before.Casting flaw? This is a ECZ 312 block.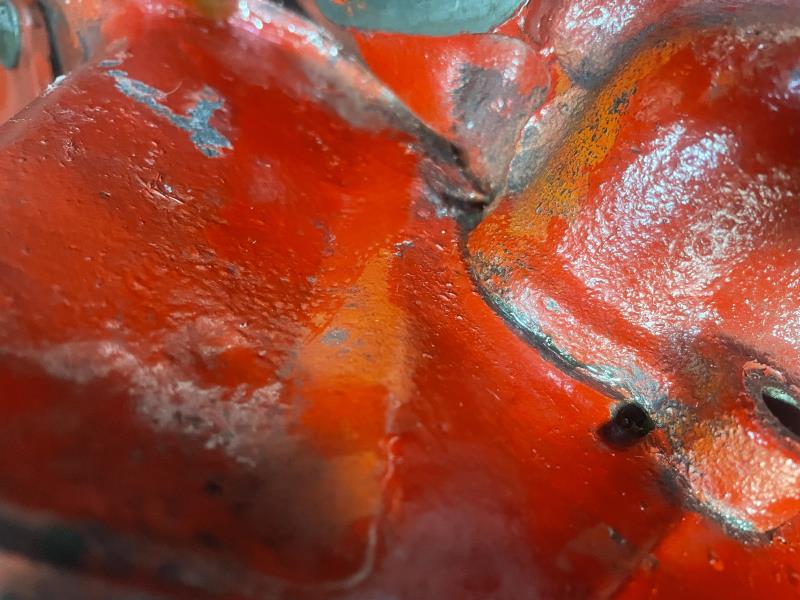
|
|
By Rono - 3 Years Ago
|
Ted;
I do not have a T Bird manual and really don't understand the process of centering the crankshaft snout using the PVC pipe. I measured the I.D. of the new seal to be about 1.800". (The crank damper is boxed up ready to be mailed to Damper Doctor for rebuild so I couldn't measure it.) So do I use a piece of PVC pipe with close to that for the O.D. and then measure somehow the distance between the crankshaft snout and the inside of the PVC pipe? Never tried to center the timing cover before.
Thanks,
|
|
By Ted - 3 Years Ago
|
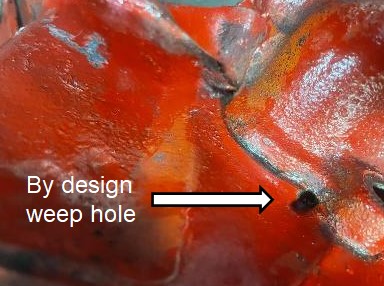
That hole you found is there by design and you’ll find one on each side of the block. It is there in case the gasket that surrounds the coolant passage going to the block from the timing cover starts to leak. There is a channel around each of those two coolant holes at the block face and those channels (grooves) divert any coolant seepage past the gasket to the exposed weep holes.
The two timing cover bolt holes at the lower side of those same coolant holes are also open holes and not blind. Those two bolts do require some form of sealer on the threads to prevent any coolant leakage past the threads and to the front of the cover.
As mentioned before, you can get by without a centering tool when reinstalling the timing cover. Just ensure that the oil pan gasket flange at the bottom of the cover is aligned with the oil pan flange on the block when reinstalling the cover. The cover is heavy and will have a tendency to drop to the lower position so just watch for that.
|
|
By Rono - 3 Years Ago
|
Thanks ted! I really appreciate the info!
|
|
By Daniel Jessup - 3 Years Ago
|
|
If it helps, I used stout angle iron to extend the line of the oil pan rail of the block so that the timing cover would line up.
|
|
By Rono - 3 Years Ago
|
While waiting for the crank damper to come back from the Damper Doctor, I made this cheap, crude tool for aligning the crank damper in the front seal. A 6" length of 1.250" PVC pipe with a 1/4" x 2" long slot to slide around the Woodruff Key and then just a plywood disk to center everything in the timing cover. Seemed to work out well.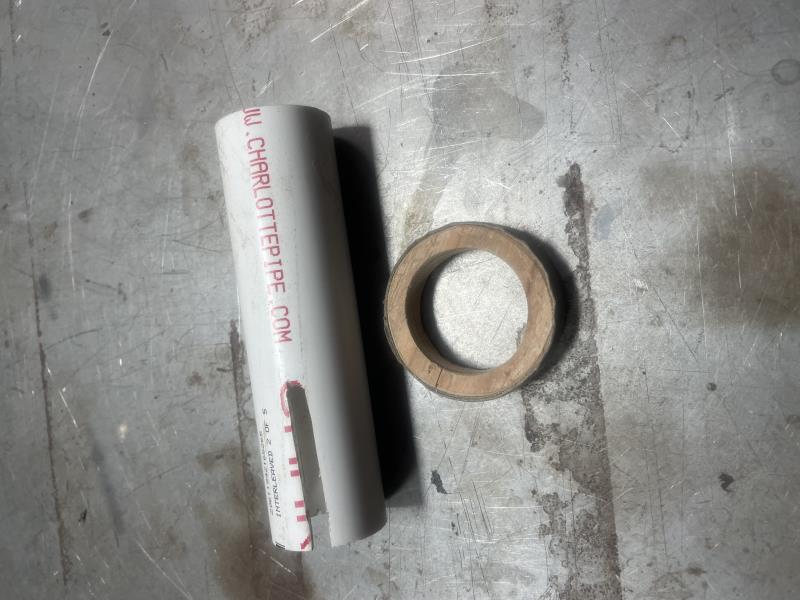 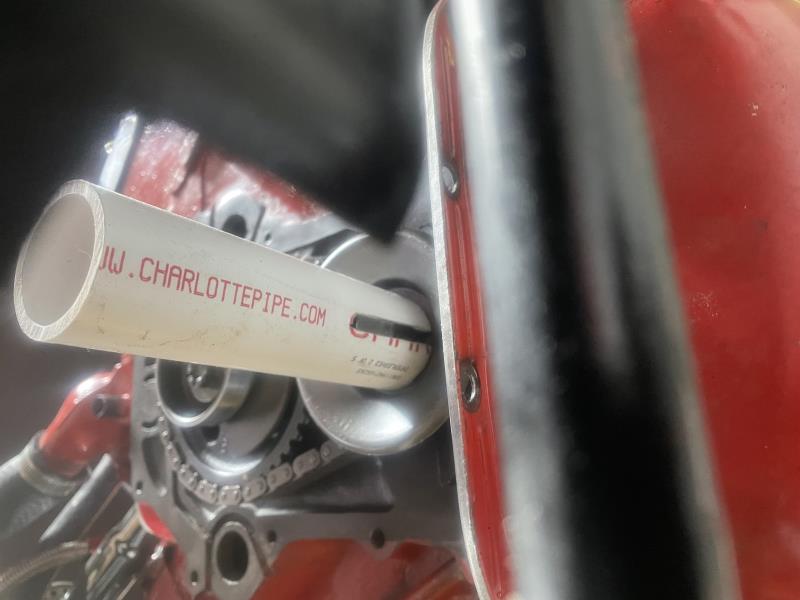 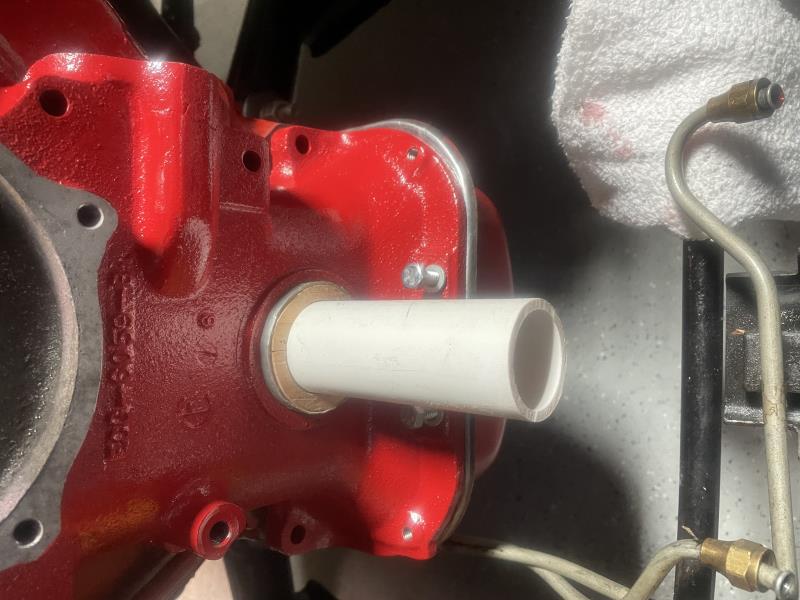
|