Profile Picture

F-100 Project Progress

Posted By Bob Gardner 9 Years Ago
You don't have permission to rate!
Author
Message
Bob Gardner
General Posted 9 Years Ago
View Quick Profile
Supercharged

Supercharged (316 reputation)Supercharged (316 reputation)Supercharged (316 reputation)Supercharged (316 reputation)Supercharged (316 reputation)Supercharged (316 reputation)Supercharged (316 reputation)Supercharged (316 reputation)Supercharged (316 reputation)

Group: Forum Members
Last Active: 3 Years Ago
Posts: 118, Visits: 2.0K
I have been busting my butt on the getting the bodywork finished so it can be sent off to the painter.  Here are some pictures of the progress.  
http://forums.y-blocksforever.com/uploads/images/e1adb416-c3cf-4af5-a4ec-288d.jpg
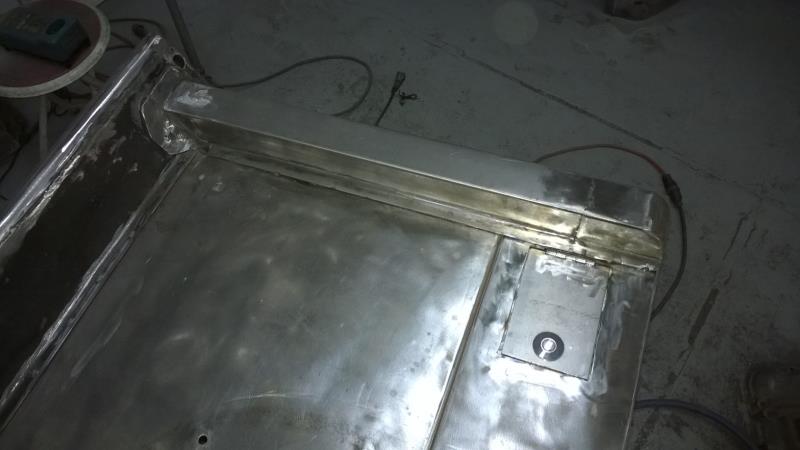
I have done some work on the bed sides.  Behind the access door is the control panel for the air load levelers.
http://forums.y-blocksforever.com/uploads/images/c82bb632-90ad-4392-a100-e9f0.jpg
Did some work on the bed rails and caps.
http://forums.y-blocksforever.com/uploads/images/36cd8484-5004-4ef1-b727-779e.jpg
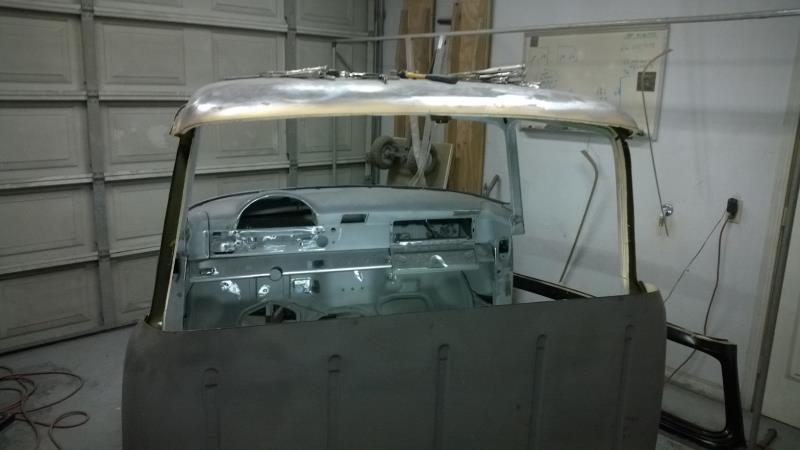
The small back window has been removed and...
http://forums.y-blocksforever.com/uploads/images/5db0487e-451d-4017-91d7-9d04.jpg
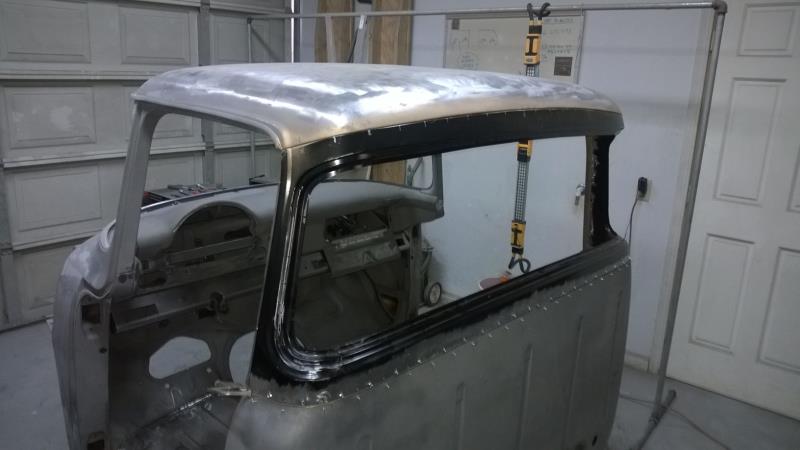
Replaced with a big one.  :-)
http://forums.y-blocksforever.com/uploads/images/5a480d63-1048-4ca0-b919-a7b4.jpg
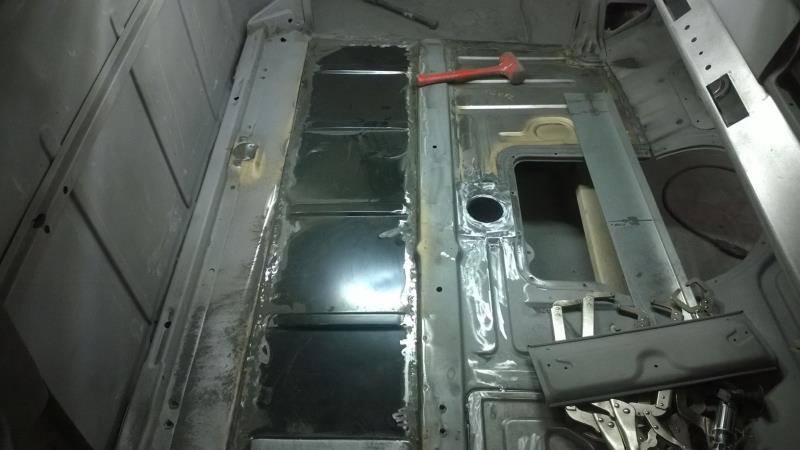
Rust damaged floor panels have been replaced.  I also fixed the forward cab corners due to rust damage.
http://forums.y-blocksforever.com/uploads/images/4738c2fc-2131-471d-b626-022c.jpg
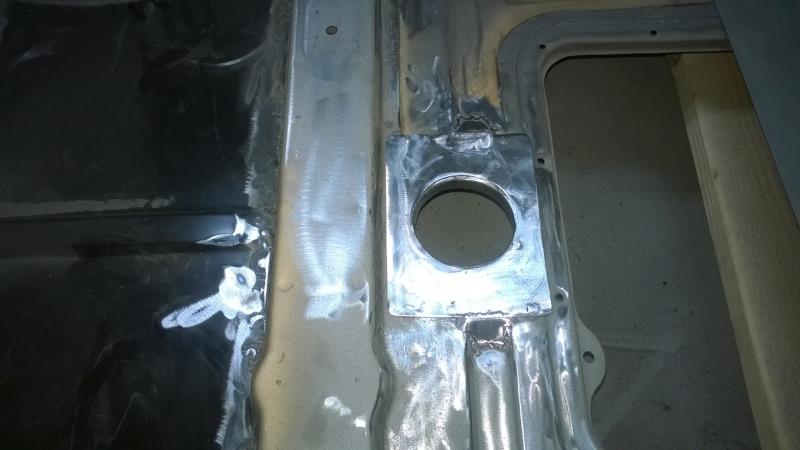
Cut out for the T5 floor shifter.
http://forums.y-blocksforever.com/uploads/images/308512d8-fd87-4415-ada8-d947.jpg
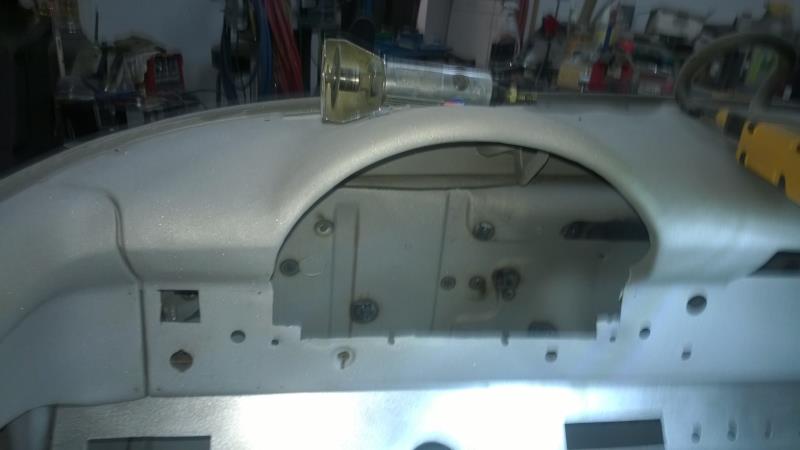
Nasty hack job on the dash and a bunch of unnecessary holes that need to be repaired.
http://forums.y-blocksforever.com/uploads/images/6c882055-c4ad-4719-aaff-2925.jpg
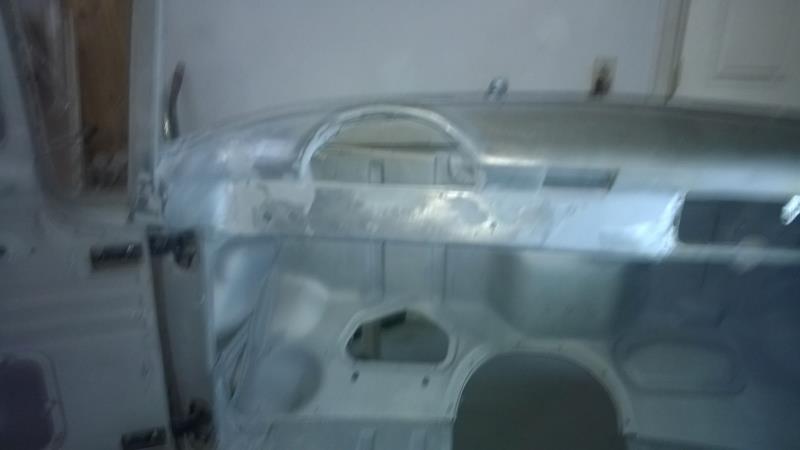
A somewhat out of focus picture of the repaired and smoothed out dash.  My fingers are raw from sanding all the nooks and crannies that I wiggled the camera abit when I took this picture.  Now I have to get back out in the garage and get back to work.


Bill Childs
Posted 9 Years Ago
View Quick Profile
Supercharged

Supercharged (196 reputation)Supercharged (196 reputation)Supercharged (196 reputation)Supercharged (196 reputation)Supercharged (196 reputation)Supercharged (196 reputation)Supercharged (196 reputation)Supercharged (196 reputation)Supercharged (196 reputation)

Group: Forum Members
Last Active: 8 Years Ago
Posts: 67, Visits: 472
Nice work Bob! Thanks for sharing your project. I'm at about the same place on my '56 cab right now.

Bill C
http://forums.y-blocksforever.com/uploads/images/61bc0a7f-ca1c-4ce4-b1f2-4b5b.jpg
Drag it home, figure it out.
dbird
Posted 9 Years Ago
View Quick Profile
Supercharged

Supercharged (592 reputation)Supercharged (592 reputation)Supercharged (592 reputation)Supercharged (592 reputation)Supercharged (592 reputation)Supercharged (592 reputation)Supercharged (592 reputation)Supercharged (592 reputation)Supercharged (592 reputation)

Group: Forum Members
Last Active: Last Year
Posts: 279, Visits: 4.0K
Nice work.  It's good to see that I'm not to only one crazy enough to take the time to weld, grind and finish all the seams in the cab.  I haven't even started on the bed.

Don W

55 'Bird, 56 F100 in progress.
Bill Childs
Posted 9 Years Ago
View Quick Profile
Supercharged

Supercharged (196 reputation)Supercharged (196 reputation)Supercharged (196 reputation)Supercharged (196 reputation)Supercharged (196 reputation)Supercharged (196 reputation)Supercharged (196 reputation)Supercharged (196 reputation)Supercharged (196 reputation)

Group: Forum Members
Last Active: 8 Years Ago
Posts: 67, Visits: 472
It's all about that effin' cab! Lotta rotten trash out there - take your time on the heart and soul of the rig and you'll never regret it! Well, that and the ubiquitous Y-block of course. What do you guys have going for Y-block power in your effies? So great to see the Y-blocks being put back in these trucks after decades of disrespect.

Bill C
http://forums.y-blocksforever.com/uploads/images/61bc0a7f-ca1c-4ce4-b1f2-4b5b.jpg
Drag it home, figure it out.
Bob Gardner
Posted 9 Years Ago
View Quick Profile
Supercharged

Supercharged (316 reputation)Supercharged (316 reputation)Supercharged (316 reputation)Supercharged (316 reputation)Supercharged (316 reputation)Supercharged (316 reputation)Supercharged (316 reputation)Supercharged (316 reputation)Supercharged (316 reputation)

Group: Forum Members
Last Active: 3 Years Ago
Posts: 118, Visits: 2.0K
Thanks for the good words.  I really don't like doing bodywork but it is a necessary evil associated with our hobby.  Bill here is a picture of the engine before and after (nearly fully assembled for the dyno).
http://forums.y-blocksforever.com/uploads/images/9a61db71-b982-41e1-89bd-a97d.jpg
http://forums.y-blocksforever.com/uploads/images/7c44c221-4fbc-46e8-b29e-a0ae.jpg
Bob Gardner
Posted 8 Years Ago
View Quick Profile
Supercharged

Supercharged (316 reputation)Supercharged (316 reputation)Supercharged (316 reputation)Supercharged (316 reputation)Supercharged (316 reputation)Supercharged (316 reputation)Supercharged (316 reputation)Supercharged (316 reputation)Supercharged (316 reputation)

Group: Forum Members
Last Active: 3 Years Ago
Posts: 118, Visits: 2.0K
I finished up the elrctrically actuated e-brakes on the truck.  Here is a picture of the ladder frame I built to mount all of the e-brake parts.http://forums.y-blocksforever.com/uploads/images/fecddbdf-ef11-4bca-af64-f3ba.jpg

Here is a picture of the e-brake assembly...
http://forums.y-blocksforever.com/uploads/images/af409160-d731-44f7-ab7b-6f55.jpg

Here is a couple of pictures of the installation in the chassis...
http://forums.y-blocksforever.com/uploads/images/cad1e9c6-cbf3-4768-9903-a5bc.jpg
http://forums.y-blocksforever.com/uploads/images/ba003b36-89bd-4d97-a12f-ce28.jpg
Bob Gardner
Posted 8 Years Ago
View Quick Profile
Supercharged

Supercharged (316 reputation)Supercharged (316 reputation)Supercharged (316 reputation)Supercharged (316 reputation)Supercharged (316 reputation)Supercharged (316 reputation)Supercharged (316 reputation)Supercharged (316 reputation)Supercharged (316 reputation)

Group: Forum Members
Last Active: 3 Years Ago
Posts: 118, Visits: 2.0K
Spent the last couple of days putting the epoxy primed truck back together for the trailer ride to Georgia from the Bay Area. I was super happy with the repaired front cab corners and mounting wings...the mounting bolts just dropped into the holes. The adjustable rear cab links are worth every penny. I was able with just a few turns of a wrench level out the cab with the frame and bed. No more listing to the drivers side.  I still have the front sheet metal to hang but I am holding out in hopes of maybe getting my engine back this week from the engine builder. I bolted in the fuel tank to locate the Aeromotive in tank fuel pump...but as you can see the bed brace is making the job more difficult...so I am stopping here until I figure out just how I'm going to run the plumbing back in this tight area and still be able to easily remove the tank. The tailgate, rollpan, and receiver hitch worked really clean as well. This are not the wheels and tires that are going on the final assembly...I picked up the custom order 18's last week...they are really nice and fill up the fenders. So while I'm waiting on the engine and other parts to show up, I am going to finish the bed wood and continue to pack up the garage for the 2700 mile road tip in March.

http://forums.y-blocksforever.com/uploads/images/78bd03ce-91be-4cfb-bc69-a2df.jpg
Dropped in the steering column so I will be afle to guide the truck into the enclosed trailer.
http://forums.y-blocksforever.com/uploads/images/76a265f9-32b0-407b-a603-8448.jpg
You can see the new tires and wheels stacked in the garage...they will get put on during final assembly.
http://forums.y-blocksforever.com/uploads/images/b36c580f-ce9b-4130-ae76-ceee.jpg
I will solve the fuel tank puzzle after we get relocated in Georgia
http://forums.y-blocksforever.com/uploads/images/a2948872-6f98-4f8a-9837-0a19.jpg

http://forums.y-blocksforever.com/uploads/images/efccd410-45c3-4970-808c-4b1f.jpg
Bill Childs
Posted 8 Years Ago
View Quick Profile
Supercharged

Supercharged (196 reputation)Supercharged (196 reputation)Supercharged (196 reputation)Supercharged (196 reputation)Supercharged (196 reputation)Supercharged (196 reputation)Supercharged (196 reputation)Supercharged (196 reputation)Supercharged (196 reputation)

Group: Forum Members
Last Active: 8 Years Ago
Posts: 67, Visits: 472
Coming together nicely Bob. Thanks for the pics and report. Keep at it!

Bill C
http://forums.y-blocksforever.com/uploads/images/61bc0a7f-ca1c-4ce4-b1f2-4b5b.jpg
Drag it home, figure it out.
hest_c
Posted 8 Years Ago
View Quick Profile
First Time Poster

First Time Poster (3 reputation)First Time Poster (3 reputation)First Time Poster (3 reputation)First Time Poster (3 reputation)First Time Poster (3 reputation)First Time Poster (3 reputation)First Time Poster (3 reputation)First Time Poster (3 reputation)First Time Poster (3 reputation)

Group: Forum Members
Last Active: 8 Years Ago
Posts: 1, Visits: 4
Great looking truck, I'll bring mine by for the body work part BigGrin

Just got a hold of a 1958 F100 that will be my project but right now I'm more concerned with getting it running. I'll sort out the body issues down the road when I have time for a frame up resto. In the meantime, happy wrenching, love seeing the progress!
Bob Gardner
Posted 8 Years Ago
View Quick Profile
Supercharged

Supercharged (316 reputation)Supercharged (316 reputation)Supercharged (316 reputation)Supercharged (316 reputation)Supercharged (316 reputation)Supercharged (316 reputation)Supercharged (316 reputation)Supercharged (316 reputation)Supercharged (316 reputation)

Group: Forum Members
Last Active: 3 Years Ago
Posts: 118, Visits: 2.0K
Thanks for the kind words on my truck project.  It is going to be a while before I will be able to get back to work on in.  First I have to get the garage set up with add electrical outlets, install better lighting, paint walls & ceiling, epoxy coat the floor, install storage & counters, plumb it for air, and unpack the PODS container.  Then I can think about getting back to work on the truck.


Reading This Topic


Site Meter