|
By Bob Gardner - 11 Years Ago
|
I have been busting my butt on the getting the bodywork finished so it can be sent off to the painter. Here are some pictures of the progress.
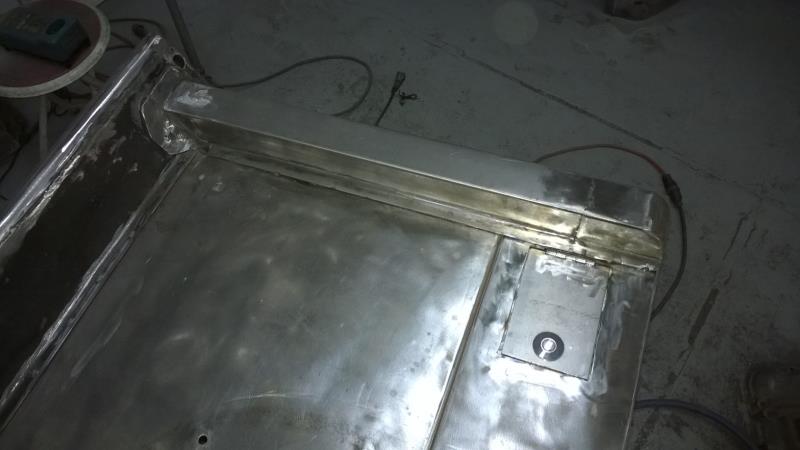
I have done some work on the bed sides. Behind the access door is the control panel for the air load levelers.
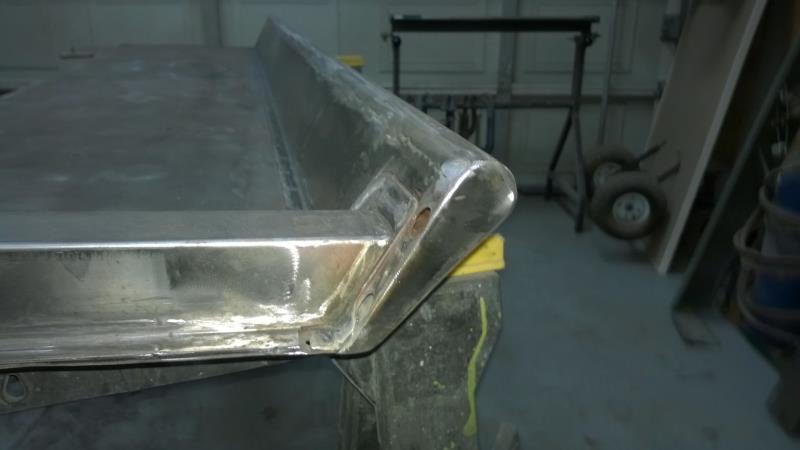
Did some work on the bed rails and caps.
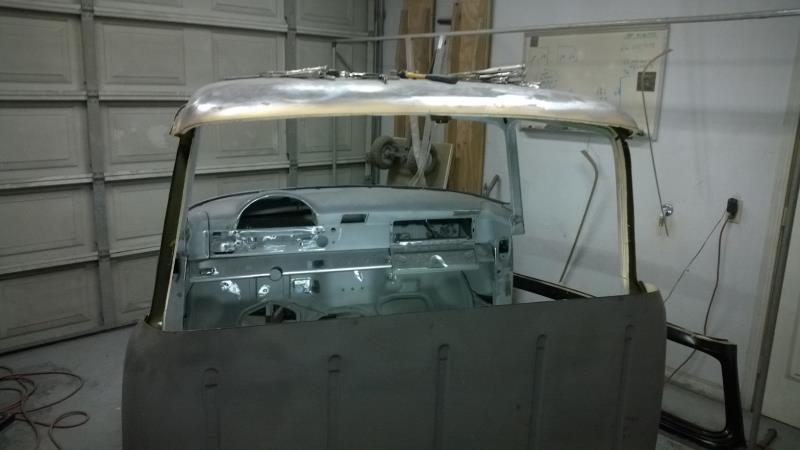
The small back window has been removed and...
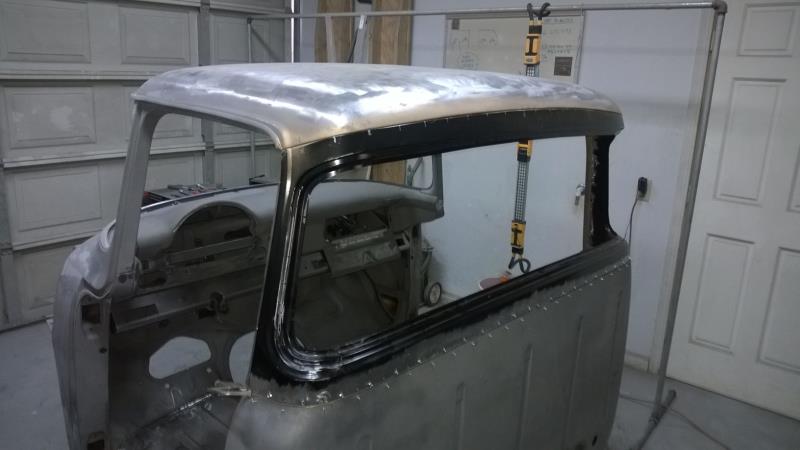
Replaced with a big one. :-)
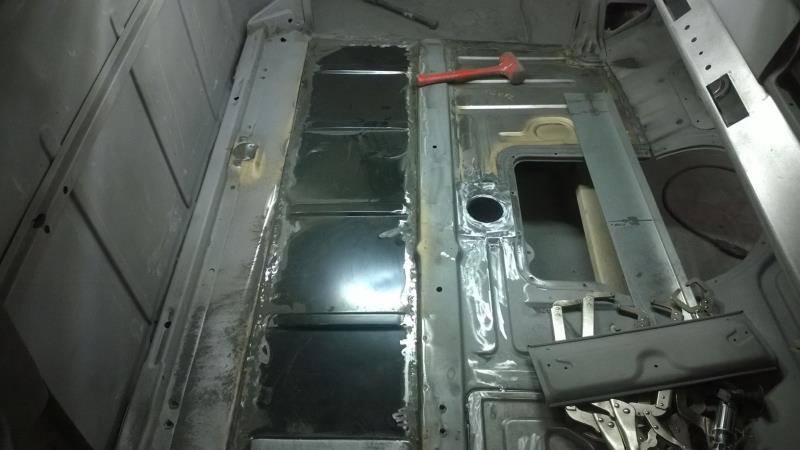
Rust damaged floor panels have been replaced. I also fixed the forward cab corners due to rust damage.
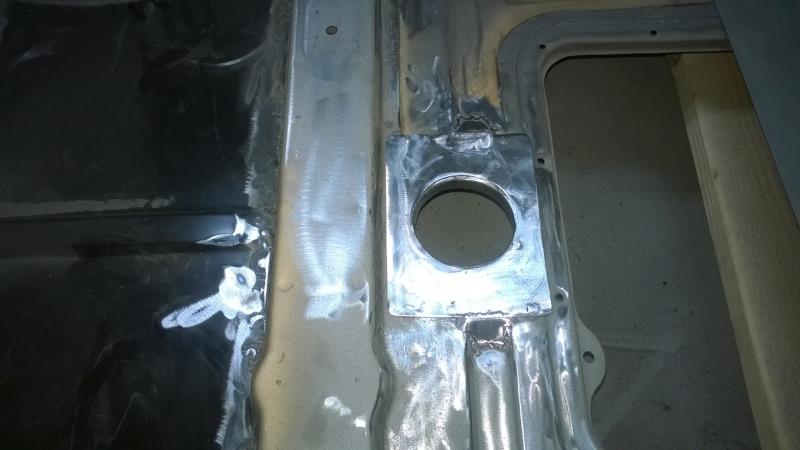
Cut out for the T5 floor shifter.
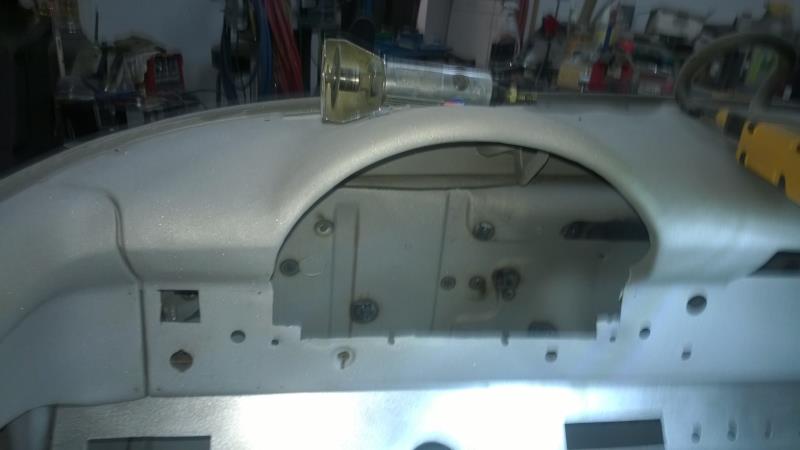
Nasty hack job on the dash and a bunch of unnecessary holes that need to be repaired.
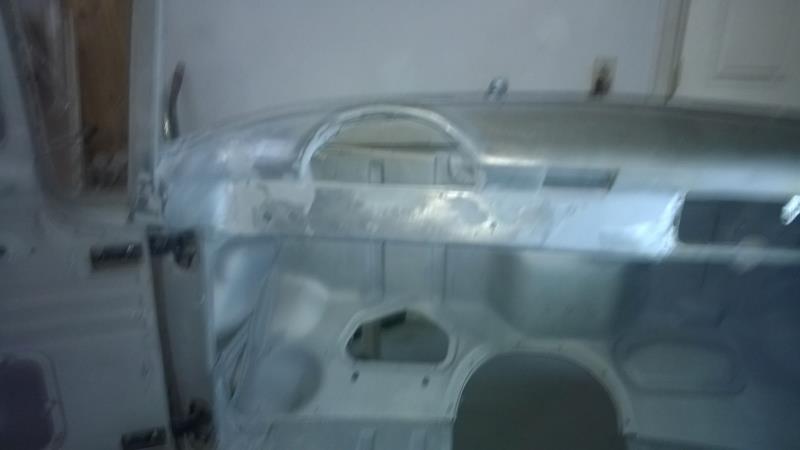
A somewhat out of focus picture of the repaired and smoothed out dash. My fingers are raw from sanding all the nooks and crannies that I wiggled the camera abit when I took this picture. Now I have to get back out in the garage and get back to work.
|
|
By Bill Childs - 11 Years Ago
|
|
Nice work Bob! Thanks for sharing your project. I'm at about the same place on my '56 cab right now.
|
|
By dbird - 11 Years Ago
|
Nice work. It's good to see that I'm not to only one crazy enough to take the time to weld, grind and finish all the seams in the cab. I haven't even started on the bed.
Don W
55 'Bird, 56 F100 in progress.
|
|
By Bill Childs - 11 Years Ago
|
|
It's all about that effin' cab! Lotta rotten trash out there - take your time on the heart and soul of the rig and you'll never regret it! Well, that and the ubiquitous Y-block of course. What do you guys have going for Y-block power in your effies? So great to see the Y-blocks being put back in these trucks after decades of disrespect.
|
|
By Bob Gardner - 11 Years Ago
|
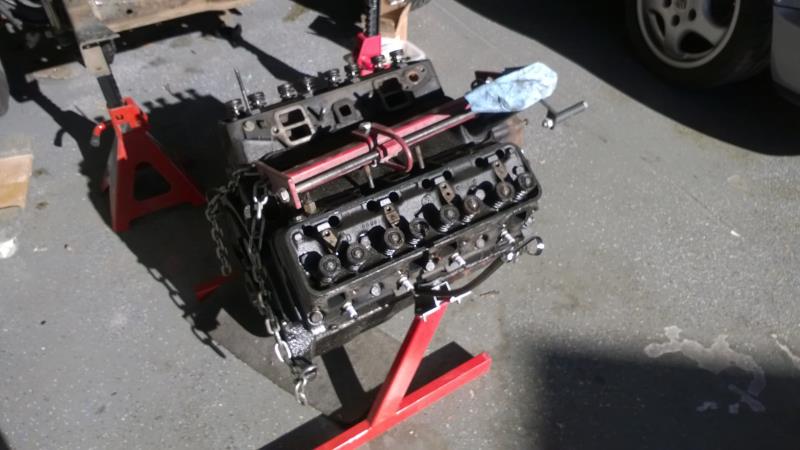
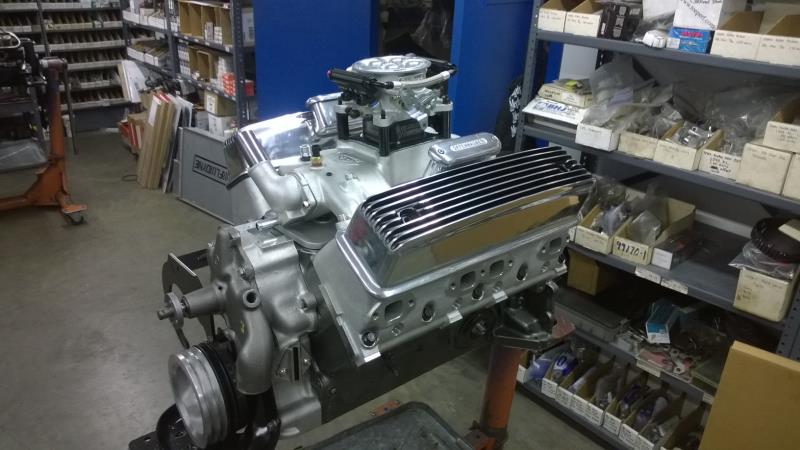
Thanks for the good words. I really don't like doing bodywork but it is a necessary evil associated with our hobby. Bill here is a picture of the engine before and after (nearly fully assembled for the dyno).
|
|
By Bob Gardner - 10 Years Ago
|
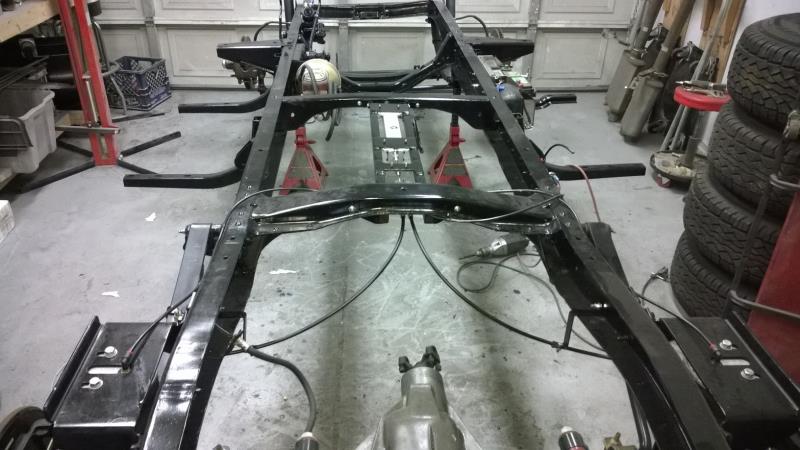
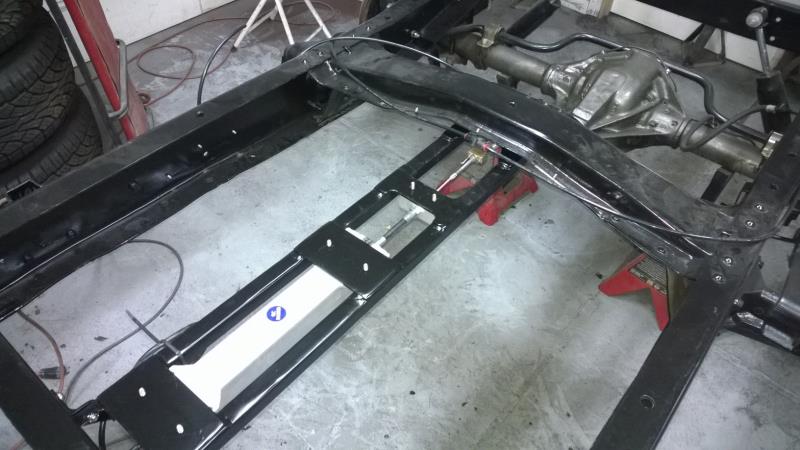
I finished up the elrctrically actuated e-brakes on the truck. Here is a picture of the ladder frame I built to mount all of the e-brake parts.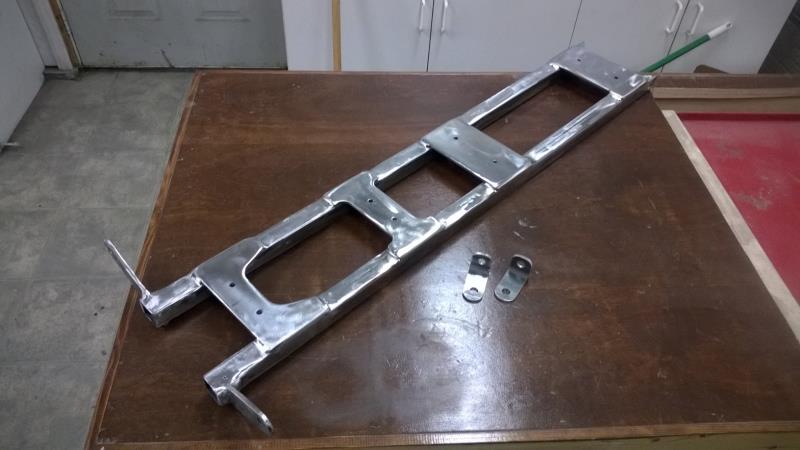
Here is a picture of the e-brake assembly...
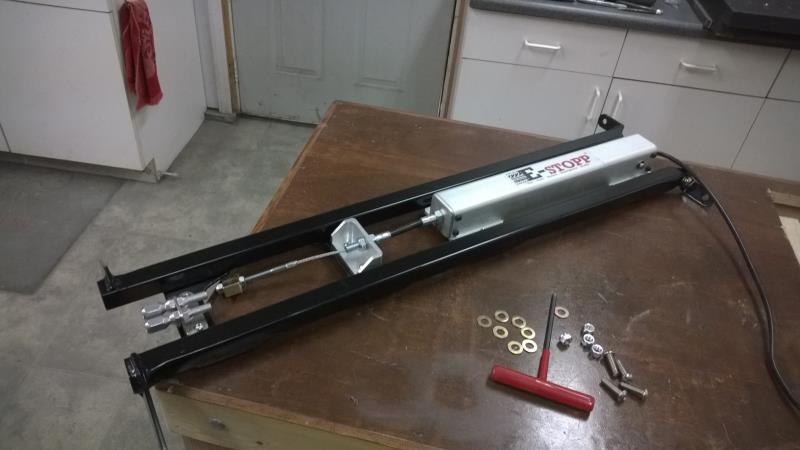
Here is a couple of pictures of the installation in the chassis...
|
|
By Bob Gardner - 10 Years Ago
|
Spent the last couple of days putting the epoxy primed truck back together for the trailer ride to Georgia from the Bay Area. I was super happy with the repaired front cab corners and mounting wings...the mounting bolts just dropped into the holes. The adjustable rear cab links are worth every penny. I was able with just a few turns of a wrench level out the cab with the frame and bed. No more listing to the drivers side.  I still have the front sheet metal to hang but I am holding out in hopes of maybe getting my engine back this week from the engine builder. I bolted in the fuel tank to locate the Aeromotive in tank fuel pump...but as you can see the bed brace is making the job more difficult...so I am stopping here until I figure out just how I'm going to run the plumbing back in this tight area and still be able to easily remove the tank. The tailgate, rollpan, and receiver hitch worked really clean as well. This are not the wheels and tires that are going on the final assembly...I picked up the custom order 18's last week...they are really nice and fill up the fenders. So while I'm waiting on the engine and other parts to show up, I am going to finish the bed wood and continue to pack up the garage for the 2700 mile road tip in March. I still have the front sheet metal to hang but I am holding out in hopes of maybe getting my engine back this week from the engine builder. I bolted in the fuel tank to locate the Aeromotive in tank fuel pump...but as you can see the bed brace is making the job more difficult...so I am stopping here until I figure out just how I'm going to run the plumbing back in this tight area and still be able to easily remove the tank. The tailgate, rollpan, and receiver hitch worked really clean as well. This are not the wheels and tires that are going on the final assembly...I picked up the custom order 18's last week...they are really nice and fill up the fenders. So while I'm waiting on the engine and other parts to show up, I am going to finish the bed wood and continue to pack up the garage for the 2700 mile road tip in March.
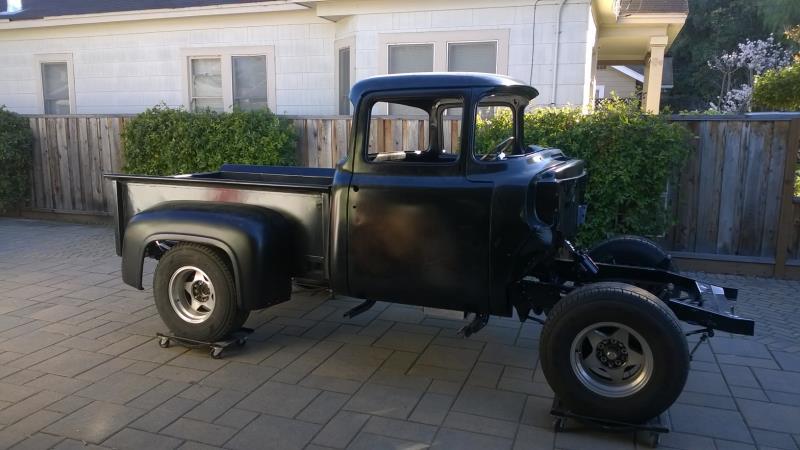
Dropped in the steering column so I will be afle to guide the truck into the enclosed trailer.
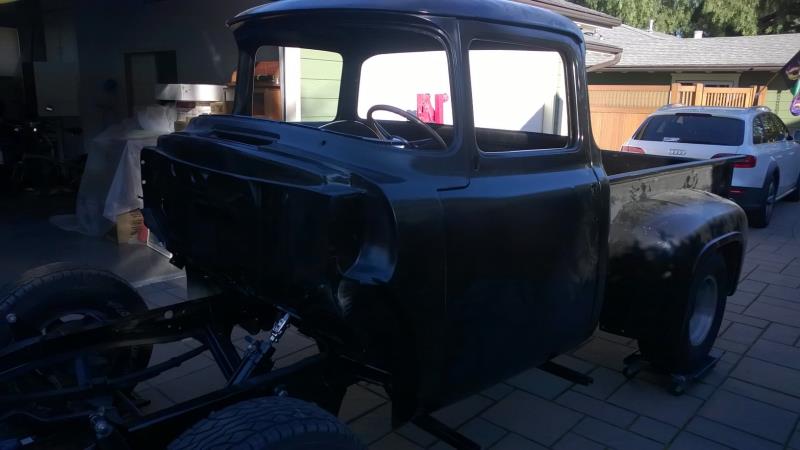
You can see the new tires and wheels stacked in the garage...they will get put on during final assembly.
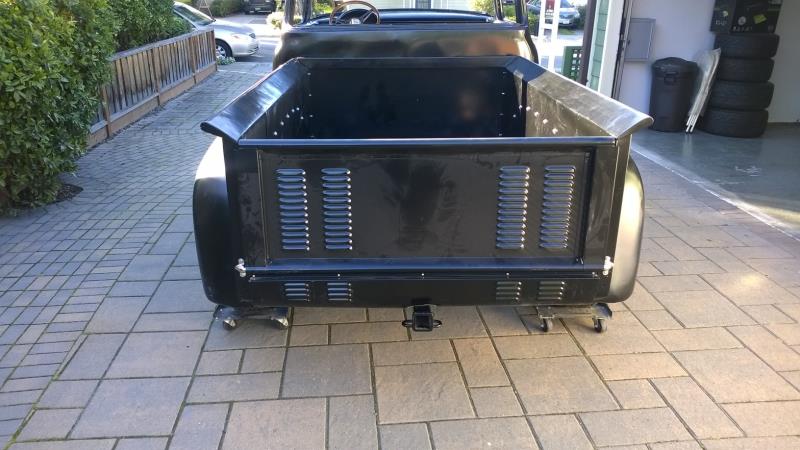
I will solve the fuel tank puzzle after we get relocated in Georgia
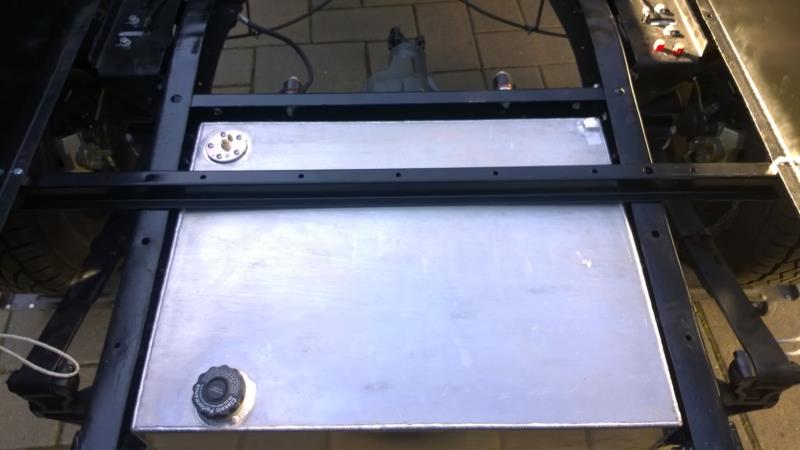
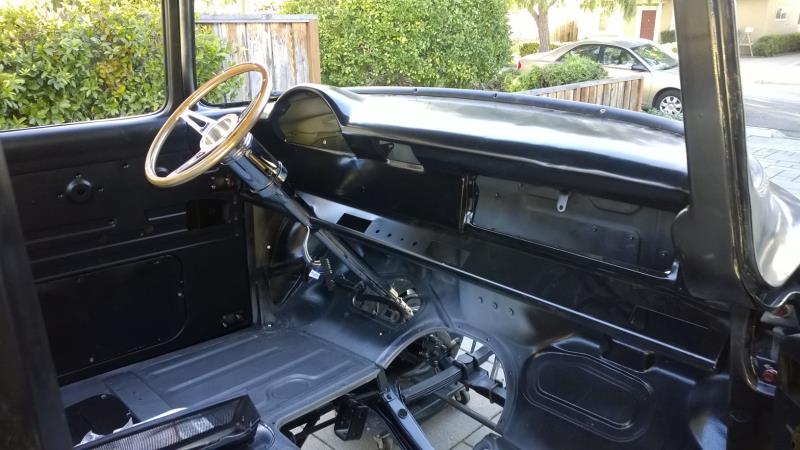
|
|
By Bill Childs - 10 Years Ago
|
|
Coming together nicely Bob. Thanks for the pics and report. Keep at it!
|
|
By hest_c - 10 Years Ago
|
Great looking truck, I'll bring mine by for the body work part 
Just got a hold of a 1958 F100 that will be my project but right now I'm more concerned with getting it running. I'll sort out the body issues down the road when I have time for a frame up resto. In the meantime, happy wrenching, love seeing the progress!
|
|
By Bob Gardner - 10 Years Ago
|
|
Thanks for the kind words on my truck project. It is going to be a while before I will be able to get back to work on in. First I have to get the garage set up with add electrical outlets, install better lighting, paint walls & ceiling, epoxy coat the floor, install storage & counters, plumb it for air, and unpack the PODS container. Then I can think about getting back to work on the truck.
|
|
By Bob Gardner - 10 Years Ago
|
Well it has been awhile but I finally got the garage set up.
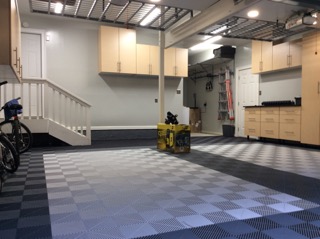
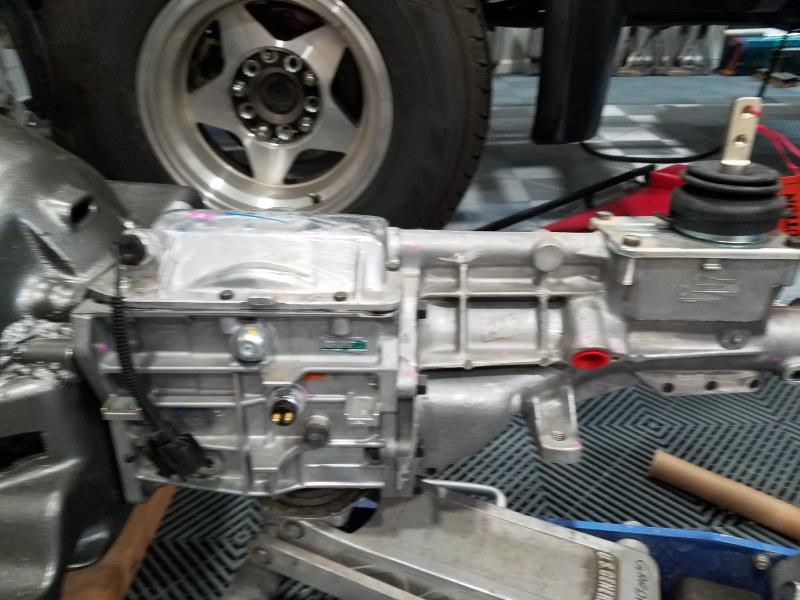
I brought the truck home last weekend and unloaded the engine from the pick up bed. Today I married the new T-5 transmission with the Y Block. I fully expected that it wouldn't fit and require the pilot shaft to be shortened. I was really suprised when it slide right in with that satisfying clunk when it contacted the bell housing mating surface. I am going to remove the front sheet metal in order to test fit the engine/trans into the frame. I need to measure for the drive shaft and make sure the the floor shifter will line up with the access hole I put into the cab.
|
|
By Ted - 10 Years Ago
|
Bob. Great job on the garage. Looks too good to work in and get dirty.
Although the tranny slid right in place with a nice ‘thunk’ when bottoming out to the bellhousing, you would still be ahead to do an input shaft measurement and compare that to a ‘inside’ bellhousing measurement. This will insure that the input is at least 3/16” shorter than the ‘inside’ bellhousing measurement. At zero clearance, you can still wipe out a center main thrust bearing.
|
|
By charliemccraney - 10 Years Ago
|
That is a nice looking garage.
|
|
By Bob Gardner - 10 Years Ago
|
Thanks guys. Hopefully the weather will cool down soon so I can spend more time in there. I have a couple of fans to move the air around but I still come out with a soaking wet
t-shirt. I was planning to do that after I do a test fit of the engine and trans in the truck. I still have to install the throw out bearing and arm. So I am still some way from final assembly.
|
|
By MoonShadow - 10 Years Ago
|
You mean with all that beauty of a garage you don't have central air and heat? Shocking! That is a beautiful setup though. Problem is where do you put all your "can't let it go" stuff?
|
|
By Kahuna - 10 Years Ago
|
Bob
Who did the engine work?
Thanks
Jim
|
|
By Bob Gardner - 10 Years Ago
|
Moon Shadow...if you look closely in the photo you will see a rack frame that goes across the garage...this is for storing all those "I got to keep" things.
Kahuna...I sourced all the parts and TOE Performance in the SF Bay Area did the machine work.
|
|
By Bob Gardner - 9 Years Ago
|
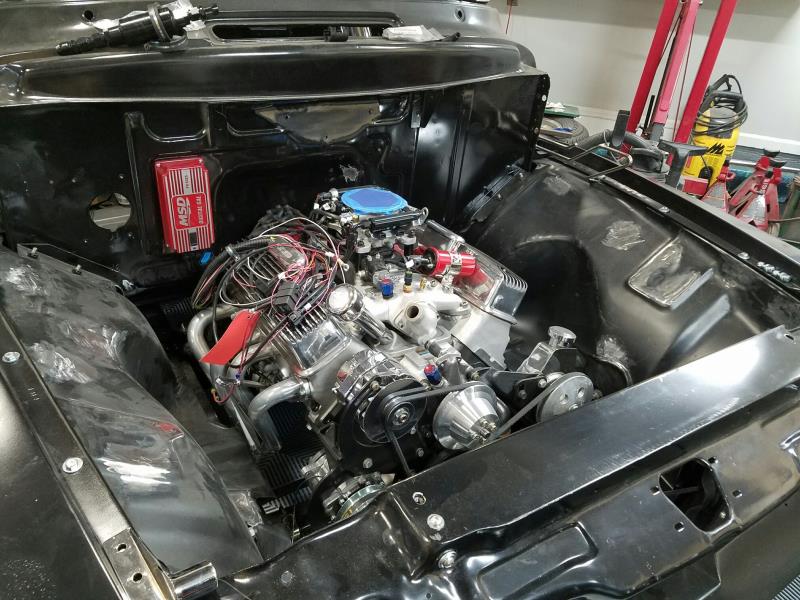
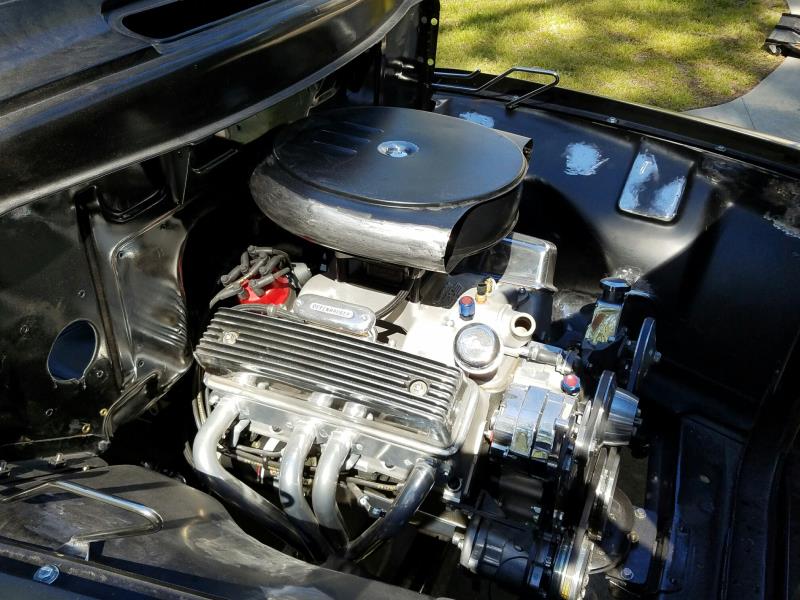
I am about a month away from handing the truck over to my Georgia body guy for final paint. So I thought it was time to update what has been done since the last one. First I went back and cut down the input shaft to the transmission and installed the throw out bearing. I dropped the engine in the frame with the new motor and trans mounts. Then I had to remove the dash extension to modify so the steering column and wiring could be installed correctly. I partly installed the engine wire harness so I could firgure out where the firewall pass throughs needed to go. Modified the inner fender panels filling and smoothing all of the unused holes.
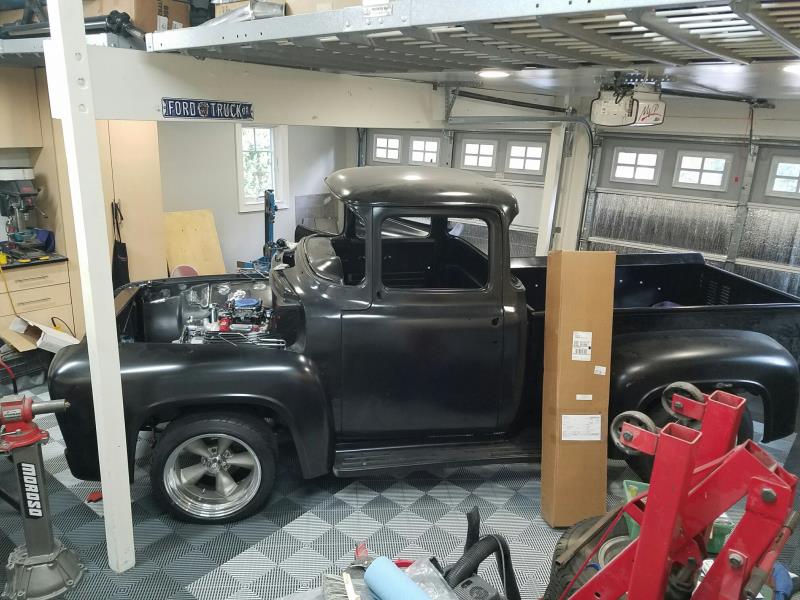
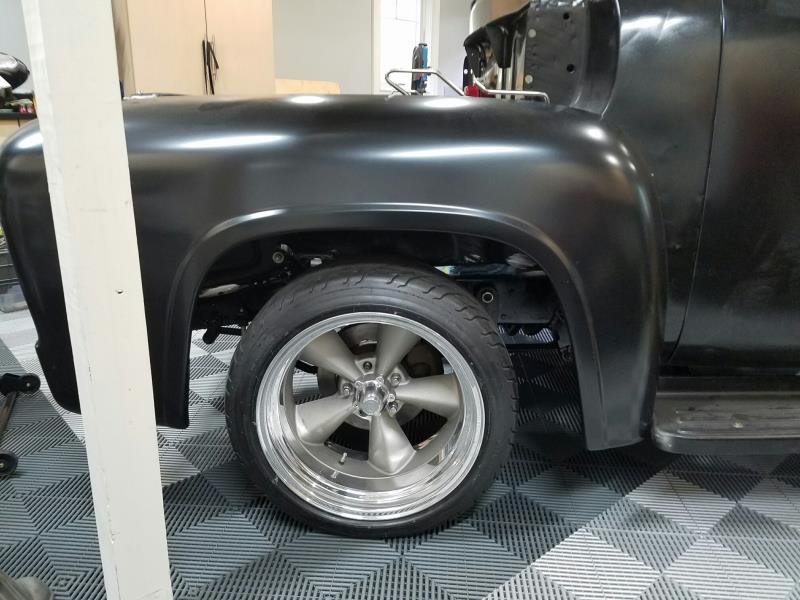
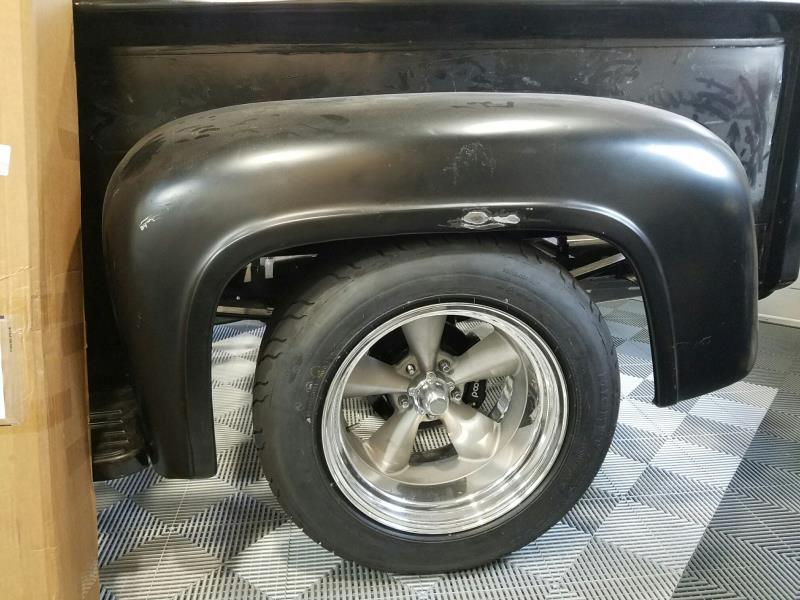
The second big issue was overcomming my incorrect bolt circle specification for the custom wheels I had made. After a lot of research I figured out that by changing out the front & rear disk brake packages for ones from Wilwood, have a set of custom rear axles made by Moser, and make a custom caliper mounting plate for the front...everything would bolt up and work correctly inculding the e-brake. The e-brake didn't work too well on the last rear disk set up...a modified kit for a Jeep. With the body work installed and the truck setting on its wheels, the ride height was right where it was supposed to be. The problem will fix in final assembly is that I don't like the way the wheels and tires fit in the fender. When I did the chassis rebuild right after I bought the truck...the only drop axle available didn't have a "stock" appearance. So I kept the stock one. Mid Fifty has just brought out a 3" drop replacement axle that looks exactly like the original unit. I have one coming in the next few weeks. When installed it will drop the fender opening to just above the rim...like the rear of the truck.
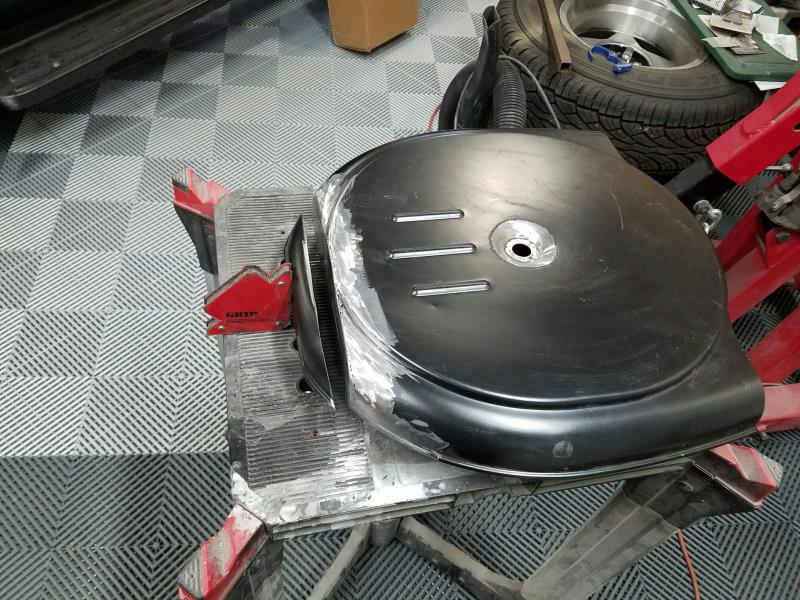
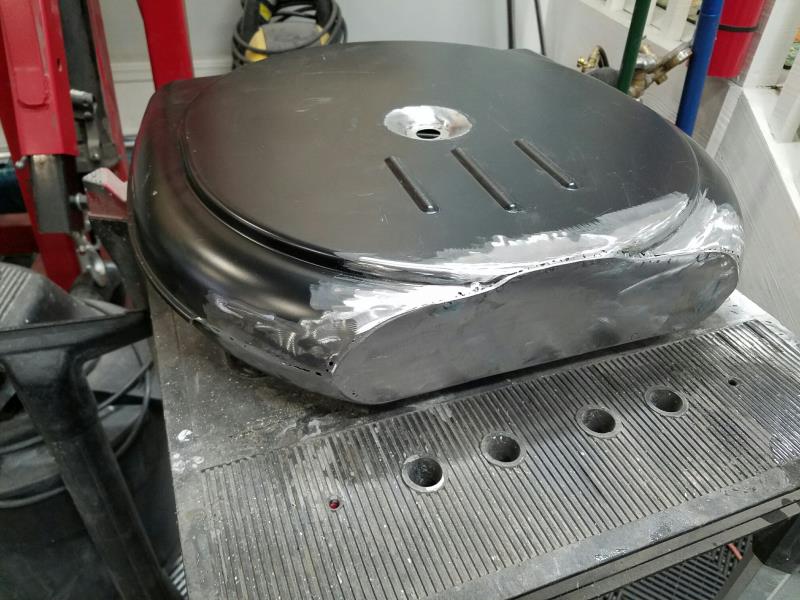
I had to modify the Olds/Caddy (reproduction) air cleaner. It hit the firewall. Not a big deal since it had a flat on the that side of the air cleaner I just cut off enough to provide clearance. Welded it a patch to close up the hole. Since I was already welding on the unit, I decided that I would remove the outside pinch weld. Everything is tack welded in and is ready for me to finish with the TIG welder. This will give me smooth sides on the air cleaner to put Ford Y block valve cover decals.
|
|
By Bob Gardner - 9 Years Ago
|
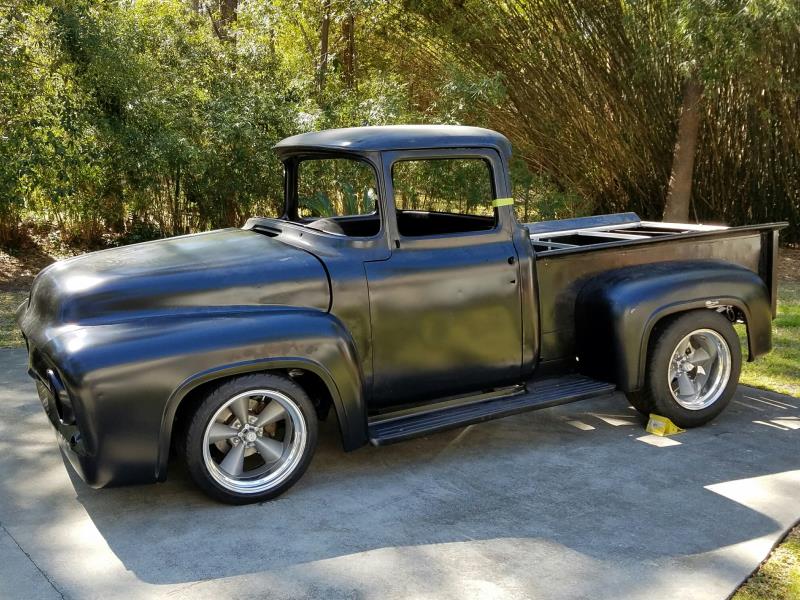
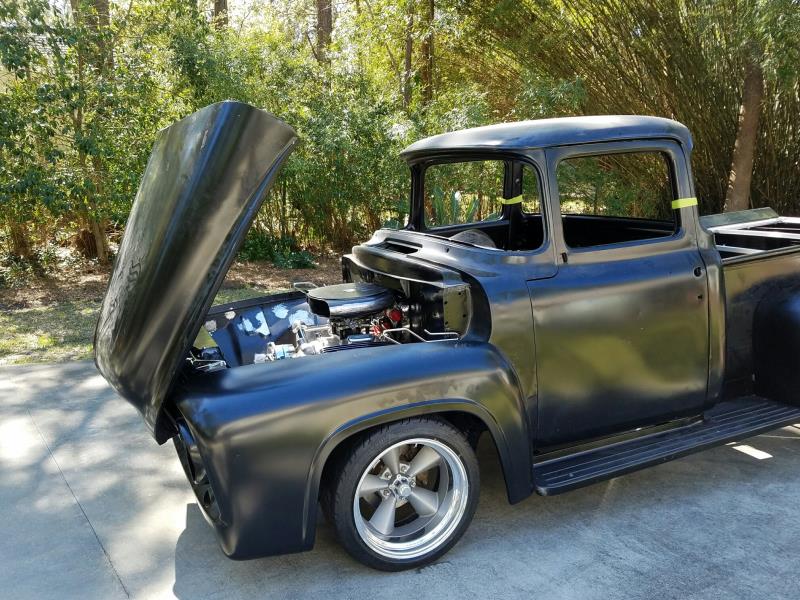
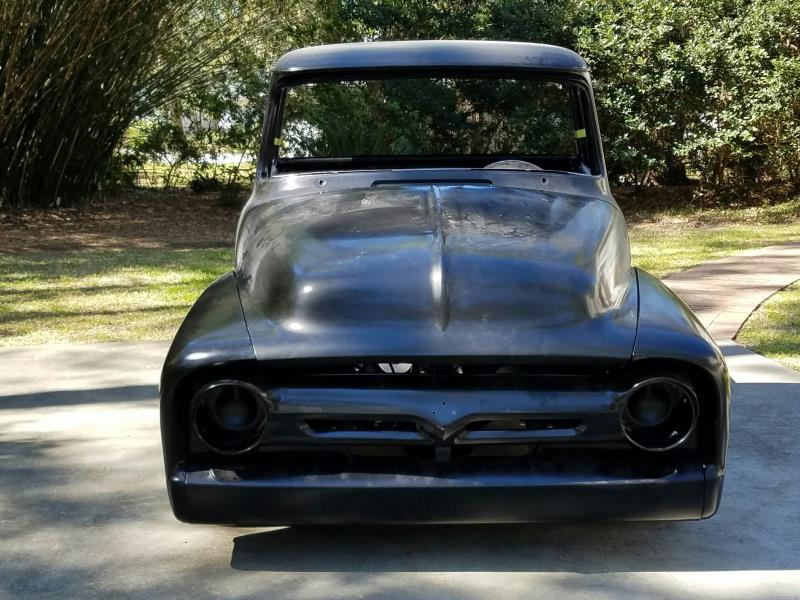
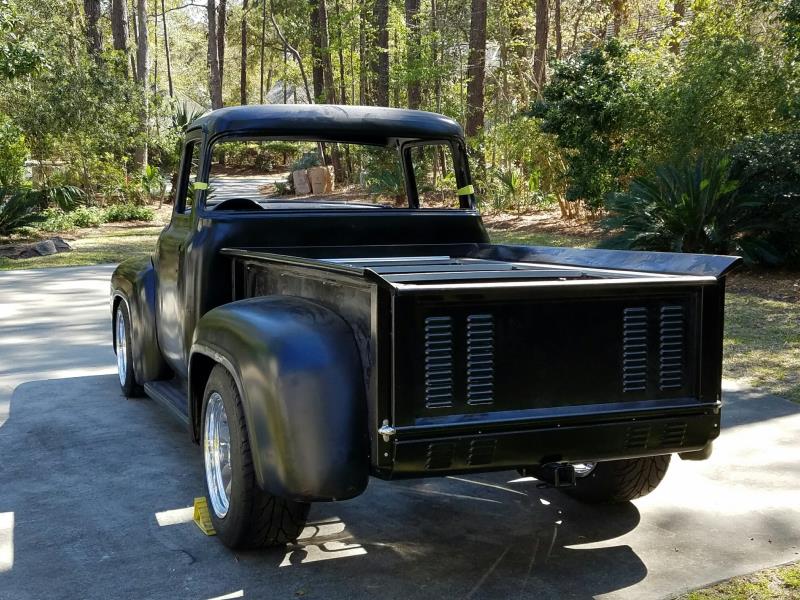
The truck is finally ready to the body shop. Here are some pictures right before I loaded it into the enclosed trailer.
|
|
By Rowen - 9 Years Ago
|
|
Very nice truck bob, what color you gonna paint it?
|
|
By Bob Gardner - 9 Years Ago
|
|
Rowen...It is a choice between a 2010 Subaru color "Paprika Red Pearl" or "Gulf Racing Blue". The pearl would really pop on all of the curved surfaces but will require that the bodywork be done the same as a black color car. The baby blue is a solid color and would be more forgiving in the bodywork department. We will see what the bodywork guy says.
|
|
By Rowen - 9 Years Ago
|
|
Either I'm sure will be beautiful! Look forward to seeing it painted. Btw, nice work on the air cleaner as well. Regards
|
|
By prosycamore - 9 Years Ago
|
|
Got an update on this project?
|
|
By Bob Gardner - 9 Years Ago
|
|
It is still working its way up the painter's cue of jobs to do...he still has some minor sheet metal gaps to finish up before I can get the chassis back...I am still on schedule to have the truck done next year.
|
|
By ledjon - 9 Years Ago
|
Interesting project. Any update so far?
|