|
Author
|
Message
|
|
Talkwrench
|
|
|
Group: Forum Members
Last Active: 5 Years Ago
Posts: 898,
Visits: 23.2K
|
|
|
|
|
|
Rono
|
|
|
Group: Forum Members
Last Active: 2 Years Ago
Posts: 1.3K,
Visits: 80.0K
|
Not sure what you mean by removing the "guards"? Do you mean the fenders? The radiator is new and the motor was rebuilt not too long ago so I am not worried about them. I think I can support the fenders with angle iron across the top (as Daniel suggested) where the upper radiator valance was bolted. I can then use my shop crane to keep the front of the fenders up while I disconnect the core support and lower splash pan. I think I can keep the front bumper attached but remove the outer bumper bracket bolts so the cross member can come out the front of the frame horns. While doing some pre-measurements, I did find that the inside width between the frame horns is 35&3/4", but the width of the new cross member is only 35". So there will be about 5/8" space on either end of the new cross member inside the frame horns. I don't think this will matter much because the top and bottom of the cross member is where the weld points are. Rono
 Ron Lane, Meridian, ID Ron Lane, Meridian, ID
|
|
|
|
|
Talkwrench
|
|
|
Group: Forum Members
Last Active: 5 Years Ago
Posts: 898,
Visits: 23.2K
|
|
|
|
|
|
Rono
|
|
|
Group: Forum Members
Last Active: 2 Years Ago
Posts: 1.3K,
Visits: 80.0K
|
I thought I would try to follow my original plan and leave the fenders ("guards") on while I try to remove the front crossmember. To do this, I used a 1&1/2" piece of angle iron (46" long) bolted across the front fender mounting flange where the upper radiator valance bolts. After removing the two small rubber splash aprons between the bottom of the air deflectors and top part of the crossmember, I could see that the entire width of the top part of the crossmember is welded to the upper part of the frame horn. Since the core support is still in place, I used an air chisel and was able to cut the entire weld under the air deflector without removing it. Tomorrow, I will cut the other side along the top of the crossmember and then weld a piece of 1" square tubing horizontally across the ends of the frame horns and then weld two vertical 1" tubing pieces up to the angle iron. This should stabilize the fenders both horizontally and vertically when I remove the core support. 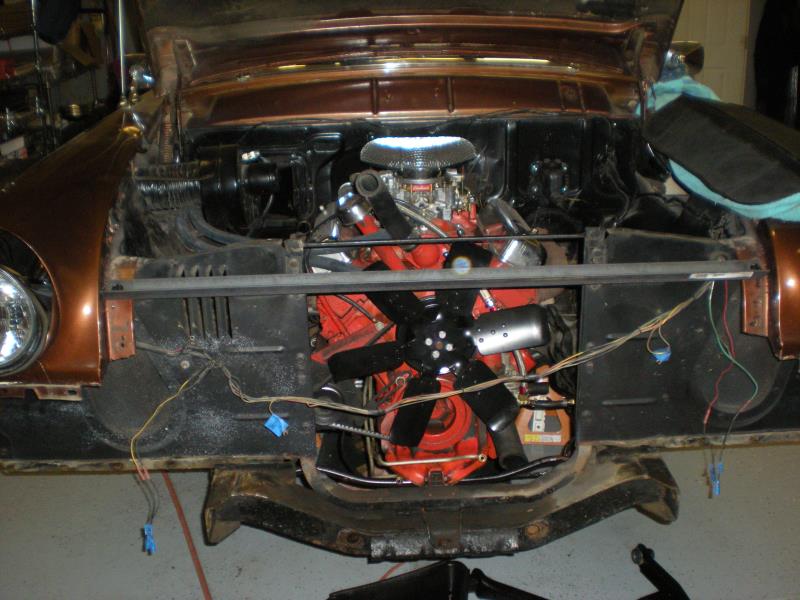 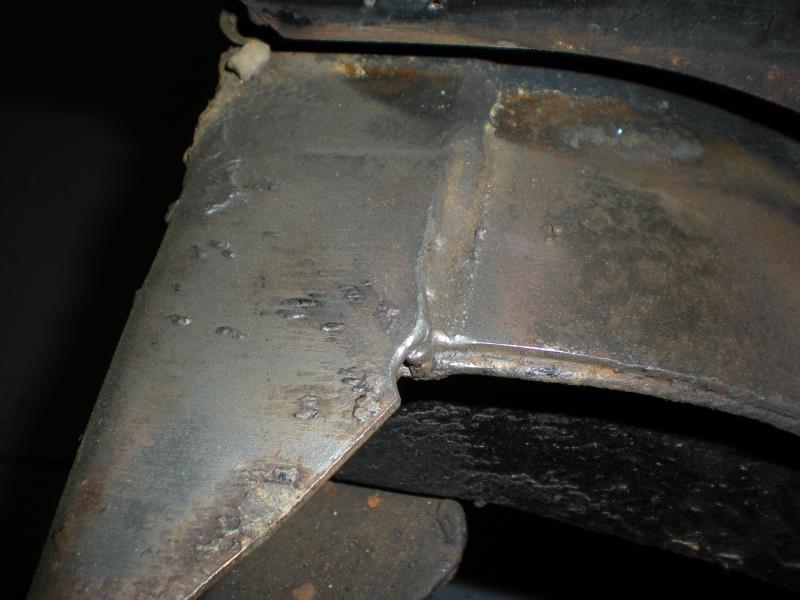  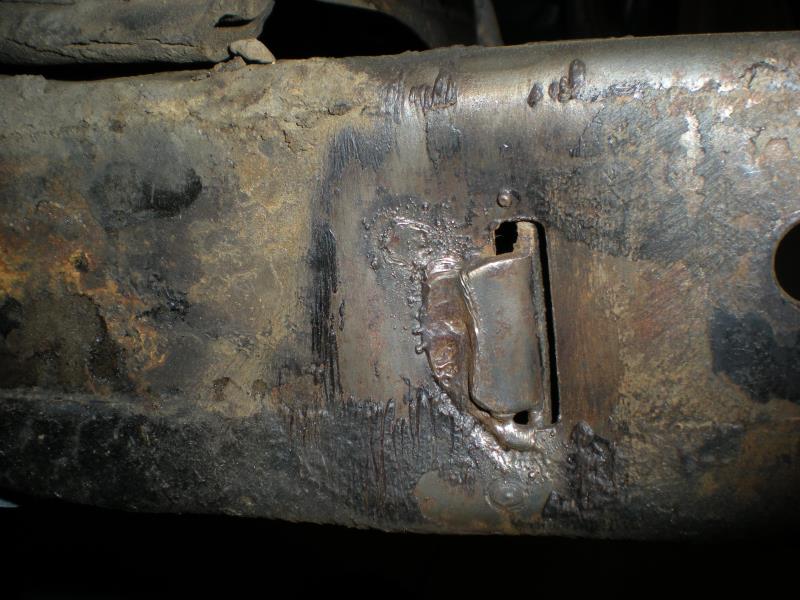 There is one issue that I haven't quite figured out yet and that is the factory tabs that extend through slots in the frame horn and are then bent over and welded in place. The aftermarket "Goodall" crossmember doesn't have these tabs, so I need to decide whether to fabricate them once the crossmember is in place and bolted up to the lower control arms or just not bother with making any tabs. All the other welds should hold it in place. What do you guys think? Rono
Ron Lane, Meridian, ID
|
|
|
|
|
Rowen
|
|
|
Group: Forum Members
Last Active: 6 Years Ago
Posts: 435,
Visits: 29.3K
|
Pure speculation, I'm thinking those tabs are alignment tabs for mass production. I doubt that they are "structural" in nature.
Rowen
Rowen
55CV
Woodland, Ca
|
|
|
|
|
Rono
|
|
|
Group: Forum Members
Last Active: 2 Years Ago
Posts: 1.3K,
Visits: 80.0K
|
Rowen; I think you are probably correct. The tabs probably just generally located where the crossmember was supposed to go. In fact, it was probably placed in a jig and then the frame rails were brought in from either side. Since I had the lower control arms out, I replaced the bushings but may have pressed them in a little too far. I checked for fitment with the new bushings against the old crossmember and will need to press each one back out about 1/16". Also, when I took the arms off the original cross member, there were 2 washer "shims" on the driver's side, but only 1 on the passenger side. Below is a picture of those shims. I'm wondering if I should adjust the bushings so that I don't need the shims at all or adjust them so they will match how it was originally set up. 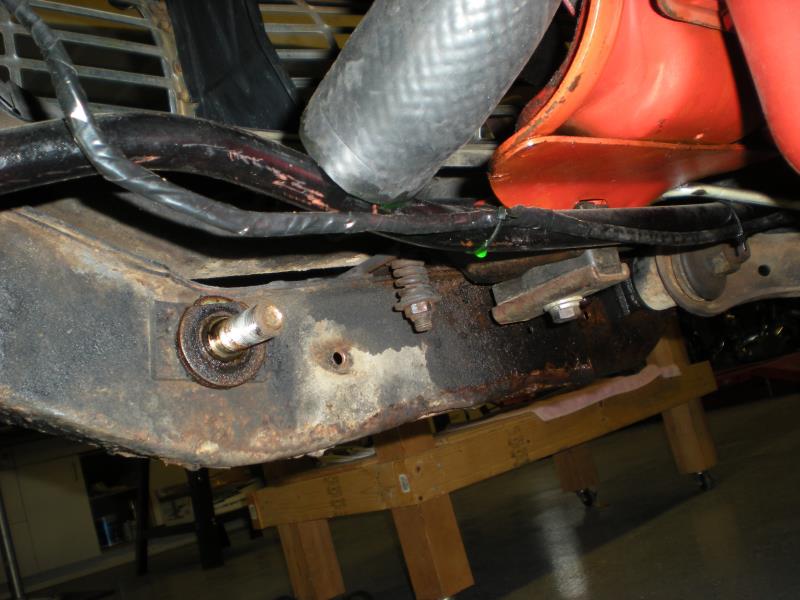 Rono
Ron Lane, Meridian, ID
|
|
|
|
|
Rono
|
|
|
Group: Forum Members
Last Active: 2 Years Ago
Posts: 1.3K,
Visits: 80.0K
|
|
|
|
|
|
rick55
|
|
|
Group: Forum Members
Last Active: 6 Years Ago
Posts: 550,
Visits: 4.4K
|
The crossmember does not need the tabs but you use their position to locate the new crossmember. It is much easier to do the job with the front clip and bumper removed but if you choose to leave it on it just makes access difficult though not impossible to do some of the welding necessary. I don't know what the poster sometime previous meant when he managed to fit a new crossmember without welding it. Definitely not possible. Reno you have saved yourself some grief by grinding that rear lip off the crossmember. I ended up by not using the front engine steady rest because it was fouling that tab. It was too hard to cut it once I had the engine in place. The shimson the front bolt may or not be necessary to refit. They are merely to align both lower control arms. The rear of the control arms bolt directly to the crossmember and the shims at the front are to adjust play out of the control arm at the front. From memory mine didn't need any shims on my my 55.
You've got lots of bolts to undo if you're taking the front apron (stone tray) off the car. It is much easier just to take the whole font clip off in one piece. I'm all for the easy life.
Good luck however you do it. A job well worth doing. My 55 had the drivers side a arm chained to the crossmember. It was just swinging in the breeze.
Rick - West Australia
Do Y Blocks Downunder run upside down? Gravity Sucks!!
|
|
|
|
|
Rono
|
|
|
Group: Forum Members
Last Active: 2 Years Ago
Posts: 1.3K,
Visits: 80.0K
|
Rick; I did remove the front bumper for this job and I wanted to powder coat the lower stone guard and the upper radiator valance anyway. The main reason for not taking the front clip entirely off was that I didn't want to have to cut the wiring harness. Not ready for re-wiring yet. We plan on changing to an alternator and adding AC maybe next year so when we do that, it will be time for a new wiring harness. I would like to know if you tack welded the new cross member in the correct position before trying to fit the control arms or if you tried to locate the correct position of the crossmember using the control arms? I tried the latter and that didn't seem to work so I now have the new crossmember tack welded in place and will try again tomorrow to fit the control arms. I pressed new bushings into all the control arms (upper and lower) and test fitted the lower arms with the new bushings against the old crossmember before I took it out and the front to rear distance seemed correct so they should be okay. I also wanted to know if that new crossmember has a weld-through primer on it or if you ground off all that heavy paint where the welds need to go. I thought it might be a weld through primer, but it seems pretty thick to me. Thanks, Rono
Ron Lane, Meridian, ID
|
|
|
|
|
Rono
|
|
|
Group: Forum Members
Last Active: 2 Years Ago
Posts: 1.3K,
Visits: 80.0K
|
The crossmember replacement is done. One final confusing detail was that I could not use the stock rubber pad on the bottom of the radiator core support because the mounting holes in the air deflectors would not line up. This pad is about 1/2" thick, but I replaced it with a leftover 56 gas tank pad that I cut down to fit. I'll move on now to the disk brake conversion and will be posting some pictures on how that job goes.   Rono
Ron Lane, Meridian, ID
|
|
|
|