|
Author
|
Message
|
|
Daniel Jessup
|
|
|
Group: Forum Members
Last Active: 3 days ago
Posts: 2.0K,
Visits: 131.1K
|
Back to the grind here... my parents came up to see my wife and I - and their grandyoungin's - and we had a great time together. I didn't get to work as much on the 55 as I had planned but spending time with mom and dad was well worth it. Besides, ol' Pops carried up a small pickup truck load of parts for me and I was pretty pleased with what I saw. It was from a Craigslist deal down in Pilot Mountain, North Carolina, and dad had agreed to bring up the whole lot for me up here to Frederick County, Virginia.
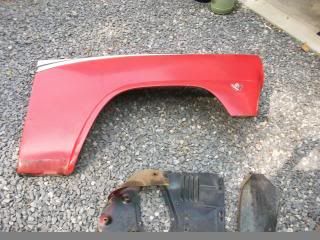
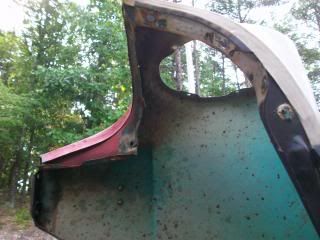
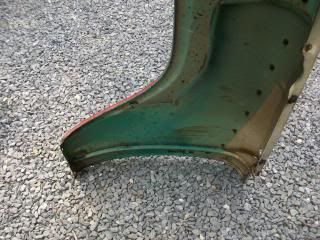
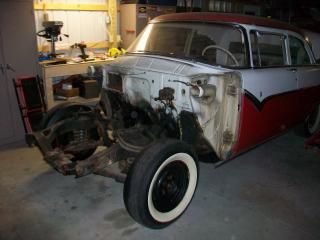
I did get the entire passenger side front end sheet metal removed. This time I had to simply remove some bolts by twisting them into two pieces but there were only two. The rest came out pretty easily. This passenger side air deflector is in excellent shape compared to the driver's side. Also, the fender lip underneath the headlight bucket is very nice. There are a couple of body work places on this fender, and I am thinking that I will have to completely remove the brace that runs the vertical length at the rear of the fender to get these repairs right, and then reinstall the brace before mounting. I had one hangup that was hard to to deal with at first - the hidden stud that goes through the body (behind the kickpanel under the dash) just spun and spun when I tried to take off the nut. There was no corrosion there so I couldn't figure out what the problem was. The stud just spun with the nut. I had to insert a long screwdriver and keep pressure under the washer as I tried to back out the nut. 5 minutes later we were ready to pull the fender and serious trouble averted. I have no idea how someone would get that fender off if that nut seized up. I don't really think you could get a grinder or cut off wheel in there. Anyone ever face that problem?  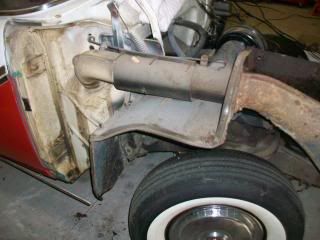 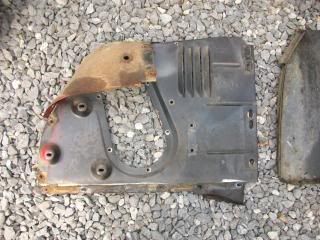
   The parts were all degreased and I hit them with a pressure washer for a little while today. The splash pan is also in good condition and will clean up nicely. I will have to put some of these parts up in the rafters in the garage until I can get to things later on. The firewall and the frame is really what I want to attack first and get the car ready to place the transmission and engine back in there. There is definitely some body work to do. I am not going to be able to simply sand and paint, but I was expecting to have to work things over. It will be a learning experience for sure.
I have had some questions about why I left the bumper on the front of the clip while removing everything else. It "should" be easier to remove the bumper after all the other parts are removed. I am expecting some very rough hardware on those bumper brackets and being able to get at them from the TOP with the sheet metal out of the way looks to be a good thing to do.
A couple of questions:
1. What is involved in removing that brace that runs the vertical length of the fender?
2. Hardware - I have plans to degrease and blast the hardware per my ultrasonic cleaner and my glass bead cabinet. However, does anyone have some ideas on coating or finishing the hardware to keep it from rusting? I think the factory simply painted the heads of the bolts, but I am not going original here. If all of the hardware was one color that would not be a problem. This is a driver car for my father-in-law.
3. Thinking along the lines of hardware, has anyone made any updates to what Ford did to put all that sheet metal together back in 55? In other words, I am asking you guys that have disassembled and assembled front end sheet metal on 55/56 Fords with some frequency... was there any change you made to hardware use/location (fender washers, special fasteners, hidden nuts, welded hardware, etc)? Lancaster, California aka "The Hot Rod Reverend" 
check out the 1955 Ford Fairlane build at www.hotrodreverend.com
|
|
|
|
|
Daniel Jessup
|
|
|
Group: Forum Members
Last Active: 3 days ago
Posts: 2.0K,
Visits: 131.1K
|
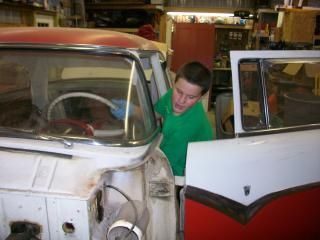
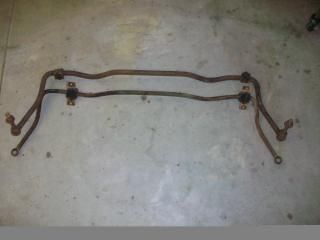
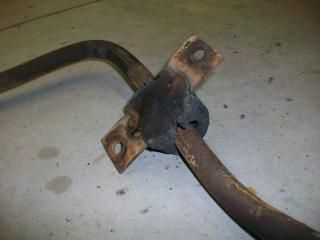
Things went really slow this week but when I look at these photos, I say to myself, "who cares?" My boy (I have 3 kids, 2 daughters and a son) came into the garage with me last night to work on one of his projects - he was making a homemade trailer to go behind one of his small Tonka type trucks. "Hey dad, can I help?" he says. "Sure thing," I tell him, and my 11 year old son Ethan (we call him EJ) grabs the air ratchet and asks what's next...  . I laughed a little and patted him on the back and we spent a couple of hours removing the front bumper, the hood hinges, various hoses and wiring, the sway bar, etc. It took me a whole lot longer because while he has his own hand tools he had never used an air ratchet before... I guess he has never really asked me to. Looking at the photos here I guess I should have made him wear a pair of safety goggles - will have to do that next time. He always knows to wear a pair when he is at the grinder or using a cut-off wheel or a Dremel tool.
  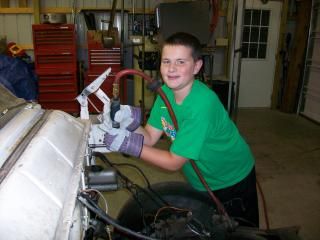
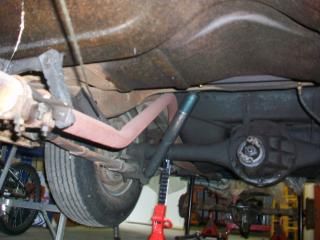
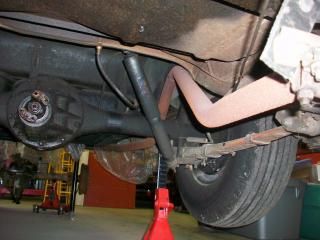
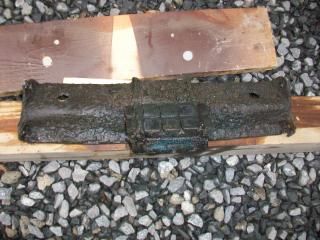
I did take some photos of the front sway bar after removal and of a sway bar that I had on the shelf here. As I recall, it was from a 56 Station Wagon... can I mount that front sway bar with the same metal brackets? It looks like the bushings are the same but the ID of the hole is probably different. It looks like I will need new a kit for the hardware also. Those rubber washer bushings are WORE OUT lol. The bolts from the wagon sway bar look like they are a little longer. I guess there is such a thing as a kit for a wagon sway bar?
I will have to say that with my son's interest here this week things have gotten a whole lot more "fun". We'll see how long he lasts. The last thing he told me before we went in for a shower last night was whether or not he would be allowed to drive it when he got his license. I laughed and said, "You are going to have to talk to your Papa about that one!" I'm sure he will.
Daniel JessupLancaster, California aka "The Hot Rod Reverend"
check out the 1955 Ford Fairlane build at www.hotrodreverend.com
|
|
|
|
|
pegleg
|
|
|
Group: Forum Members
Last Active: 4 Years Ago
Posts: 3.0K,
Visits: 8.7K
|
You may have created a monster! Good for you.
Frank/RebopBristol, In ( by Elkhart) 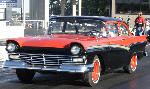
|
|
|
|
|
Daniel Jessup
|
|
|
Group: Forum Members
Last Active: 3 days ago
Posts: 2.0K,
Visits: 131.1K
|
pegleg (8/17/2014)
You may have created a monster! Good for you.
Let's hope! Here comes the Hot Rod Reverend Jr.  Daniel Jessup
Lancaster, California aka "The Hot Rod Reverend"
check out the 1955 Ford Fairlane build at www.hotrodreverend.com
|
|
|
|
|
texasmark1
|
|
|
Group: Forum Members
Last Active: 7 Years Ago
Posts: 650,
Visits: 2.7K
|
reminds me of how my Daniel began helping me on my 57... he was only 5 or so, but he dug right in!
now he's driving his restored 63 Mercury back to his sophomore year of college...
best times we've had together... wrenching and getting greasy.
don't miss a minute of it... EJ may surprise you and really pick up the torch!
Mark
"God Bless Texas"location: Houston,TX
|
|
|
|
|
Daniel Jessup
|
|
|
Group: Forum Members
Last Active: 3 days ago
Posts: 2.0K,
Visits: 131.1K
|
Well I finally had a half day off today and got a chance to get in the garage for a few hours to turn some wrenches on this old Ford. Right now my life is very busy what with school starting up (I administrate or church's academy), the new volleyball season (yep - I coach girls' volleyball... don't ask me how I got talked into that but it has to do with my daughters lol), and everything else with a family of 5 I don't know how I have time. No complaints,,,, just letting you know the reason for so much time between posts.
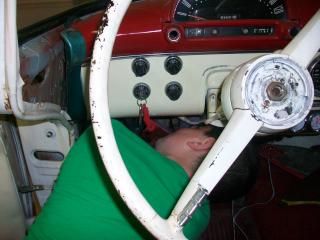
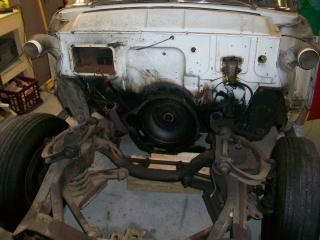
I removed the transmission and the crossmember along with the drive shaft. It took a little more time than I anticipated - stuff was really gunked up under there. I remember years ago that a rear main seal was dumping oil everywhere for while - guess it made the floor pans last a long time! I did find one small place on the driver's floor pan that was not solid. Everything else is good.
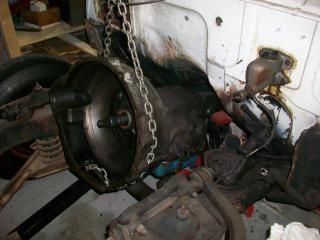 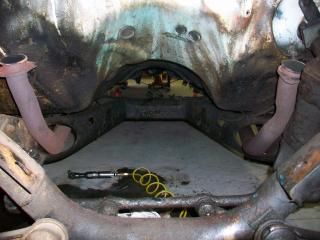 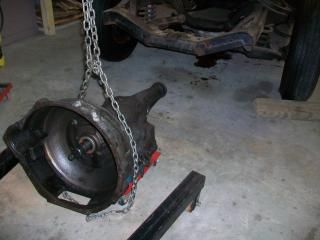
 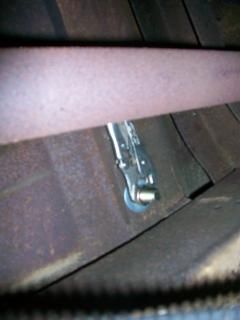 If you are wondering what is going on with the photo of the vise grips... I was looking around under there and found them clamped to a nut! I think the vise grips were left under there when the seat belts were installed. That's what I get for having teenagers help me turn wrenches! I should have counted all my tools after that project was done. I took them off... they are still good after 7 years or so and all the road time. That crossmember weighs an extra 5 lbs from all the crud, grease, and road grime collected on it. Gotta get that thing cleaned up and painted. I guess the transmission mount rubber is near perfect because of being sprayed with oil so much over the years. Hopefully I can get the firewall cleaned up soon and then start prepping the firewall for paint. I would like to do that before weather sets in here.
The photos of the tail pipes are a for a member who asked for them sometime ago but I could not find his post. If you know the member or remember the post... can you direct him here?
thanks Lancaster, California aka "The Hot Rod Reverend"
check out the 1955 Ford Fairlane build at www.hotrodreverend.com
|
|
|
|
|
lyonroad
|
|
|
Group: Forum Members
Last Active: 11 Years Ago
Posts: 703,
Visits: 3.1K
|
Daniel Jessup (8/24/2014)
The photos of the tail pipes are a for a member who asked for them sometime ago but I could not find his post. If you know the member or remember the post... can you direct him here?
thanks
Found it myself Daniel. Thanks. Good call on the vice grips - "it was a teenager". I'm still looking for a 9/16" wrench that was used somewhere but there hasn't been a teenager around here for almost 15 years!
Mark
1956 Mercury M100
1955 Ford Fairlane Club Sedan
Delta, British Columbia
|
|
|
|
|
Meandean
|
|
|
Group: Forum Members
Last Active: 3 Years Ago
Posts: 163,
Visits: 137.7K
|
The vice grip photo reminded me of growing up just a little bit on the rural (not redneck, just rural) side.
My father was not big on fixing things around the house and all projects he started seemed to fizzle out before they were finished.
Our kitchen sink had plastic/bakelite type handles over the ribbed valves. At some point the one for the cold water broke or stripped so for years we could only get hot water out of the kitchen sink. Eventually he stuck a pair of vice grips onto the valve and viola', we could turn the cold water on again! Only 1/2 a revolution before the vice grips hit the wall so not a lot of flow, but definitely an improvement!
|
|
|
|
|
Daniel Jessup
|
|
|
Group: Forum Members
Last Active: 3 days ago
Posts: 2.0K,
Visits: 131.1K
|
I did have one of our graduating seniors over to the house one afternoon because he was a troubled kid, had some issues, his mom couldn't handle him, yada, yada, yada... the boy helped me with some disassembly and I taught him to use a few tools, etc. We actually had a great time, he learned some things, and fast forward to today he is proudly serving in our US Navy based somewhere outside Chicago (one of the Great Lakes maybe?). Anyway, he lost one of my good 3/8" sockets THAT I STILL CANNOT FIND...  I guess it is some box of parts or somewhere in the garage. I laugh about it each time I talk to him. I guess it is some box of parts or somewhere in the garage. I laugh about it each time I talk to him.
Yep - the old vice grips. Surprisingly they stayed in such good shape. I guess the car really never was driven in wet weather making the difference.
@Meandean - lol - my dad was same way!
Daniel JessupLancaster, California aka "The Hot Rod Reverend"
check out the 1955 Ford Fairlane build at www.hotrodreverend.com
|
|
|
|
|
pegleg
|
|
|
Group: Forum Members
Last Active: 4 Years Ago
Posts: 3.0K,
Visits: 8.7K
|
Probably the base Caled "Great Lakes" which is actually in North Chicago or Waukegan, Il. It's the basic training site for most of the Navy. I was there a few short years ago (50! )
Frank/RebopBristol, In ( by Elkhart)
|
|
|
|