Author
|
Message
|
Florida_Phil
|
|
Group: Forum Members
Last Active: 2 Years Ago
Posts: 1.2K,
Visits: 285.6K
|
My 1955 TBird was converted to a 12 volt electrical system before I bought it. I have the engine out of the car. I removed the battery tray to clean the frame and clutch linkage. The battery tray has been modified (crudely) so a wider 12 volt battery will the 6 volt tray. Can I swap in a battery tray from a 56 or 57 Bird to fix this problem or do I need a special 12 volt battery?

|
|
|
Hoosier Hurricane
|
|
Group: Moderators
Last Active: 5 hours ago
Posts: 3.7K,
Visits: 322.2K
|
If you go with a '56 or '57 battery tray, you will be locked in to a 29F size battery. They are available from the repro vendors, or at the local battery shop. However the local shop has them because of lift truck applications, and only have a 2 year warranty. I think the metal battery shield is different between '55 and '56. I think you could find a modern 12V battery narrow enough to fit in the '55 tray.
John - "The Hoosier Hurricane"

|
|
|
oldcarmark
|
|
Group: Forum Members
Last Active: Today @ 3:22:14 AM
Posts: 3.7K,
Visits: 32.4K
|
I believe Interstate sells them (29NF) with 5 Year Warranty. I purchased 1 last Year to replace One that expired after 6 Years and it came with 5 Year pro-rated Warranty. Check with your local Interstate Dealer.

|
|
|
Hoosier Hurricane
|
|
Group: Moderators
Last Active: 5 hours ago
Posts: 3.7K,
Visits: 322.2K
|
Mark, thanks for that info. Now I won't have to use poorly fitting group 24s in my Birds.
John - "The Hoosier Hurricane"

|
|
|
jumpstart
|
|
Group: Forum Members
Last Active: 6 Years Ago
Posts: 35,
Visits: 943
|
Florida_Phil; To answer your question about battery box. I also have a 1955 T-bird I changed it over to 12V I used my 1955 battery box tray, I went to my Ford Dealer and ordered a Motorcraft battery that was the same size as my 6V battery. That number is motorcraft, BTX-56 Amp 550 serial number 040914 I did not have to change anything. Works very well. Bob Harvey
|
|
|
KULTULZ
|
|
Group: Forum Members
Last Active: 5 days ago
Posts: 1.6K,
Visits: 304.7K
|
Just FYI- If this can help anyone; INFO URL- https://www.ctci.org/gilsgarage/BatteriesRevisit.phpThe 56/57 BIRD BAT TRAY setup is the same and uses a different tray and heat shield than the 55. A
____________________________
|
|
|
Florida_Phil
|
|
Group: Forum Members
Last Active: 2 Years Ago
Posts: 1.2K,
Visits: 285.6K
|
I straightened and painted my original 55 tray so it fits the correct battery. I converted my TBird over to a dual master cylinder using one from a 1967 Mustang. The brake lines come out the driver's side. I snaked the new lines around the clutch linkage and it looks good. It seems I will have to slot the battery heat shield to clear the lines. Do I need this shield? Has anyone run into this problem?

|
|
|
paul2748
|
|
Group: Forum Members
Last Active: 8 hours ago
Posts: 3.6K,
Visits: 497.5K
|
Keep the heat shield. It will keep the battery cooler, even if you have to cut some slots in it.
54 Victoria 312; 48 Ford Conv 302, 56 Bird 312 Forever Ford Midland Park, NJ
|
|
|
ian57tbird
|
|
Group: Forum Members
Last Active: 5 hours ago
Posts: 495,
Visits: 21.3K
|
I noticed this post come up earlier and was just planning to make a new tray for my TBird at the time that would suit a conventional shape battery. Years ago I went through the process of trying to buy a battery over here to fit but never found the correct size and ended up putting some MDF in the tray and having a conventional shape battery sit on top. I started making a battery tray earlier this year but didn't say anything until I had made some progress. Here are some pics of what I have done so far.  
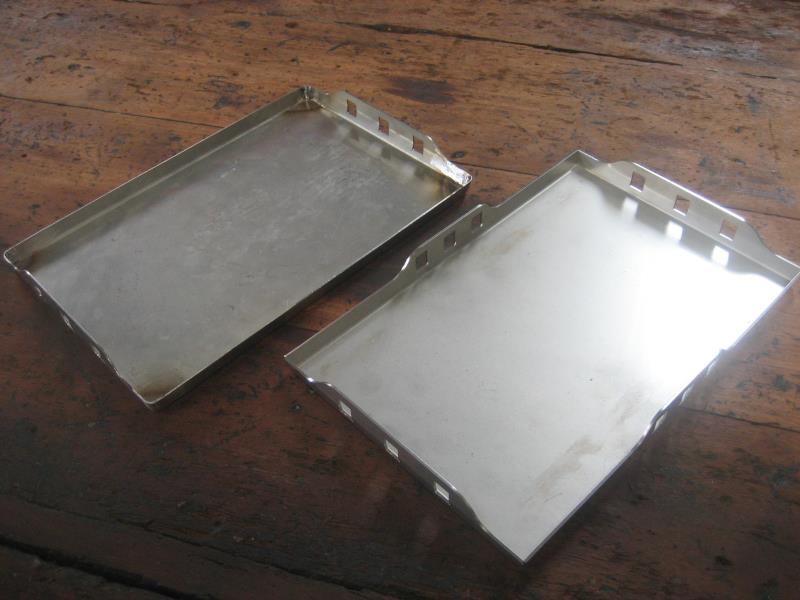
Version 1 and 2 trays.    
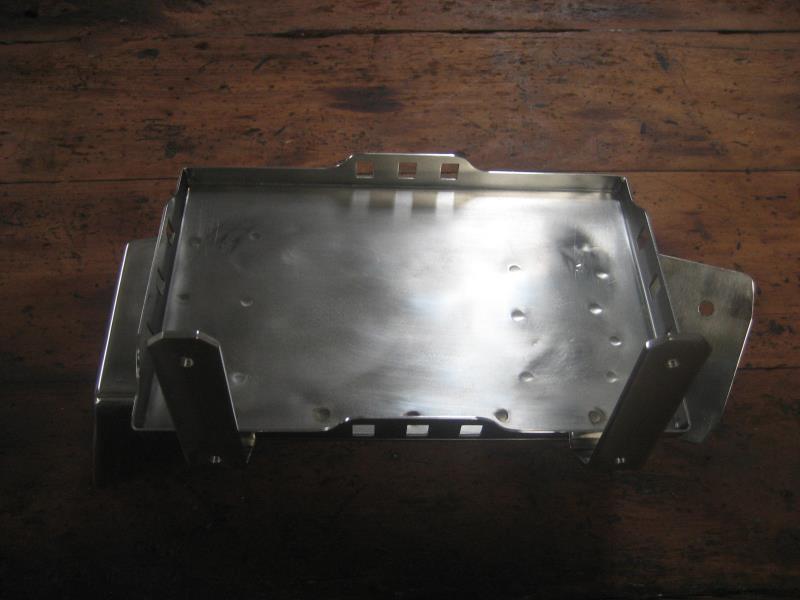
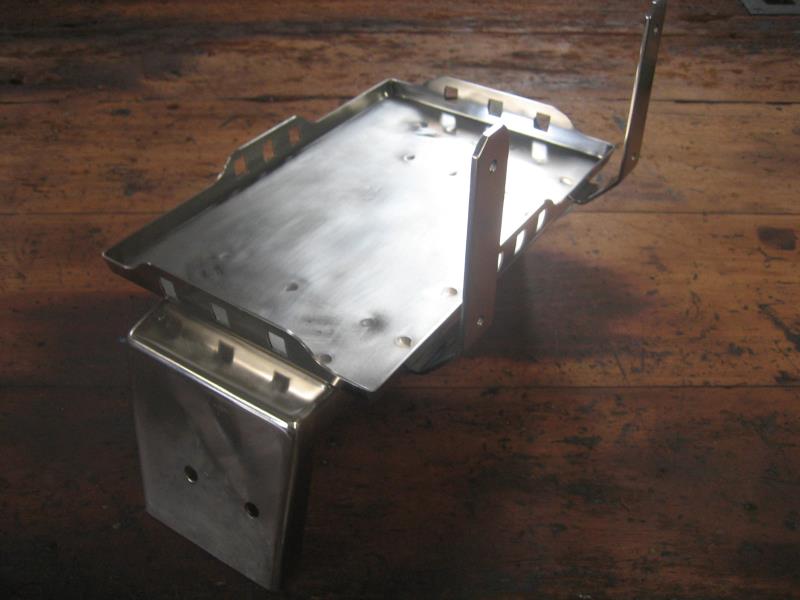
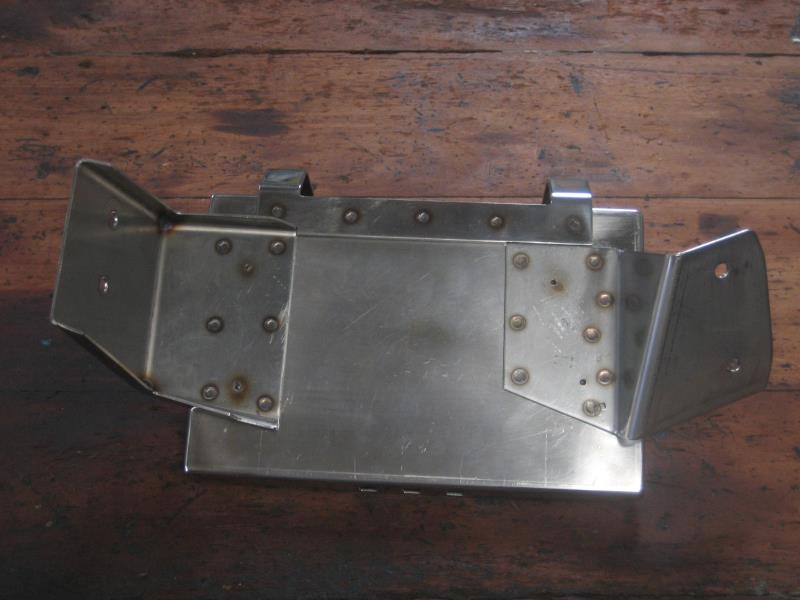
It has been lots of trial and error but I am now happy with the results. I was originally going to use mild steel but decided to use 316 stainless instead. The stainless has been much harder to work with but I think it was worth it. I probably over engineered it a bit as it has come out heavier than the original. The tray is 1.5mm, mounting brackets are 2mm and the heatshield bracket is 3mm so that it had a few turns of thread in it rather than welding nuts on the back like the original. What I didn't take into account are the mounting brackets which are much wider than the original so I could have gone to a thinner gauge steel to save some weight. Version 1 of the tray was 1.2mm thick more like the original but the 1.6mm on version 2 was much easier to TIG the corners. Still haven't worked out the heatshield yet.
|
|
|
charliemccraney
|
|
Group: Moderators
Last Active: Today @ 1:57:52 AM
Posts: 6.1K,
Visits: 441.6K
|
Very nice.
Lawrenceville, GA
|
|
|