Ok fellas... back at it again for the last two nights, cleaning things up, installing new gaskets and even had the chance to put the 292 on the run stand tonight before I got ready to turn in.
First of all, I thought it good to cover something that gets asked quite a bit by newbies... "How do you prime the oil pump?" I don't know if my answer is the best but I will show you what I do when I get a Y block ready to go and then after that I will take you through what I do to get the distributor ready for initial start up. Here we go:
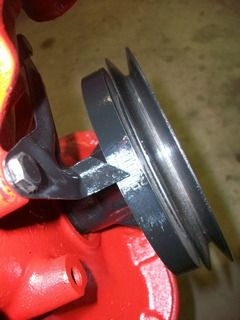
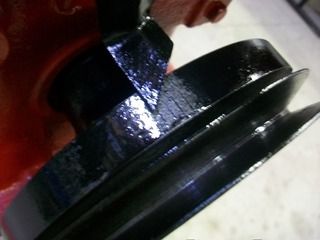
I put an NOS oil pump (gerotor type, not the "spur gear" pump) on this Y block when I put a new gasket on the oil pan also.
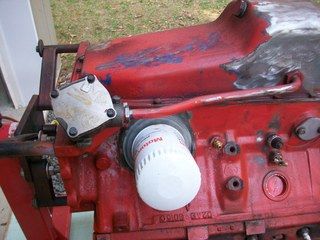
Look to the left in the photo above to see what I am talking about here. The gerotor has a smooth cover, the spur gear has a sizeable "bump out" for the gear.
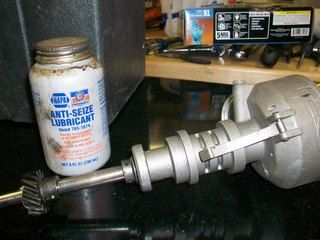
When you put one in, the best advice is to submerge the entire pump and prime the pump itself before installation. Well... I'm pretty lazy and did not want to have to clean it up to paint it, etc. So I did put a little oil in the pump inlet just to make sure it was not dry at all. I then installed a new gasket after I cleaned the block surface really well. It is not recommended that you put any silicone or sealer on the gasket for the oil pump. However, I must say that I always use high tack gasket compound (the red stuff) on the gasket at the oil pump to get it to seal nicely. Careful - a little goes a long way here! After the pump was installed, I cleaned it up with acetone before painting. Another word on the oil pump and the oil pan tube that feeds the pump. There is a very delicate tube seal that goes on your inlet tube as it mates to the pump inlet. Be careful to get this situated correctly and do not overtighten or crush the seal. If you have a leak here after priming or after initial startup it will be a PAIN because you will either have to remove the oil pump or oil pan and then reaffix the seal. You really don't want to have to do either, trust me.
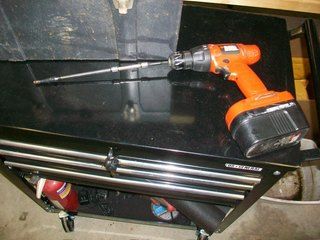
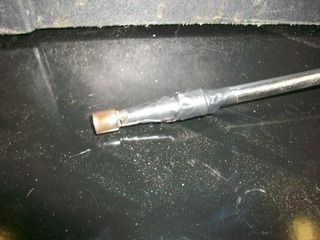
Back to priming the pump. Make sure that you installed the oil pump drive rod (get a new one when you put in a new pump - cheap insurance!) correctly in the bore. The catch washer is used to keep the shaft from coming out of the pump when you pull the distributor, so the washer needs to go on the shaft BEFORE you place it up inside the bore of the block. Please don't leave it out - you will just be swearing like a sailor the next time you pull your distributor out and find that the shaft came right on out too... OUCH. That shaft is pretty thin but it is a hex. You can use a 1/4" socket to turn the shaft so that you can prime the pump. Get yourself a long 1/4" drive extension or two, and then a THIN-WALLED socket like the one shown. TAPE THEM TOGETHER so that you don't lose anything while you are messing around in there.
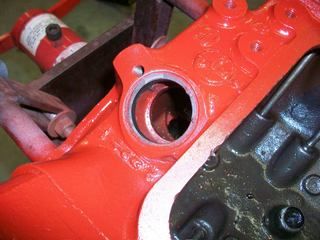
You can see the distributor boss pictured above. That is what we are shooting for here. If you look down in that hole you can see the top of the oil pump drive rod. Take your drill, set it to REVERSE (remember that counterclockwise is the way the distributor and that hex shaft will rotate when the engine is running). Now take your 1/4" extension setup and place it on the shaft... HOLD IT! Did you fill the block with 4 or 5 quarts of oil?

Thought so. You did - but I almost forgot. By the way, another thing you should do... ahem, is uh, to walk around your block and make sure you are BUTTONED UP! (see Y block follies post for explanation here lol) You don't need to go at super fast rate of speed, just touch it off and let it rotate a little bit. You can actually do this with a speed handle for a socket but this certainly takes the sweat out of it. While you are spinning the drill it will be about 10-15 seconds or so and you will feel a load... yep, we struck oil. "Drill baby drill" Keep going and watching your rocker arms to make sure you are getting oil up there. If you have a new build, it is going to take some time. The rockers are the furthest point away from the pump that the oil has to travel, so every other orifice and what have you will fill up first. If you have an early cam that is "cross-drilled" then rotate your cam so that you can mate up the feed holes.
Now on setting that distributor. With your valve cover off the passenger side head, take a look at the # 1 cylinder and the corresponding valves. You want to get TDC at the compression stroke so that you can give that ignition initial time. Go back to your crank dampener/timing pointer and bring up the TDC mark just as the intake valve has closed (exhaust will be closed as well... double check this by checking valve lash on both rocker arms for #1). Most guys like to set their initial time to exact TDC on the timing pointer. I guess this is good practice, but since Y blocks like a lot of advance I usually bring the timing pointer to 4 degrees or so and then get ready to install the distributor. You will note my timing mark on the crank dampener. I have removed the black paint where the timing marks are located and I have sprayed it with Clear Engine Paint to highlight the difference from the rest of the dampener.
Next, I take the distributor and mark the location of #1 Cylinder/Plug Wire by fitting the cap to the distributor and making a sharpie line right underneath the center of where #1 is located.
Something else I like to do is get some anti-seize on both lips of the distributor boss on the block and a little on the distributor itself where it will mate to the block. How many times have you tried to pull a seized Y block distributor? I don't know why particularly, but the Y block is NOTORIOUS for seized distributors. In my lifetime of probably dealing with 15 different Y blocks I have never owned, seen, or worked on one that had the top end oiling problems. But about half of the ones I have dealt with had a seized distributor. You may also note the ACCEL pointless ignition. While everyone and their grandmother go the Pertronix route I have used the ACCEL kit with 100% success and no ignition failures over the past 10 years or so. (lol I say that now, wait until I crank this thing up or take the father-in-law out for the initial ride after all the work is done!
 Seriously though, I do like the kit and with an ACCEL super coil there is no resistor needed. You can leave the key on with no problems, etc.
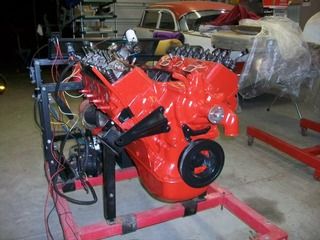
That's all for tonight - I'm beat. I did get more done in the shop but until next time, here is the engine finally back on the run stand...
You guys out here late at night can take over for me...
Daniel JessupLancaster, California
aka "The Hot Rod Reverend"
check out the 1955 Ford Fairlane build at www.hotrodreverend.com