|
By Half-dude - Last Year
|
Hey fellas, long time no see.
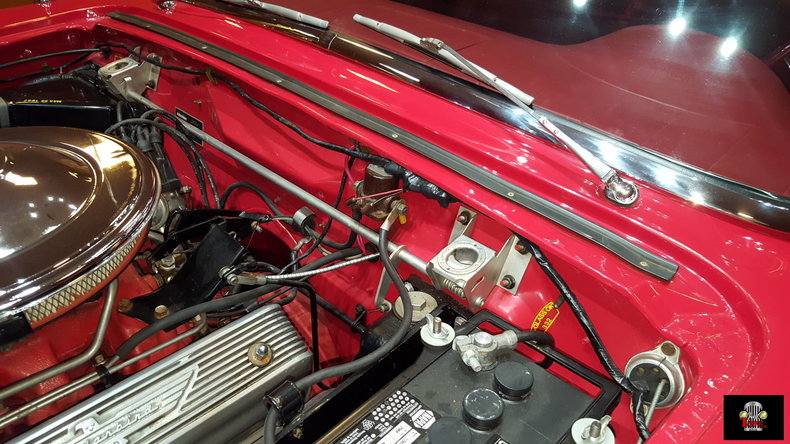
So I finally got fed up with worrying about going dead out on the road, not being able to be jumped, and just essentially the low cranking and difficulty starting due to that. So I finally got the conversion kit from Vintage Auto Garage, got the original looking Alternator generator shell and everything because while I'm doing this I do want to look as original as possible still.
I went ahead and took off all the wound electrical tape I'd put on years ago to take a look at my wiring. I thought it might be a good idea to post pictures here to see if you guys think anything here looks wonky or non-factory under the hood. Obviously I don't know the full history of the car or what might have been rewired.
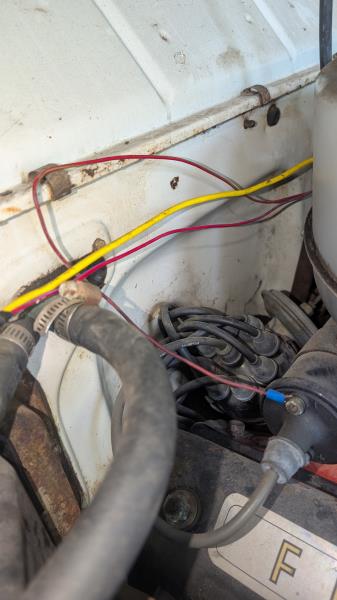 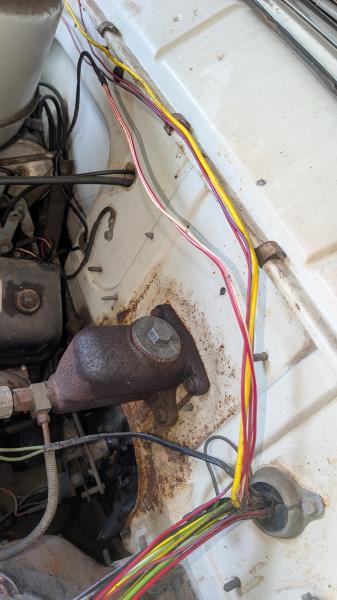  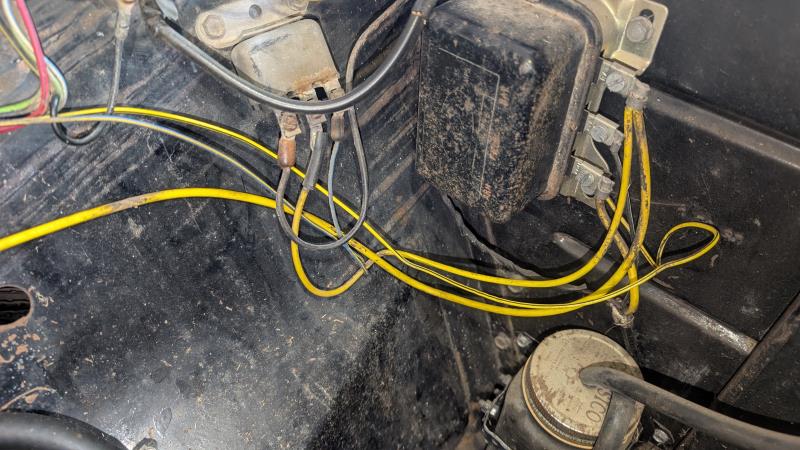
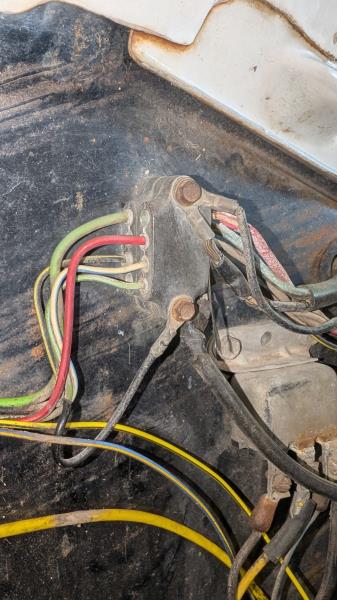
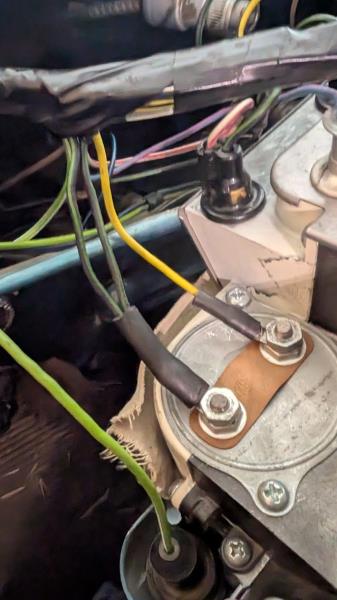
Also I'm curious about this connector here, what I suppose is the antique predecessor to the Molex connector of today. Some of the wires on this thing look pretty crusty and some are even missing insulation where they go into the connector here. I'm curious how these connectors work and how one goes about pulling the wires out so they can be repaired and reinserted. It doesn't look like they're pressed in or anything.
Also do you think this might be a good location for the 120V main-feed fuse? Just above the heater vent? (btw yeah I just noticed the area of insulation missing now that Im looking at the picture)
|
|
By Daniel Jessup - Last Year
|
I would highly suggest you replace your wiring harness. Cracked insulation and the deteriorated condition of your wiring will only lead to shorts and subsequent fires... even if you win this gamble, there will be headaches down the road chasing faulty grounds.
I went this route on my 1955 Ford Fairlane Club Sedan: https://www.hotrodreverend.com/post/2017/09/30/55-ford-fairlane-restoration-blog-part-18
The connector in your uploaded photo - those are all bullet terminals, just pull them straight out of the connector.
|
|
By miker - Last Year
|
I’m with Daniel. I’ve seen too many failures with 50 year old wiring. Rebel’s good, Ron Francis, American Autowire, just to name a few.
When I redid the bird, I kept those junction blocks in your picture. You can still buy the bullet terminals, but there’s a couple sizes if I remember, watch that.
If your switches are still good, the 6 volt ones are good for more amps than the 12v, so just clean them up and reuse them. I also like to make a couple grounding points (under dash, trunk, under hood) and tie them back to the battery. Eliminates the problem of bad grounds between dirty, rusty body panels.
It looks overwhelming at first, but with some forethought a good kit will move you thru it. And don’t forget a ballast resistor and the proper starter solenoid going to the points for starting.
|
|
By KULTULZ - Last Year
|
I bought a 55 BIRD in 1970 I think it was. Beautiful car and had both tops.
Didn't take long for me to shake it due to the 6V SYSTEM, wouldn't get out of it's way (LOM - SINGLE RANGE TRANS) and burnt the hell out of my butt (mufflers right under seat).
This was the MUSCLE CAR DAYS and this just didn't cut it.
If I had kept it (and my 67 GT-500), I would be sitting pretty today. Who figured?
Another way around it -
6V TO 12V CONVERSION INFO
"2-6 volt batteries in parallel gives you 6 volt with double the amps.
2-6 volt batteries in series gives you 12 volt.
He converted over to a 12volt system generator/alternator doesn't matter which.
He then tapped 6 volt from just 1 battery to power any and all the 6 volt components.
A separate fuse panel for 6volt.
Took 12 volt off both batteries to power any and all 12 volt components.
A separate fuse panel for 12volt.
No special batteries,charging system, regulators, shunts, resistors, etc, etc, etc.
Just stock off the shelf stuff.
Yes there are 2 different voltages running through the car so check voltage on any wire before you add or change wiring.
This is no different than wiring in your house with 120/ 240 volt.
No the 2 voltages do not interfere with each other or cause any other problems."
SOURCE -
https://forum.studebakerdriversclub.com/forum/your-studebaker-forum/tech-talk/63104-another-6v-to-12v-conversion
Also, that CONV ALT is a DELCO ONE WIRE most likely. Research the benefit(s) of wiring it as a THREE WIRE.
|
|
By 55blacktie - Last Year
|
I inherited my 55 Tbird from my dad, who complained of hard starting, particularly after the engine had reached normal operating temperature, and he asked me to convert it to 12v and install a Casco high-volume water pump & 170-degree thermostat. When converting it to 12v, I followed the instructions posted by Gil Baumgartner on CTCI Gil's Garage. After converting the Tbird to 12v, my dad said that it had never started so easily. He was happy with the conversion, but he only got to drive the car to his local donut shop a few more times before Alzheimer's got him. As far as overheating went, it needed more than a Casco water pump and thermostat. Although the original radiator (date coded December, 54) didn't leak, I could look inside the tank and see that the core was rotten.
A single Group 56 12v battery was used for the 12v conversion, and the original battery tray was retained.
|
|
By Ted - Last Year
|
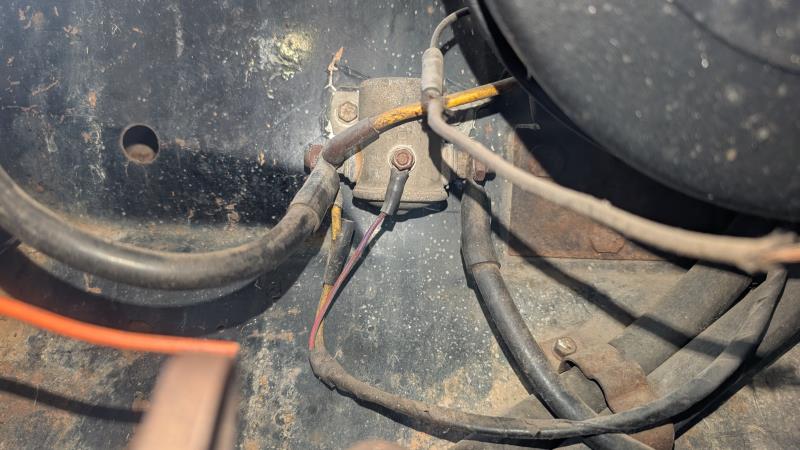
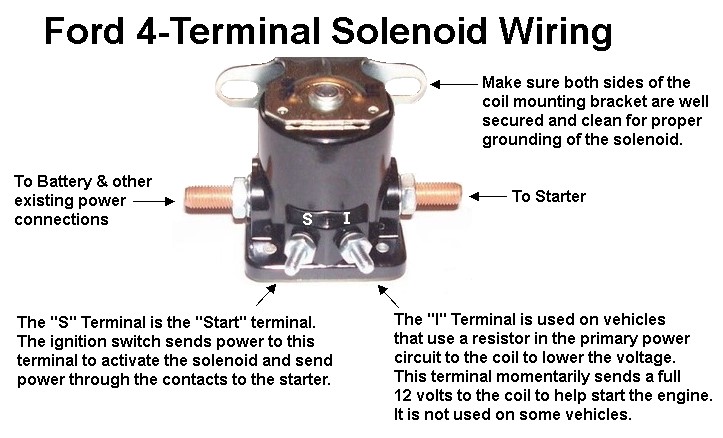
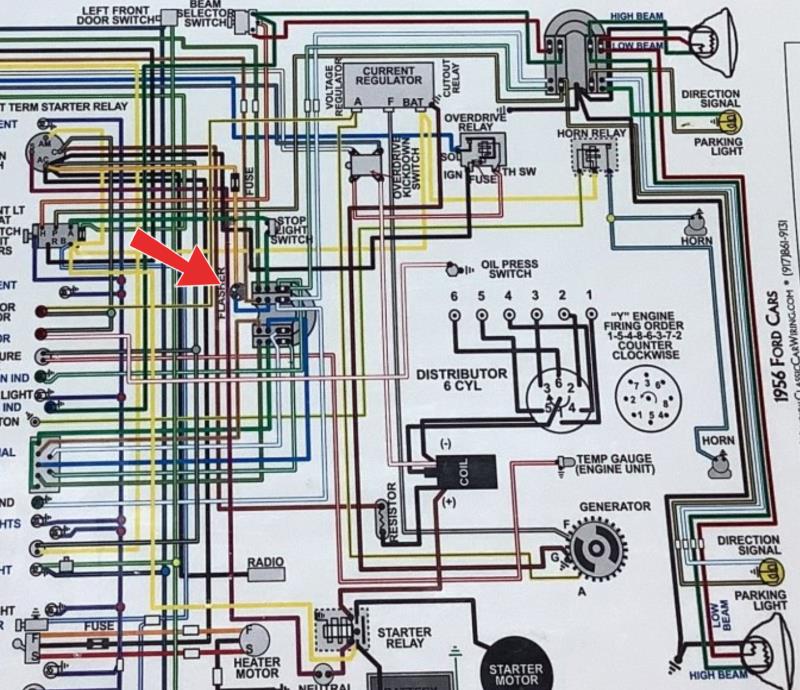
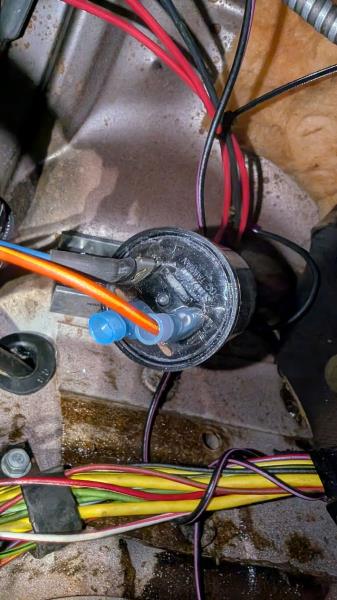
Assuming you are still running points within the distributor, then be sure to put a resistor in the ‘switch on’ power line going to the coil from the ignition switch when converting the vehicle from 6V to 12V. The breaker points in the distributor are not happy with a full 12 volts except only for starting purposes. If attempting to replicate what was done with the 1956 and newer Fords, you will need a starter solenoid with both a start and ignition terminal. Your pictured solenoid only shows the start terminal. The addition of an ignition terminal allows for a specific 12-volt line going to the coil that bypasses the resistor just for starting purposes.
|
|
By paul2748 - Last Year
|
Ted - regarding the picture you posted of the solenoid (and which I have seen before) the starter cable is connected to the right side and the battery is connected to the left side. I have mine reversed and all my fords have the same. They have operated great for years like that. And I have seen basically the same picture with them reversed from your picture (the way I have mine. . Even the TBird Electrical Assembly Manual shows the way I have it. Does it make a difference ?
Ted (9/16/2025)
Assuming you are still running points within the distributor, then be sure to put a resistor in the ‘switch on’ power line going to the coil from the ignition switch when converting the vehicle from 6V to 12V. The breaker points in the distributor are not happy with a full 12 volts except only for starting purposes. If attempting to replicate what was done with the 1956 and newer Fords, you will need a starter solenoid with both a start and ignition terminal. Your pictured solenoid only shows the start terminal. The addition of an ignition terminal allows for a specific 12-volt line going to the coil that bypasses the resistor just for starting purposes.
|
|
By KULTULZ - Last Year
|
Well, if you don't mind me interrupting ...
I see nothing wrong with it but then again have never seen it done.
The BAT (1954 FORD) is at the RS core support and the relay is on the RS apron. The starter cable runs to the starter on the right frame rail. It doesn't change the electrical flow (IMO), but would look odd I would think.
No one has called you on it? Is the BIRD wired the same?
|
|
By Ted - Last Year
|
|
paul2748 (9/16/2025)
Ted - regarding the picture you posted of the solenoid (and which I have seen before) the starter cable is connected to the right side, and the battery is connected to the left side. I have mine reversed and all my fords have the same. They have operated great for years like that. And I have seen basically the same picture with them reversed from your picture (the way I have mine. Even the TBird Electrical Assembly Manual shows the way I have it. Does it make a difference ?
All my early Fords has the starter solenoid attached to the vehicle in a ‘hanging down’ position which puts the ‘S’ terminal on the battery side of the solenoid. It’s also the battery side of the solenoid that the ‘positive’ battery cable hooks to with the starter cable then connecting to the starter side of the solenoid. With the battery located at the front of the vehicle, this keeps the two cables from crisscrossing each other while also minimizing the lengths of the cables.
While it likely does not make a difference which side of the solenoid the battery and starter cables are hooked to, the starter cable is generally hooked to the starter side of the solenoid. While probably not in the original design, the ‘S’ terminal being on the battery side does make it easier to bump over or start the engine by just placing a screwdriver across the ‘S’ terminal and the battery input terminal.
Never paid attention to the wire routing on the Thunderbirds with the rear mounted batteries so there may be some differences there. Maybe some more of you with Thunderbirds can chime in regarding both the solenoid position and the cable routing.
|
|
By KULTULZ - Last Year
|
"While it likely does not make a difference which side of the solenoid the battery and starter cables are hooked to, the starter cable is generally hooked to the starter side of the solenoid. While probably not in the original design, the ‘S’ terminal being on the battery side does make it easier to bump over or start the engine by just placing a screwdriver across the ‘S’ terminal and the battery input terminal."
- BIRD - 12V -
 |
|
By Half-dude - Last Year
|
|
I went ahead and got the Pertronix system with my kit, figured I might as well go all the way with the modernization. But they did give me a new solenoid with both connectors too.
|
|
By Half-dude - Last Year
|
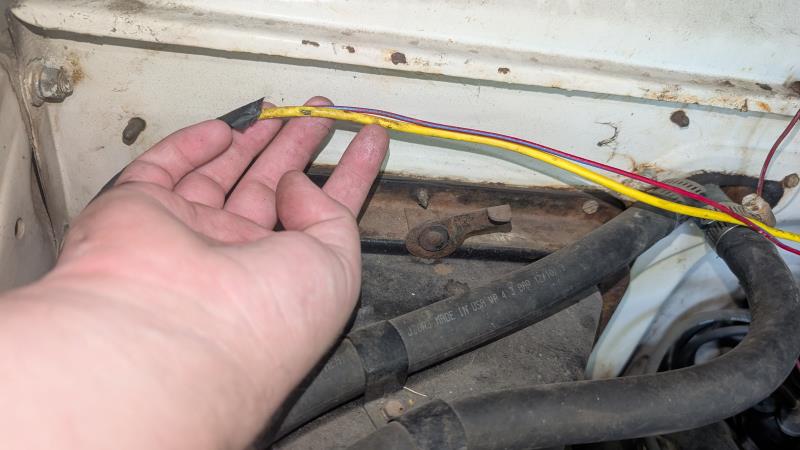
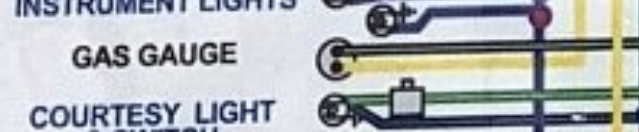
You guys have any idea why there are two signal wires crimped together going into the fuel-gauge? It doesn't show it wired like that in the typical wiring diagram.
|
|
By miker - Last Year
|
|
Power in to the fuel guage, and then out to the water temp? IIRC, the same hot feed goes to both gauges and the oil pressure and gen warning lights. Maybe something else, too. Been a long time since I rewired one.
|
|
By FORD DEARBORN - Last Year
|
|
I don't have '55 Ford wiring diagrams but the terminal with two wires is probably a 6V common feed shared with the temperature gauge.
|
|
By 55blacktie - Last Year
|
|
I believe that Ford Dearborn is correct. I looked at a diagram on another forum, and it shows black/w green wire between fuel & temperature gauges. I have a reproduction 55-57 Tbird wiring manual, but there's just too much going on to see clearly. On the opposite end, the black/w green stripe wire should connect to ACC post on the ignition switch. The yellow wire goes to the fuel-gauge sender in the tank.
|
|
By Half-dude - Last Year
|
|
I can see how that makes sense, one less wire in the entire run if you daisychain them.
|
|
By Half-dude - Last Year
|
What are your thoughts on the power seat motor? It runs pretty intermittently and for short little movements, does it need a 12v reducer since it's a 6v motor or do you think it'll be okay? I know they say the 6v starter motor is fine after the conversion and doesn't need a step-down. If you suggest putting a reducer on it, anyone know what color wire powers the power seats? I'd imagine it's ran off the ACC term on the ignition.
|
|
By 55blacktie - Last Year
|
If your power seat moves intermittently, the tracks probably are gummed up with old grease; it's common. When I removed my seat to be reupholstered, I had to use a rubber mallet to move the tracks to expose a screw that needed to be removed in order to separate the seat base from the tracks. Although no damage was done, using a rubber mallet shouldn't have been necessary. This same problem can/will eventually cause the seat motors to fail. I have since converted the power seat to manual.
Hopefully you don't have power windows as well (I wish I didn't). They close dangerously fast on 12v, which could cause injury to an unsuspecting passenger or damage the windows.
A friend of a friend used an Uxcell Power Converter (12v/24v to 6v, $25.79 on Amazon) and mounted it to the firewall inside the engine compartment. Look for the heavy-gauge yellow wire.
|
|
By miker - Last Year
|
I’ve been running my 6 volt seat motors on 12 volts for 25 years. They got cleaned and lubed, and I don’t run them for a long time. Typical forward and back
to deal with the soft top, up to clean the carpet. No problems.
I’m surprised about your power windows, mine are slow motion compared to my modern cars. And they are all rebuilt, new rollers, glass, liners, etc. They work smooth, but not fast let alone dangerous. Of course with me driving the least of your worries are the windows.
|
|
By 55blacktie - Last Year
|
|
My windows are much faster than the power windows on my 2015 Toyota Rav4 and my 2017 Ram 1500, faster than any other vehicle I have owned that was equipped with power windows. Gil Baumgartner mentioned this as well on CTCI Gil's Garage.
|
|
By miker - Last Year
|
I believe you, I’m just surprised.
|
|
By Half-dude - Last Year
|
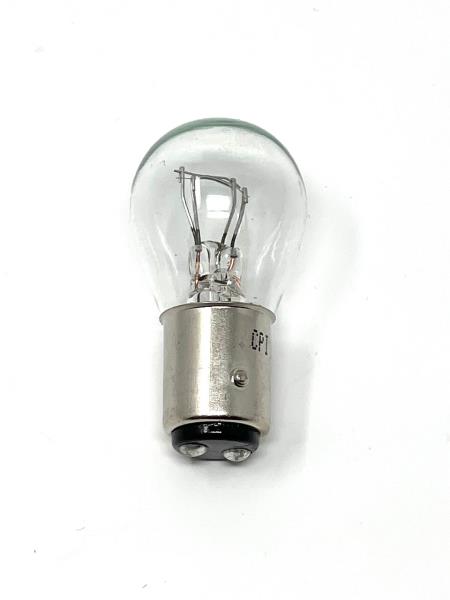
I'm just about finished with the conversion, I ran into a snag with the turn-signal and tail-light bulbs. The bulb used are 1154s double-filament bulbs that I still see on the shelves today at the autoparts store. I just picked up 2 2-packs from the store and put them in my car. I seems like by default the bulbs are shining the brights when the running lights should be on (like you have the brakes held down) and the blinkers do nothing. At first I thought I wired my new flasher wrong, but it was clicking and the indicators were flashing on the dash.
I pulled the front blinker bulb out and flipped it over and stuck it in and then the blinker worked, but of course the bulb wont stay in that way because the little nubs on the sides are keyed. What gives, are the newer 1154s wired in reverse compared to the older ones? Anyone else run into this issue?
|
|
By paul2748 - Last Year
|
|
It looks like you got the wires at the bulbs reversed . Switch wires and see what happens.
|
|
By Half-dude - Last Year
|
The thing is I didn't touch the wires for the lights, the only thing I did was install a new flasher. It's literally the two wires off the old one and two onto the new one. : o
I tested it with the old bulb (didn't burn out hmm) and it's doing the same thing, so yeah it's not the bulb..damn.The kit I got from Vintage Auto Garage gave me this flasher, said to not use the P tab if not needed but that it should work:
https://truck.upauto.com/led-flasher-12v-3-terminal-90651
But this is all I did, so I'm confused why it's not working right:
NOTE: yes I did connect the ground wire on the flasher and verified it's a good ground.
|
|
By KULTULZ - Last Year
|
Is this the flasher PN you used?
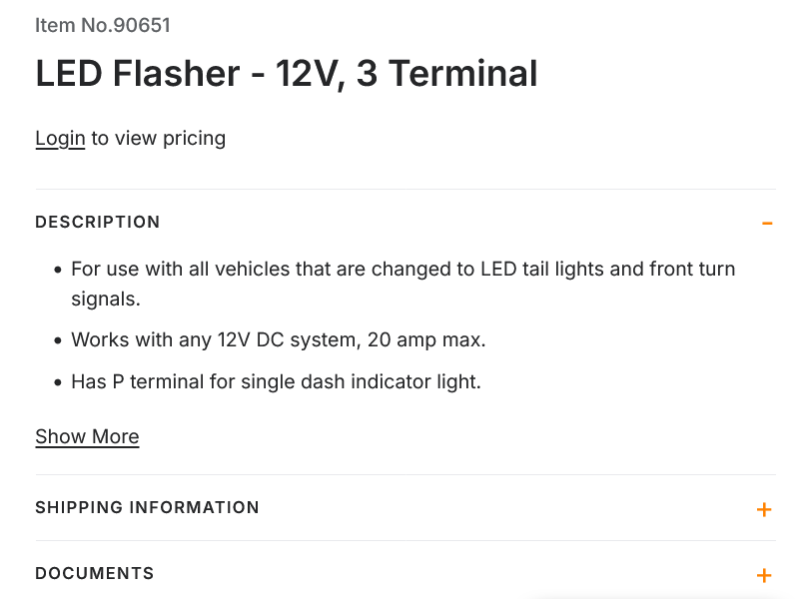 For use with all vehicles that are changed to LED tail lights and front turn signals. |
|
By Half-dude - Last Year
|
|
It is, but also I didn't choose the part it just came as part of my 12v convo-kit. The same kit optionally sold replacement 12v light-bulbs (non-led). I thought the same thing as you, but why would they sell it in the kit if they were selling you light bulbs? I figured it must work for both, is that not the case?
|
|
By KULTULZ - Last Year
|
This usually is simple.You DO NOT need to switch your headlight switch, the brake light switch, headlight high beam switch, the headlight circuit fuse, and the turn signal fuse. They are fine for a 12v system. You will want to change your turn signal flasher for a 12V unit. Just take the old 6V one in and match up a 12V replacement. The wires connect to the similarly labeled terminals on the 12V flasher. Now just change out the bulbs. Look closely at the sockets and make sure they are clean and not corroded. Usually, you can just take one of each type of 6V bulb you have and find its 12V equivalent. You want to pay attention how the base is made and the size of the bulb. Sometimes you may have to change out the pigtails in a socket to make them work. Pigtails are the bottom terminals that push into a socket and have the wire ends. Or you may just change the entire socket.
SOURCE - https://classicautoadvisors.com/2021/07/12/classic-car-6-volt-to-12-volt-conversions/
All you need is a 1956/ 2-BLADE 12V flasher. Take your 6V in with you to ensure correct pin-out.
|
|
By KULTULZ - Last Year
|
" ... but why would they sell it in the kit if they were selling you light bulbs? I figured it must work for both, is that not the case?"
You have to be very careful of vendors these days. They are usually out for quick bucks offering cheap off-shore service parts.
|
|
By Half-dude - Last Year
|
Thanks for that conversion table, that was a big help. I actually got the issue figured out, it wasn't a wiring issue it was the bulbs. I bought new 1154 bulbs not knowing 1154s were still 6v. I guess it's stupid to think so but I actually thought all bulbs sold for cars were 12v now. I went ahead and bought some 2057s and everything works fine now. Thanks for the help guys. 
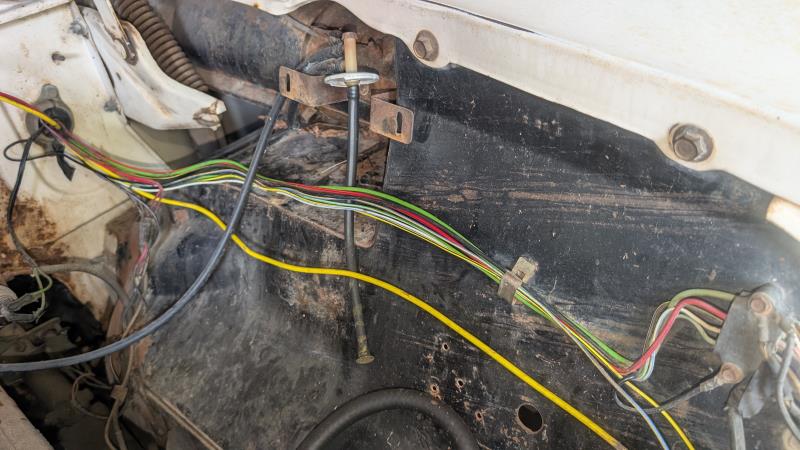
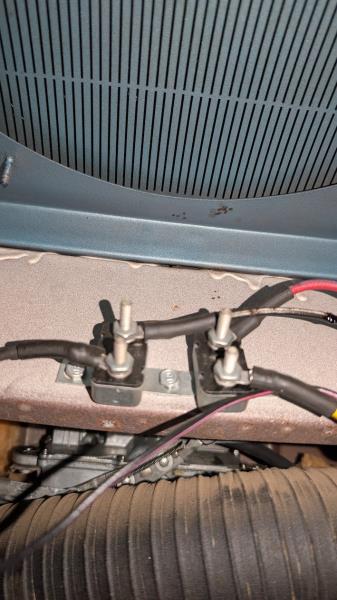
This should be my last ever question on this thread, but are you guys aware of what these are under the dash? They have power leads going into them but I can't tell if the little blocks there are just junction posts or actually some kind of relays, they don't show up on any of the schematics I can find. Maybe they're just hookups for accessories like the clock and such? I'm wondering if they might be a good spot to hook up my voltmeter to.
|
|
By KULTULZ - Last Year
|
|
I guess it's stupid to think so ...
There is no stupid, only learning.
Those are either relays or circuit breakers. You would have to trace the wiring to see where it goes.
|
|
By KULTULZ - Last Year
|
|
What gives, are the newer 1154s wired in reverse compared to the older ones? Anyone else run into this issue?
... duh ...
Revelation.
The bulbs themselves are reversed wired according to vehicle POS or NEG GRD.
I learn't something new today. I did not know that and of course, it took a while to settle in but I learn't something.
My 3rd grade education (two tours) is finally starting to pay off ... 
|
|
By FORD DEARBORN - Last Year
|
|
Sorry for the late reply but you probably know by now those small metal devices with two posts are circuit breakers.
|
|
By Half-dude - Last Year
|
|
Wild, I thought they just used glass fuses, are those like internally melting (one time usable) elements?
|
|
By RossL - Last Year
|
Half-dude (10/22/2025)
Wild, I thought they just used glass fuses, are those like internally melting (one time usable) elements?
They heat up "open" the circuit, when they cool down (normal current draw) they "close" the circuit. Multi use
|