|
By 55blacktie - 3 Years Ago
|
Joe, what will it take to get 207 cfm on the intake/w 1.94 valves @ .450 and 155 cfm on the exhaust/w 1.54 valves @ .450? How much can be taken off the heads without shrouding the valves? At what lift is notching the cylinders required? Thanks.
I looked at Mummert's "Street Port" numbers; intake meets/exceeds my goal, but exhaust less than 75% of intake flow. He did get 169 cfm exhaust flow with "Performance Port," but he used 1.60 exhaust valves for both.
|
|
By Joe-JDC - 3 Years Ago
|
If you have six inch carbides in diamond oval, or flame shapes that are 7/16" or 1/2" diameter, then clean up the entire ports from valve seat to intake manifold. Match the intake to a Fel Pro gasket size and clean up around the valve guides so that you end up with a taper to the stem. The valves should not hit the cylinder at less than .535" lift, and you may get by with more with the 1.94" valve. The exhaust valve is not an issue. On the pushrod wall, work that down a bit, and the cylinder head bolt wall. A good multi-angle valve job and you should be close to your goal. Work the tops and sides of the ports more than the floor. I personally use stones on 3 1/2" mandrels in various sizes to get a better radius around the guide, pushrod tube wall, and cylinder head wall. Those are hard to find but work really well on iron heads. The exhaust port just needs a clean-up and square it to the gasket size. Don't try to take down the guide area very much, or you will find water. A radius valve job on the exhaust with a 45* seat angle works well for street duty. I would not worry too much about the combustion chamber at your performance goal. 210 cfm is easy, but 150+ is not. Nature of the head. Joe-JDC

|
|
By Joe-JDC - 3 Years Ago
|
|
|
By 55blacktie - 3 Years Ago
|
|
Thanks for the photos. I see you used Beehive springs. I will use Pac 1283 Viper Beehive springs. They are Beehives that are closest to cam manufacturer's recommended installed height and seat/open pressures. I realize that the heads will have to be cut for same.
|
|
By Cliff - 3 Years Ago
|
|
Watch beehive springs, when they break (and they will) there is nothing to hold the valve up (heavy damage), I have seen this a lot in 6.2 scrubys
|
|
By Joe-JDC - 3 Years Ago
|
|
So far, they have been run to 7300 with 5/16" valve stemmed valves and titanium retainers on many dyno pulls. The springs that are designed for the LS engines seem to be trouble free---so far. I have a new set of PAC double springs for the race heads that will be going on the dyno soon. They will be used with titanium retainers, and hollow stem valves. Shooting for .675" lift at retainer. Joe-JDC
|
|
By Cliff - 3 Years Ago
|
Look here (gm service bulletin)
https://gmauthority.com/blog/2020/09/new-service-bulletin-addresses-valve-spring-issues-in-gm-v8-engines/
|
|
By 55blacktie - 3 Years Ago
|
|
I like to think I've done my homework and have selected the best components for my application. I'm not building a race engine, valve lift under .500, and not likely to see 6,000 rpm. No matter how good your components are/how much work goes into building an engine, if you push it to/over the limit, sometimes things break.
|
|
By Joe-JDC - 3 Years Ago
|
|
I agree it is an issue to be considered. I also like that Ted always puts a heat cycle into every dyno test on start up where the engine is run in for 20-30 minutes and got the rings seated, then lets the engine completely cool down before repeating dyno testing. That seems to let the valve springs temper properly and have no further issues under normal engine operation. Joe-JDC
|
|
By DryLakesRacer - 3 Years Ago
|
|
Interesting information on the Beehive style springs with failures. In the racing engines I design and assemble I recently went to that style after finding a livable pressure at nearly 2” installed height; they under a Howard’s listing and since LS are so much shorter I’m not worried. The smaller top design with retainers are a relief after using 1.550” diameter springs with rocker arm interference which has been a problem for years. There are no commercial available roller rocker arms available for the engine in question. The ones I have were designed by me made by a machine shop before I needed to go to a larger diameter spring. Thanks for sharing..
|
|
By Cliff - 3 Years Ago
|
|
The problem is when the spring breaks the retainer is small enough to fall all the way to the guide, this cannot happen with a standard retainer, however I do know the benefit of the lighter retainer and the shape of the spring.
|
|
By 55blacktie - 3 Years Ago
|
|
How small is small? What diameter of retainer are you talking about?
|
|
By John Mummert - 3 Years Ago
|
|
I have yet to see a quality beehive break and we have run them hard. I have seen more spring breakage with multi piece springs. Single with dampers, Duals, Duals with dampers.
|
|
By PF Arcand - 3 Years Ago
|
Just asking? I was under the impression on a Y-Block, that the intake ports being done to polish, was not a good idea on a street engine, as it can contributed to fuel mixture seperation or fall out.. Yes, no?..
This would seem to be born out somewhat from Ted's cylinder head testing, published in Y-Block magazine issue #156, of several sets of heads, done on his test Mule. It was interesting to note that the "ECG stock heads" out performed "all" 9 sets of the original modified heads to 3500 RPM. And overall power of the other modified heads varied very noticeably.. In addition, 2 sets of Mummert's heads were tested and only the stock set out pointed slightly the the stock "G"s to 3500 RPM. ..
|
|
By Ted - 3 Years Ago
|
|
You are correct in that a textured finish is required on the intake ports to create a boundary barrier in which to keep the fuel from dropping out of suspension in the air/fuel mixture. It may not be obvious in the pictures that Joe posted earlier on that textured finish, but it is there. When it comes to low end performance, port sizing is a big player as flow velocity is a determining factor there. I’m sure Joe can elaborate much better on the finer points regarding this.
|
|
By Joe-JDC - 3 Years Ago
|
|
I have never "polished" an intake port in anything. I rough up the intake ports with either a 36-50grit cartridge roll, or carbide, or on iron heads, sometimes I leave the stone grind surface as is. I do polish the exhaust ports in most heads. I also rough up the intake portion of the combustion chambers and polish the exhaust side to some extent. Current "wisdom" seems to trend to using a carbide rough finish on the ports and leave them rough. Funny thing is that every "high end" engine that I see the CNC'c ports on has them nearly mirror smooth from the CNC process. I used to get a lot of heads from racers back east that came off Roush, Yates, Nascar, others that the intakes had a very smooth finish on the ports. Those heads usually flowed at or near 400 cfm for the SBFs. I am with John on the beehives being very dependable if you are using an aftermarket brand such as PSI, or PAC. Joe-JDC
|
|
By Joe-JDC - 3 Years Ago
|
|
Porting basically is "averaging" an existing port to maximize flow and keeping the velocity up so that the fuel does not come out of suspension and cling to the port walls and run into the chamber or cylinder in rivulets. The key to increasing flow is to speed it up without creating depressions or turbulence areas in the flow path. If you open up the throat and don't get the intake tract opened to match, you will actually slow down the airflow. If you open up the intake manifold to gasket size, and open up the head to gasket size but don't open up the intake port to the valve seat, you created a huge low pressure area, and flow will decrease until engine speed rises enough to overcome that low pressure area. "Line of sight" becomes a critical issue for best flow characteristics. Shortest distance between two points is a straight line, and when porting, think line of sight from port to valve stem. Remove material to get closer to the straight shot to the back of the valve, and you will pick up flow. Bigger does not always increase the airflow, either. Air needs to be prepared to turn over the valve seat, and that is why there are several angles in a good valve job. The problem with the Y head is the turns make this almost impossible, and takes some finesse to get the flow up to potential of the port size. Just increasing valve size does not always increase flow since it may shroud the combustion chamber wall. Getting air to swirl into the combustion chamber and keep the fuel in suspension is a real problem with the Y due to part of the combustion chamber being outside the cylinder bore. I studied under a Master Porter who worked for a factory race team. We had 14 engines that we kept ready to rotate into the cars at a moments notice. Those heads and intakes were ported, sent back for re-casting to the ported shape, ported again, sent back for re-casting to the new size, and then ported again for race day. We eventually had heads that were virtually race heads "as cast". Porting requires a lot of specialized equipment and takes time to get the finished product to be competitive. Joe-JDC
|
|
By 55blacktie - 3 Years Ago
|
|
The Pac 1283 springs are rated for 0.600 lift; I will be under 0.500. A broken spring can be due to other factors, not necessarily caused by a defect in design, materials, or manufacturing of the spring itself.
|
|
By bird55 - 3 Years Ago
|
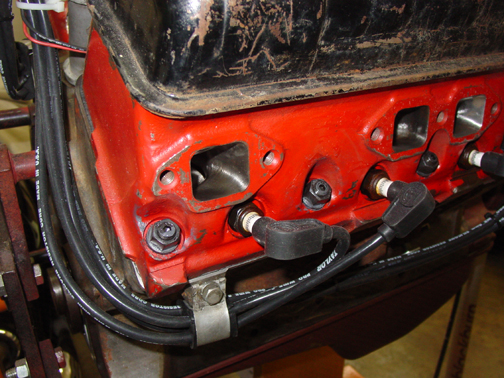
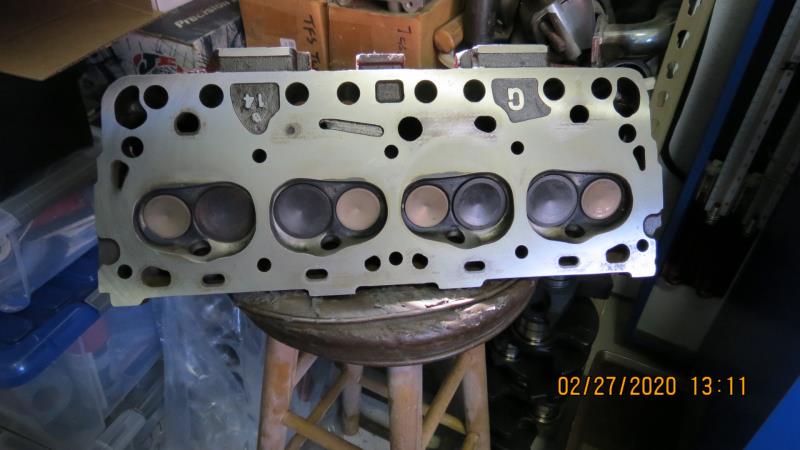
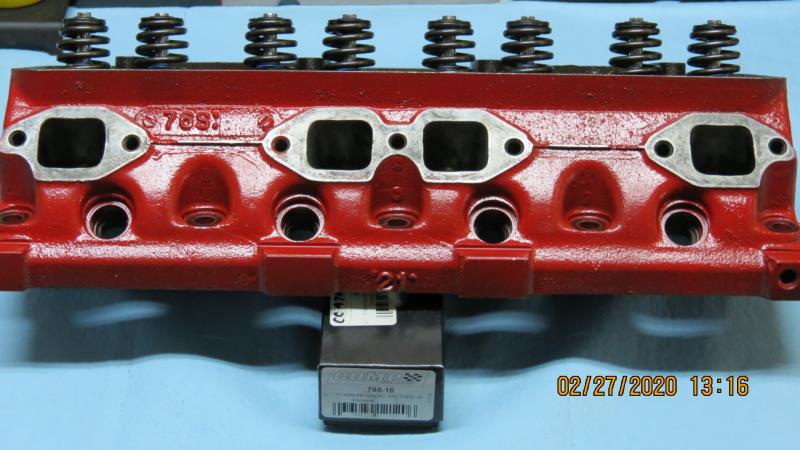
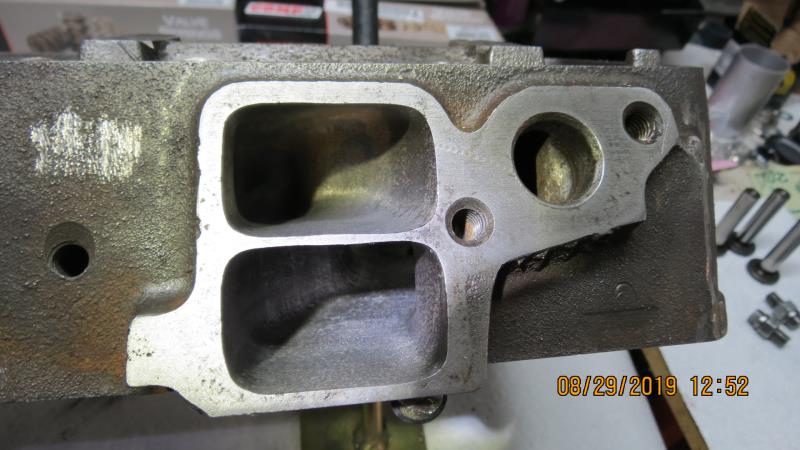
Here's a shot of what the finish looked like on the G heads I sent to John Mummert. I realize this is exhaust but the intake was the same. This is before it went to the dyno. I don't believe Mummert offers this service on iron heads anymore since he has aluminum heads to work with. BTW I am very satisfied with this work. And at the time of the dyno test (about 10 years ago) All the dyno and machine works folks were very impressed and asked a lot of questions about what was done and by whom. Really made the difference in my engine they said.
|
|
By 55blacktie - 3 Years Ago
|
|
Bird55, you're right. According to John's site, he no longer ports Y-block heads. Did you opt for his "Street Port" or "Performance Port?" Were your heads flow-tested? Displacement, compression, cam choice, carburetion, gearing? How do you like it?
|
|
By Lord Gaga - 3 Years Ago
|
|
Great info, but I remember reading somewhere that the "bump" in the exhaust port at the manifold should be left there. No?
|
|
By Joe-JDC - 3 Years Ago
|
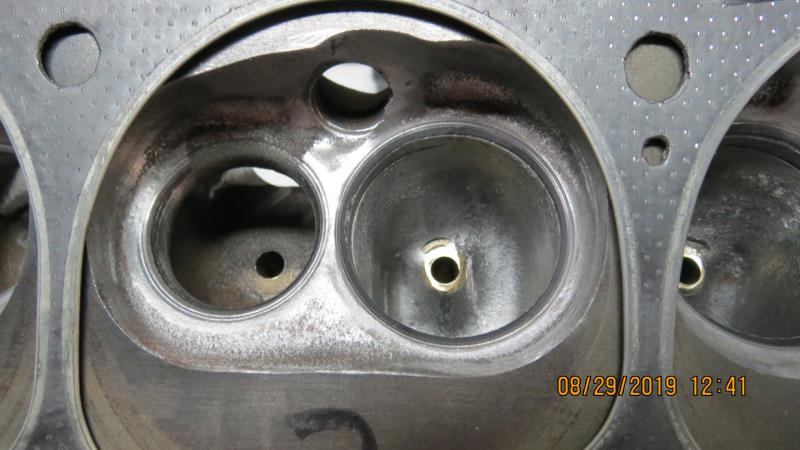
If you take too much out of the exhaust port roof you will find water. Same for the floor. A simple squaring up of the port will help, but most of the flow increase will come from a larger exhaust valve and multi-angle or radius valve job. I have seen completely round exhaust ports on the Y block heads, D shaped, oval shape, and square. I try to get 70% flow bias between the intake and exhaust port's flow, and that is difficult with the Y iron heads. Here are a couple of shots of the texture in a combustion chamber that I found in my archives. Joe-JDC

|
|
By NY59F100 - 3 Years Ago
|
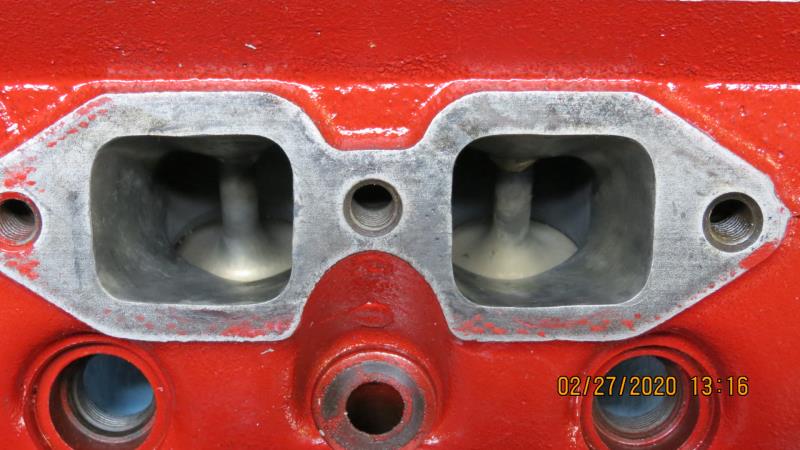
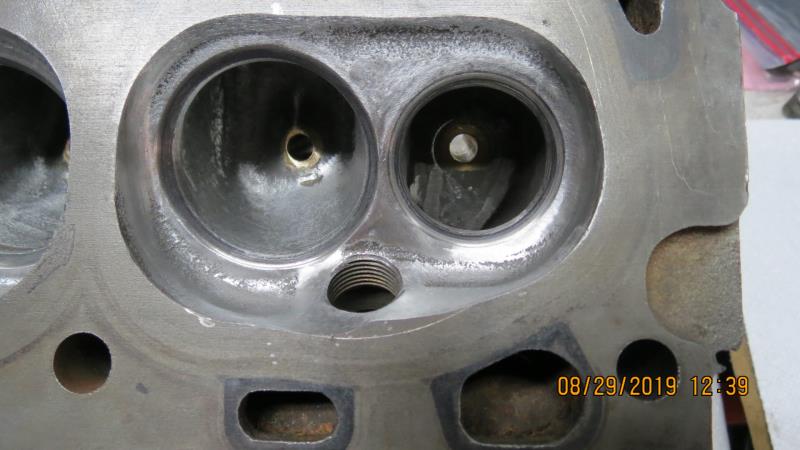
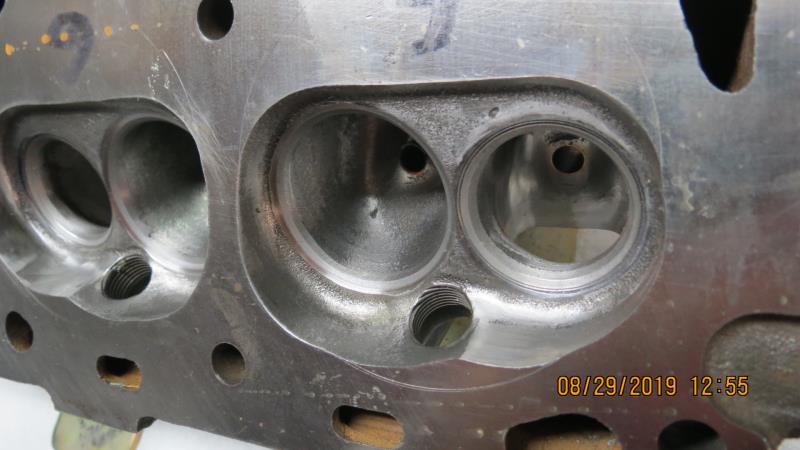
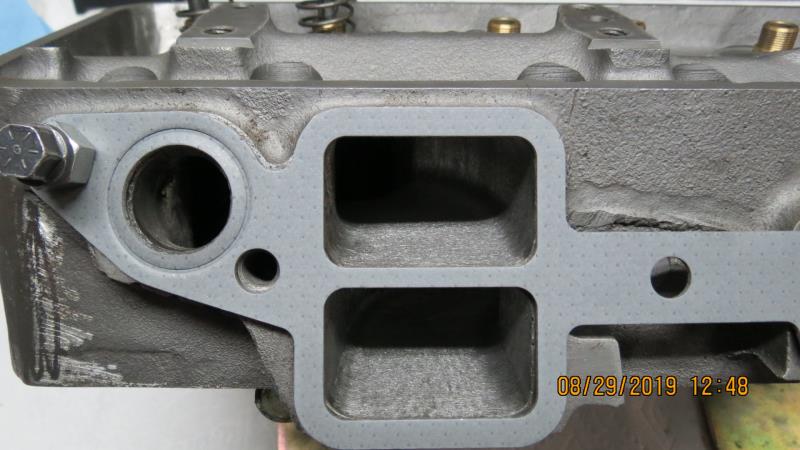
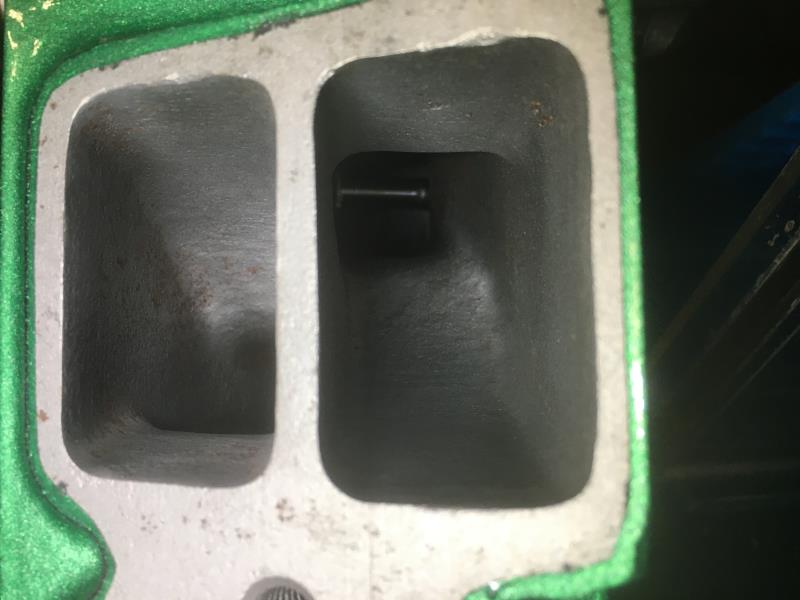
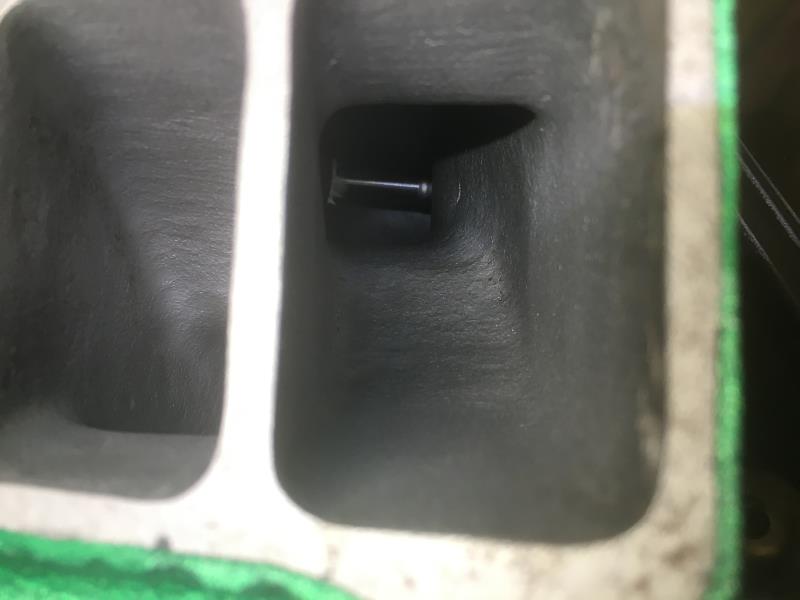
Joe,
Thank you for the information and the photos. I had assembled my G heads over a year ago after doing some amateur porting myself. I took some pictures of one of them. Would you be able to comment on them? I am hoping to assemble the motor in April. No problem in disassembling and reassembling on my end.
|
|
By Joe-JDC - 3 Years Ago
|
|
If you are happy with them, then that is all that counts. Pictures seem to be Ok. Everyone has to start somewhere in the Hot Rodding business, and you can take pride in saying "I ported them myself". Good luck. Joe-JDC
|
|
By NY59F100 - 3 Years Ago
|
|
Thanks Joe. I am satisfied with them, as I spent quite awhile working on them. The only thing I never liked was how the valve seats were installed. The edges seemed to protrude into the combustion chambers, but they were done before the heads came into my possession. I didn’t know if that would have any negative effects.
|
|
By bird55 - 3 Years Ago
|
BlackTie, I am very happy with all the work that John did and his recommendations for what I was only setting out to do. It was a "Street" port job. Mummert also installed new seats, valves, etc., and measured out the ISKY spring pressures.
Since the insurance co. recently declared our new Bronco Sport Badlands a total, I have been driving the old bird for all our errands. I don't usually do this, So now that I am driving it more, it starts quickly and runs and drives well for an old beater!
The extra work and time I took back then to get what I wanted has been well worth it. Even though at the time I kept worrying about the costs. I remember thinking I would never spend the $325.00 for a Blue Thunder intake, that's outrageous. However, I did. I wish I had bought ten. Back then an iron B manifold was only around 10 to 20 bucks or so.
Ted also helped me immensely. with advice and support. Jerry Christianson was the first to get me started. 'Nuff rambling.
|
|
By 55blacktie - 3 Years Ago
|
bird55, more detailed information for your build would be appreciated, but I realize it wasn't yesterday. It sounds like you had it done by the right people, at the right time.
I'm sorry to hear about your new Bronco. I hope no one was injured.
Take care.
|
|
By bird55 - 3 Years Ago
|
55blacktie, Thanks, no one was hurt, thanks for asking.
You can find some explanation of the work done on a blog I did years ago with some pics and the dyno sheet. I did post along the way on this site but I'm sure most of those pics links are broken and I'm not sure how to find the posts easily.
You can look here
|
|
By 55blacktie - 3 Years Ago
|
|
bird55, I just sent a PM to you. Please let me know if it doesn't reach you.
|
|
By bird55 - 3 Years Ago
|
Got it. Sorry guys to sidetrack this post.
|