|
By Cliff - 8 Years Ago
|
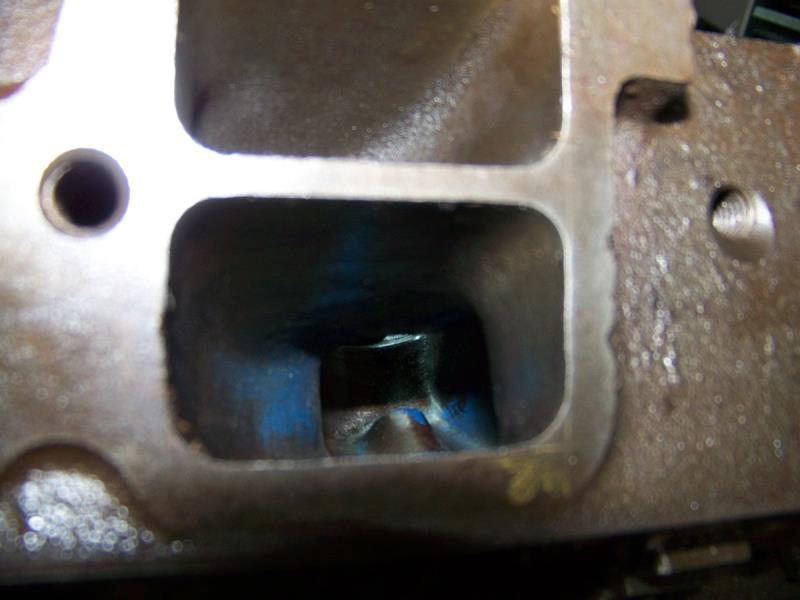 
 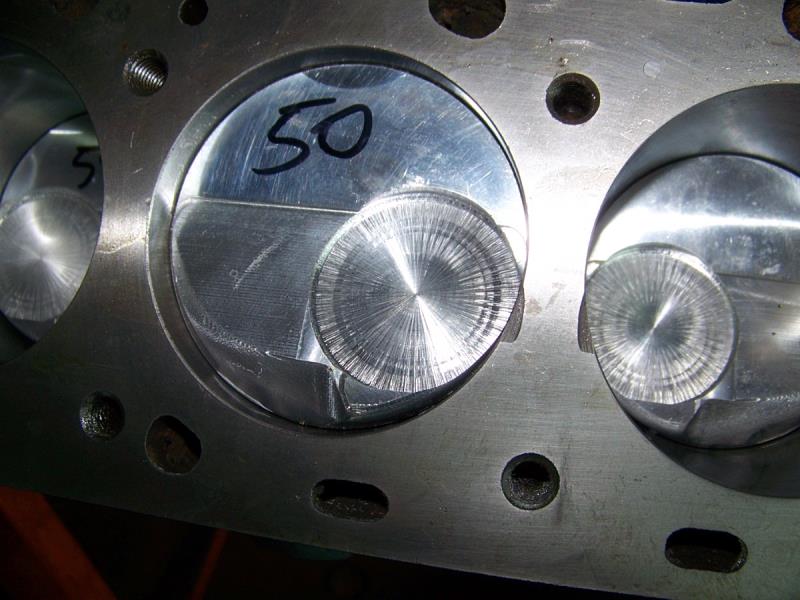
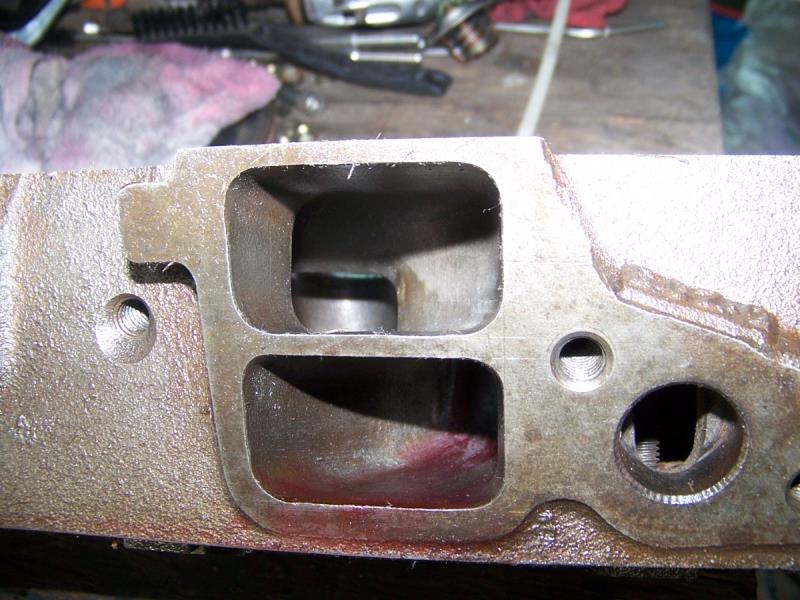
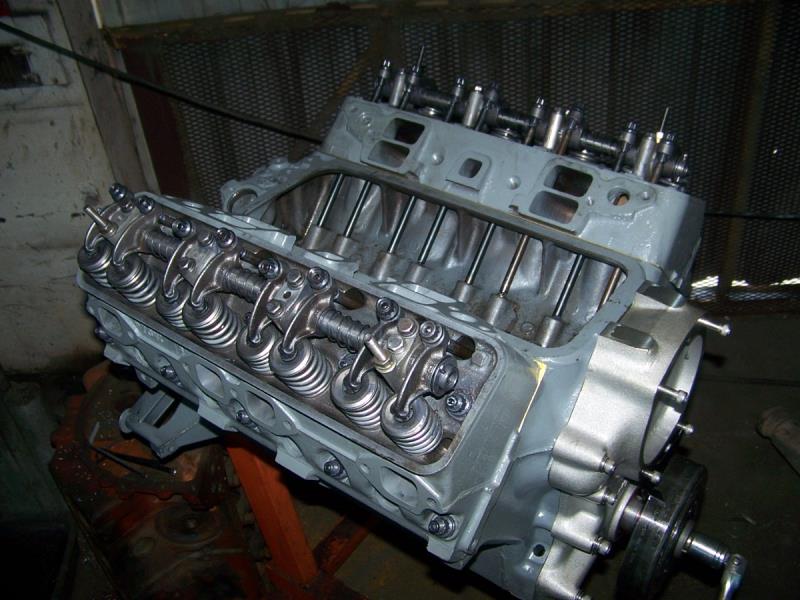
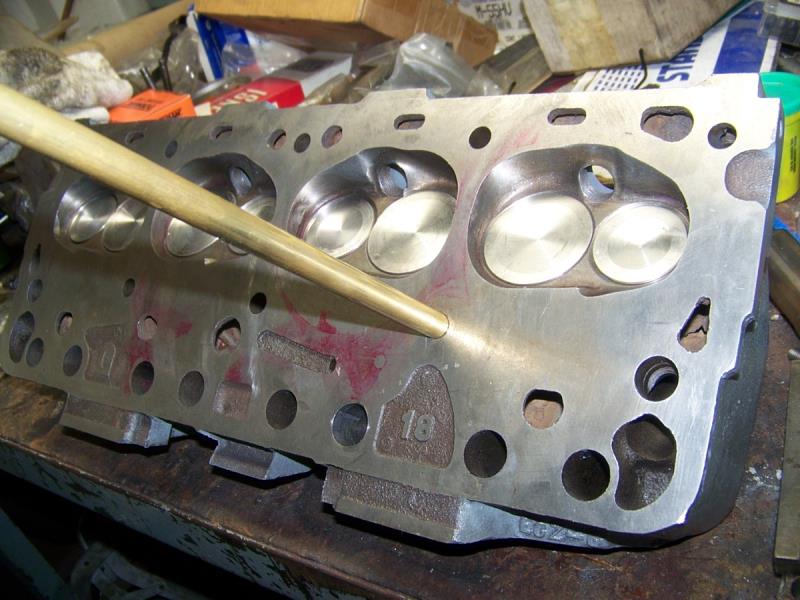
Finishing this up, Head porting and chamber by John, valve seats by me, piston domes by John, valve pockets by me, non posted heads, posts added through the rocker stand bolt holes (2 on each head), over 8 months of working on Saturdays to get this far.
|
|
By charliemccraney - 8 Years Ago
|
|
Sweet
|
|
By Cliff - 8 Years Ago
|
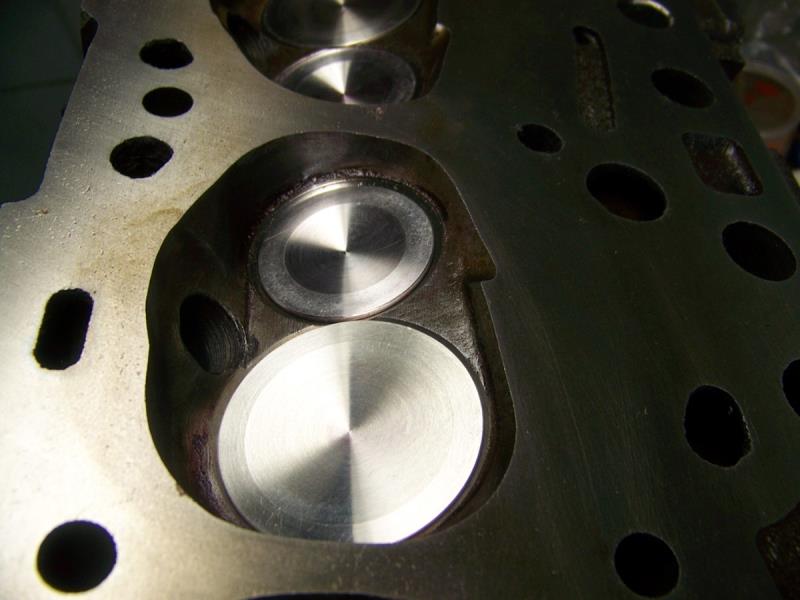
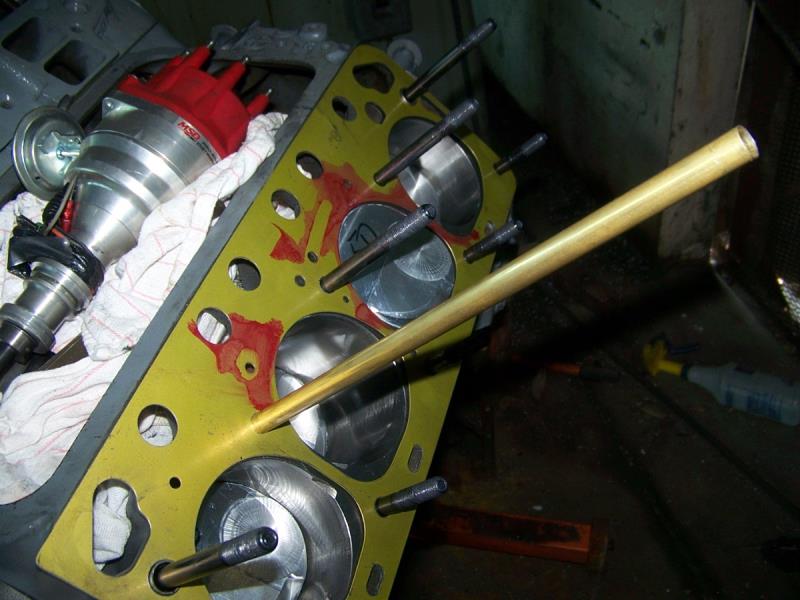
More work done, 2.02 intake, 1.60 exhaust (manley proflow), Isky springs (intake 170 on the seat, exhaust 160), titanium retainers, steel keepers (super7), More to come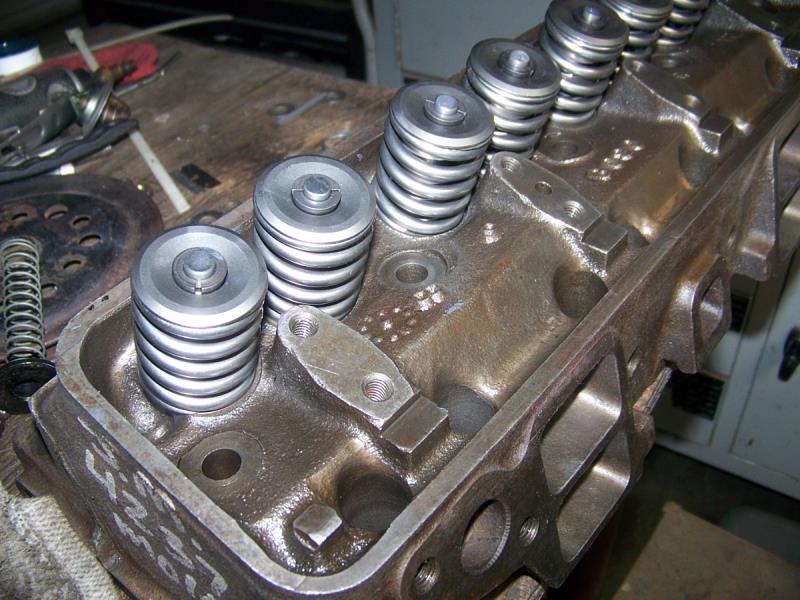 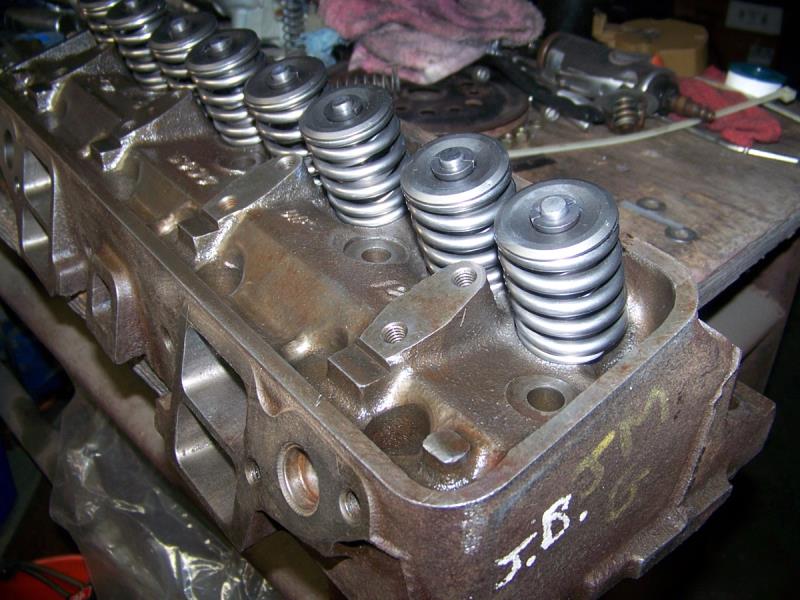 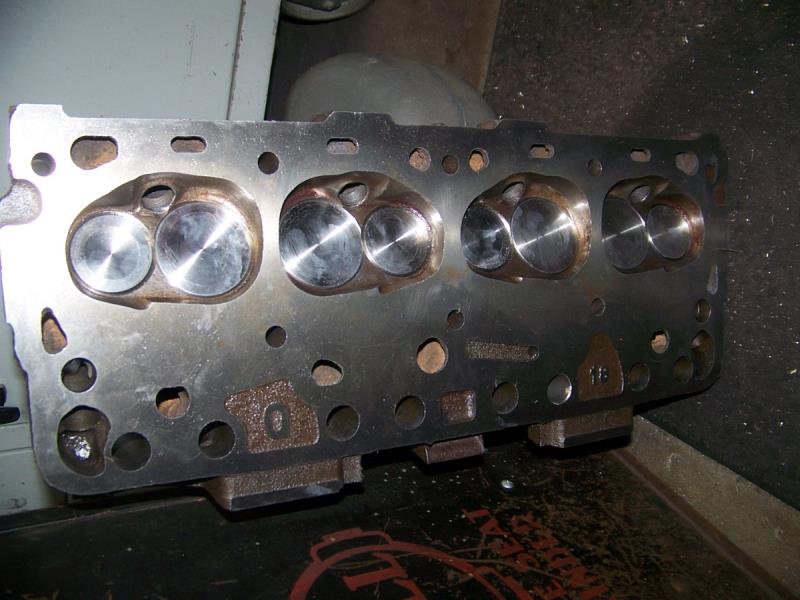 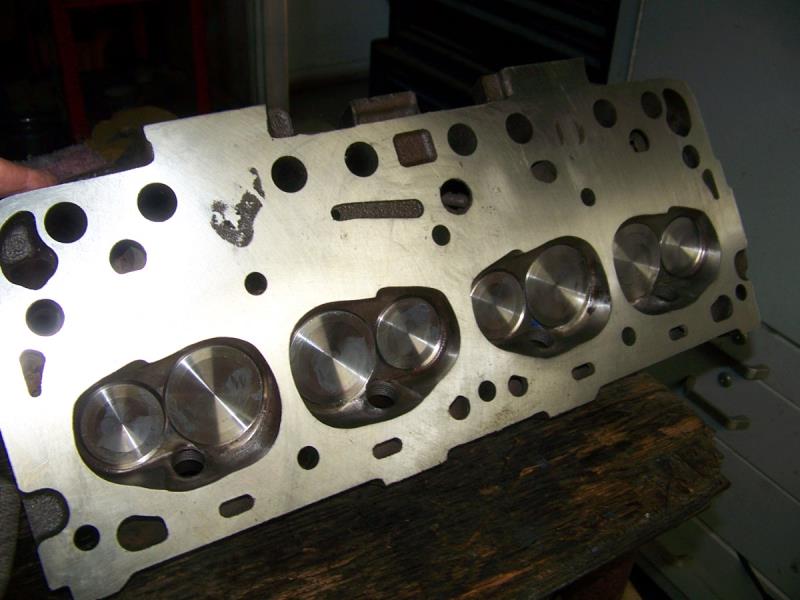
|
|
By NoShortcuts - 8 Years Ago
|
Cliff. I'm very interested in what you are doing on your engine modifications for the dragster project. Some years ago in communicating with John, I understood him to indicated a preference for the small letter G heads for porting over the big letter G heads. He did not share the Why of his statement.
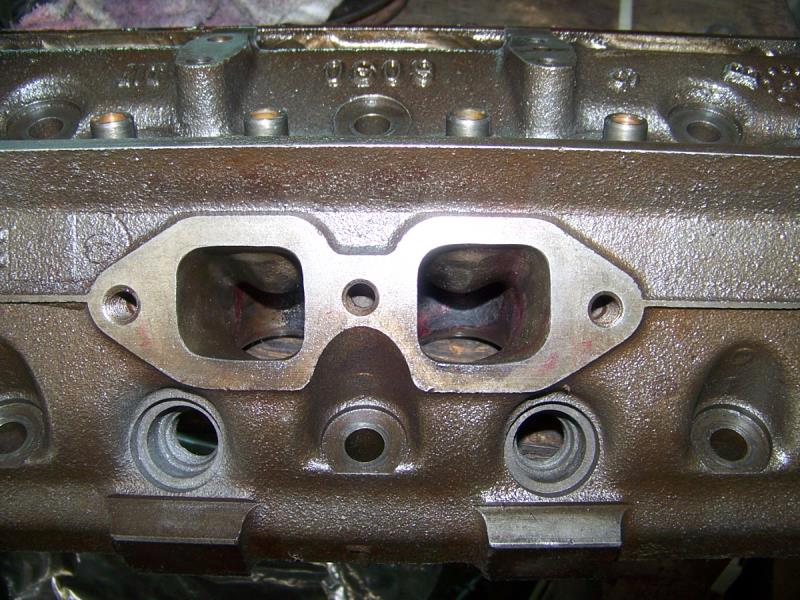
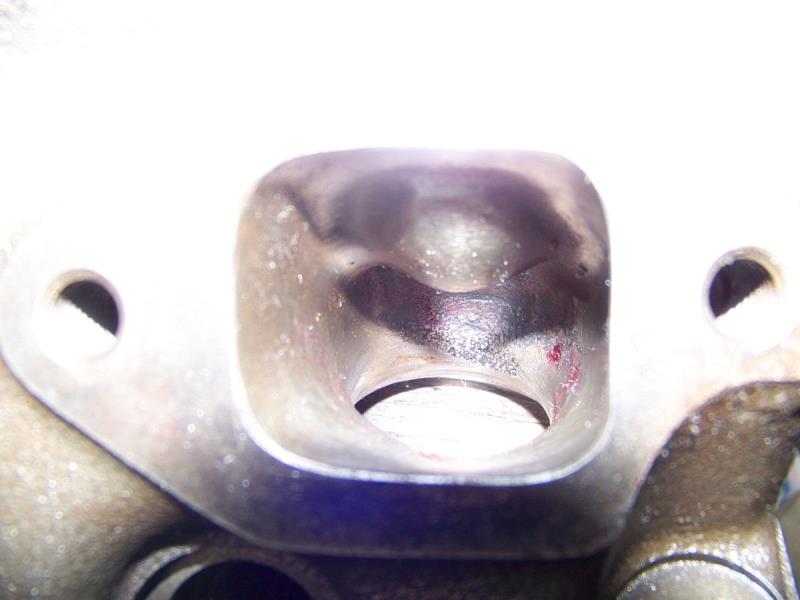
I'm no experienced cylinder head porter. My amateur view of the intake and exhaust ports made me state to John that the bowl area immediately under the intake valves looked better shaped for flow purposes on the little letter G heads. Conversely, the exhaust ports on the little letter G heads as produced appeared to need more opening up than the large letter G heads did as produced when viewed from where the exhaust headers attach.
Your pictures of the cylinder head ports, the combustion chamber shaping, and the piston top shaping were excellent to view and interesting to reflect upon.
I hope you'll keep us informed about other modifications employed in your engine build.
Best Wishes and thanks for sharing! 
|
|
By Cliff - 8 Years Ago
|
The small letter heads have a better exhaust port (per John), John is the man for porting, I changed the valve seats for my own reasons (maybe for the worst) I also sunk the exhaust valve about .040 and changed some of the angles.
|
|
By Cliff - 8 Years Ago
|
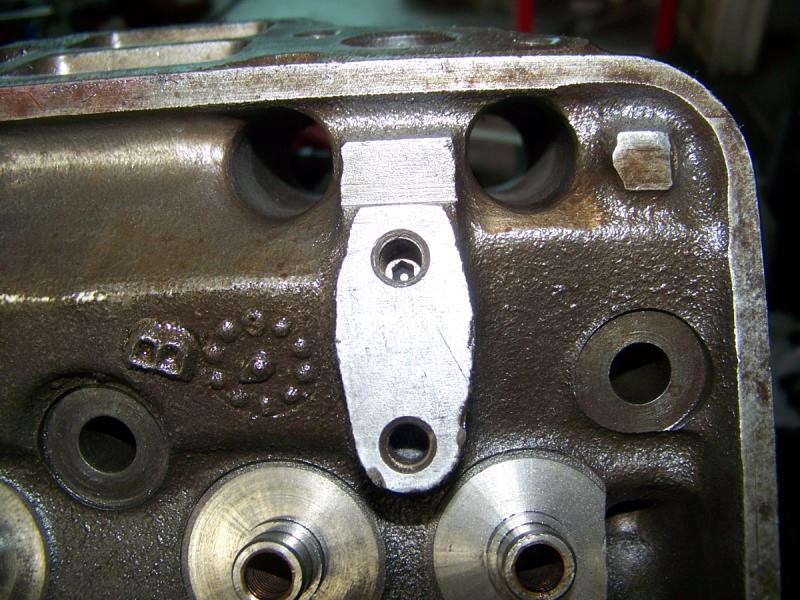
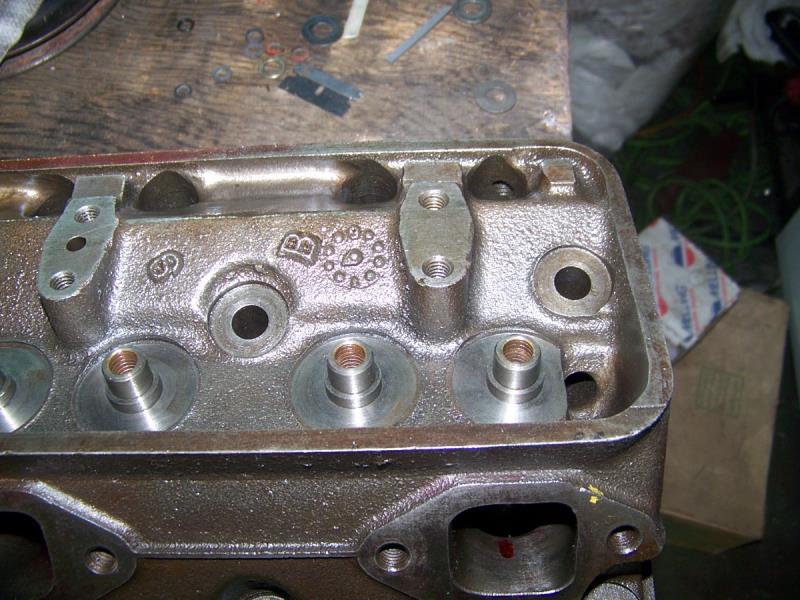
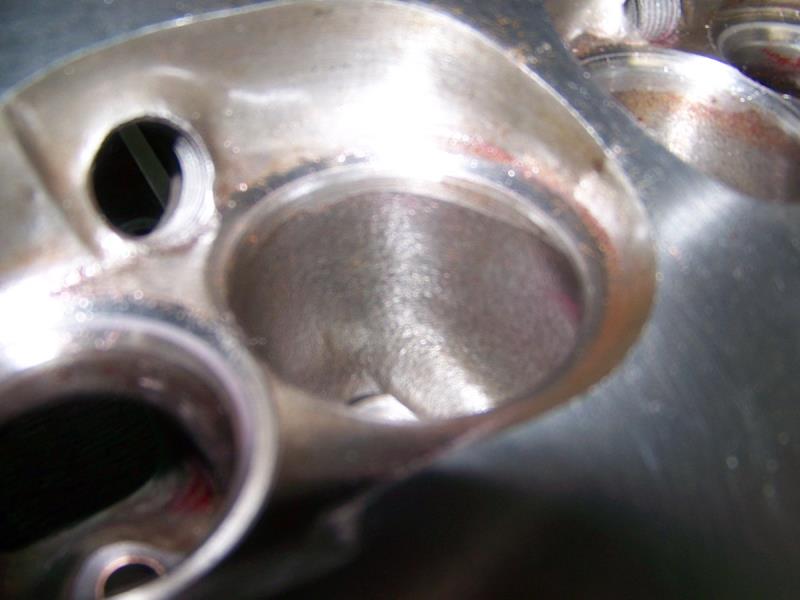
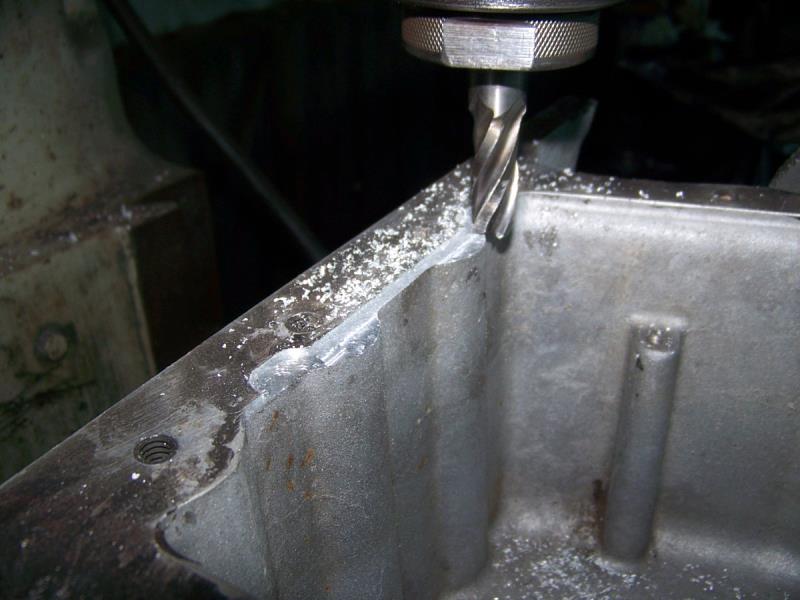
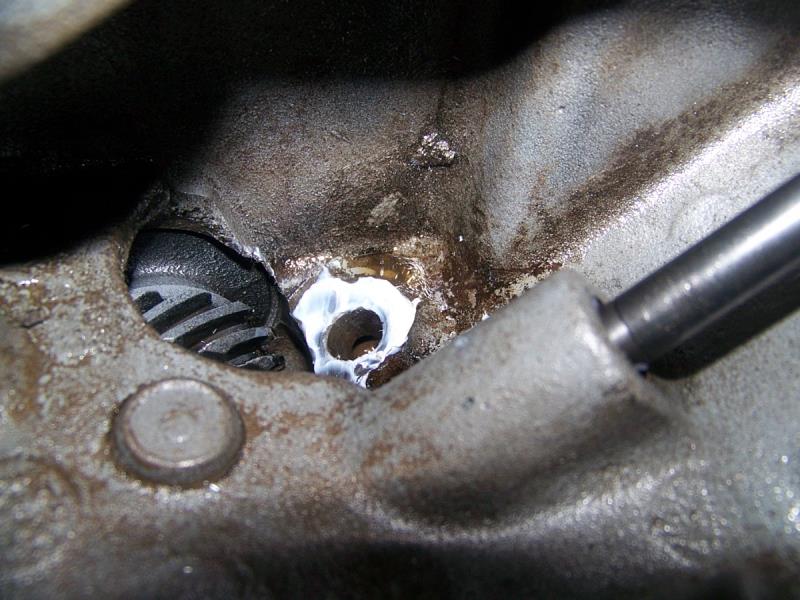
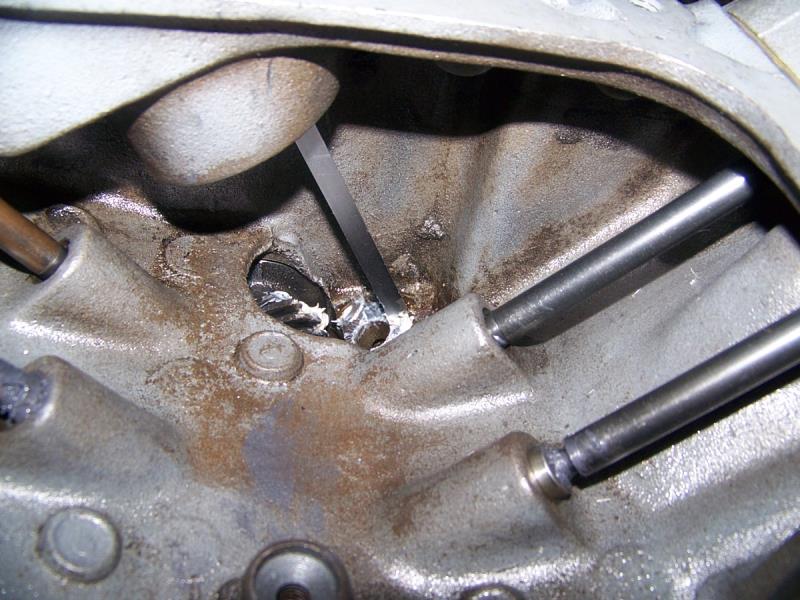
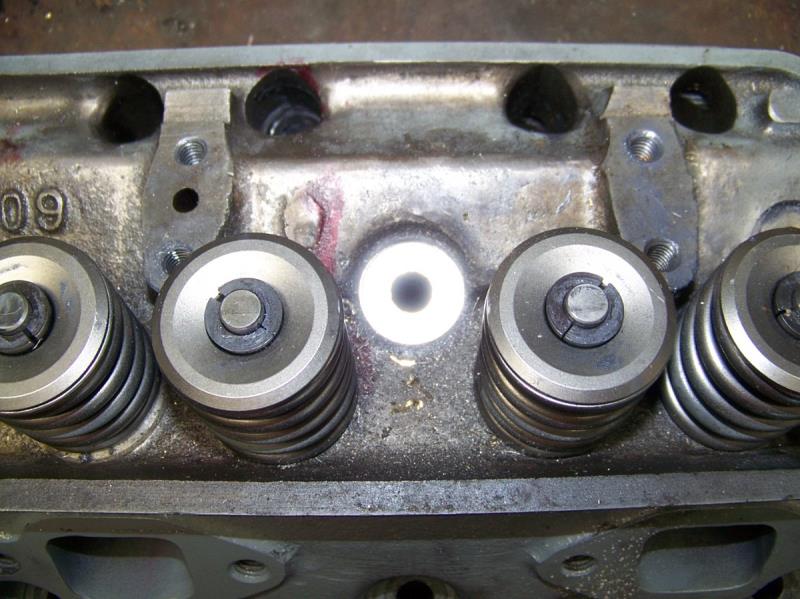
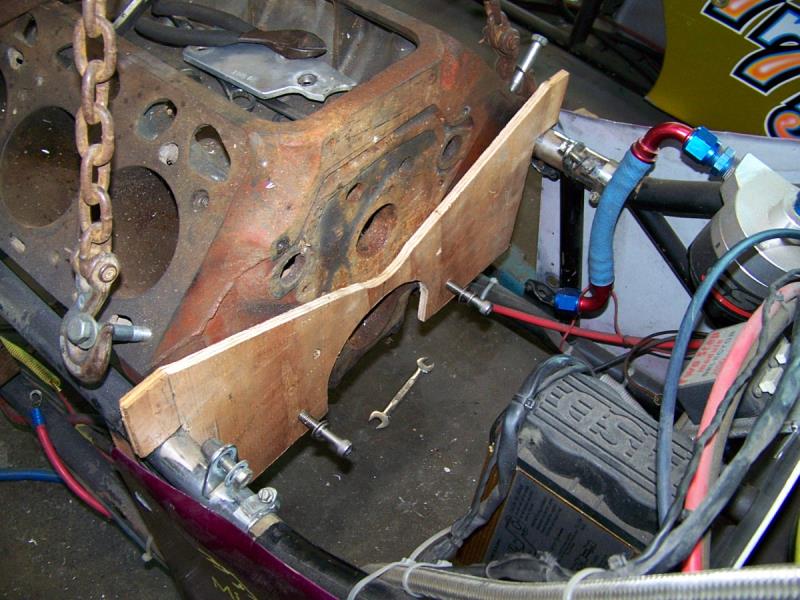
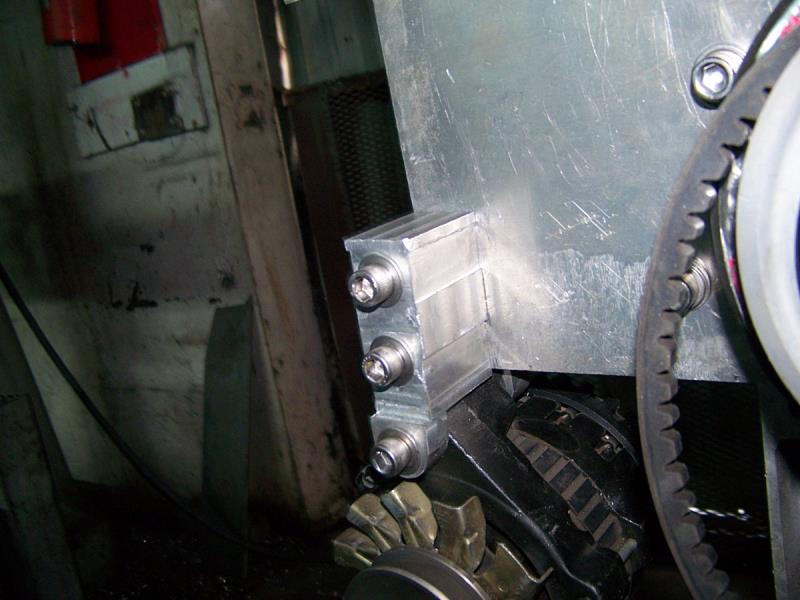
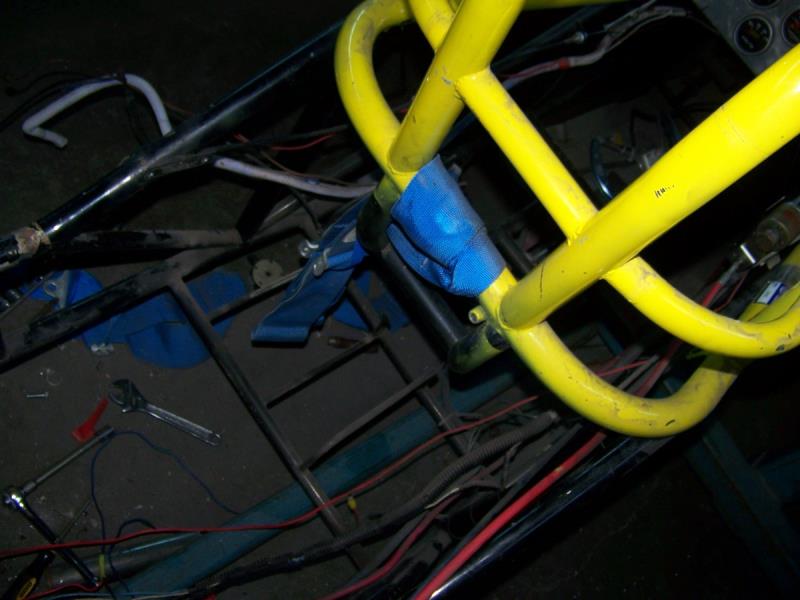
Added post seen in water port
|
|
By Cliff - 8 Years Ago
|
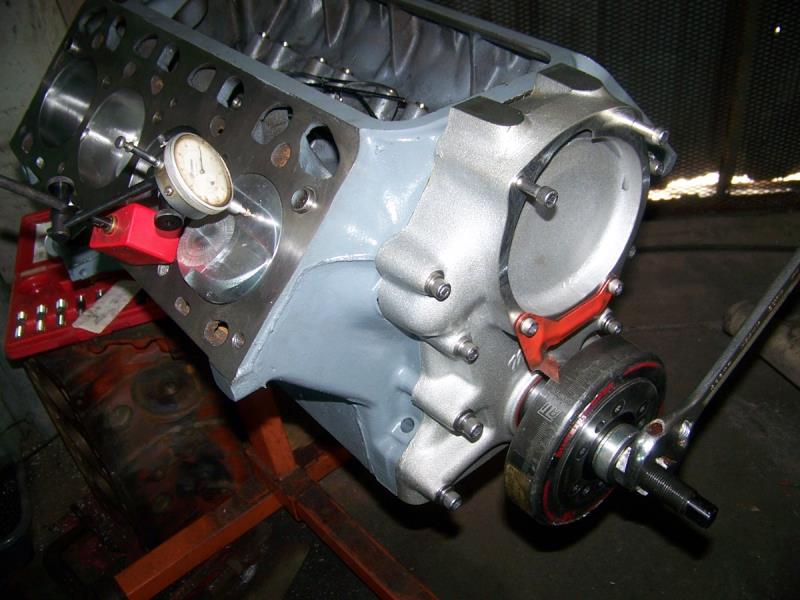
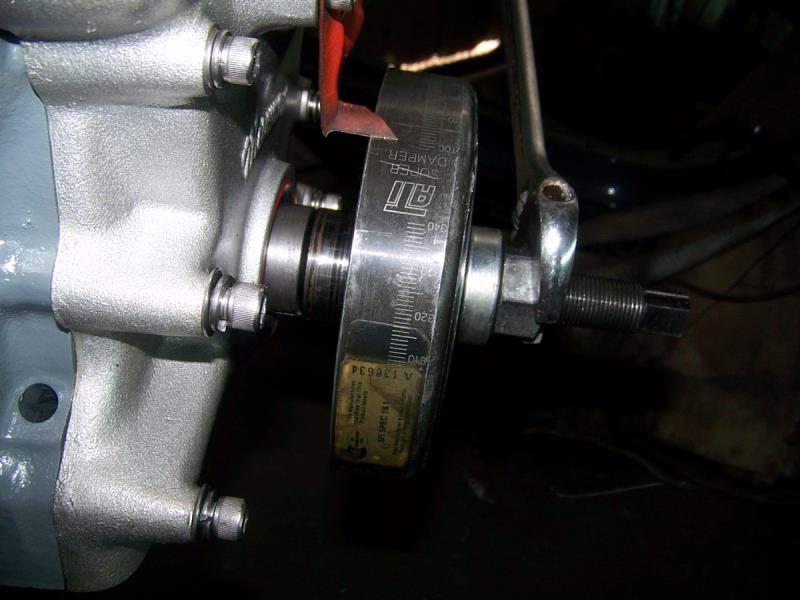
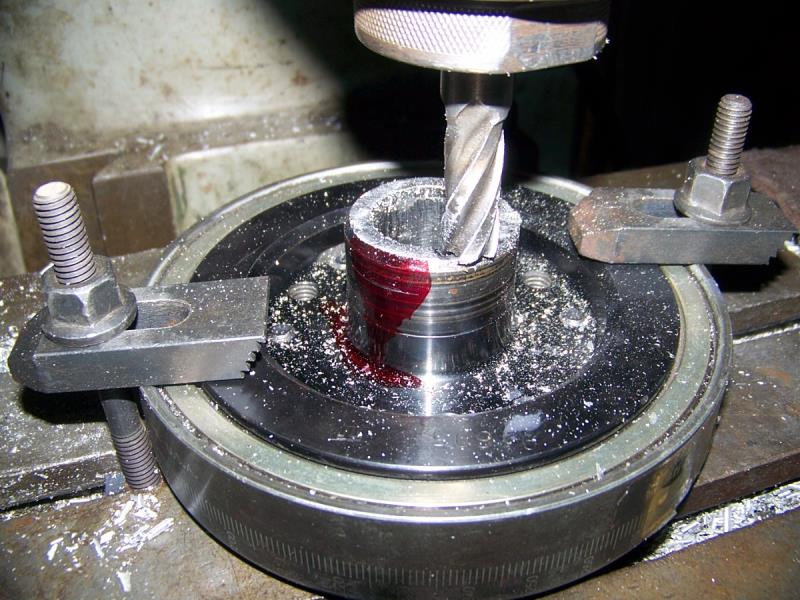
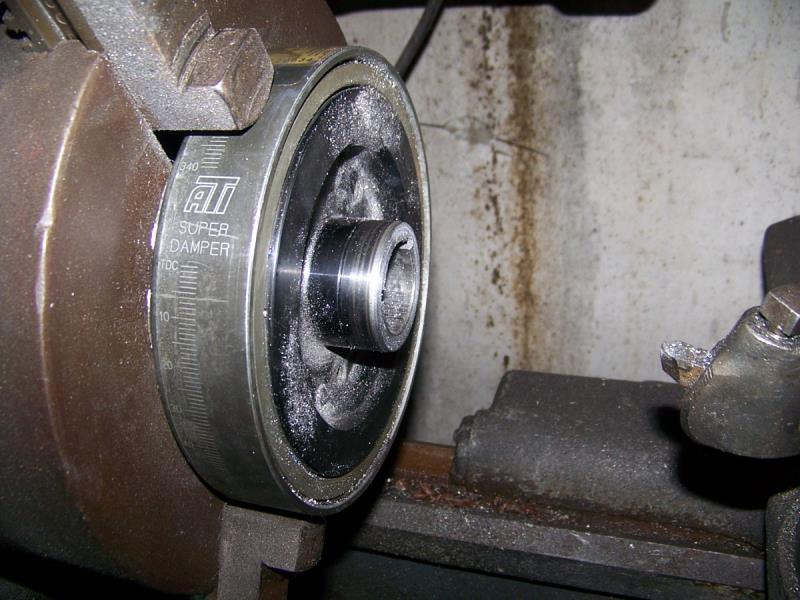
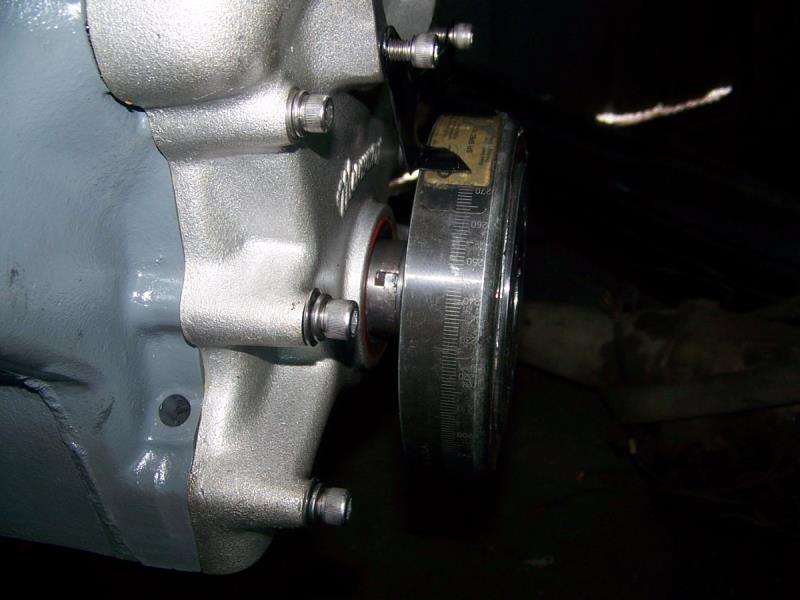
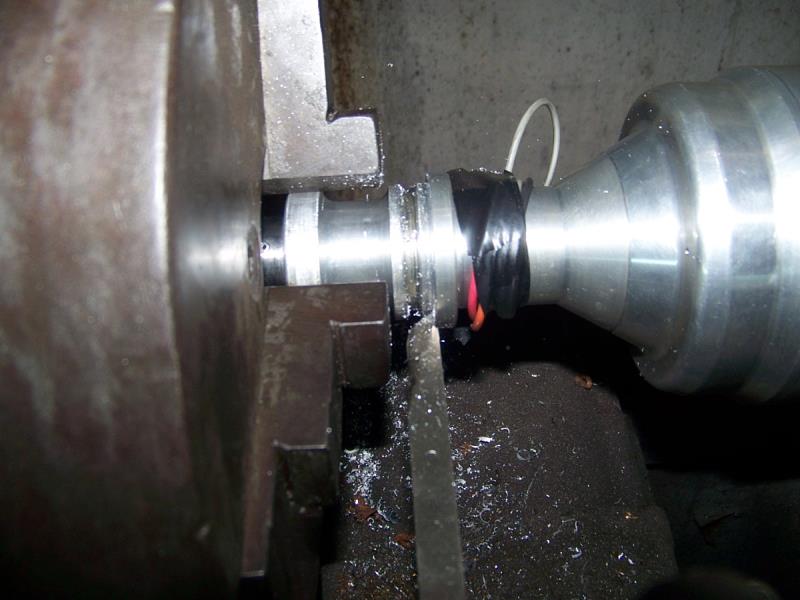
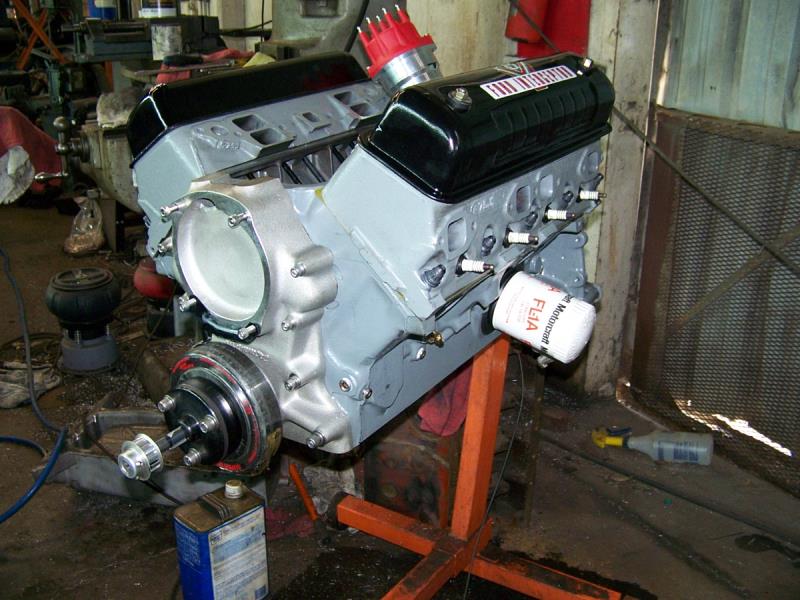
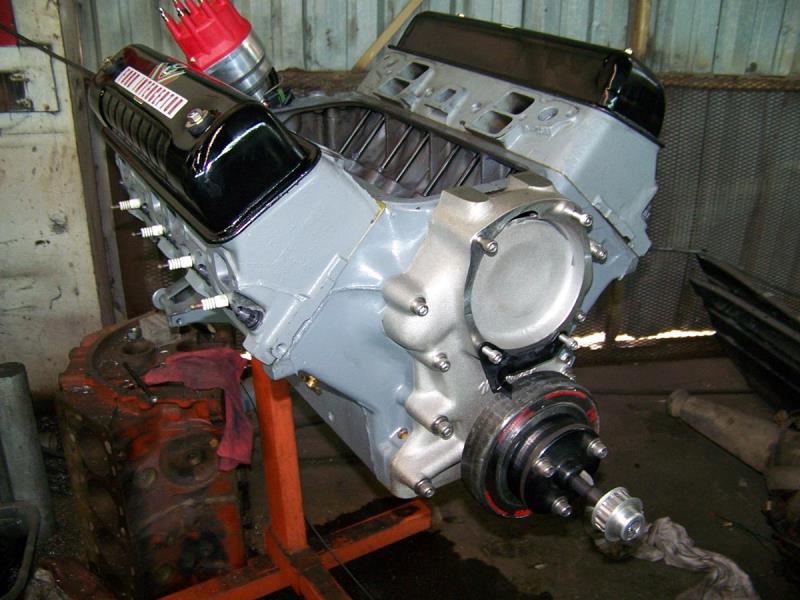
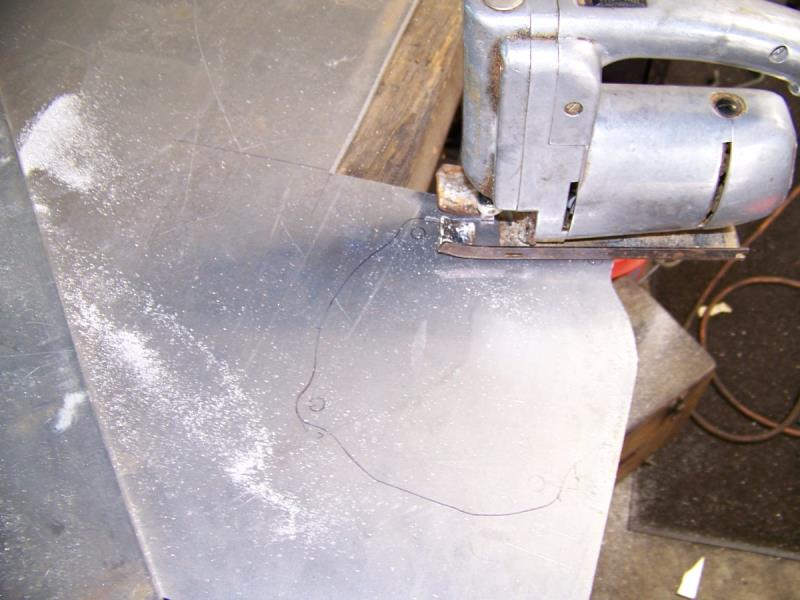
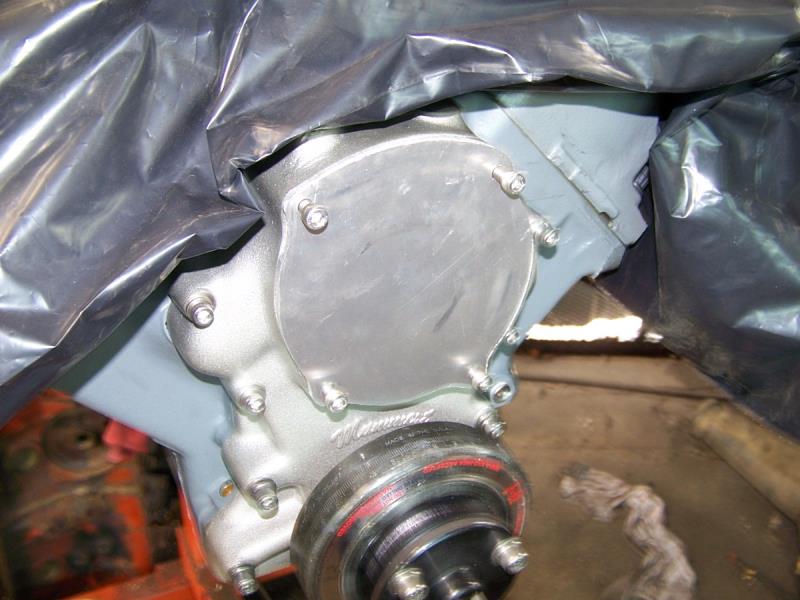
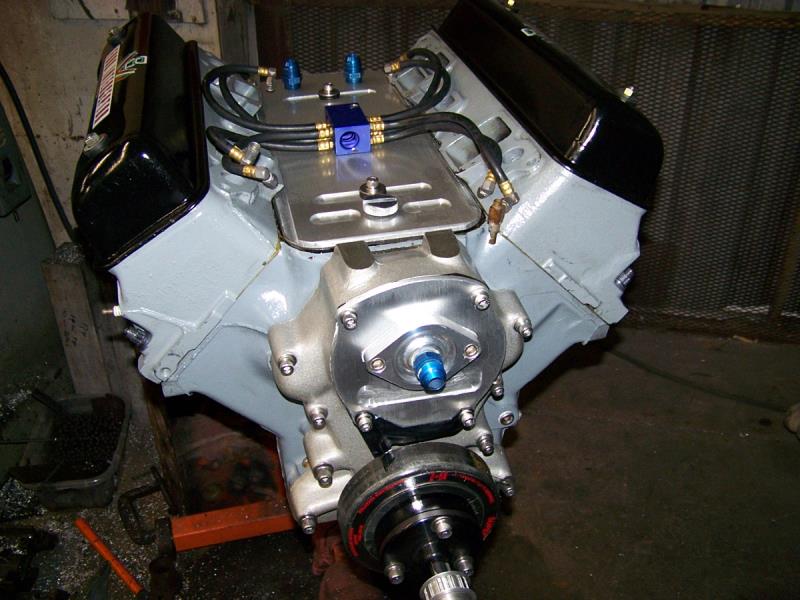
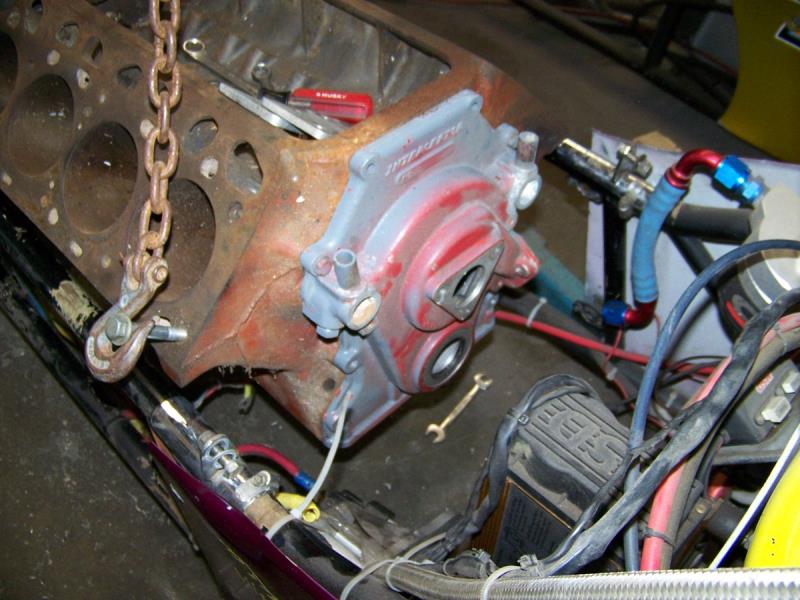
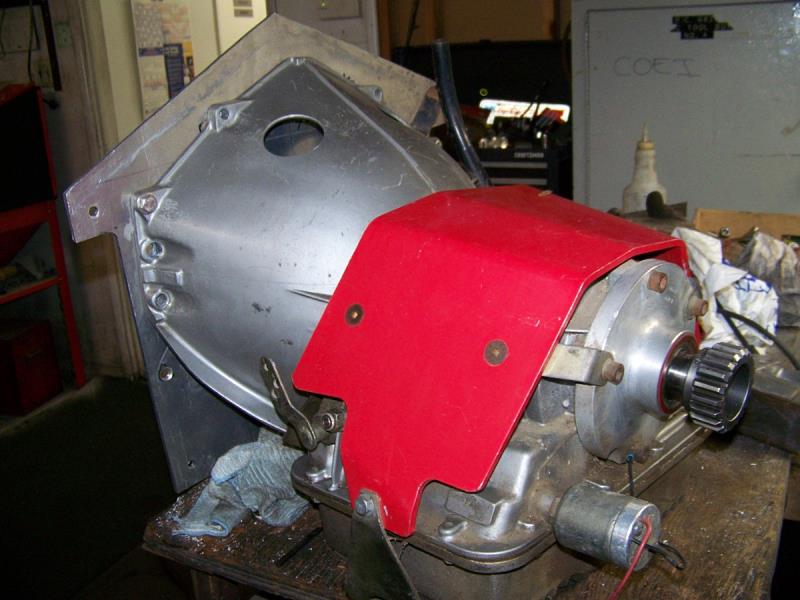
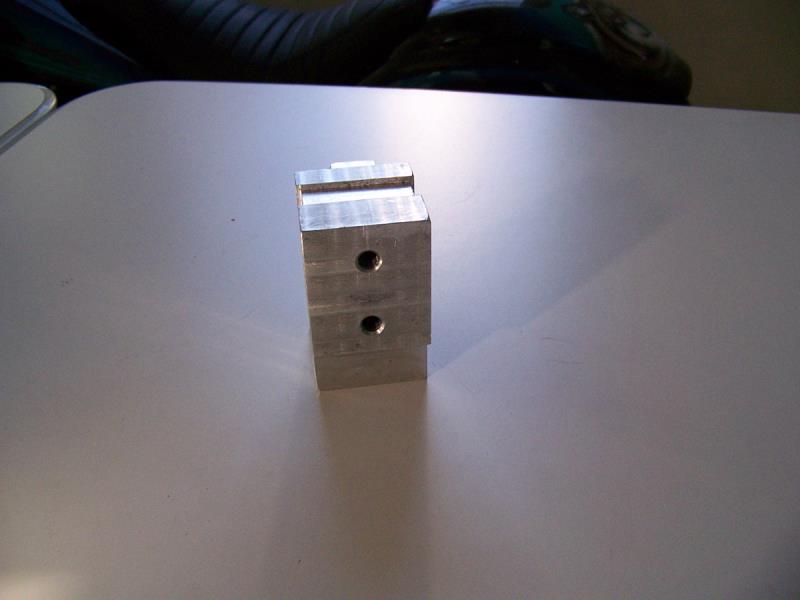
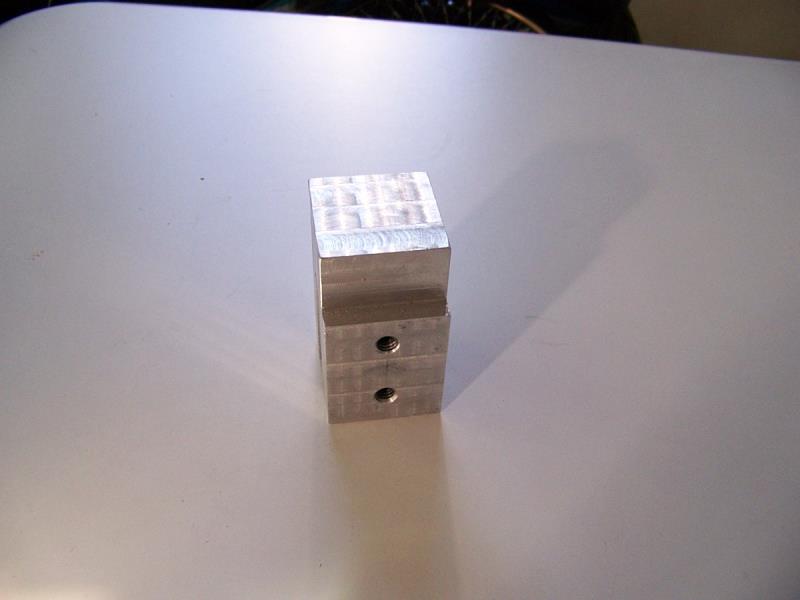
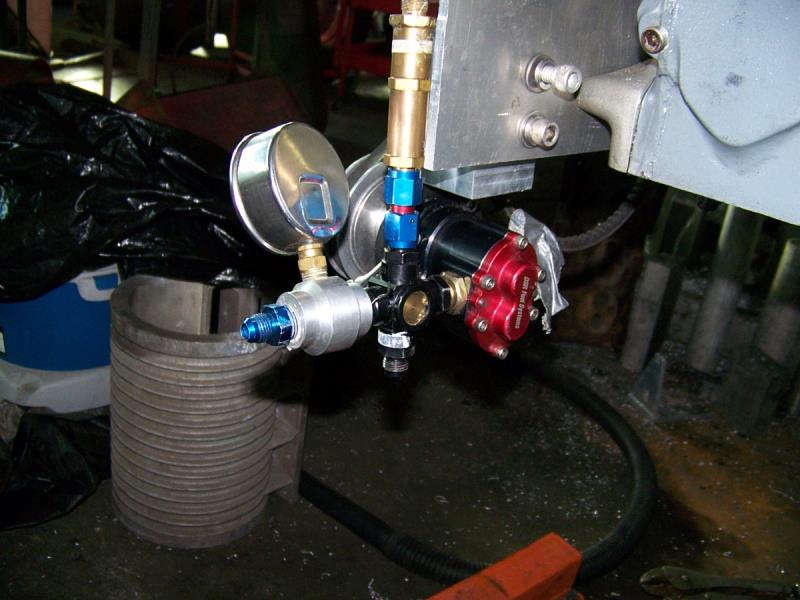
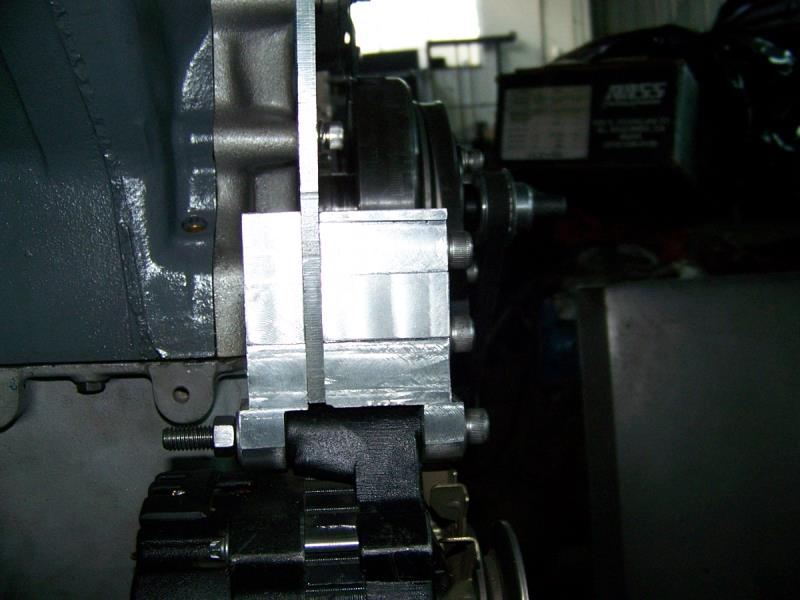
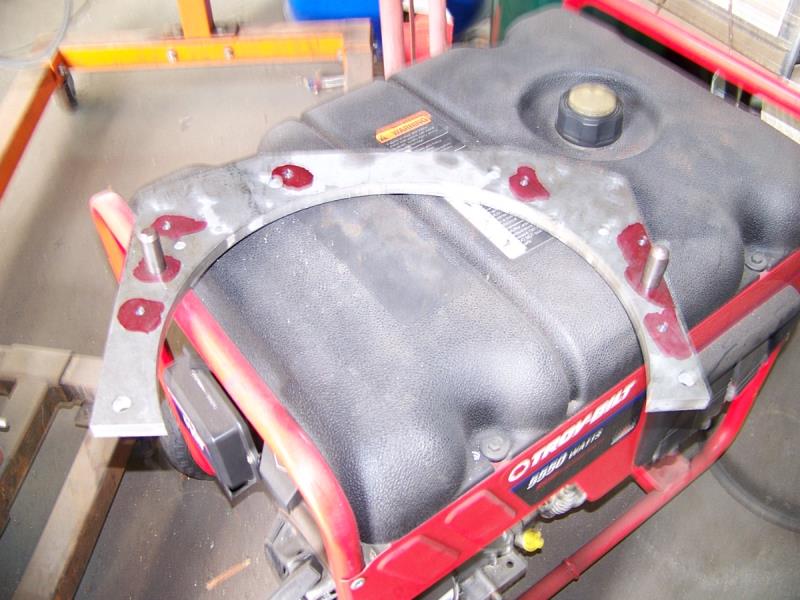
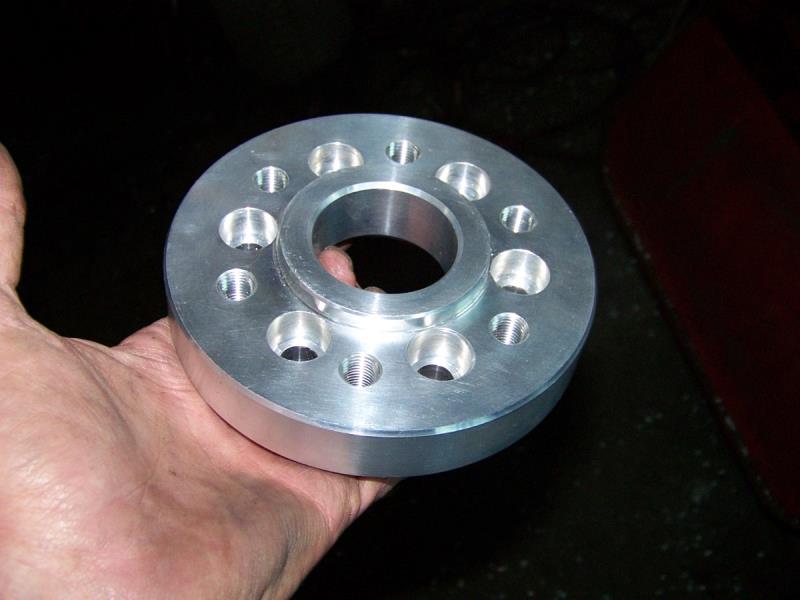
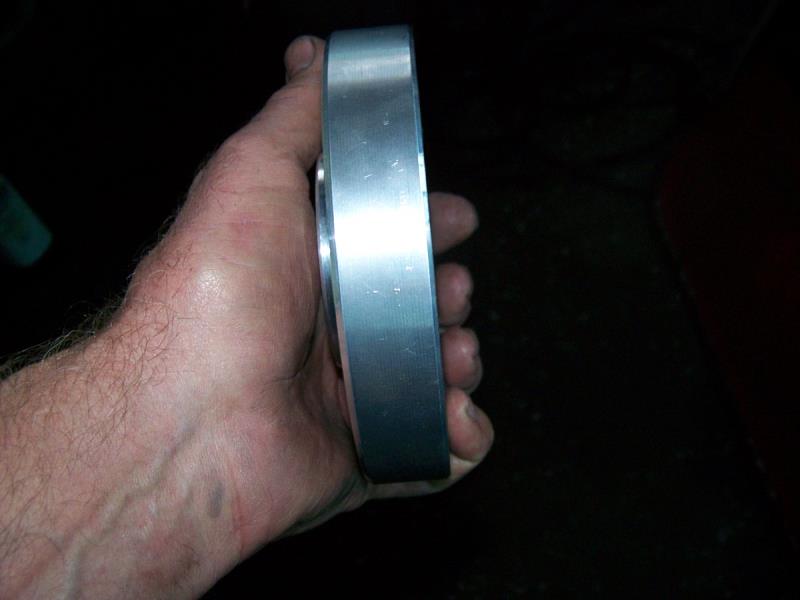
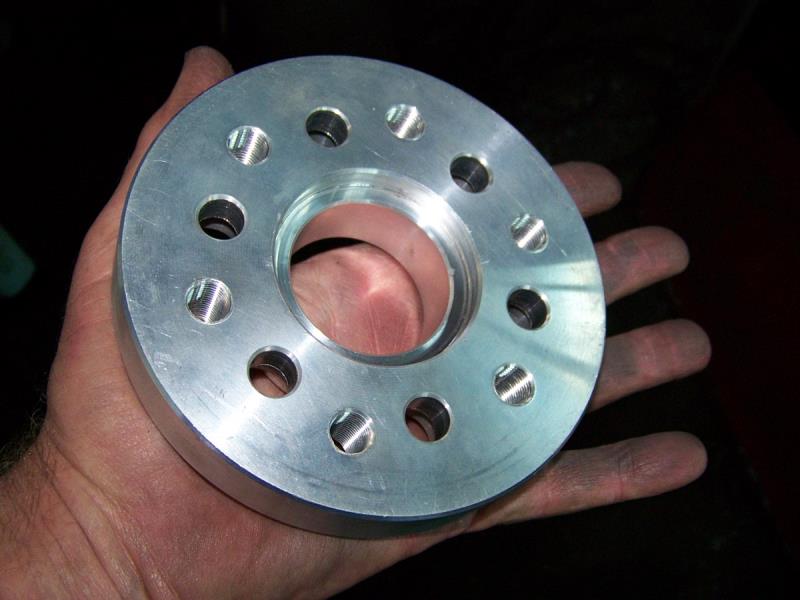
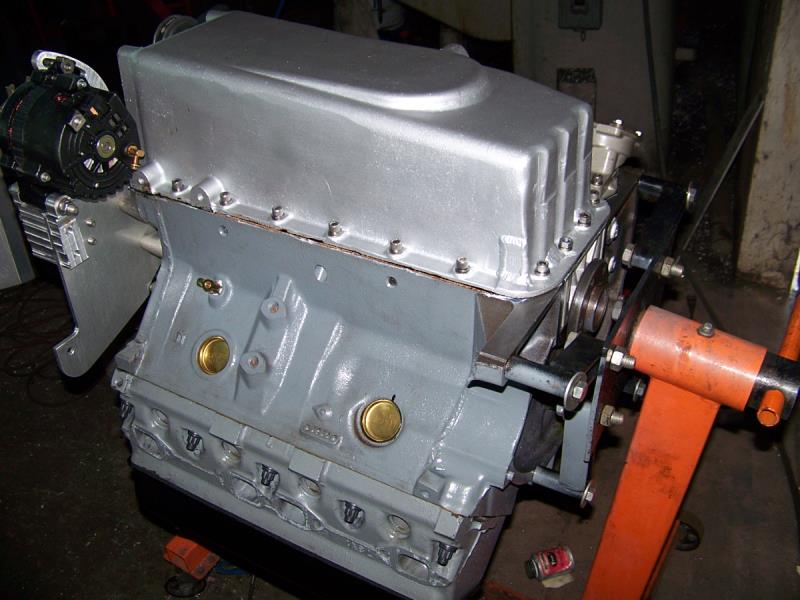
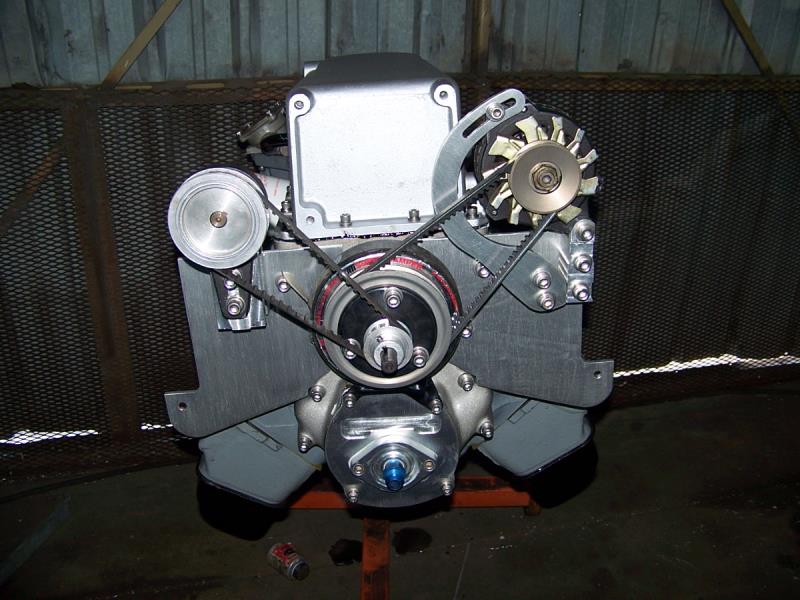
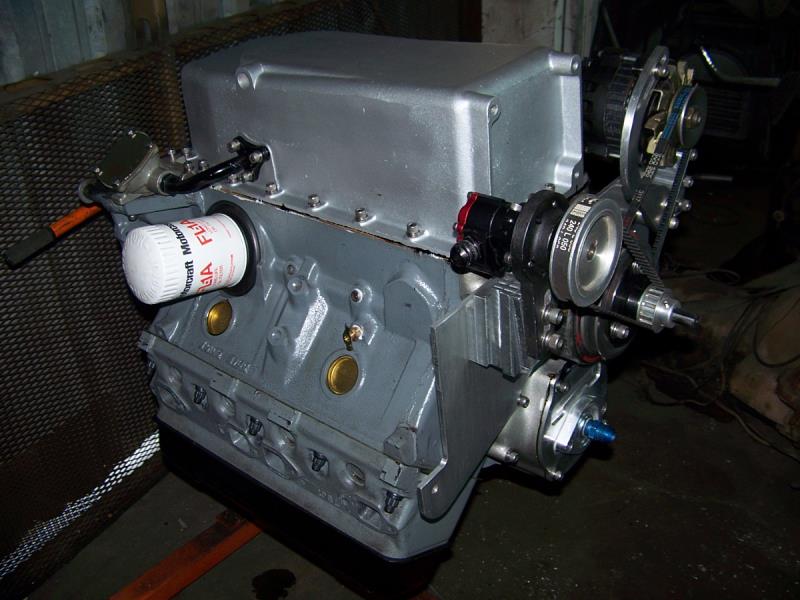
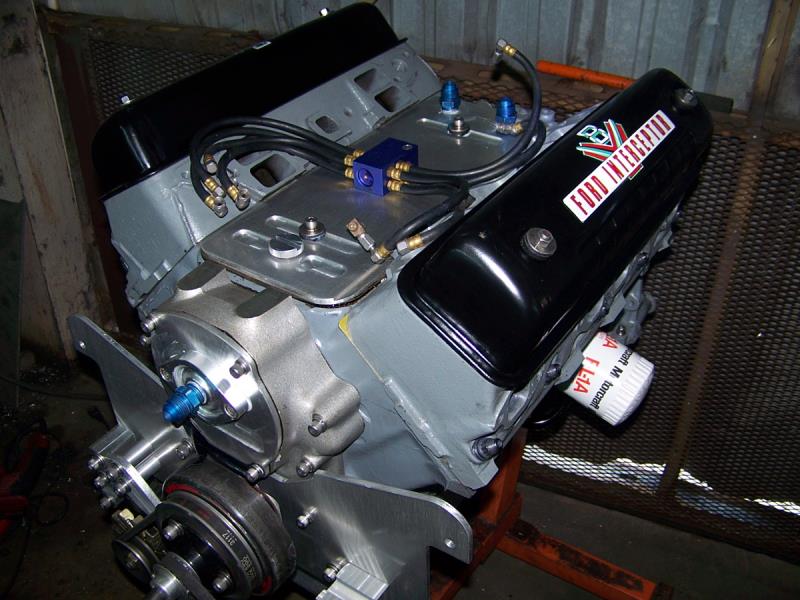
ATI Super Damper installed (sbc 6"), honed to Ford crank snout size, spacer made from a Y Block marine spacer (shortened) John's timing cover (nice), cut the key way with a broach (did by eyeball), ended up being able to use the stock pointer (trimmed a little).
|
|
By Cliff - 8 Years Ago
|
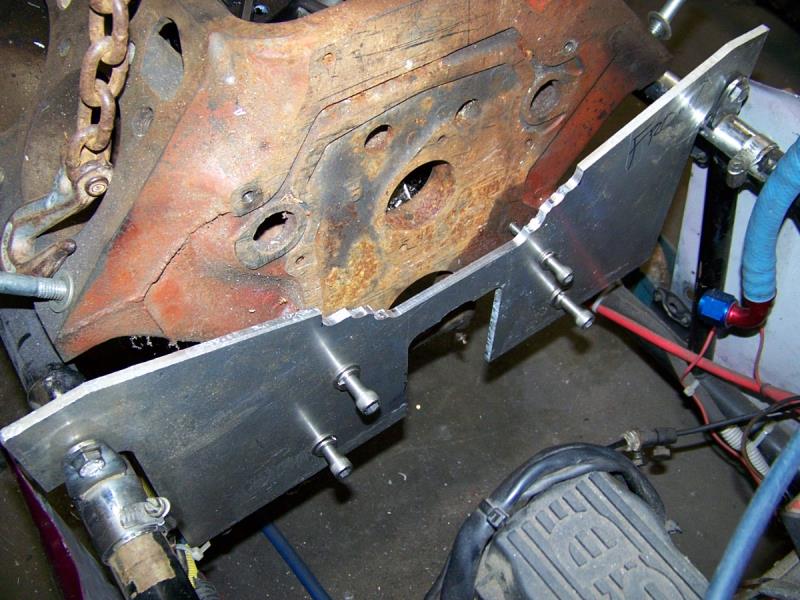
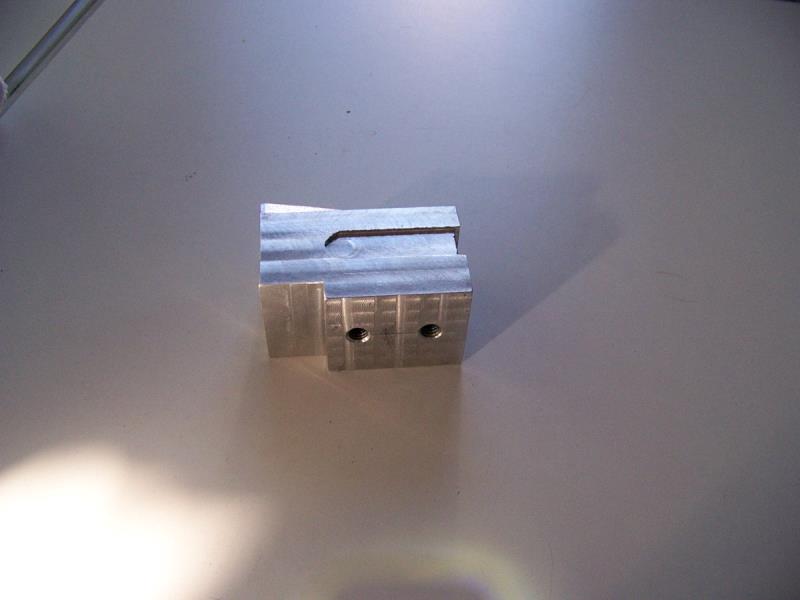
Closer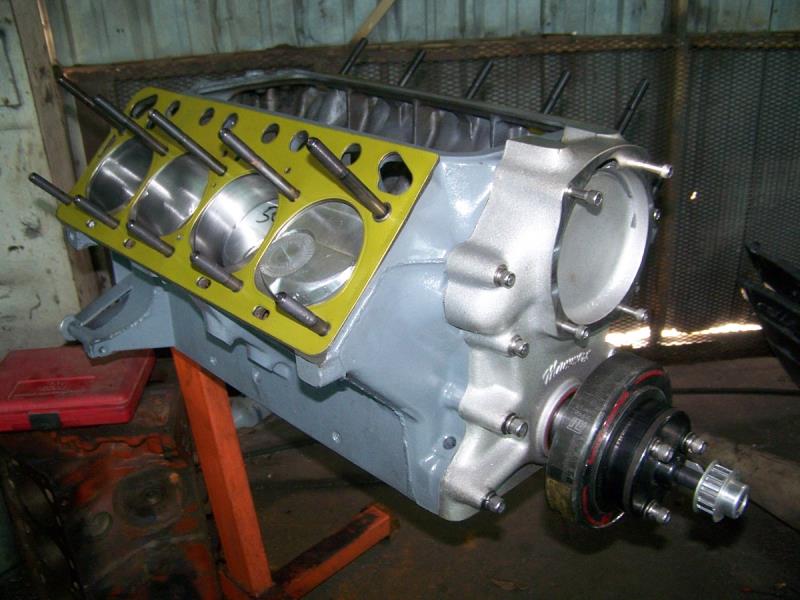
|
|
By Cliff - 8 Years Ago
|
Learned a lesson today, I bought Procomp head studs (they were cheap) thinking that if they went bad I would only loose a head gasket (used ARP for the bottom end), When torquing the heads I was looking for 85lbs on the top row and 75lbs on the bottom, however at 75 all's good, trying for 85 the nuts just kept turning after 2 full turns I stopped, never did torque 85lbs, so work stops until I get better studs.
UPDATE the studs were good, I over torqued them, max with the lube I used is 63lbs
|
|
By NoShortcuts - 8 Years Ago
|
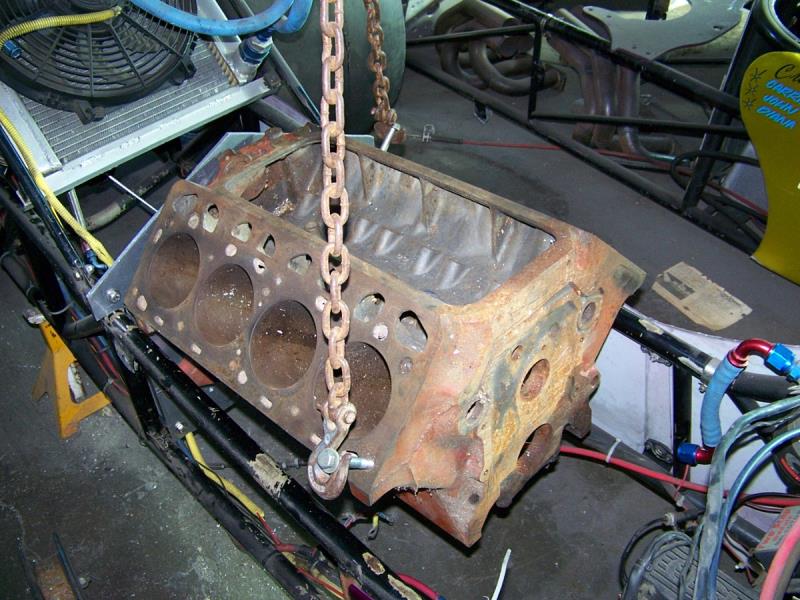
Cliff. My recollection is that you started with a 292 block. Interested to know:
- What bore and stroke combination did you end up choosing for your dragster engine build?
- Are you using a cast or forged crankshaft?
- What cylinder head combustion chamber volume did you end-up with after modifying the G head combustion chamber shape?
- Did you zero deck the engine block?
- With the modified piston domes you're using, what static compression ratio have you calculated having with the composite head gaskets you've selected?
- Are you using forged pistons?
- Are you planning to use carburetion or fuel injection?
Interested in what you're putting together, Cliff. IF for competitive reasons these answers are not available for sharing, I understand.
Regards,
Charlie Brown
|
|
By Cliff - 8 Years Ago
|
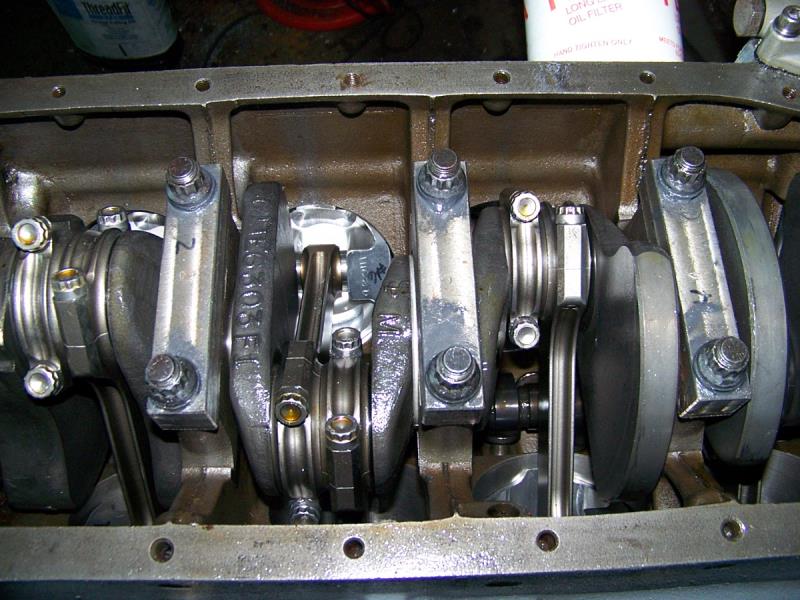
Yes a 292 block B9AE-6015 F, 9.750 Deck Height, 3.810 Bore, 3.600 Stroke (292 steel crank), Rod Length 6.380 (Carrillo 1.850 journal), Piston Dome (24.83cc, Ross), Piston Pin Height 1.58, Chamber Volume 71cc, Head Gasket .045, Piston .010 out of the hole, Compression 13.76 to1, 328.3 CID, Rod Ratio 1.77 to 1, Am building a Lexan Intake Manifold to mount a Hilborn 4 port (short).
|
|
By Cliff - 8 Years Ago
|
More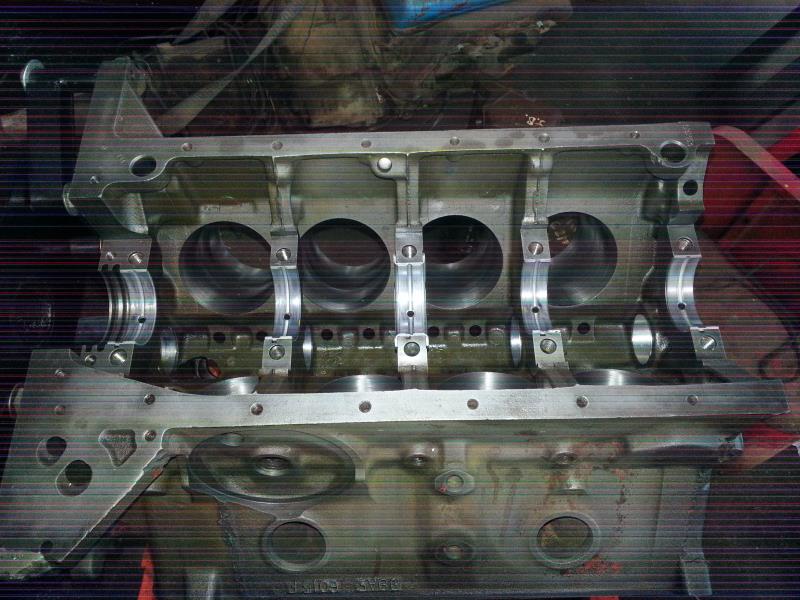 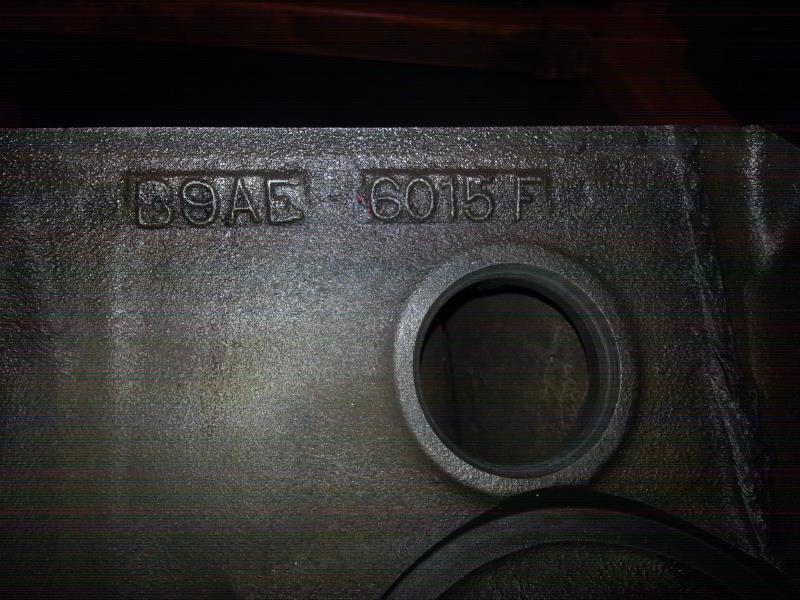  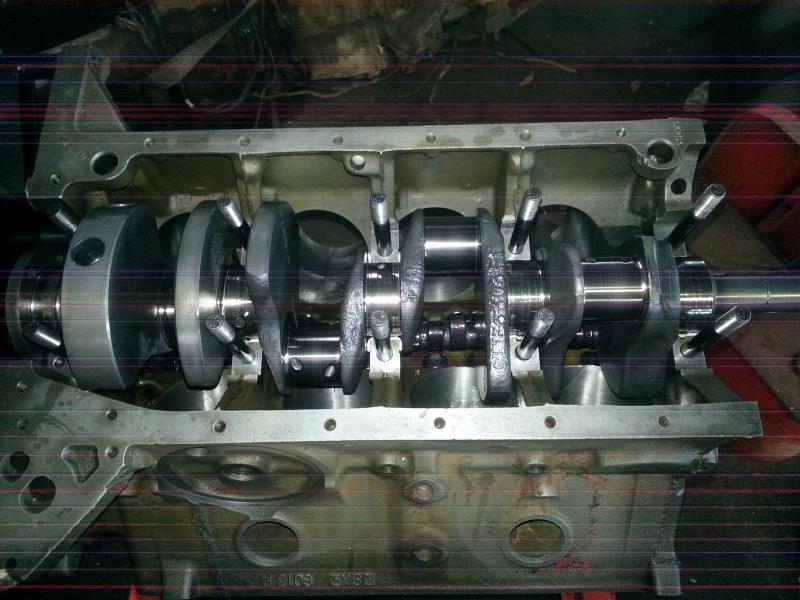 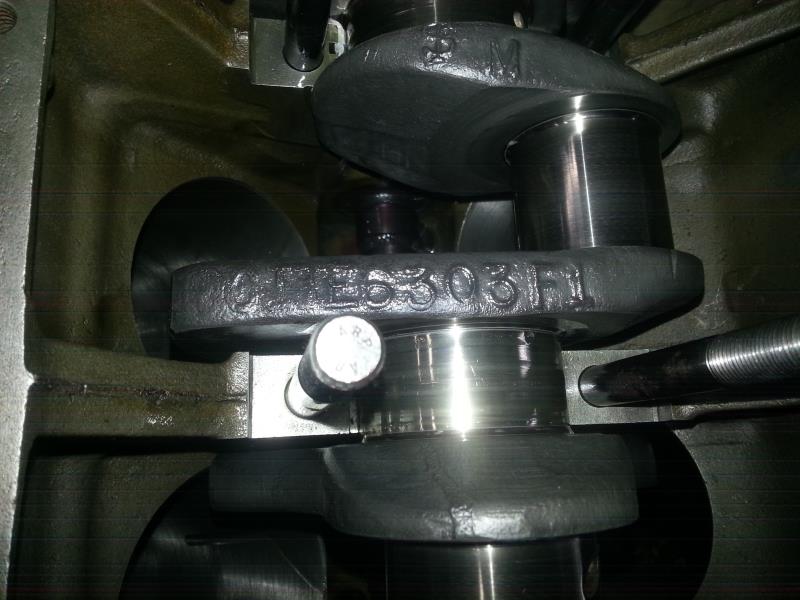
|
|
By Cliff - 8 Years Ago
|
Stee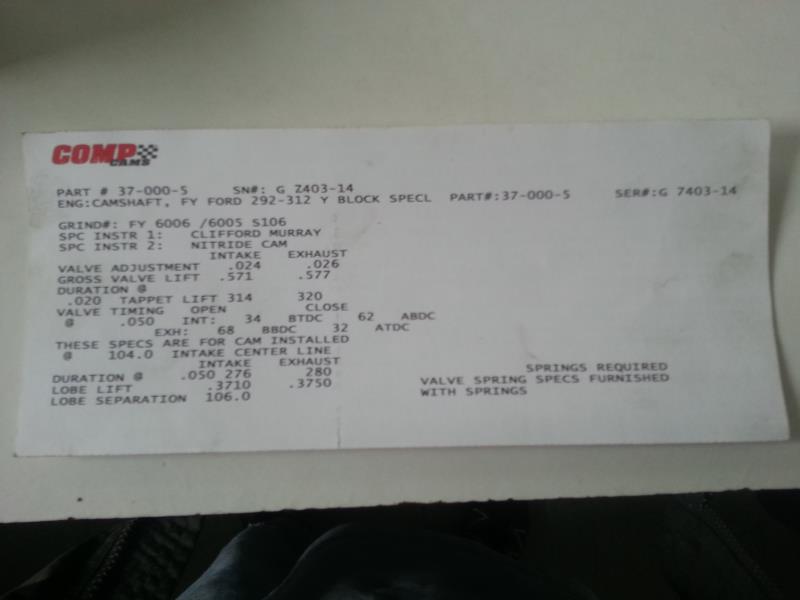 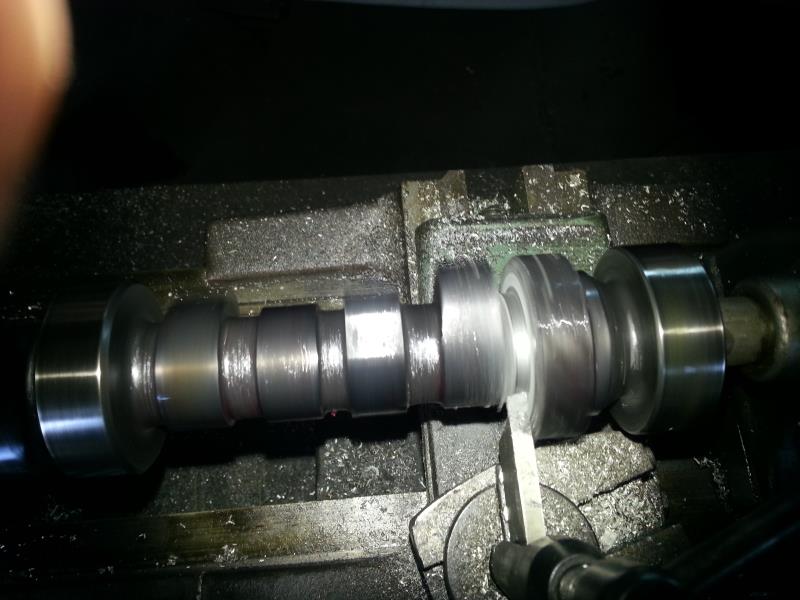 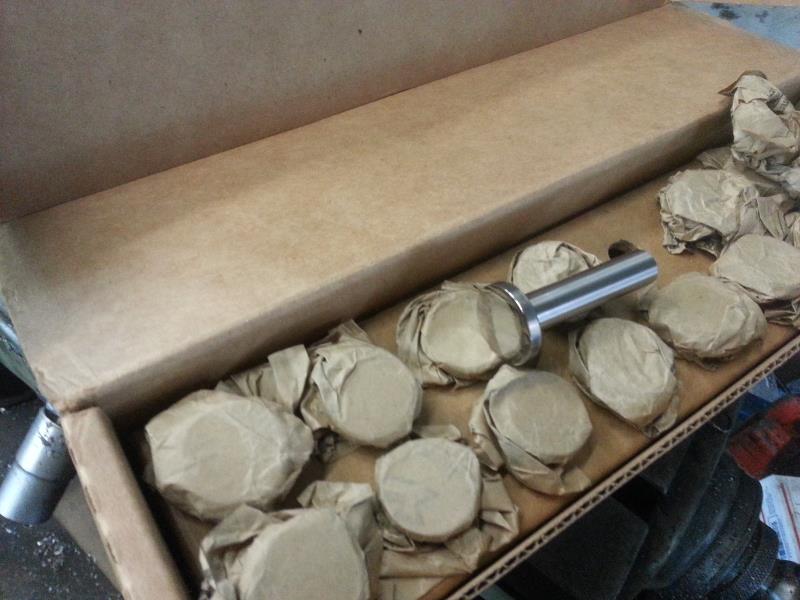 Cam and lifters (had to turn down the cam so the lifter would ride on the lobe) Tool Steel lifters Cam and lifters (had to turn down the cam so the lifter would ride on the lobe) Tool Steel lifters
|
|
By Cliff - 8 Years Ago
|
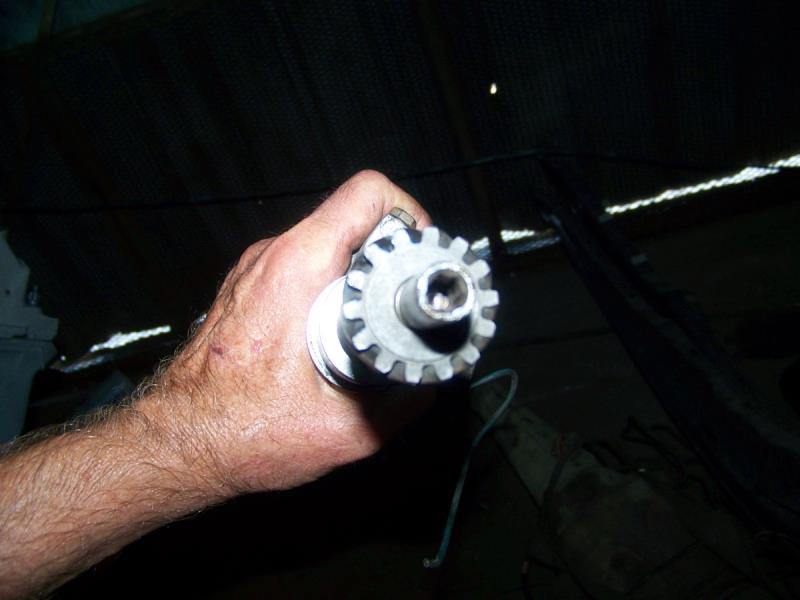
Roll 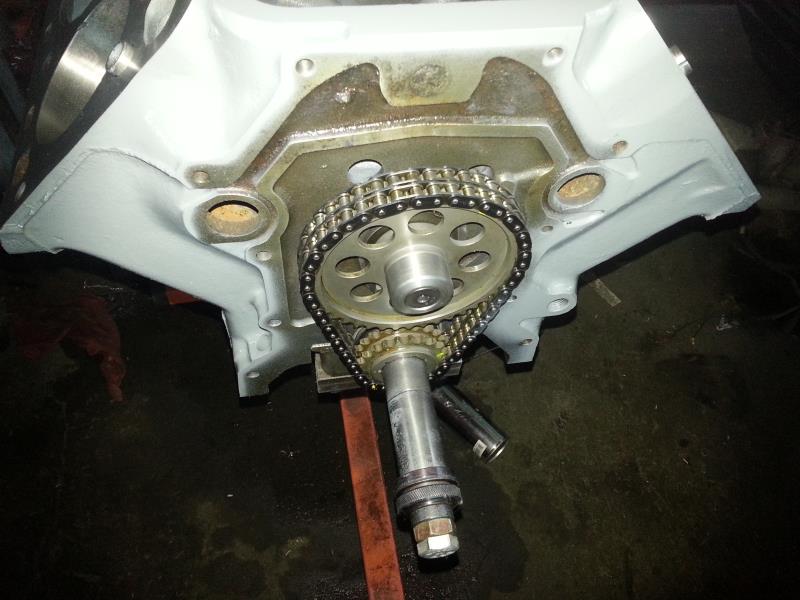 master timing set (heat treated) master timing set (heat treated)
|
|
By Cliff - 8 Years Ago
|
More done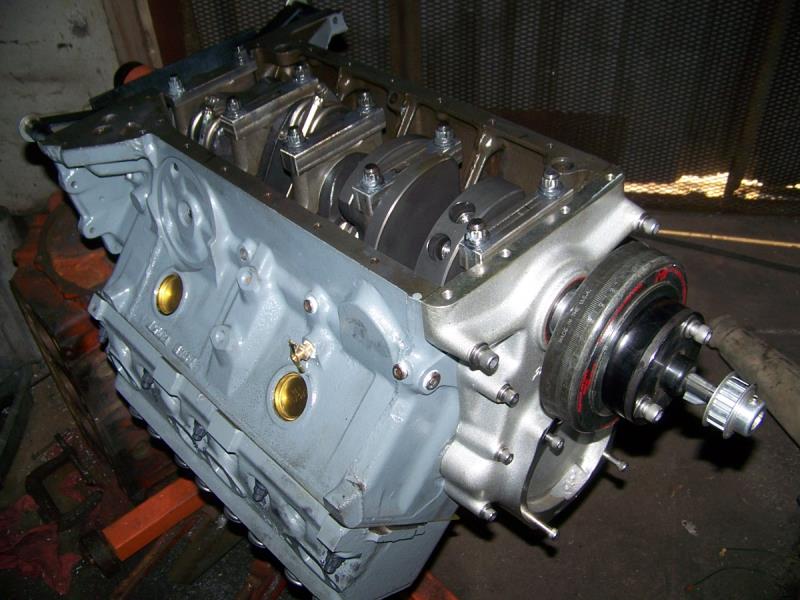 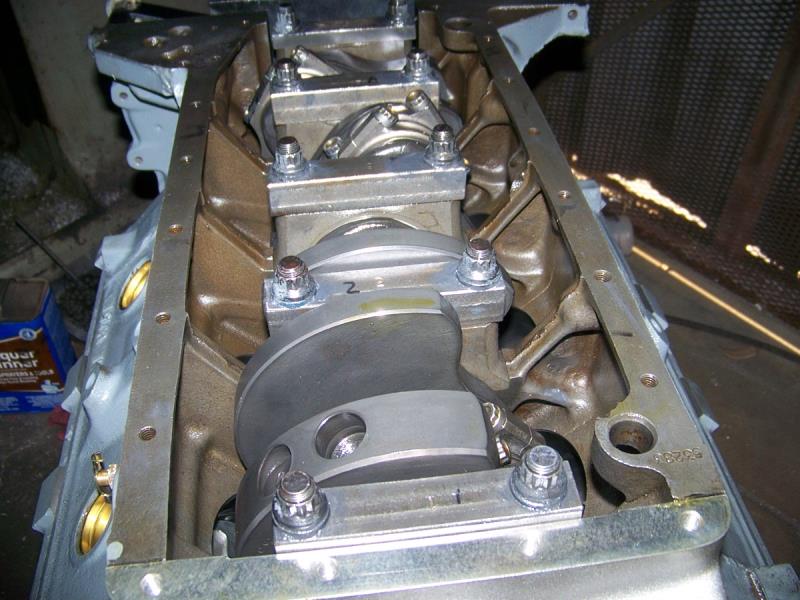 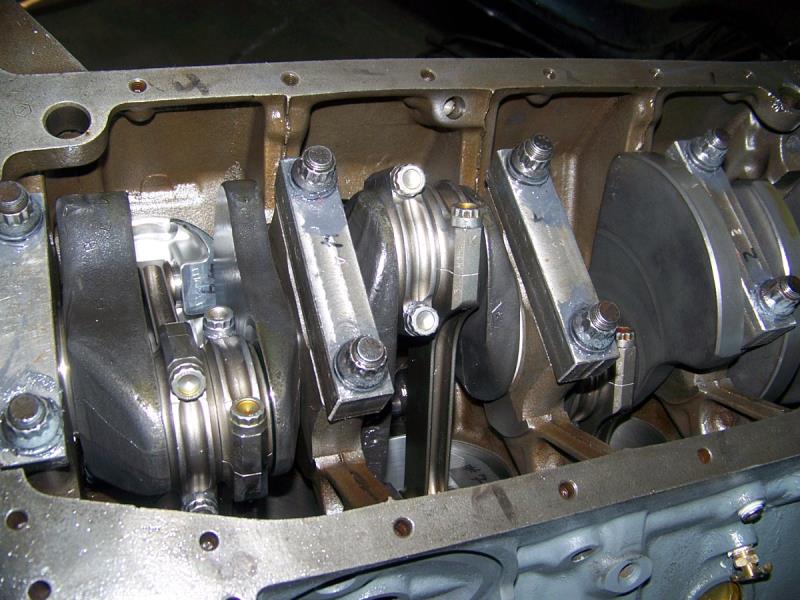
|
|
By Cliff - 8 Years Ago
|
|
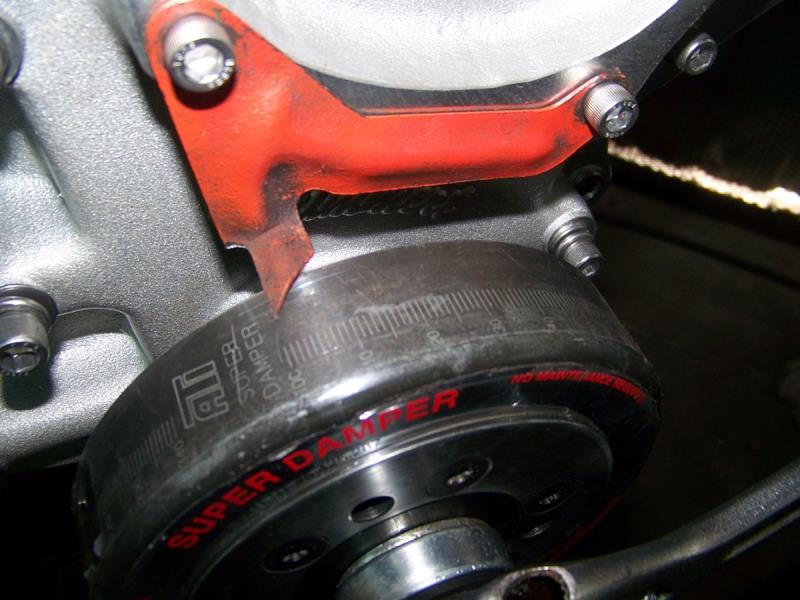
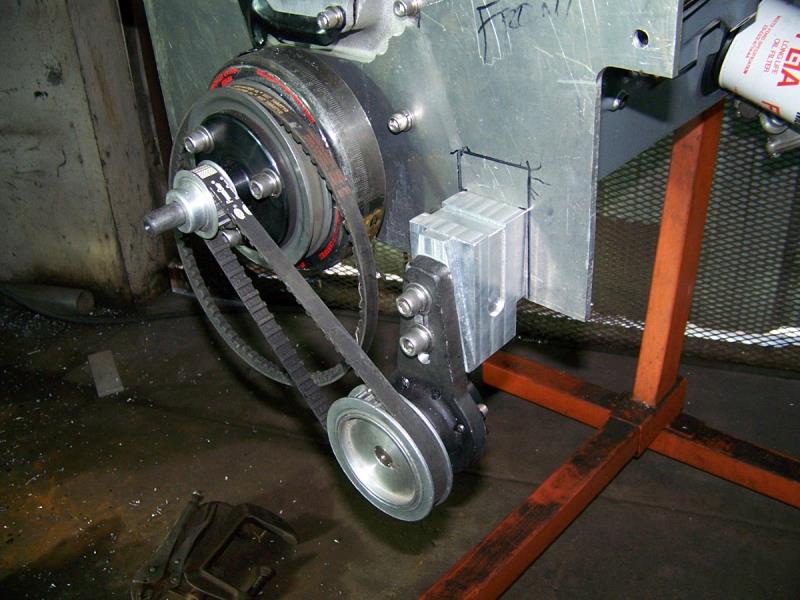
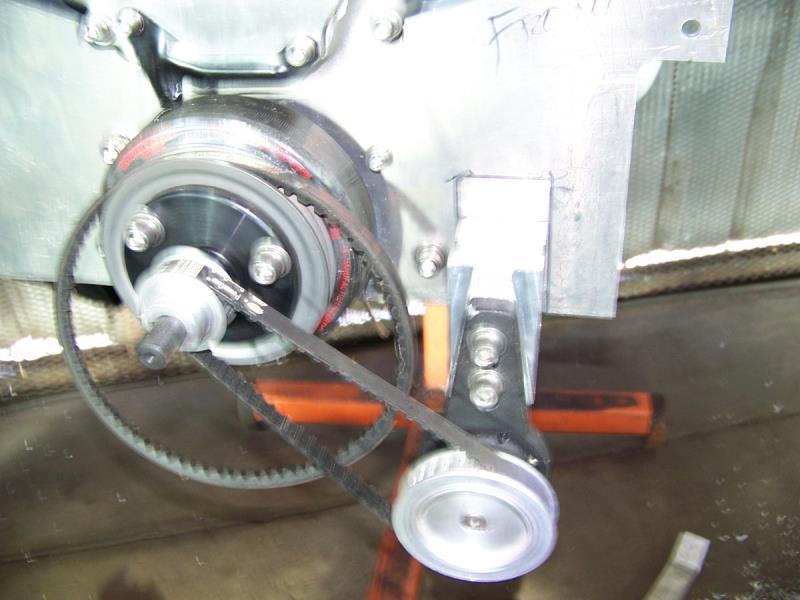
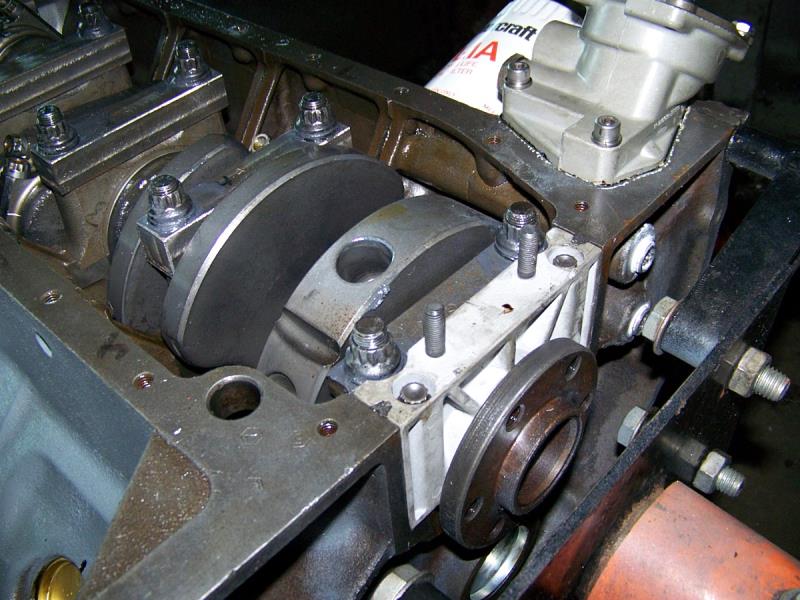
I think I'm going trim the damper about 1/2 inch to bring it closer to the engine, what do you guys think of the old style main straps? (5 not 3), look at the fit of the front strap to the timing cover, the real oil seal is a job (strap and studs in the way) .045 side clearance on the rods (!!) more oil to the cam?
|
|
By Cliff - 8 Years Ago
|
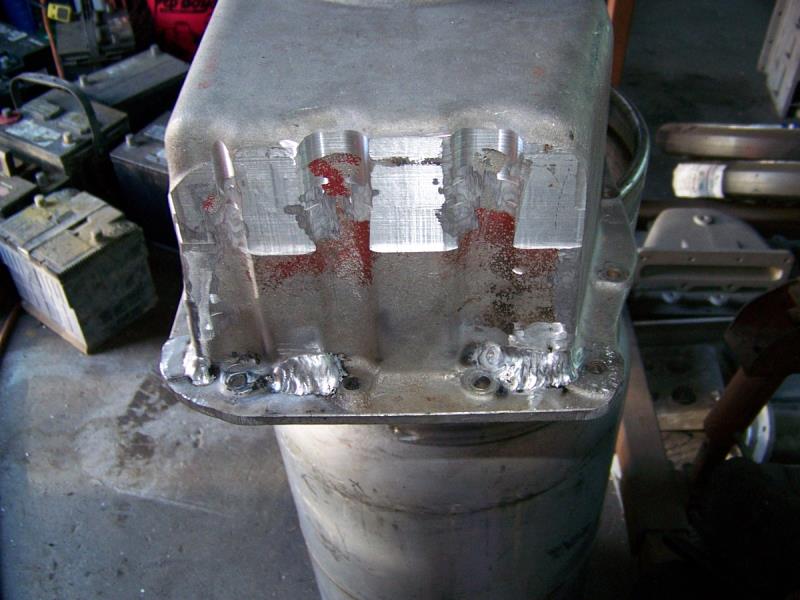
Rear seal retainer done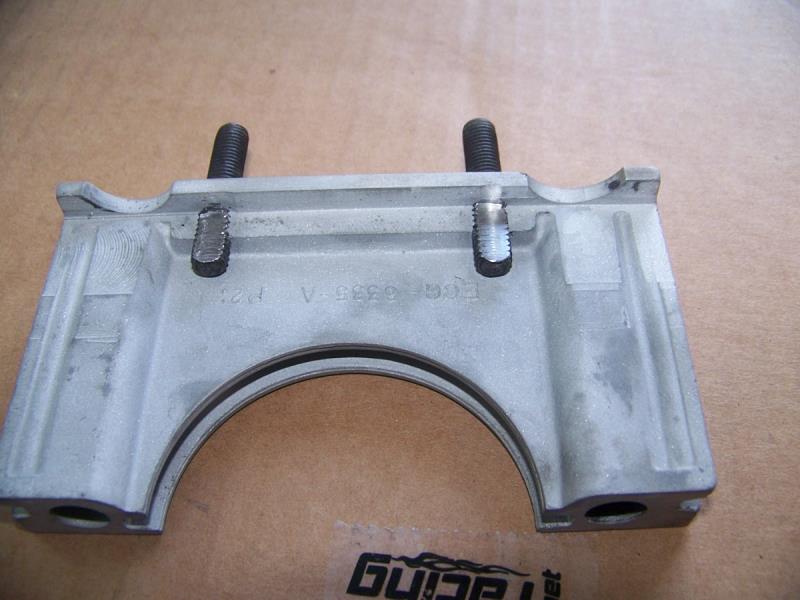 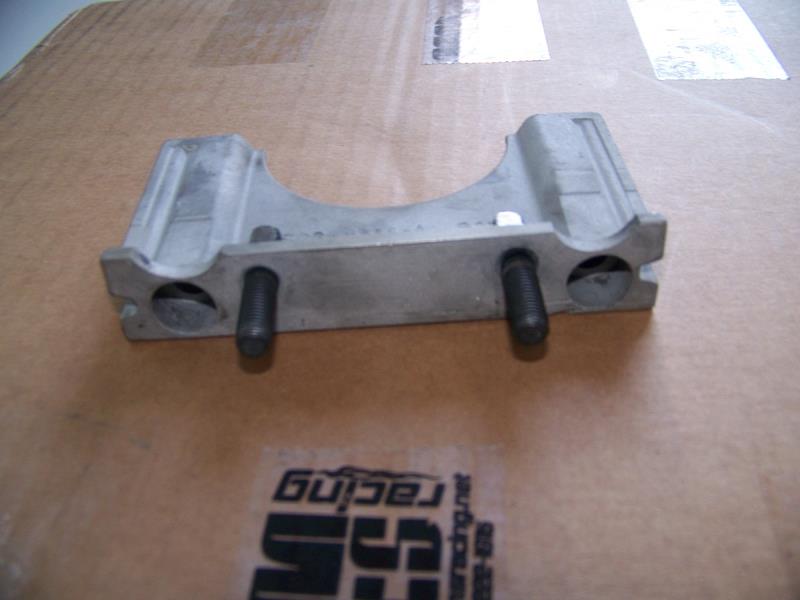
|
|
By Cliff - 8 Years Ago
|
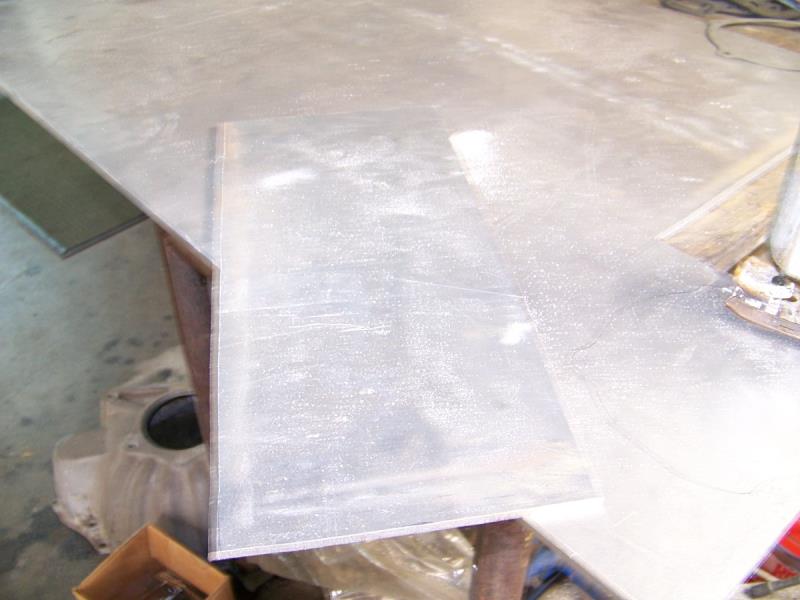
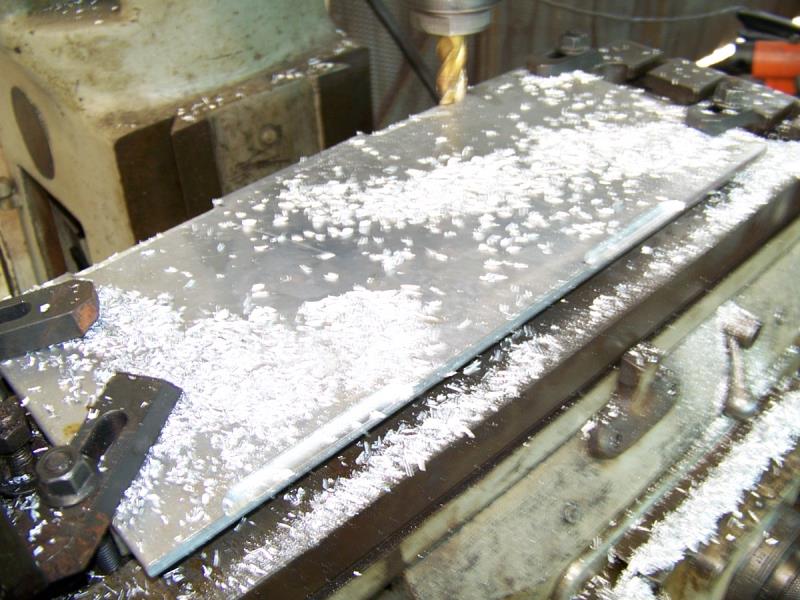
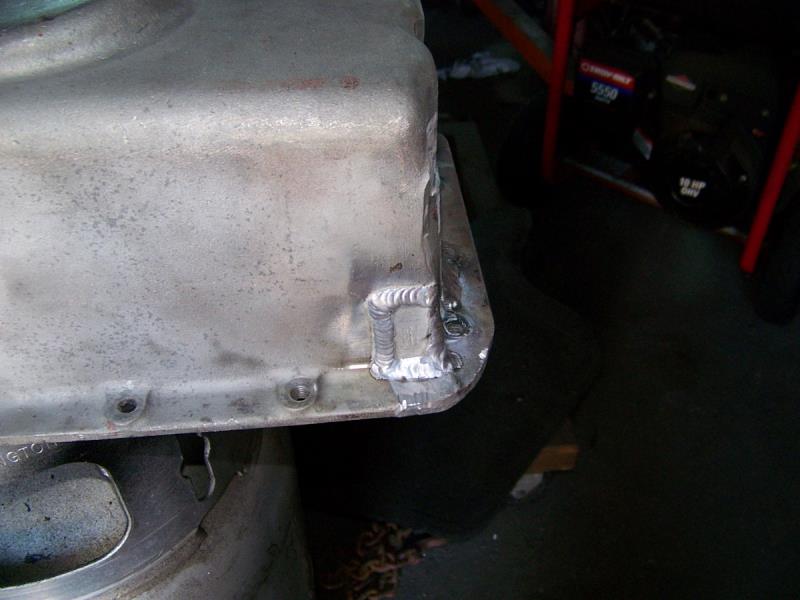
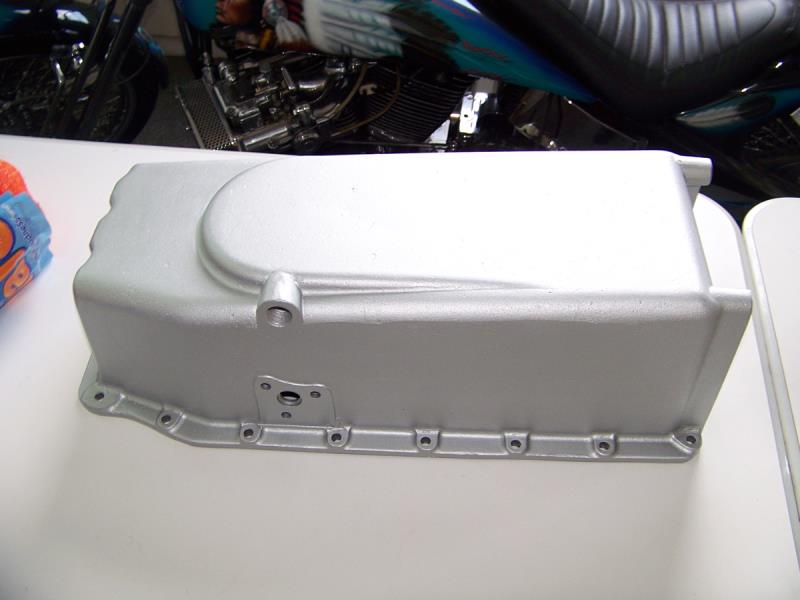
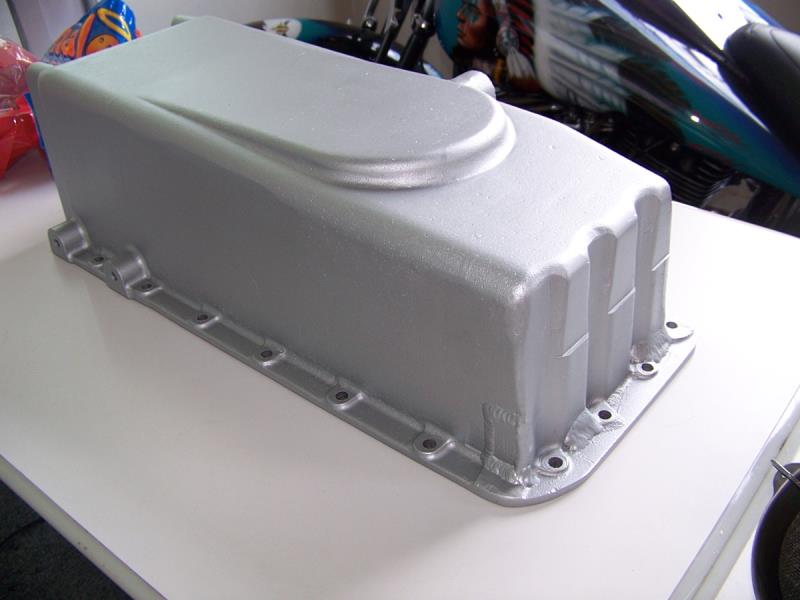
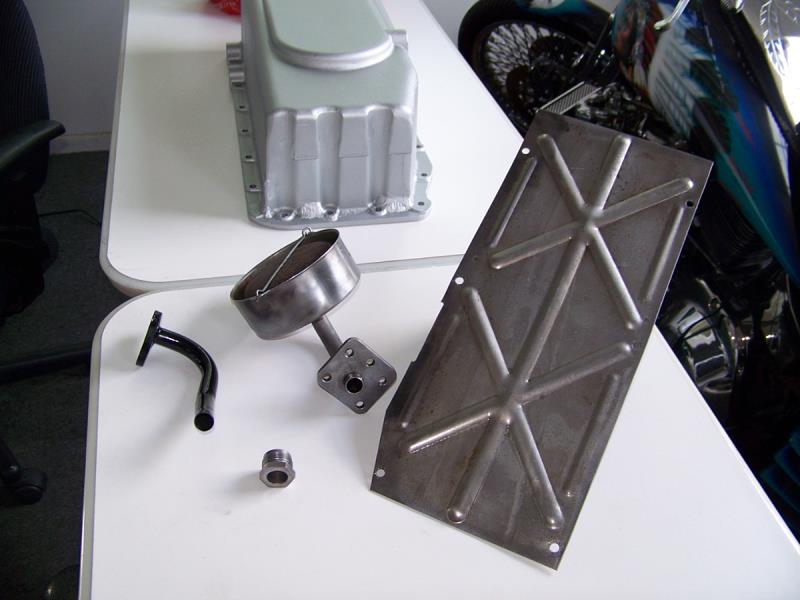
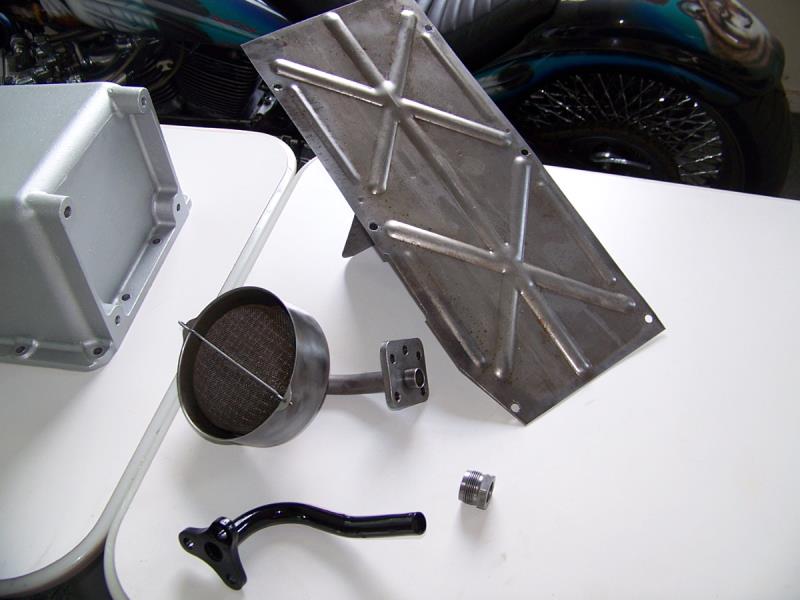
Fitting oil pan (marine)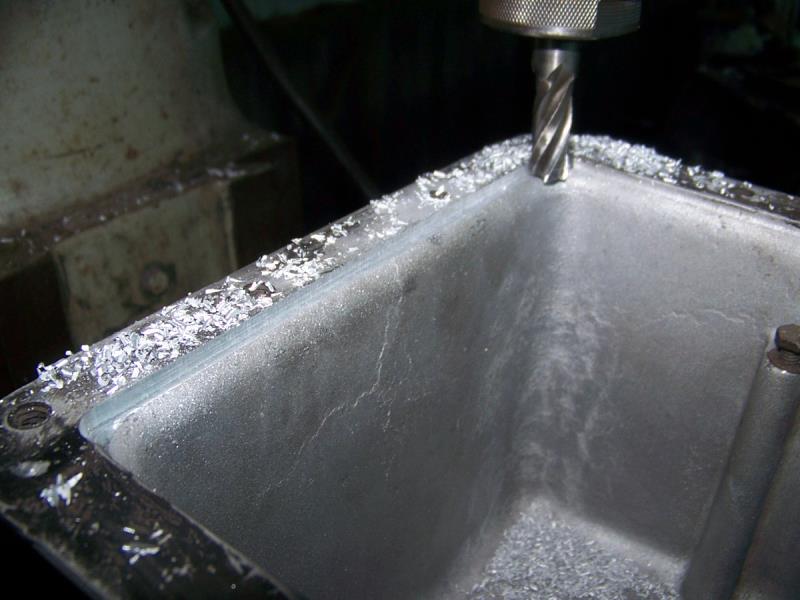 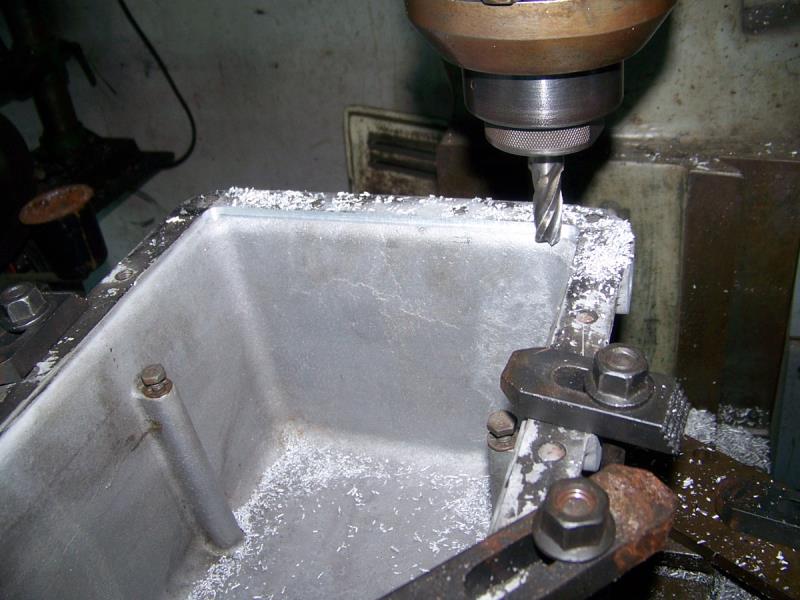
|
|
By Cliff - 8 Years Ago
|
 More More
|
|
By Cliff - 8 Years Ago
|
|
Well a step backward, went to turn over the engine after installing the heads, the piston domes hit the heads, took it apart and discovered the gasket compressed to .039, I checked it with a .045 gasket, at .045 no problems (maybe to close anyway), so all stop again.
|
|
By Cliff - 8 Years Ago
|
Shorting the damper .400
|
|
By Cliff - 8 Years Ago
|
Ended up taking off .330
|
|
By Cliff - 8 Years Ago
|
Installed
|
|
By Cliff - 8 Years Ago
|
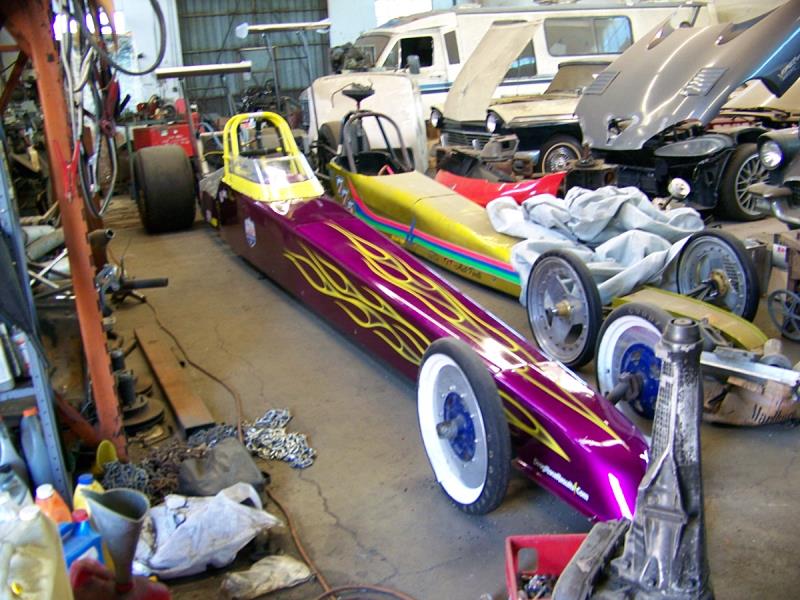
Here's the car
|
|
By MoonShadow - 8 Years Ago
|
|
Is that a flex chassis? Randy Gumalt had a problem with his dragster breaking loose around the 1/8th mile marker because the chassis was too rigid. He thought a flex chassis would fix that. He made numerous changes but nothing seemed to help. Just wanted to mention.
|
|
By Cliff - 8 Years Ago
|
|
This one's good to go, used to run with a BB chv
|
|
By MoonShadow - 8 Years Ago
|
Randy's chassis was also BBC. I've never pitted for a full on dragster so I have no experience in this. Just passing on what I was told. I wishing all the best for you and your setup. We need a new record I think its currently at 7.8 for the quarter. Living proof that the Y-block got a bum rap. Love to see you at the shootout in June.
|
|
By charliemccraney - 8 Years Ago
|
|
I think Randy's chassis was designed for less power. I think they thought that it would be adequate since it had a BBC but it got a very powerful, blown Y.
|
|
By MoonShadow - 8 Years Ago
|
I can see him thinking that a chassis made for a BBC would work on the Y. Seems he overpowered it.
|
|
By Cliff - 8 Years Ago
|
|
This one is a 234" Spitzer, and has run a lot faster than I will, I had to loose 15 lbs to fit in the car (I still need to loose 15 lbs more), I worked hard to go to the Y Block meet in San Diego meet this week (not going to make it), making parts and waiting for parts takes a long time, however 2 back up engines are also in the works, and 2 transmissions, the car is certed, a set of new tires and very close but not yet.
|
|
By Ted - 8 Years Ago
|
|
Randy’s dragster was a solid 8.90 performer with the 762HP BBC engine and running on a throttle stop. The previous owners had tried a much higher horsepower 615” BBC and the dragster chassis simply had trouble planting itself after 700 feet. Randy’s Y-Block had the same issues with traction at the top end of the track.
|
|
By Cliff - 8 Years Ago
|
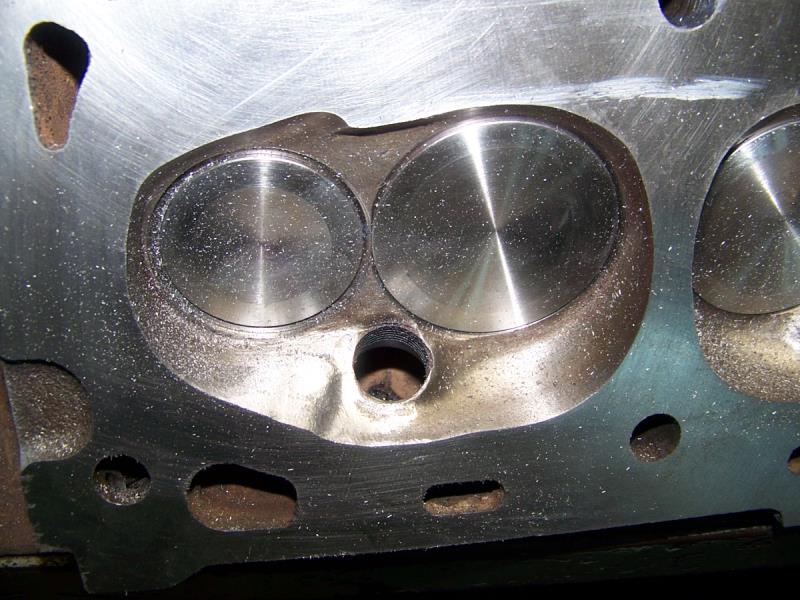
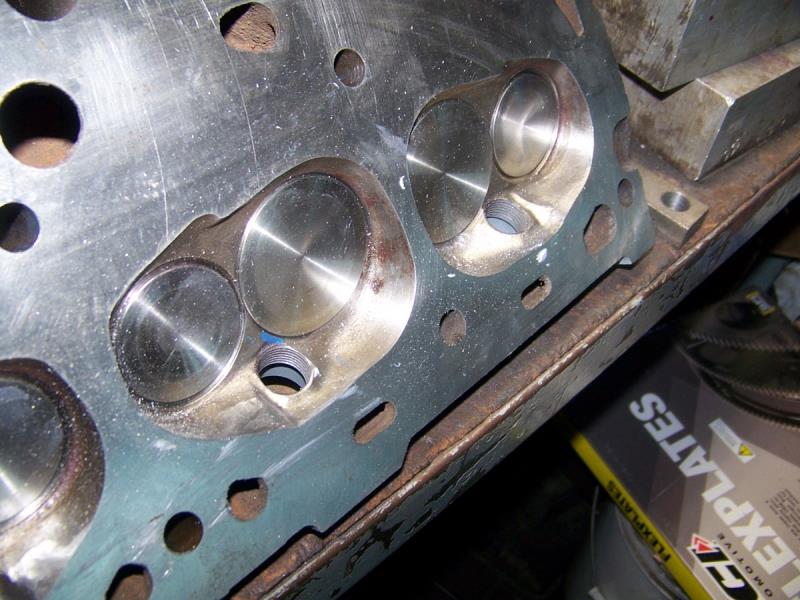
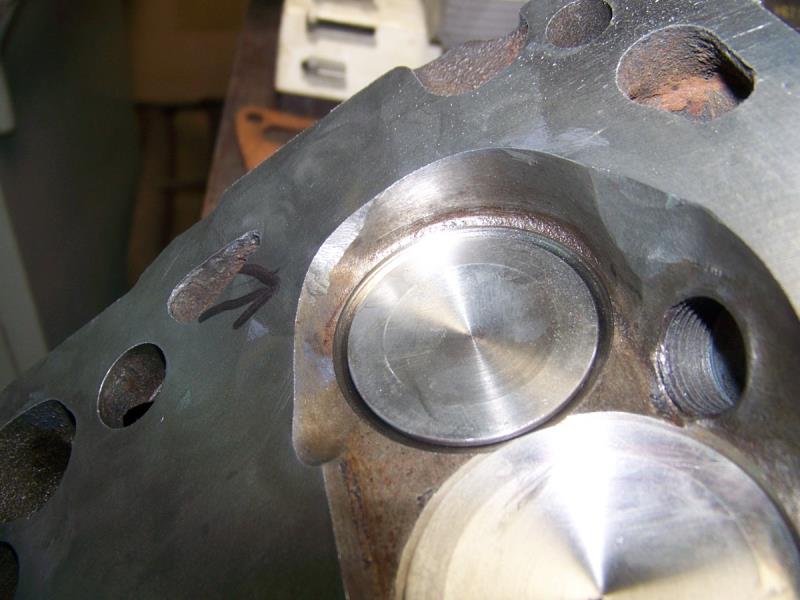
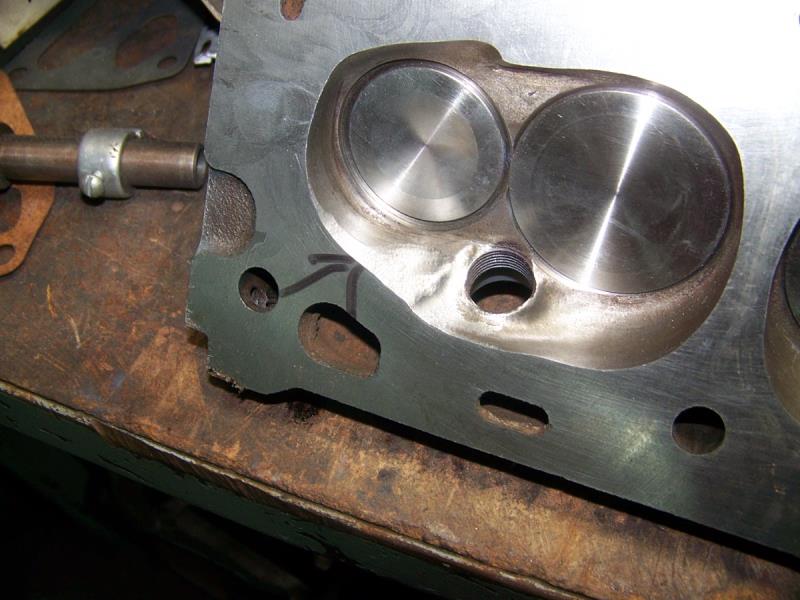
Working again, had to remove a little metal from the chambers.
|
|
By Cliff - 8 Years Ago
|
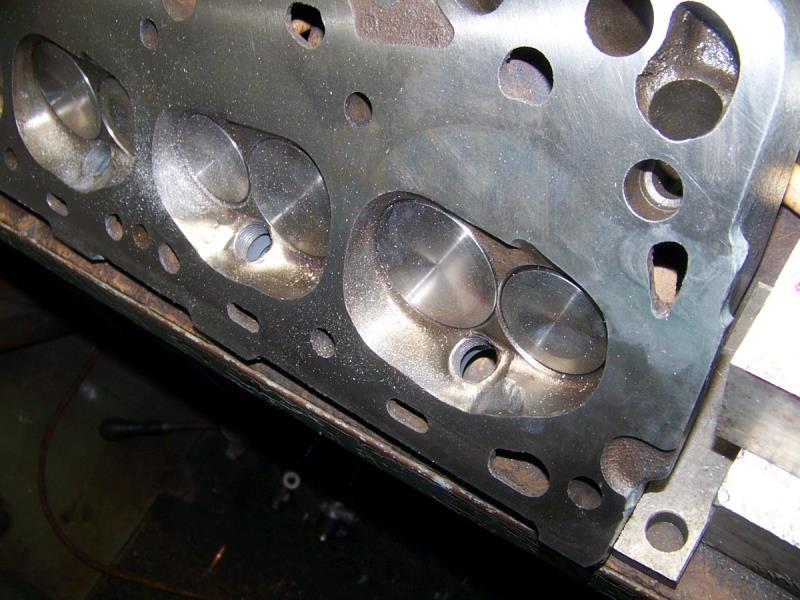
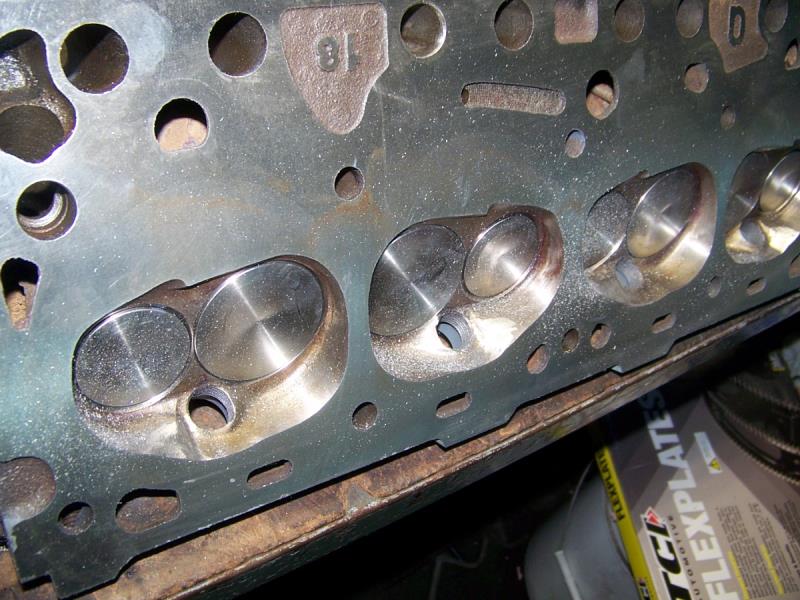
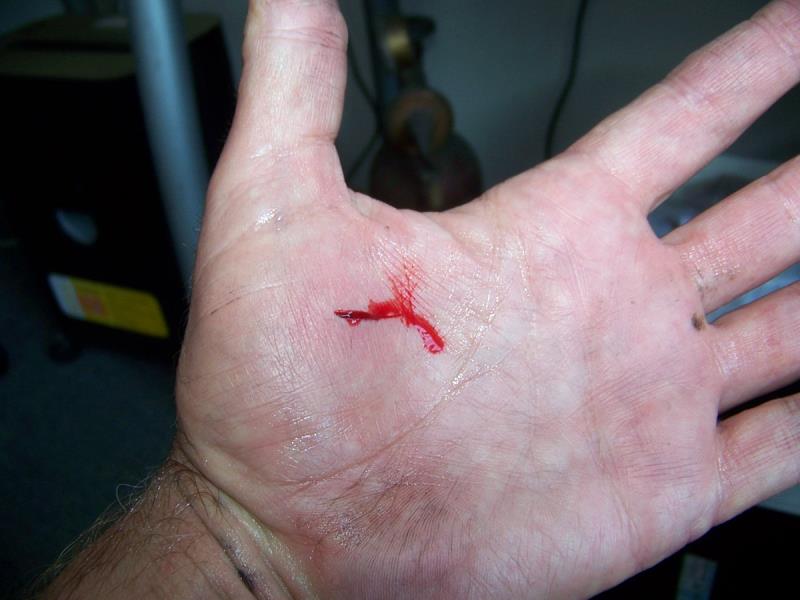
Next head, some of this stuff is SHARP.
|
|
By Hoosier Hurricane - 8 Years Ago
|
|
OUCH!!!!!!!!!! Your Block bit you! Those big intake valves look awesome, however to my untrained eyes they look to be shrouded pretty seriously. I hope I'm wrong.
|
|
By Cliff - 8 Years Ago
|
|
Hi, John Mummert did the ports and the chambers, they flow 245@.500@28" and 205@.500@28" I did some changes and did not run them on my bench.
|
|
By prosycamore - 8 Years Ago
|
|
Got any new updates?
|
|
By Cliff - 8 Years Ago
|
Needed to catch up on other work, will be back on it this weekend, will be rechecking, piston to valve, piston to head, valve to block clearance, then modify rocker arms for ball and ball push rods (5/16 ball, cut passage for oil to the top ball)
Thanks for the interest
|
|
By charliemccraney - 8 Years Ago
|
|
Why the change for the pushrods?
|
|
By Cliff - 8 Years Ago
|
|
I do things to solve problems I have had in the past (push rods ending up in the valley), this may or may not be of any value but I try.
|
|
By LordMrFord - 8 Years Ago
|
|
alu rocker got too big ball problem?
|
|
By Cliff - 8 Years Ago
|
|
You got it, going to run steel rockers this time, I see you are running ECZ-C heads, what's up, are you having better luck with them, better than the G?
|
|
By charliemccraney - 8 Years Ago
|
|
The Dove rocker arms became problematic. Harland Sharp have been great.
|
|
By LordMrFord - 8 Years Ago
|
Cliff (5/17/2018)
You got it, going to run steel rockers this time, I see you are running ECZ-C heads, what's up, are you having better luck with them, better than the G?
If I remember right, we put stock balls to alu rockers.
We got no spare G heads so we have to live with what we have.
Our N/A spare engine (11.8s) have those but got no titanium valves or flame ring groove.
Head itself never had a mechanical problem, but maybe some other heads might be more powerful but we dont know.
|
|
By Cliff - 8 Years Ago
|
Ok, the drivers side head just touches the piston, a little more grinding (this is a lot of work)
|
|
By Cliff - 8 Years Ago
|
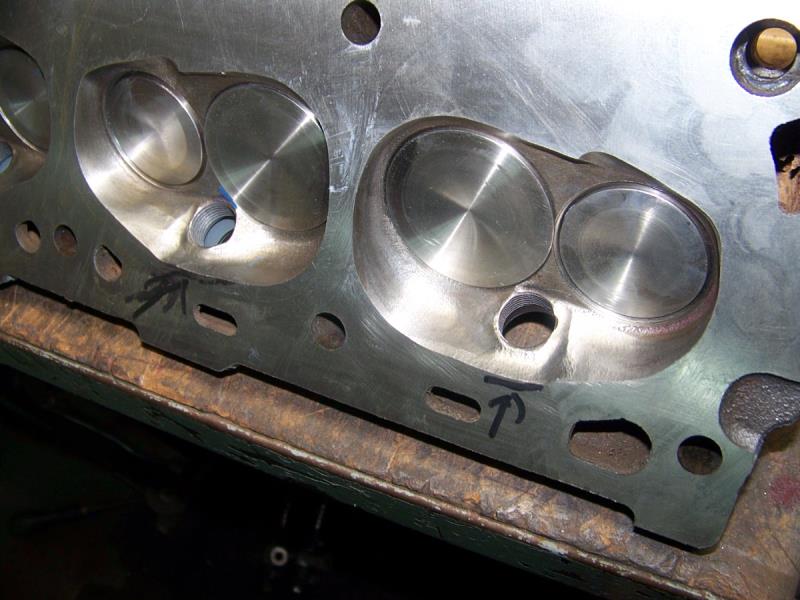
Now the right head done (3 spots).
|
|
By Cliff - 8 Years Ago
|
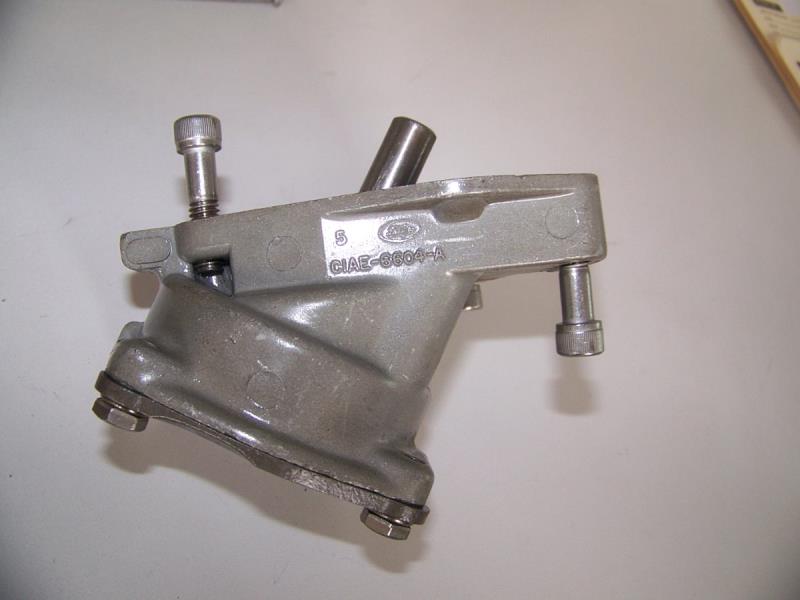
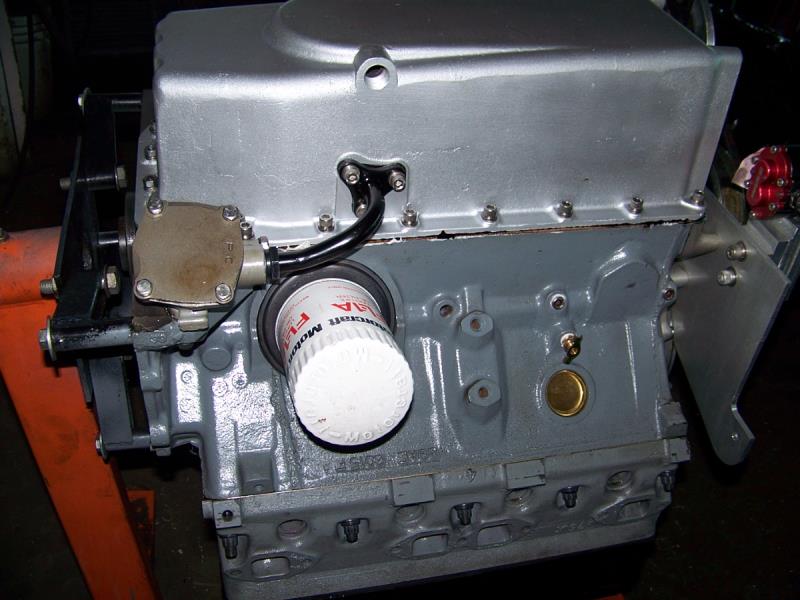
Oil pump done, this is a 1961 Ford reman, I took it apart and increased the spring pressure (spacer) nothing else done, I had to make the shoulder bolts out of longer bolts (stainless allen), this holds the pump better.

|
|
By Cliff - 8 Years Ago
|
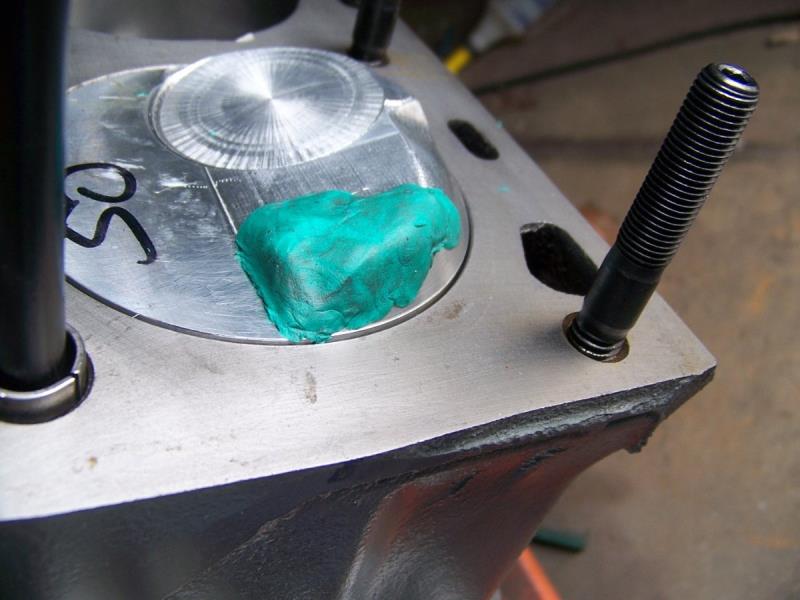
Last check for clearance, white grease on pistons, head installed, engine turned over, No Touch (: .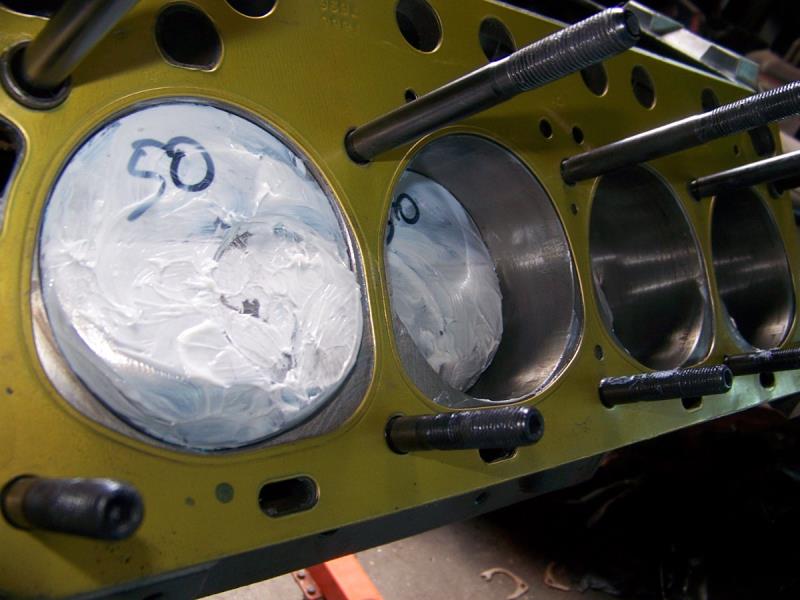
|
|
By Cliff - 8 Years Ago
|
Drivers side head needed more work, this is going to be a tight engine .039 head gasket, piston .010 out of the hole (.029 deck clearance)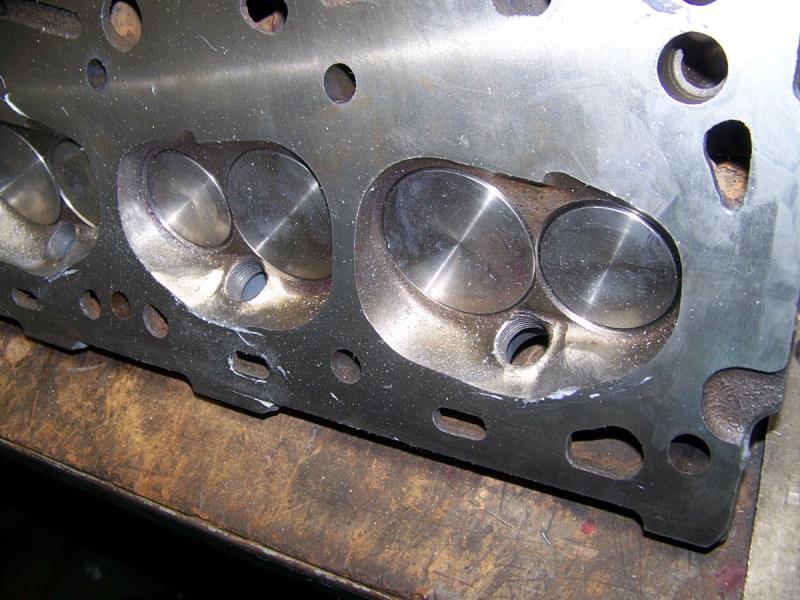 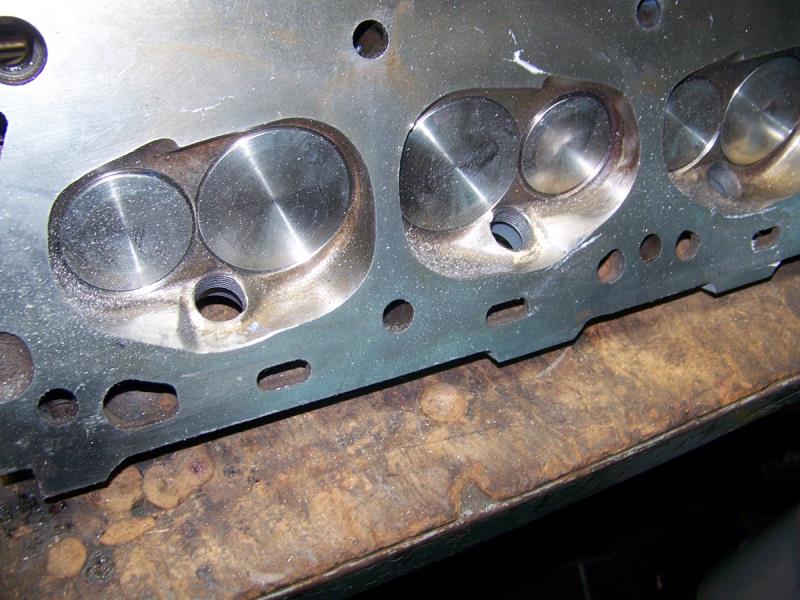
|
|
By Cliff - 8 Years Ago
|
|
New problem, pistons hit the spark plugs (closed the gap) found shorter plugs that fixed it (AC R86T), have to look at everything on this engine
|
|
By Cliff - 8 Years Ago
|
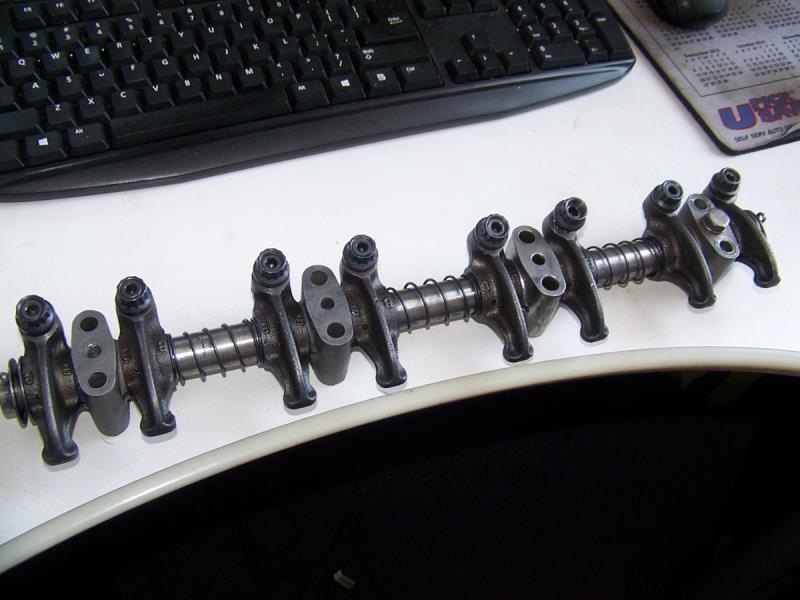
More stuff, here's the the rocker arms I'm going to use, real FoMoCo shafts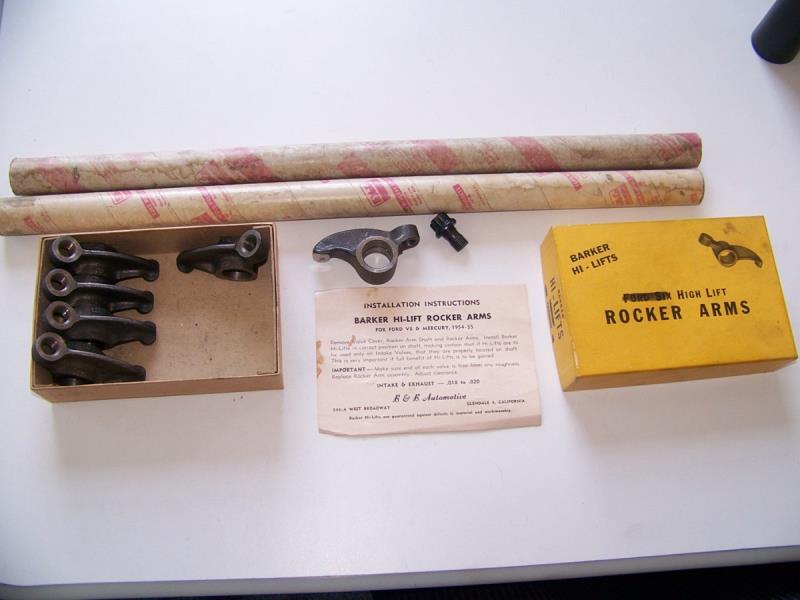 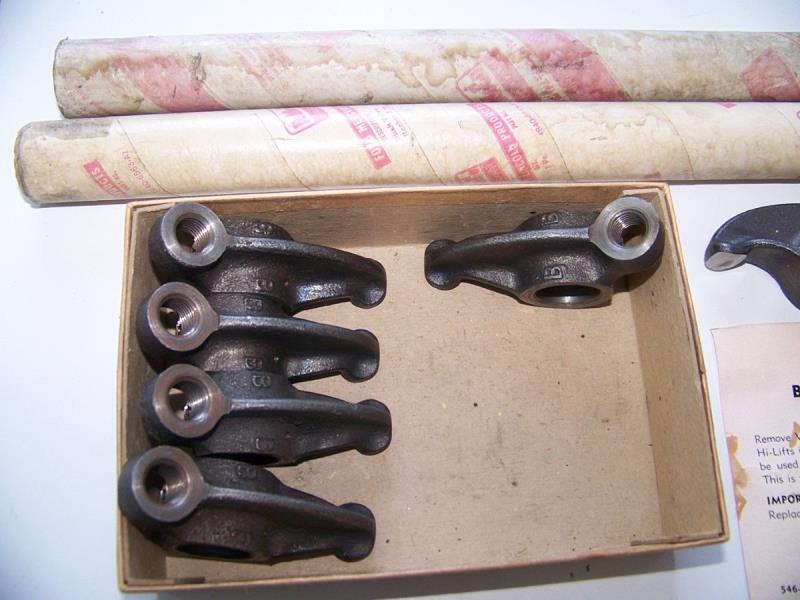 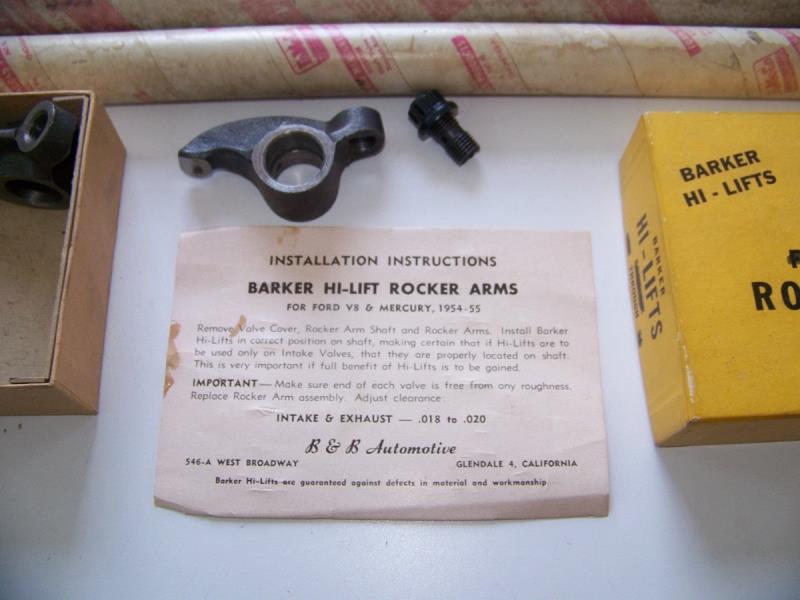 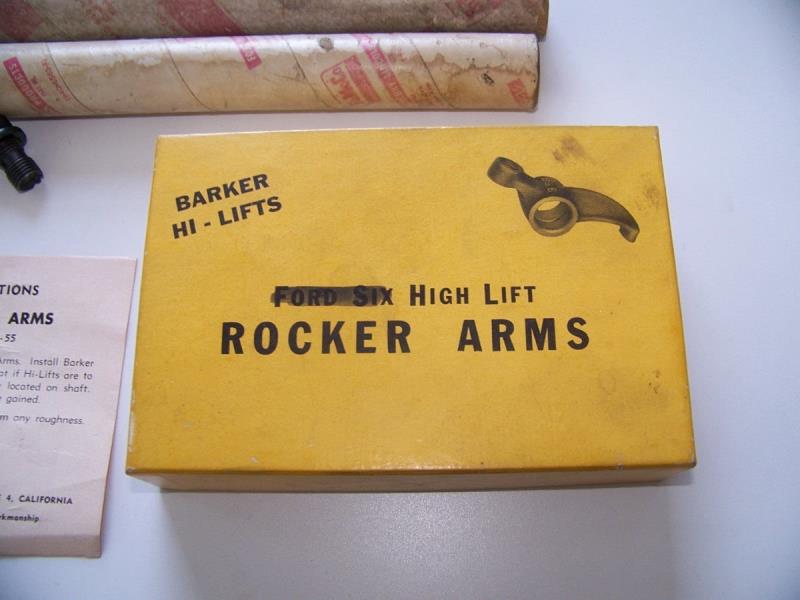
|
|
By charliemccraney - 8 Years Ago
|
You can usually index the plugs to get more clearance.
You also want to be sure that the pistons have enough clearance, not simply that they don't touch in a static situation. It could still be tight enough that it will hit at high rpm. I don't know what that clearance should be, though. I haven't yet built a high compression racing engine.
|
|
By Cliff - 8 Years Ago
|
Last of the work for today,

|
|
By Joe-JDC - 8 Years Ago
|
|
It looks like you will need longer push rods from those pictures. Most blue printing of rocker arms to pushrods have one thread showing below the rocker body so that you have a better angle and more stable valve train at high rpms. It usually moves the pushrod away from the head a bit better, also. Would need to check adjuster to valve cover clearance if you do go to longer pushrods. Joe-JDC
|
|
By charliemccraney - 8 Years Ago
|
Longer pushrods also give you a higher rocker ratio because of the relation of the adjuster to the centerline of the rocker bore.
The scrub pattern on the stems also looks like it would benefit from a geometry adjustment - shimming or milling the stands. An easy way to get an idea if geometry is near optimum is to have the engine in the appropriate spot that the valve is at half lift and observe the relation of the pushrod to the adjuster screw. In line is at or near optimum. Angled is not. Best way is to know is to shim, and see what happens. When I did this, I got a bunch of arbor shims for checking. Worked out well.
If you want to tackle this, pick a rocker screw position and then use an adjustable pushrod to set your lash for checking. When you find the correct geometry, measure that adjustable pushrod to determine the length of pushrod required. It's a good thing to do because it transmits information more accurately from the camshaft to the valve, so you get more valve lift, and duration as well as less strain on valve train components.
|
|
By Cliff - 8 Years Ago
|
|
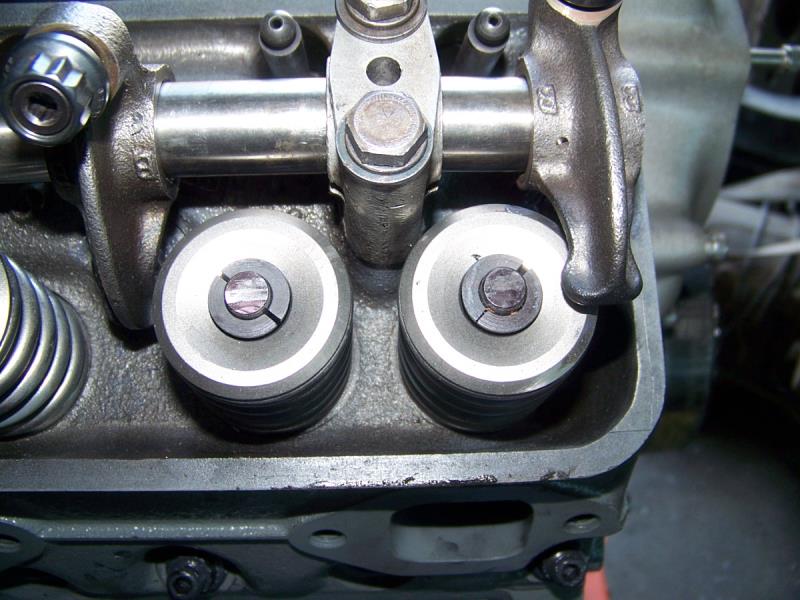
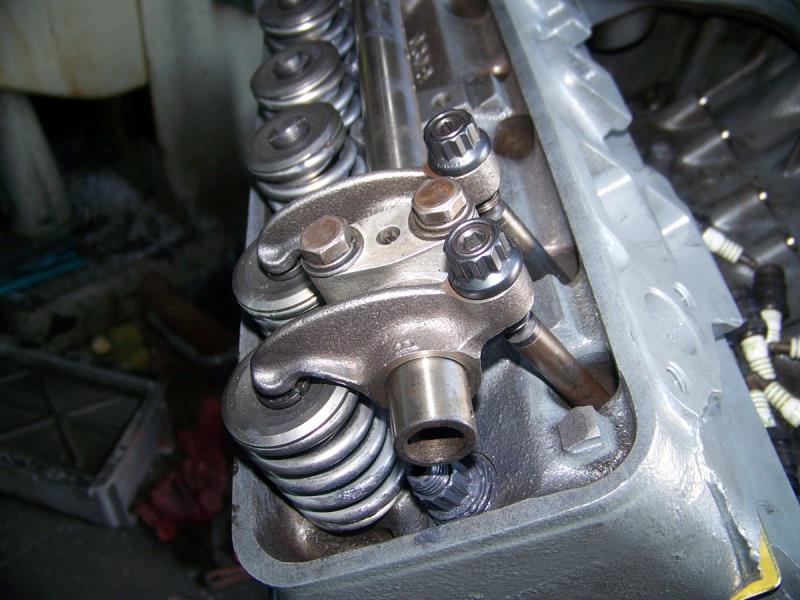
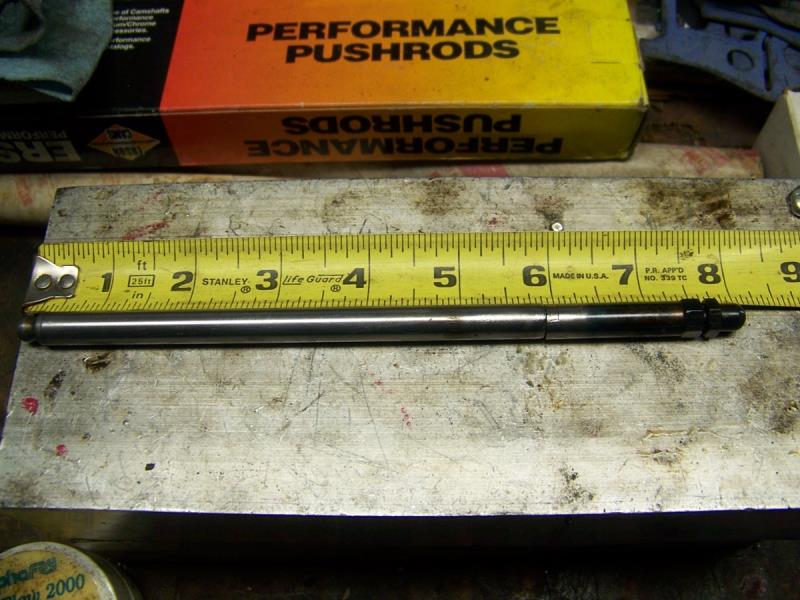
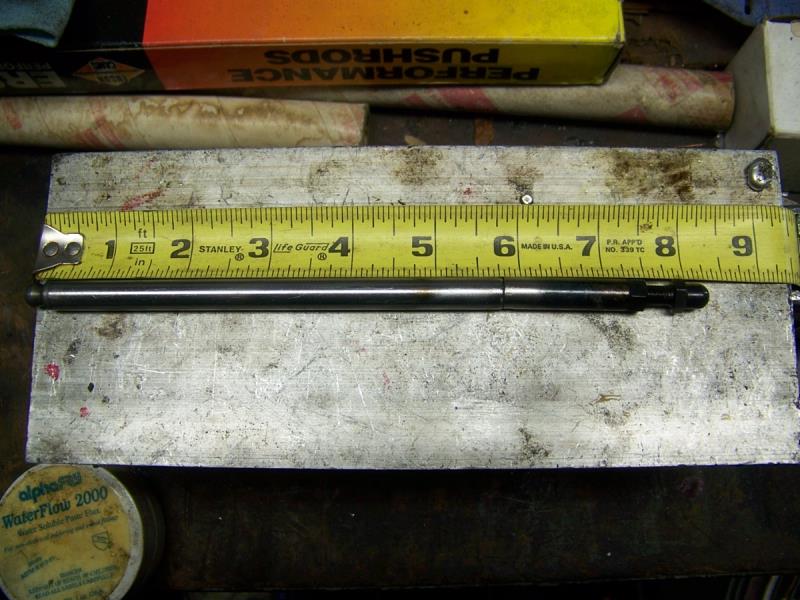
I had to cut into the rocker a channel to oil the top ball (5/16 ball, top and bottom), if I use a longer push rod and move the adjuster up it uncovers the oil channel, this is the longest push rod I can use, I will post pictures next time I'm at work, I took this into account when I specified the cam and rocker ratio, I have all the lift I can fit in the engine now, at full lift I have .050 clearance to the top of the block (counting the notches), and large fly cuts in the piston and only have about .070 piston to valve (intake) and .090 (exhaust), remember that adjuster is a female cup,, the push rod ball is inside the cup, if you take that into account there are only 2 full threads showing ( hard to tell in the pictures) the Erson push rods are 8.426 long, the Fords 8.11
|
|
By Ted - 8 Years Ago
|
|
Cliff. Thanks for sharing the pictures. Good find on those rockers and they do look like the later Gotha rockers that use to be available for the FE’s. Be sure to let us know what ratio those rocker arms are once it’s known.
|
|
By Cliff - 8 Years Ago
|
|
I'm jealous of the prize you got
|
|
By Cliff - 8 Years Ago
|
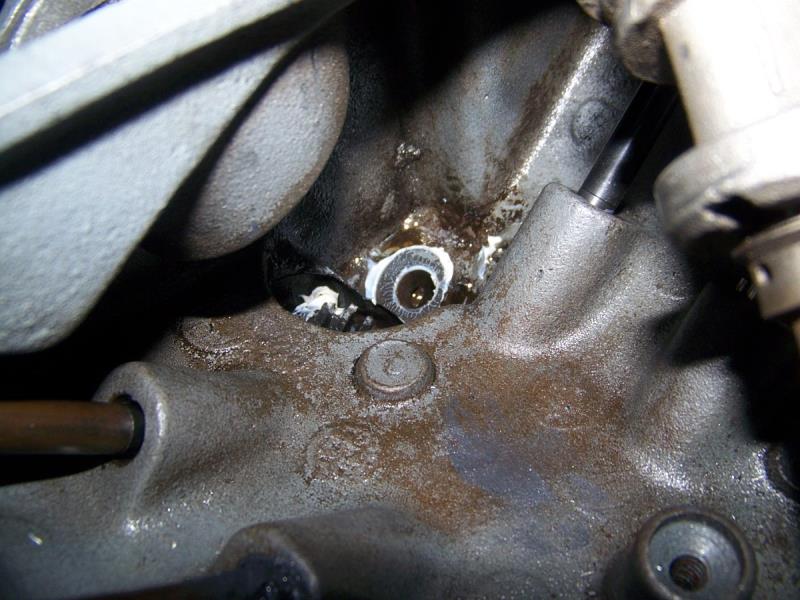
Hi, the contact on the push rod is ether the top of the ball or the bottom of the cup, if I were to use this length of push rod with a cup, and the ball on the rocker it would be to long, the side of the cup would hit the rocker at full lift, I chose to use the longest push rod I could (hence the ball and ball), I was going to keep quiet, however since I'm showing all I might as well explain why, I do not follow anyone but have always gone my own way, the contact patch on the valve is just about center through the whole cycle, the added support can be seen in the water port.
Cliff Murray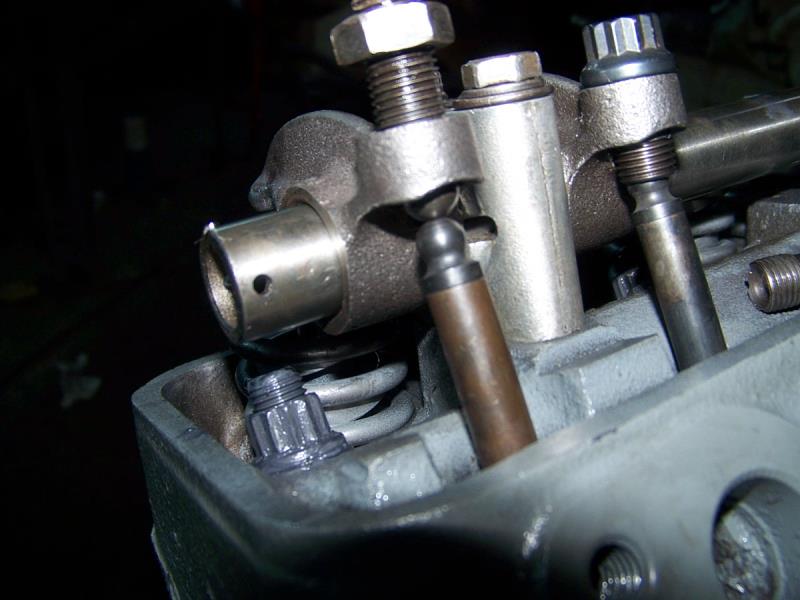 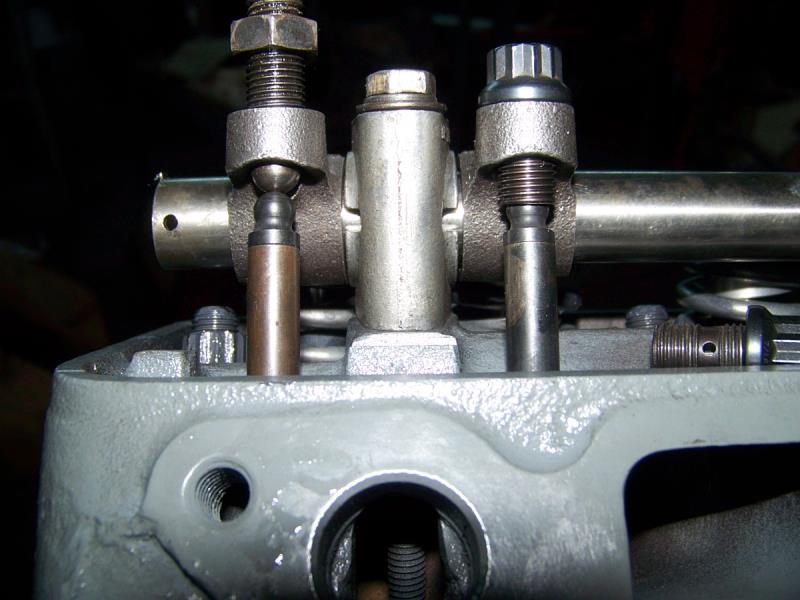
|
|
By Cliff - 8 Years Ago
|
Hey, did you guys notice that the retainers have the center milled out? these are titanium, but a little more weight was saved.
Cliff
|
|
By Cliff - 8 Years Ago
|
|
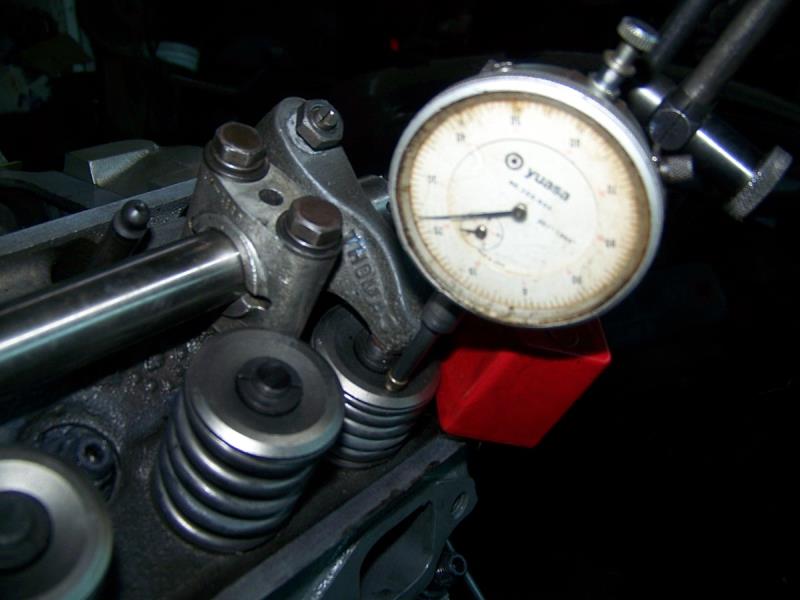
These Hi Lift rockers check out @1.48 (+), looks like these all check out from 1.47 to 1.485, I'm going to pick the best ones I can find (I have many sets to chose from) will check Ford rockers next, and maybe I will check out others, I have Thomas, and Fenton (new). I'm checking these on the engine so it takes time, I may have the cam broken in before it's done (lots of turning)
|
|
By Cliff - 8 Years Ago
|
Here's what I will be testing, not all but samples, these will be tested with no lash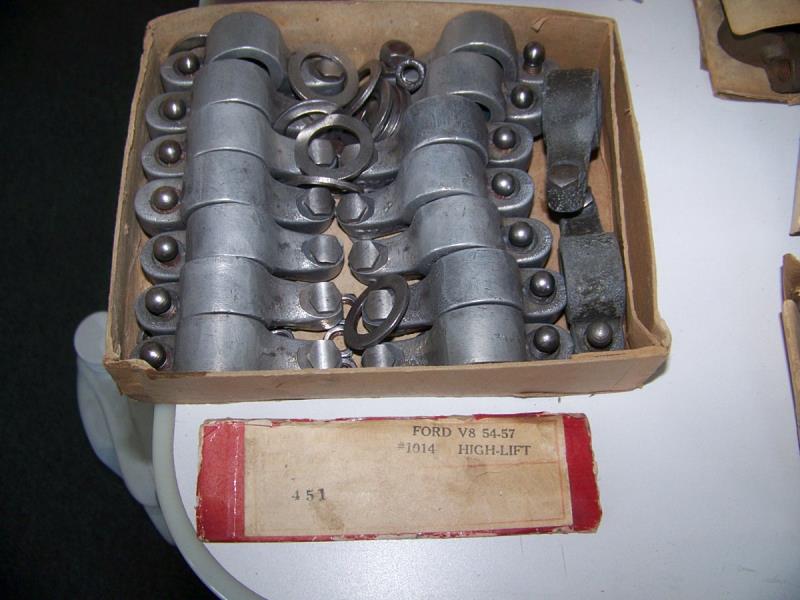 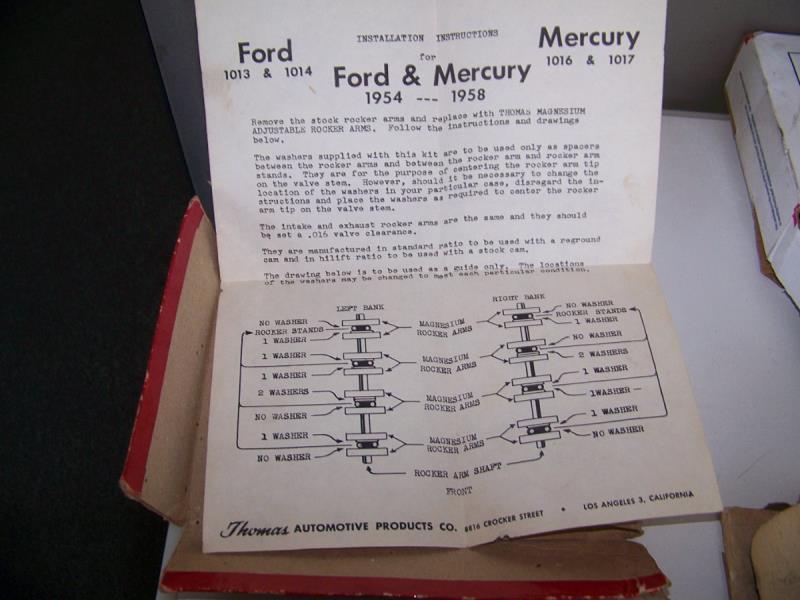 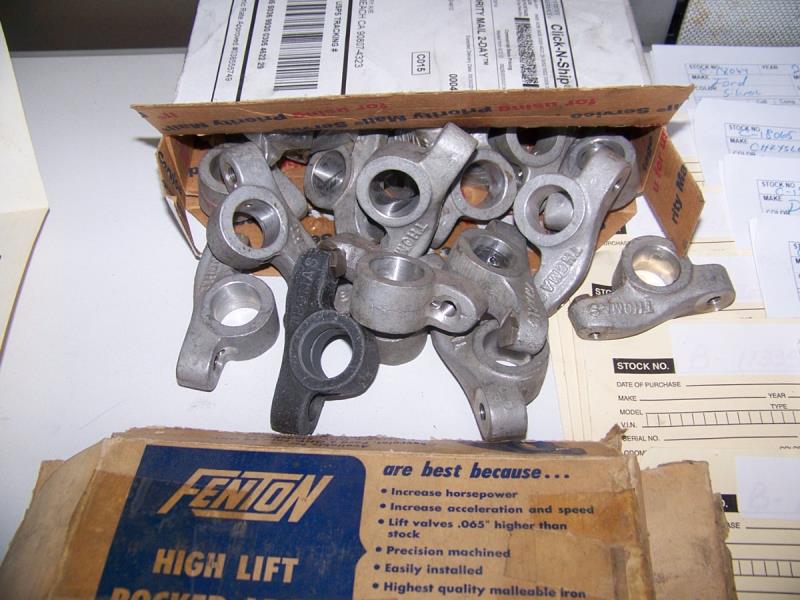 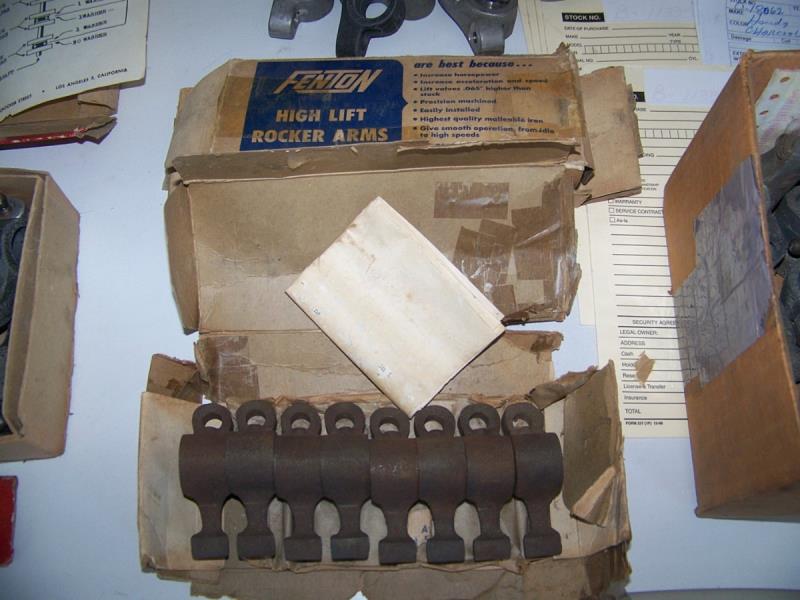 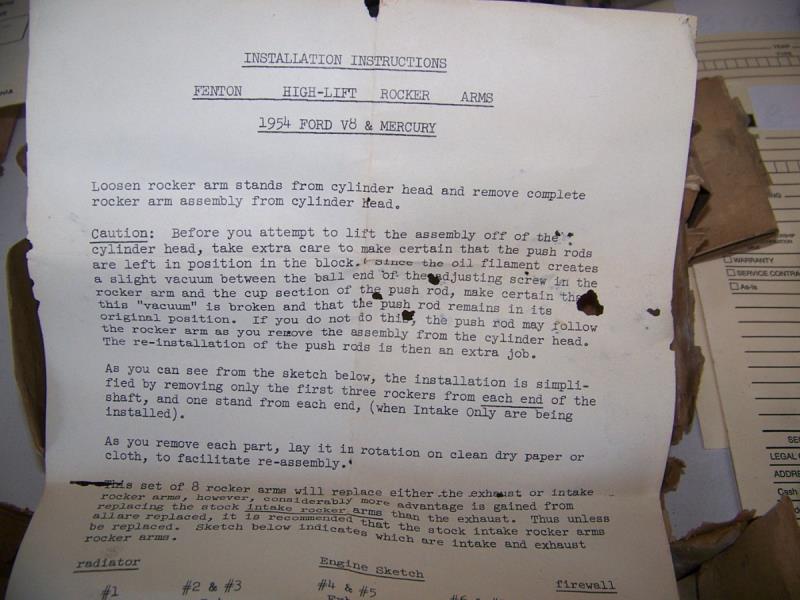 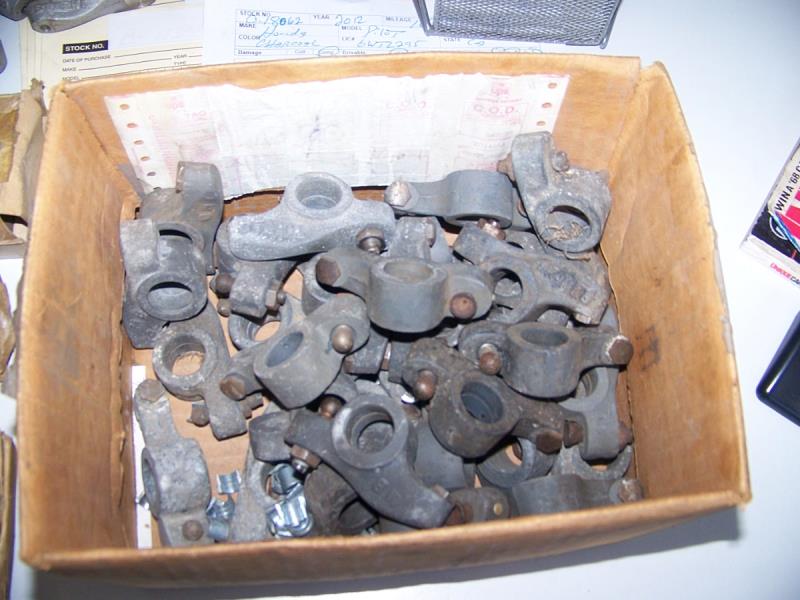
|
|
By Cliff - 8 Years Ago
|
 Fenton = 1.3925 Fenton = 1.3925
|
|
By Cliff - 8 Years Ago
|
Thomas = 1.531
|
|
By Cliff - 8 Years Ago
|
Ok, tested the Ford rockers with Ford push rods and adjusters.
Lo Ratio = 1.3263
Hi Ratio = 1.4721
This is on my engine with the setup I have, I will do one more test with my push rods and adjusters on the high ratio rockers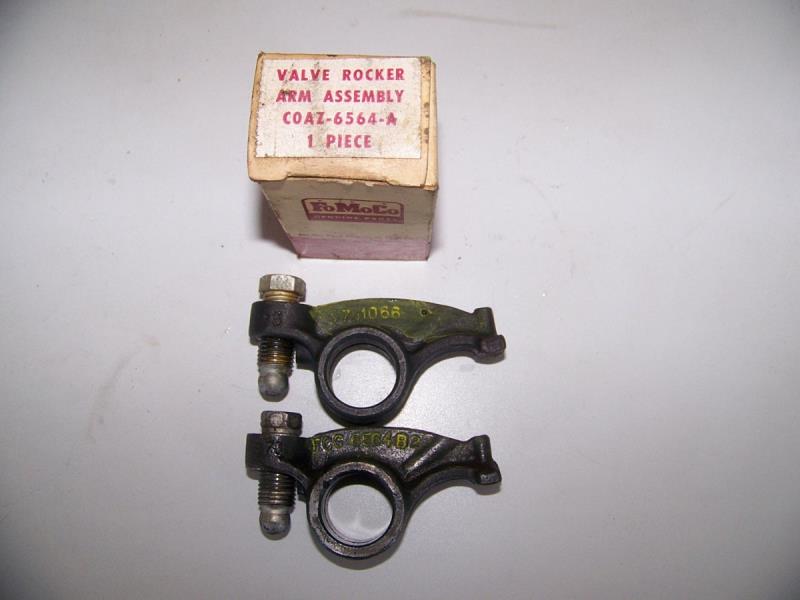 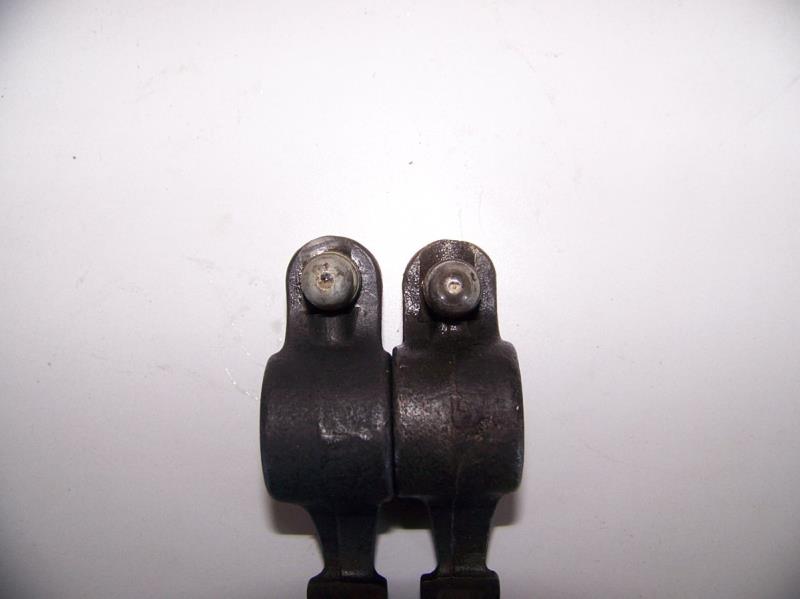 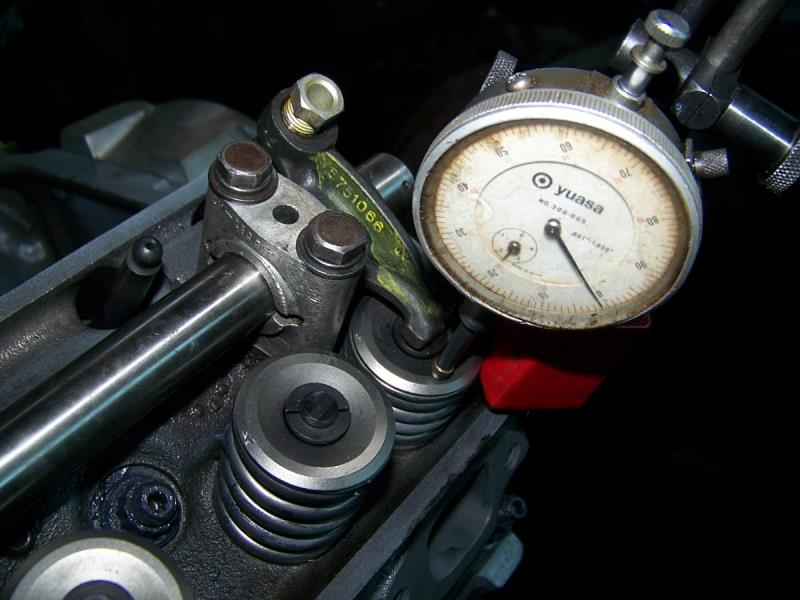 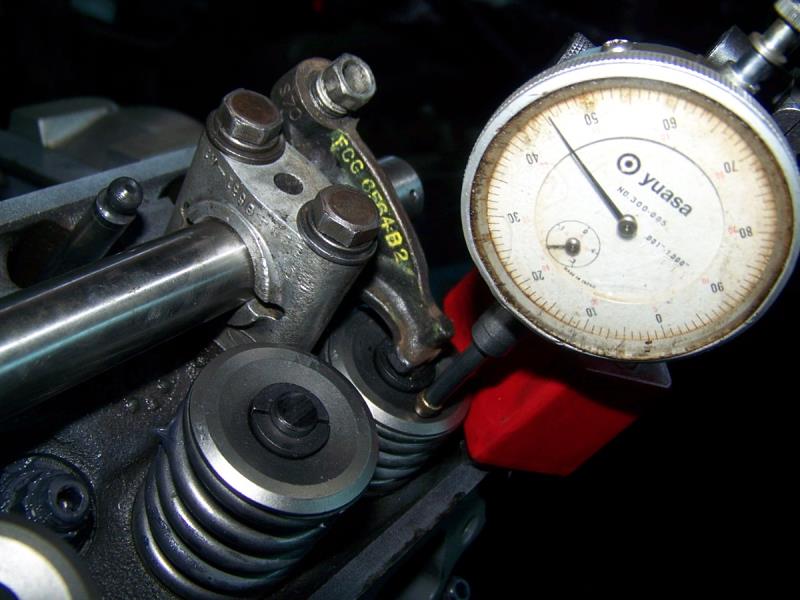
|
|
By Cliff - 8 Years Ago
|
Done with this, the last test was with the Ford Hi Ratio rocker with my cup and ball setup 1.4589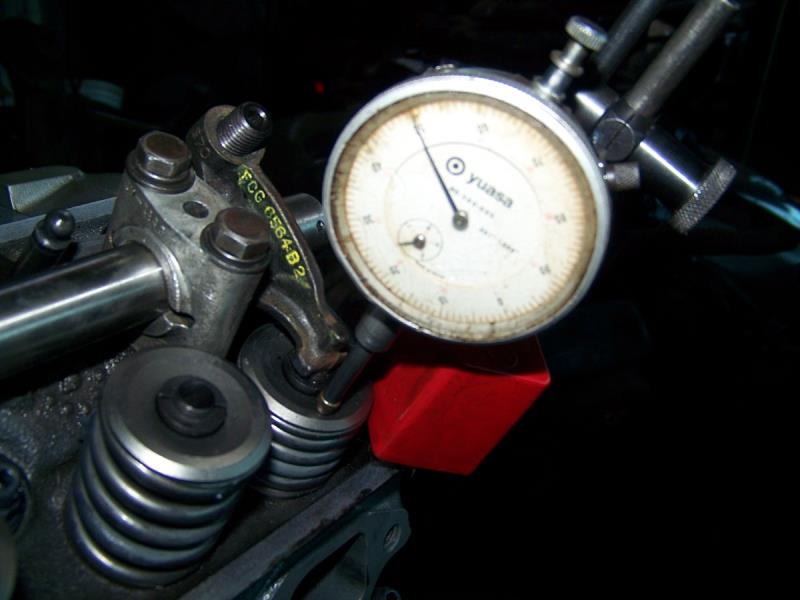
|
|
By Cliff - 8 Years Ago
|
So far I have spent the whole morning measuring rocker arms to get a perfect matched set, went through 10 sets, now to try on the engine.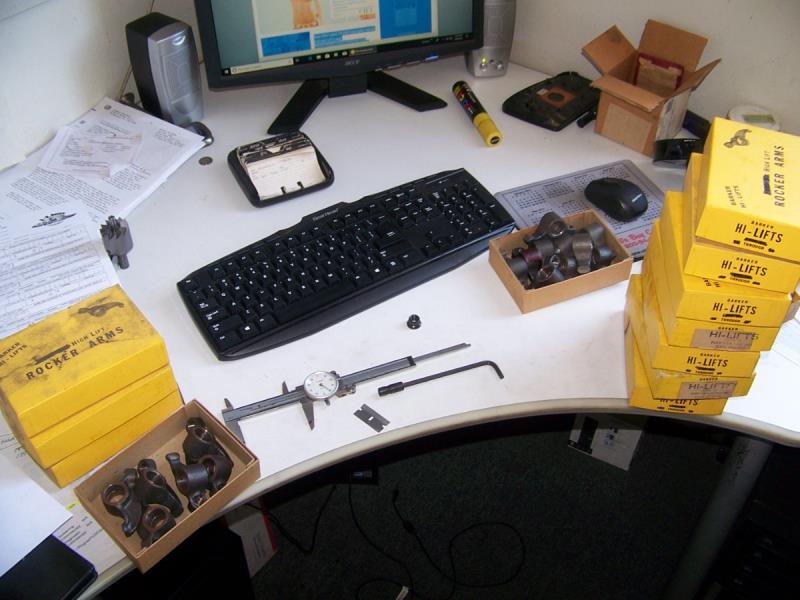
|
|
By Cliff - 8 Years Ago
|
Well after all my work, I installed these one at a time on the same valve and measured the lift, .020 difference from the high to the low, not good, so now I will check all numbers on the engine and not on the desk.
Cliff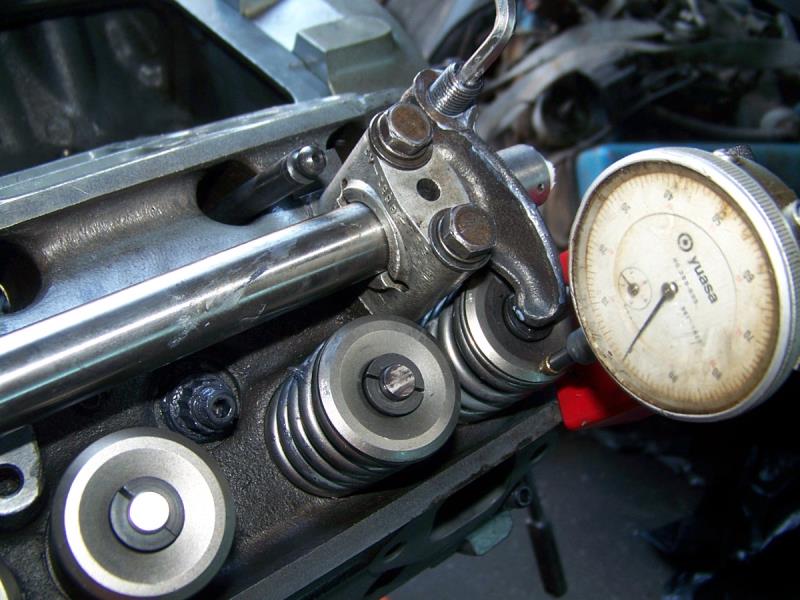
|
|
By Cliff - 8 Years Ago
|
|
No work this weekend went to the L.A. Roadster Show
|
|
By Cliff - 8 Years Ago
|
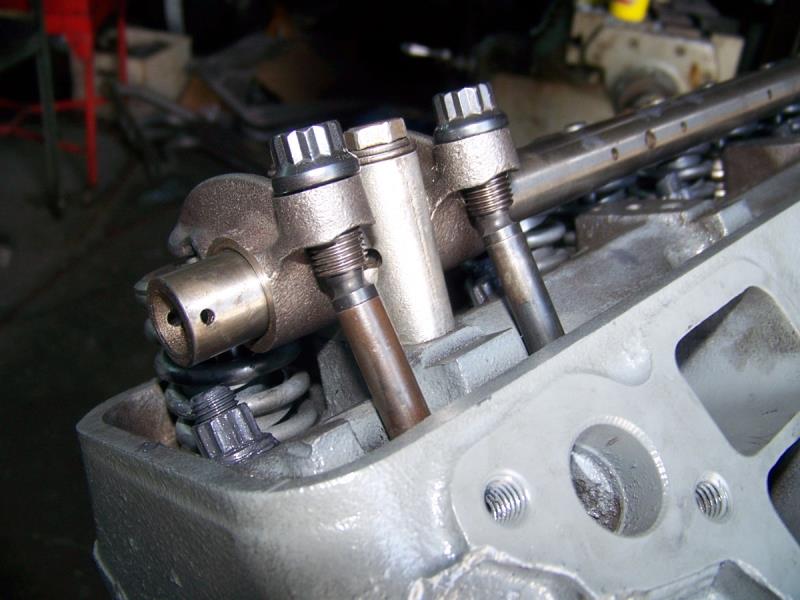
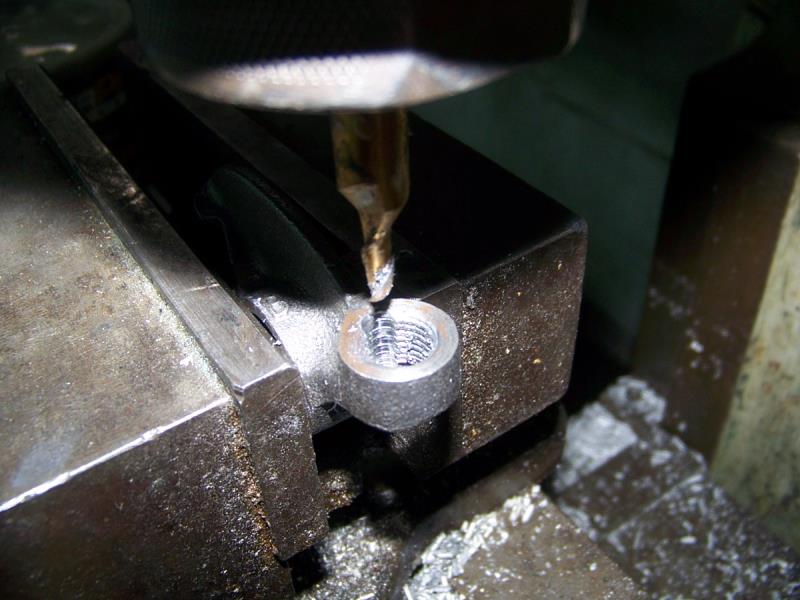
Here's the oil channel cut into the rocker to oil to the top ball, the oil flows around the adjuster to the hole in the side and to the top of the push rod ball.
|
|
By john2747 - 8 Years Ago
|
Yes Cliff :
Years ago I tested all 16 ECG 6564 A2 1956 272 rocker arms taken from a 1956 ford sedan that was run into the ground and left to rust away in a patch of trees.Made a jig from a piece sawed off a ECG-C cylinder head and replaced the lifter
with a micrometer head to accurately measure push rod travel. I offset the rocker arms side to side in order to test them on the unworn area of the valve pad to establish there true factory ratio.I started the tests with the factory adjusting screws set as high as possible.Used .250" push rod travel for all tests.Lowest ratio rocker arm tested at 1.552 to 1,highest ratio rocker arm tested at 1.592 to 1.After the first test I adjusted the rocker arm adjusters down exactly 5 turns[.250"],results of this test[all 16 rocker arms] valve lift was increased .002" to.003".I also did tests with older EAN rocker arms and discovered that changing the valve pad radius also changed the rocker arm ratio,so proper care is needed when re-surfacing valve pads.
john2747
|
|
By Cliff - 8 Years Ago
|
|
Good job, however when you look at higher lifts things change, I will always do the check on the setup I plan to run (well I will now), I plan do do another test with shorter and longer push rods to see the change. Has anyone adapted a FE rocker? (I might), it looks like narrowing and bushing will make them fit.
|
|
By Genuinerod - 8 Years Ago
|
|
If I remember right, FE rockers are 1:7 ratio, Mummert has them for the Y Blocks.
|
|
By charliemccraney - 8 Years Ago
|
Mummert's 1.7 ratio are only for aluminum heads.
I have seen where someone in South America adapted some roller rockers from another engine. You probably will not find something that only requires modification to the rocker arms. It will probably require modification to the pushrod holes in the heads, as well. You will also have to pay attention to the relation of the tip to the valve.
Everything else equal, a longer pushrod results in a higher ratio and a shorter pushrod results in a lower ratio. You can see this by looking at the rocker arm and observing the relation of the adjuster screw to the shaft center. As the screw is turned in, the distance from the adjuster center to shaft center increases, reducing the ratio. Assuming geometry is currently optimum, changing from one to the other will require a correction to geometry.
|
|
By LordMrFord - 8 Years Ago
|
Cliff (6/24/2018)
Good job, however when you look at higher lifts things change, I will always do the check on the setup I plan to run (well I will now), I plan do do another test with shorter and longer push rods to see the change. Has anyone adapted a FE rocker? (I might), it looks like narrowing and bushing will make them fit.
I think it needs smaller diameter shaft and some offset setup to tune the tip lenght right for the Y.
|
|
By Cliff - 8 Years Ago
|
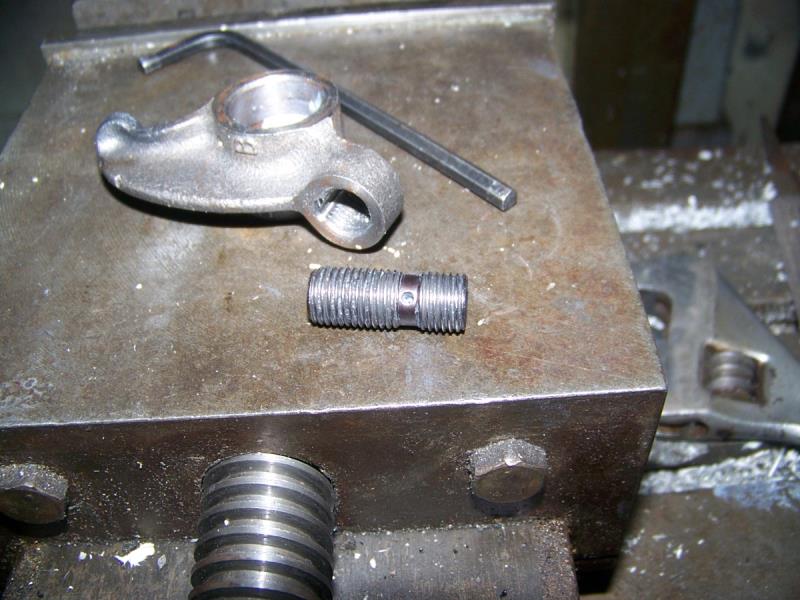
Better photo of the oil channel cut into the rocker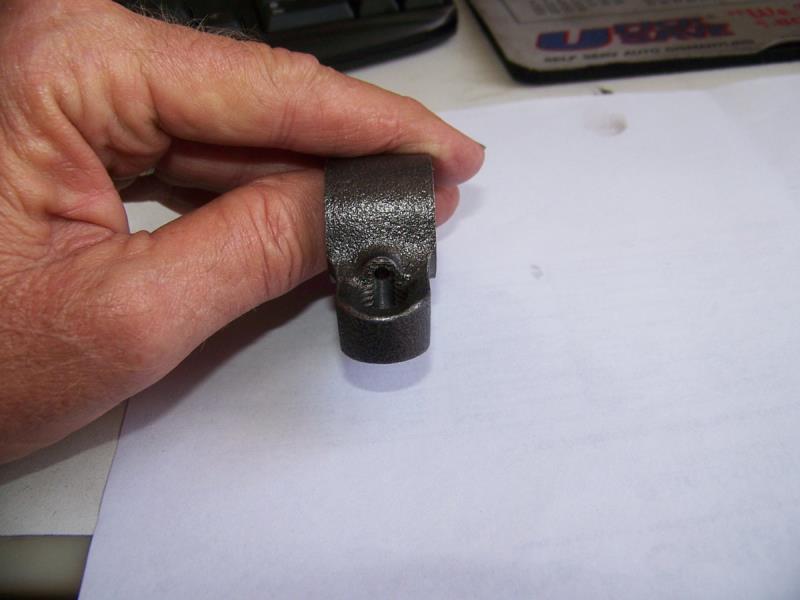
|
|
By john2747 - 8 Years Ago
|
Charlie: I doubt very much if you have ever checked a rocker arm for ratio,but yet you chose to criticize people who have made the effort to do that.I have been to Ted Eaton's web site many times,and it is very apparent that you are using his effort's to criticize other peoples effort's,very handy.I totally respect Ted's work to give us information about y-blocks when I get a y-block mag in the mail Ted's article is usually the first one I read.Any engine builder that can put John Kasse in 2'nd place has to be very knowledgeable.But no one gets it right100% of the time.Ted's rig for checking rocker arm ratio does not maintain the angles and pivot points of an assembled y-block engine.The jig I use maintains all the angles and pivot points of a fully assembled y-block engine About 10 years ago I was going to send an article to Bruce for his mag.I didn't do that,now I will send the info to Ted and hope to hear his thoughts about checking rocker ratio's.
This discussion has prompted me to clean the dust off my jig and put it to work again.For this ratio test I will use a ECG 6564-A2 1956 rocker arm and a long EAN adj.screw.This time using.300" push rod travel and the adj. high enough so that no threads are visible under the body of the rocker arm, the valve moves .476" divided by .300"= 1.586 to 1 ratio.The rocker screw is then turned down 10 full turns.Moving the push rod .300" the valve moves .485" -- .009" more than the first test .485" divided by .300" = 1.616 to 1 ratio.Charlie your theory about rocker arm ratio is useless if it can't be proven with legitimate tests
john2747
|
|
By charliemccraney - 8 Years Ago
|
There was no criticism and it's not my theory. If you just google rocker ratio and look at the explanations and pictures, you will see that the ratio is the distance from valve tip to pivot center divided by the distance from pivot center to pushrod contact point. The ratio does in fact decrease as the adjuster screw is turned in..
Your setup performs the check with valve and rocker dimensions setup as they would be on an actual engine which does give a better picture of how it all interacts. I bet when it is actually on an engine, it changes yet again because of the pushrod and lifter angles. What your test does not take into account is rocker geometry. Simply adjusting the screw may not be an accurate way to perform this check since geometry will not be correct for both and that is going to affect the lift result. It would be interesting to know how the effective ratio works out with actual Y block dimensions and when geometry is correct. That would make for a good article.
|
|
By DryLakesRacer - 8 Years Ago
|
Over the years I have played with rocker arm geometry and designed and built my own true roller rockers. (no they are not for a Y-Block or any other Ford product) Lowering or raising the stands do make a difference as does the use of lash caps when making adjustments. All my work was done on an exact mockup engine with light weight test springs and the camshaft I was planning on using. By playing around with it I was able to see slight changes and after flowing my cylinder head the slight amount was not worth the trouble as for me anything over .600" lift was not doing any good and I maxed out at .615".
With that said the correct geometry is easier on parts especially when you do not have roller tips from what I understand. My original reason for making roller rockers was to eliminate valve guide ware which was actually occuring because the geometry was off. Good Luck.
|
|
By Cliff - 8 Years Ago
|
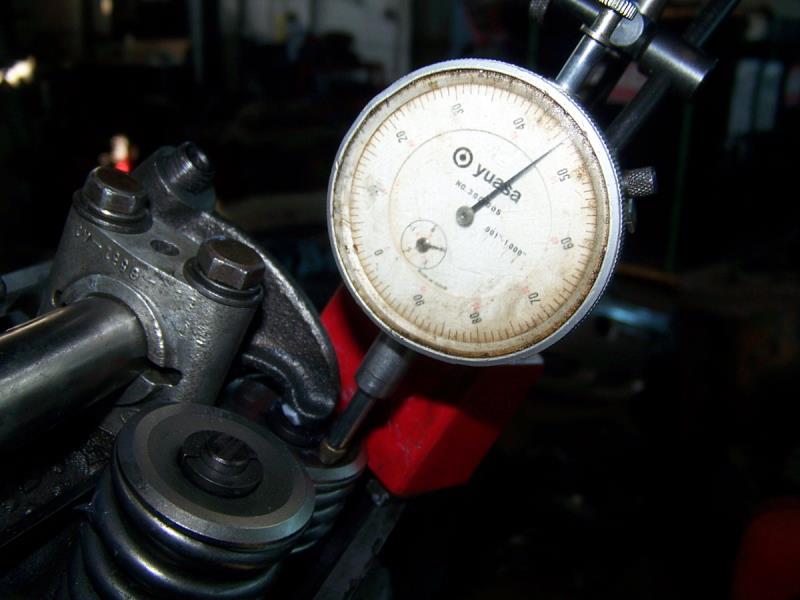
Ok, here's the test, used 3 length push rods,
1st 8.000 this opened the valve .556
2nd 8.250 this opened the valve .554
3rd 8.500 this opened the valve .550
|
|
By Cliff - 8 Years Ago
|
|
PS lobe lift is .374 with no lash
|
|
By John Mummert - 8 Years Ago
|
So is it running yet?
|
|
By Cliff - 8 Years Ago
|
No, stuck in the weeds, I do have a motor ready to bolt in, however I'm working on the good motor, if you see me doing any dumb stuff (I always do) let me know.
Cliff
PS. Buy your parts from John Mummert, support the man that supports us, just look at Engine Masters.
|
|
By John Mummert - 8 Years Ago
|
Don't see anything stupid just a little puzzling. When we did our rocker testing a few years back we saw short pushrods increase ratio at low lift and decrease ratio at high lift. Small bits. We ended up running Smith Bros. pushrods because the cup is very streamlined. They gave the ability to have the pushrod adjuster up as high as we could get it, and just barely clear the rocker arm body. With our angle milled race head the long pushrod helped clearance when the valve was closed as well, early on. Our Race Head program now has machining on the bottom of pushrod holes to give a some more clearance.
I know one time I bought a brand new tenth indicator from a pawn shop for our small dial bore gauge. Man I scored. A brand new Federal Indicator. Get it to shop install it on the gauge. (It took me a while to figure out it was a backward indicator.) It works beautiful as long as you know (+ means interference) and (- means clearance).
Keep on truckin'. Hows your intake manifold coming?. I know last time we talked you had some interesting ideas for that.
|
|
By Cliff - 8 Years Ago
|
Well the intake is on it way, I'm working on injector placement, this is a big problem (wet flow), will post photos when a little closer, I'm going to install a pop off valve in the back of the intake in case of a back fire, I'm having to coat the inside of the manifold with clear epoxy to stop clouding up from the fuel
(I hope this works), I have not started on the scoop (Lexan also)
|
|
By Cliff - 8 Years Ago
|
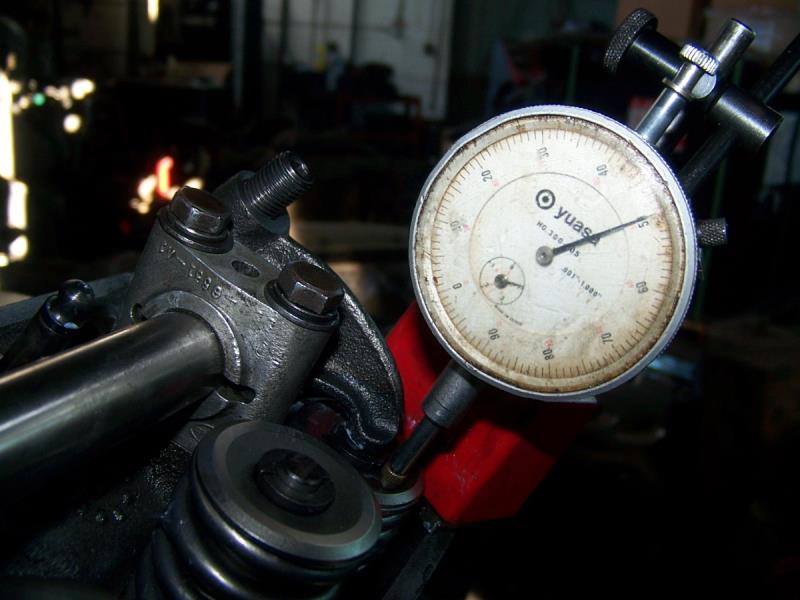
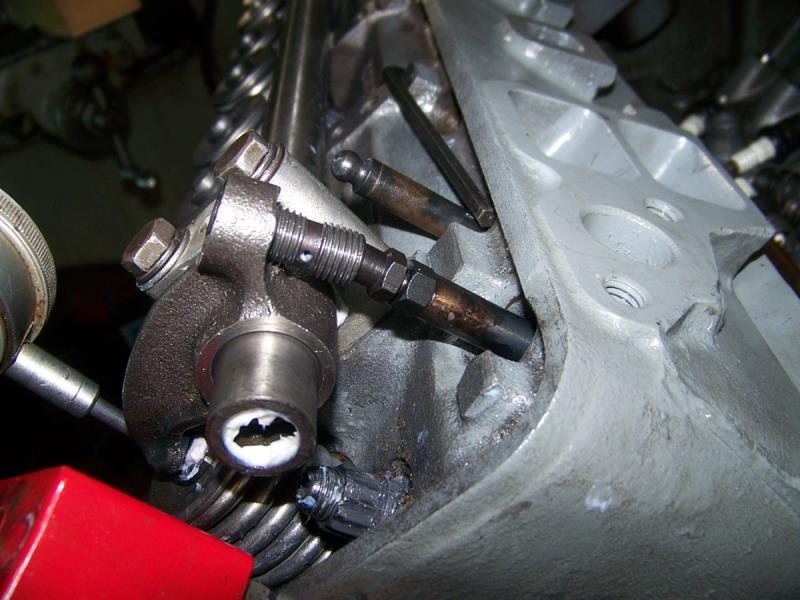
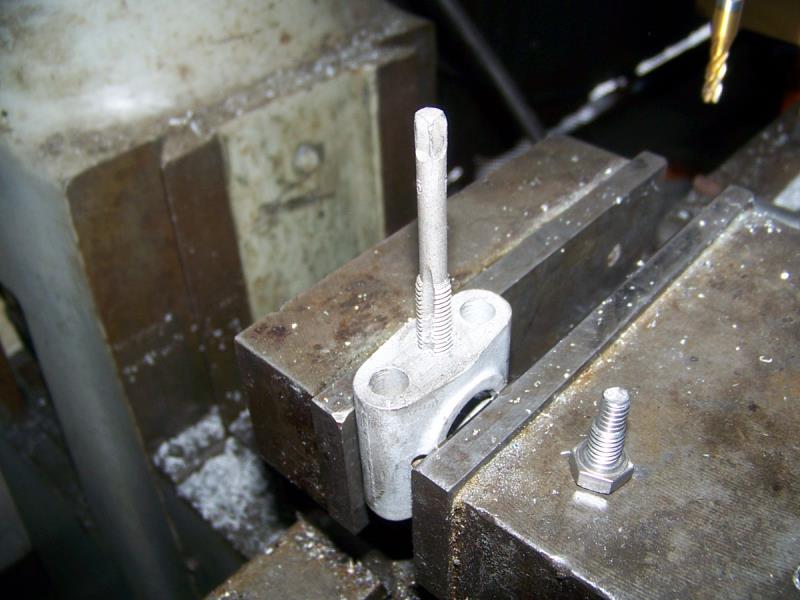
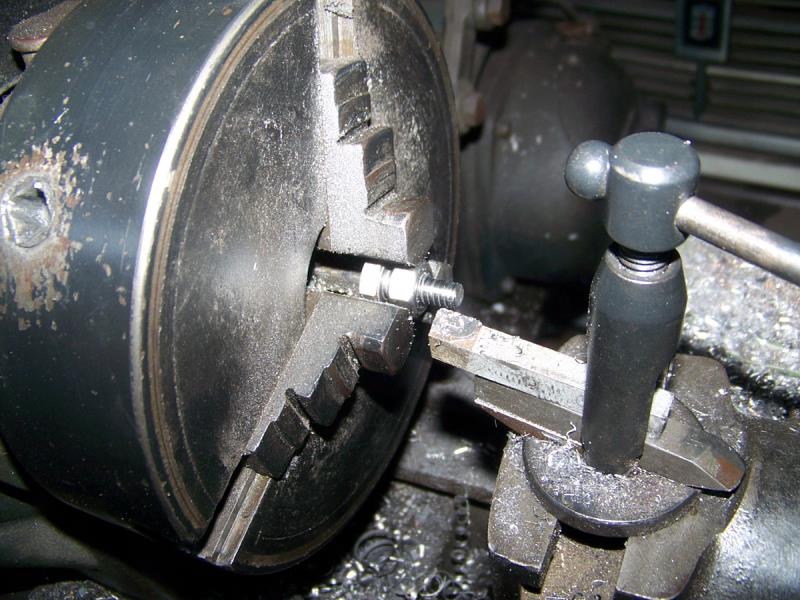
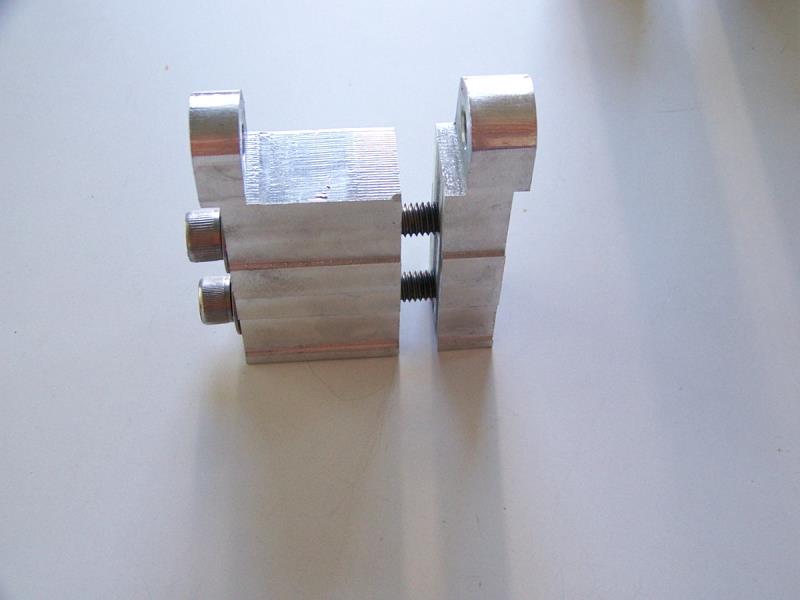
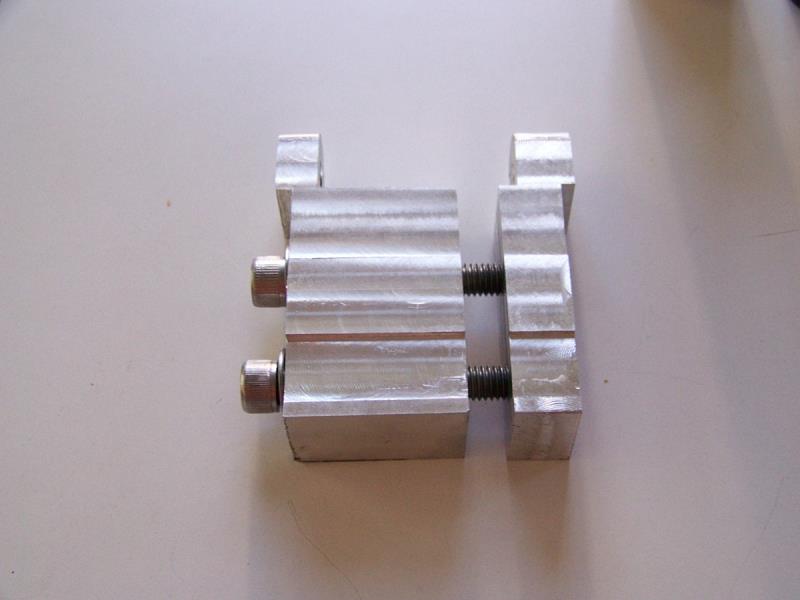
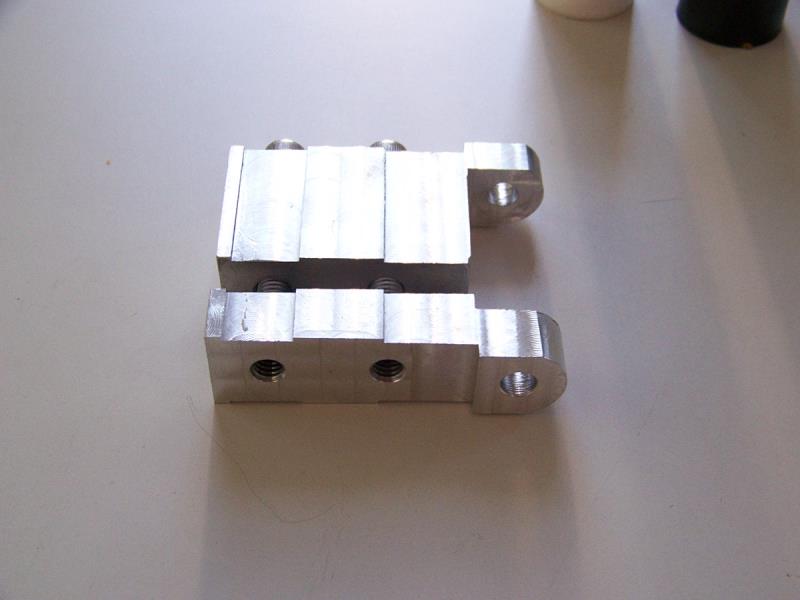
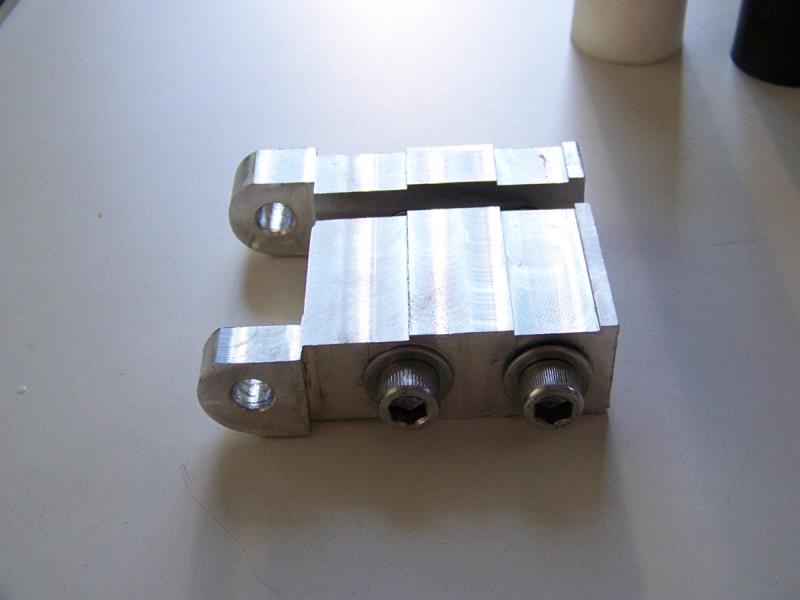
Some work today, removed the overflow tubes from the shafts, replaced them with bolts turned down on the ends, this stops the shafts from turning, had to thread the end stands for the bolts.
|
|
By Cliff - 8 Years Ago
|
All day working on the rockers, shafts polished checked and assembled.
|
|
By Cliff - 8 Years Ago
|
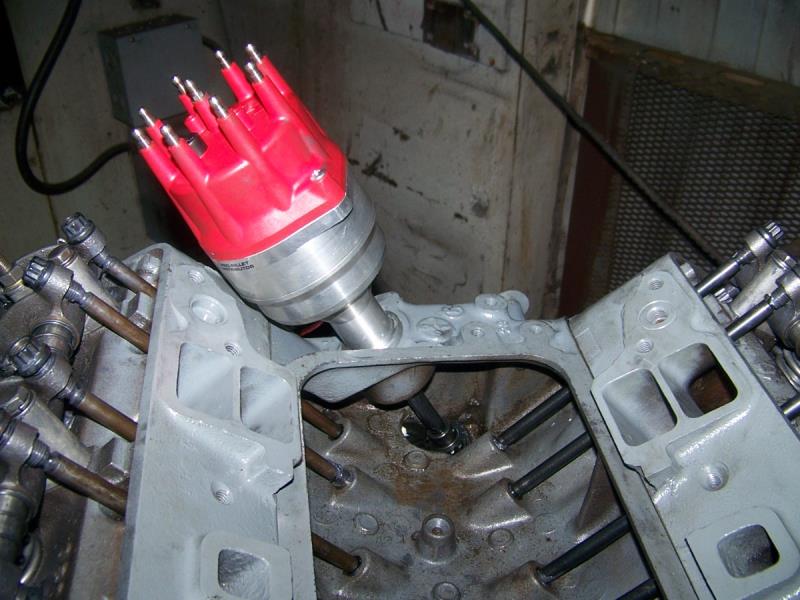 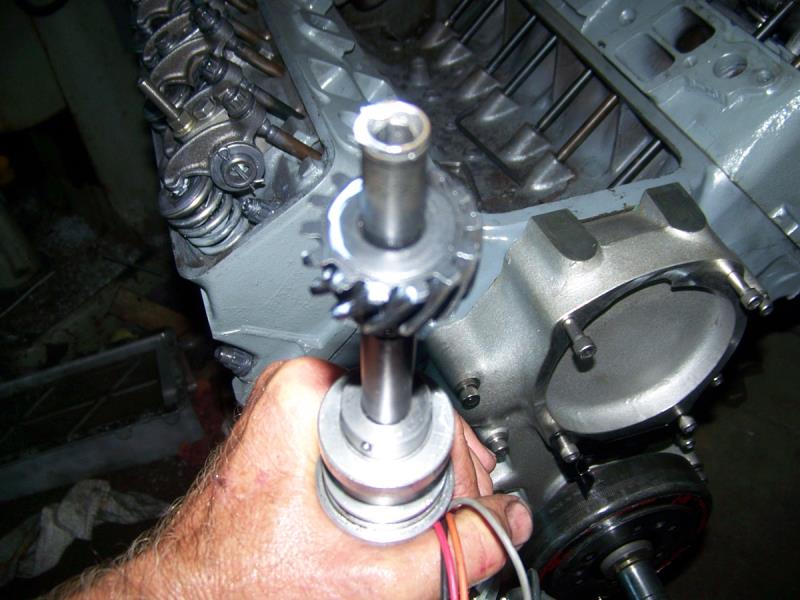
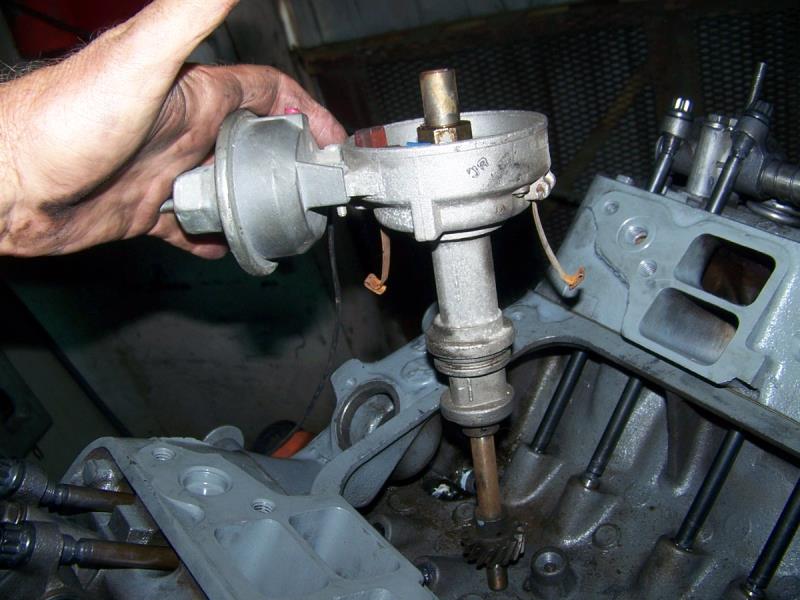
Ok more work done, long block about finished, there's my 8,000 RPM valve train (?), big problem with the distributor, the gear on the MSD will not ride on the machined surface on the block, so I tried an old Mallory, same problem, then I tried a Ford distributor no problem, I wonder how many people don't check this, Monday I will call MSD and see what they say. PS I know it looks like a dirty block, I scrubbed it to death


|
|
By Dave C - 8 Years Ago
|
Just an idea for you.. Machine a spacer that fits between the block and base o the distributor. I used to do that to adapt a 440 mopar distributor to a 383 type block. In fat mopar performance makes them. There is roughly 1/2 inch difference in the length of the distributors.
Even now when replacing my oil pump drive/distributor gear I have to check the length to ensure the drive isn't bottoming out in the oil pump gear.
Just an idea to keep you going without buying a bunch of different stuff..
Dave
|
|
By Cliff - 8 Years Ago
|
Good idea, but not for this one, the gear is about .020 high on the shaft, I ether need to slide down the gear and re pin (don't want to do that) or maybe an over size pin (drilled a little lower), or maybe there is a shim at the top of the shaft that I can replace with a thinner one, will know Monday.
Cliff
|
|
By Cliff - 8 Years Ago
|
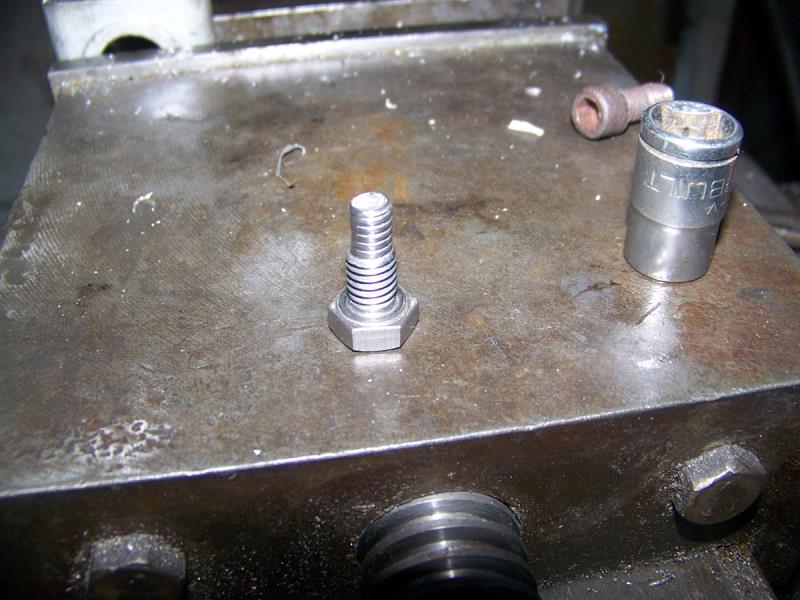
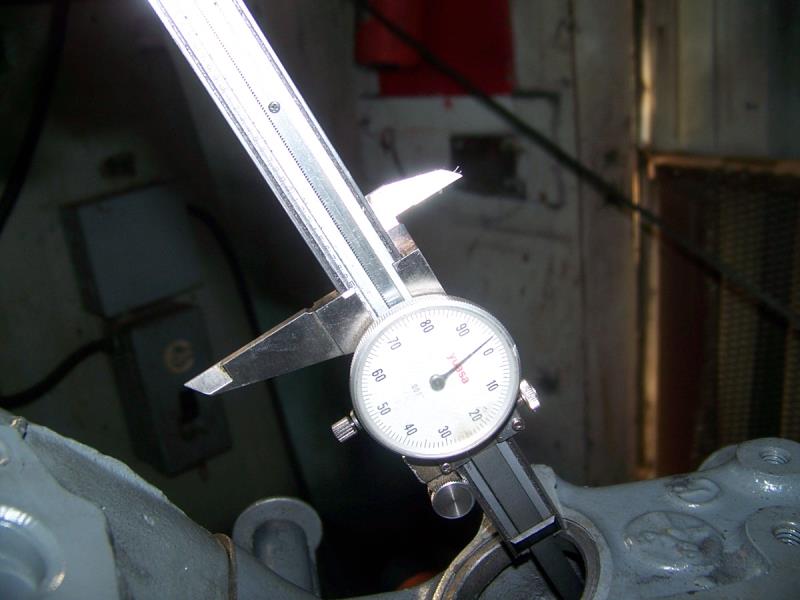
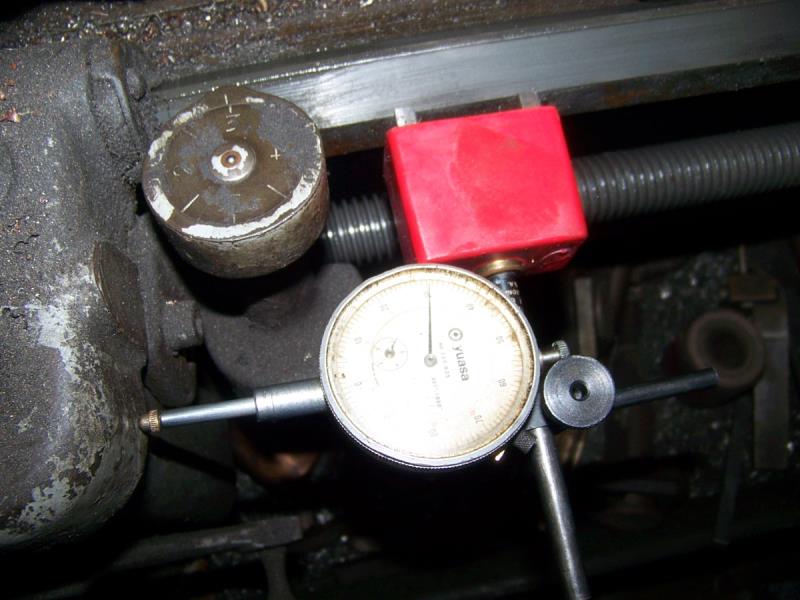
Here's the problem, Factory measures 4.944 MSD 4.885, this is with the shaft pushed up against the collar.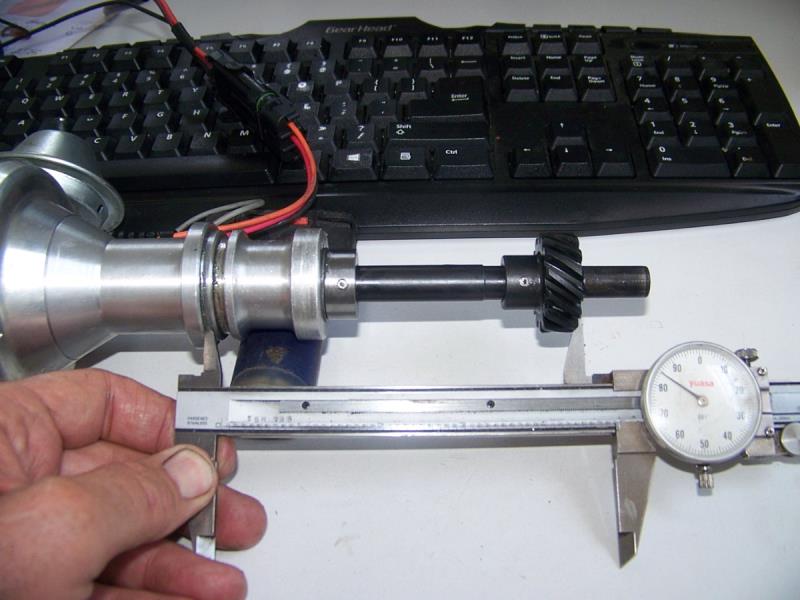 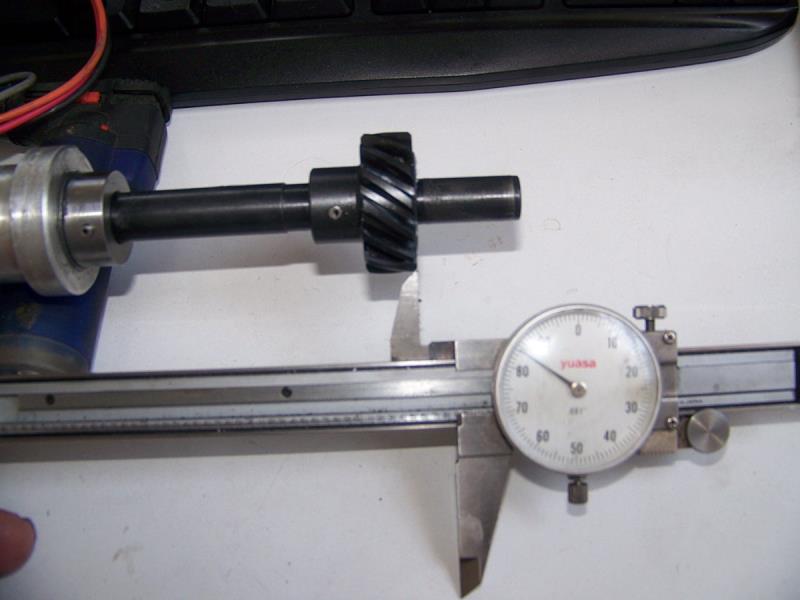 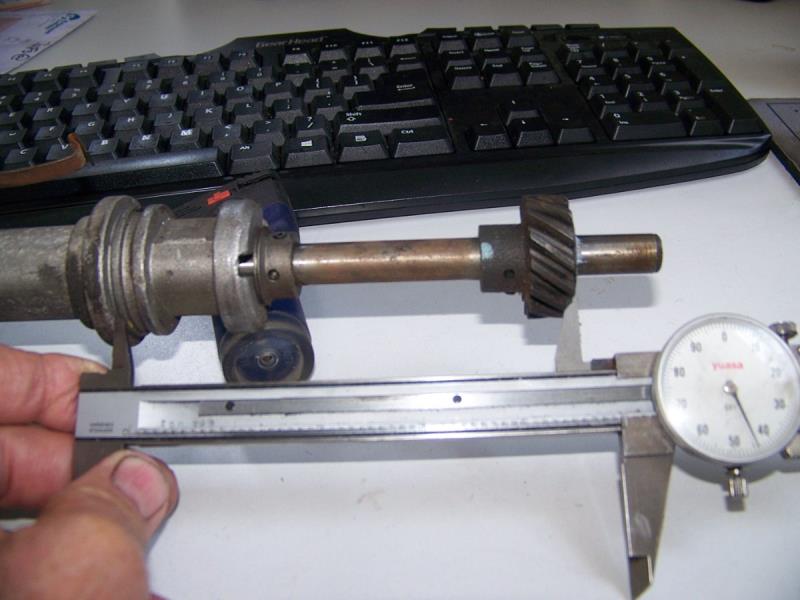 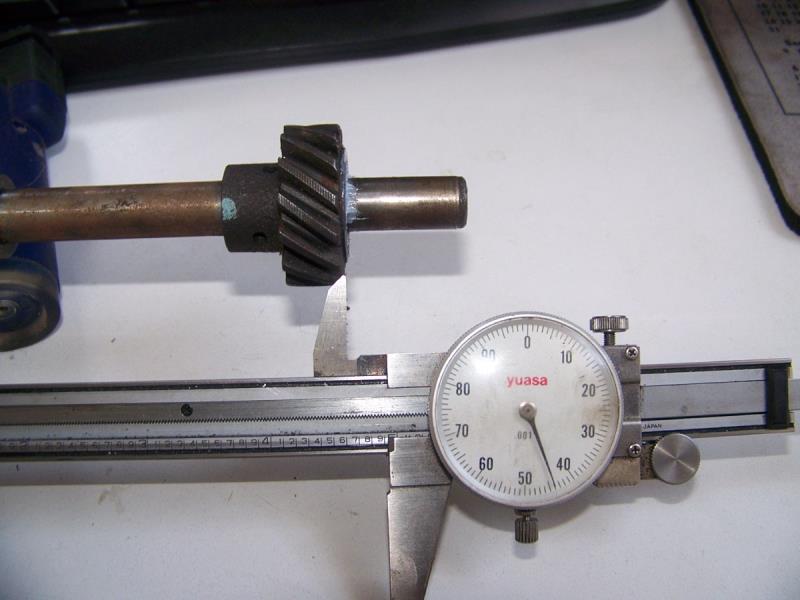
|
|
By Dave C - 8 Years Ago
|
Shoot, machine down the distributor where it sits in the block if all other measurements are correct.
Measurement from top of gear to block/distributor mounting surface, bottom of gear to end of shaft, Make sure oil pump drive isn't bottoming out inside distributor shaft.
Just touching on what I would look at.
Dave
|
|
By Cliff - 8 Years Ago
|
I think your right, Geoff Mummert says the same thing, however I think for the good of the whole I am talking to MSD about this, I have sent them pictures, it maybe all of our distributors are built wrong.
|
|
By Dave C - 8 Years Ago
|
I couldn't hurt to let MSD know there is an issue, and it wouldn't take anything for them to fix the problem.
Dave
|
|
By Cliff - 8 Years Ago
|
 Here is a copy of my E Mail to MSD Here is a copy of my E Mail to MSD
Hi Bass, those measurements are incorrect, that is the source of our problems, your measurement from the flange to the bottom of the gear should read 5.0 (+or-) your numbers of 4.905 - 4.895 is the problem, your numbers will not let the gear rest on the machined surface of the block, this causes cam gear problems, I am able to repair this, however I am bringing this to your attention so that you guys will look into and correct this problem
Thanks Cliff Murray
|
|
By charliemccraney - 8 Years Ago
|
The spec in my '61 shop manual says 4.991" - 4.996" with .022" - .030" end play.
It's interesting that this has not come up before, given how long the MSD distributor has been available.. I wonder why the Mallory is similar. Makes me think the aftermarket is getting an incorrect spec from a common source.
|
|
By john2747 - 8 Years Ago
|
Cliff ; Your numbers and the description of how the measurement is taken is not correct.1957 FORD SHOP MANUAL,on page 2-22 top left corner you will see a tach drive distributor that is in a fixture upside down,the distributor housing is locked in the fixture,there is a screw in the bottom of the fixture.This screw is tightened against the main shaft forcing it to the bottom of the housing.After all end play is removed the measurement from bottom of flange to the bottom of the pad on the gear is 4.991"to 4.996".You cannot take this measurement with a caliper with out having a straight edge clamped to the bottom of the gear pad. All y-block distributors have to be measured this way. Giving out the wrong information is worse than none at all. All this came up about 1 month ago.
john2747
|
|
By Ted - 8 Years Ago
|
Ditto on using a straight edge on the bottom of the gear when measuring distributor gear placement. The distributor gears being higher on the shaft than called for in the specification manual likely hasn’t come up before simply due to it not being a problem.
I’ll weigh into this as I typically check that the distributors and the oil pump drives are not in a bind when being installed. The distributor bind occurs when the fully compressed distributor shaft measurement exceeds the depth measurement for the distributor in the block. The oil pump drive is in a bind when the shaft is either too long or the receiving holes are too short. What this conversation brings up is the opposite in that the distributor gears are not resting on the machined boss in the block and are instead free floating above that boss. Joe Craine and I looked at this in detail yesterday while working on his engine and came to the conclusion that for optimizing the performance, the gear does not necessarily need to be riding on the machined boss in the block. There may actually be some horsepower to be had in not letting the gear drive itself into the block. Friction is the enemy here and any place where metal to metal contact can be eliminated, then there’s always the potential for some additional power gain. The question for me is how far up can the distributor gear be above the camshaft centerline before it actually becomes a problem?
I do find some variances in the various block distributor hole depths so distributor measurements are necessary to prevent the possibility of the distributor being in a binding situation when installed. That creates undue wear on the cam/distributor gears and in some cases, the oil pump rotors. The winning 2016 EMC engine had the MSD distributor sitting approximately 0.073” above the distributor pad when the shaft was fully extended down. The gear wear pattern is good and there was no wear other than the black oxide on the gear being rubbed off where it was running against the camshaft gear. The plan is to have this years’ EMC entry with the distributor gear not touching the boss in the block and the plan is to run the same distributor this year as was used on the 2016 entry.
Joe and I did go through some of the Y distributors sitting here in the shop and it was interesting on some of the measurements. Here are some of the distributor measurements with the shafts fully extended downward with feeler gauges being used to take up all the end play.
5.013” with 0.038” end play - 1957 Ford ball bearing advance distributor.
4.993” with 0.024” end play – 1962 Ford pivot advance distributor
4.995” with 0.020” end play – early Ford cast iron slotted distributor for HD truck engine
5.001” with 0.016” end play – Hunt electronic “Magneto look alike” distributor
4.990” with 0.028” end play – Mallory late model style
4.968” with 0.022” end play – Mallory point distributor new in the box
4.965” with 0.013” end play – Mallory model ZC
4.946” with 0.020” end play – Mallory model YCM
4.985” with 0.049” end play – Mallory model ZCM
4.968” with 0.068” end play – Mallory model ZC340B with tach drive
4.975” with 0.026” end play – Mallory model YD
4.935” with 0.025” end play – MSD 8383 recently installed in a 298” Y
4.940” with 0.025” end play – MSD 83831
4.927” with 0.026” end play – MSD 83831 used in the 2016 EMC entry
4.941” with 0.030” end play – MSD 83831 to be used in a fuel injected Y
In summary, any distributor with less than a 4.990-5.000” shaft measurement when the shaft is fully extended downwards is potentially going to have the gear free floating or not touching the machined boss in the block. Any distributor with more than 4.990” with all the end play taken up is going to be in a bind situation creating some gear wear issues.
It will be interesting to see what MSD does have to say about this. Any additional thoughts on the subject always welcome.
|
|
By Hoosier Hurricane - 8 Years Ago
|
|
Ted, here's my 2 cents worth. The helix on the cam and distributor gear will tend to drive the distributor gear down. If the gear does not contact the machined surface of the block, then the thrust will have to be absorbed by either the top of the upper distributor bushing (or the case itself) or the oil pump drive rod. I have seen distributor cases worn at the top of the bushing, but never realized why.
|
|
By Cliff - 8 Years Ago
|
Hi guys, my measurements were taken with the shaft pushed up tight against the housing (per MSD), the rough measurements shown in the photos were to get the best photo not the best measurement, the problem is the wear on the top ball bearing in the distributor, this bearing is made to run in a neutral setting (no load top or bottom), the cam gear puts a high load on that bearing if it is not supported by the block, and when the gear gets to high I see poor wear patterns (I don't know how high it can go before problems), I have seen metal shavings inside of the distributor caused by this, I currently know of a 460 Ford that just took out the cam gear because of this, My Opinion is the gear should rest on the machined surface of the block in the center of the shaft end play, however that's only me not any one else that I know of.
Cliff
PS haven't heard from MSD today
|
|
By john2747 - 8 Years Ago
|
Ted,I see from your efforts to measure 14 distributors only the three ford distributors and the Hunt distributor would have there gears making contact on the machined pad in the block.If the thrust from the gears is not controlled by the machined pad it would have to be controlled at the top of the shaft, ball bearing or needle bearing? It seems to me the MSD or mallory is not so premium if the gear position variance is .063". I have not seen any serious wear on the bottom of a factory ford distributor gear.There is a small oil gallery from the rear cam bearing that supplies oil to the shaft and gear. Maybe the MSD or mallory are tough enough to handle the thrust at the top bearing, but that would use up some horse power to, the ford's probably are not. On the ford racing site they state that the minimum clearance between the gear and pad [302 distributor] is .005" they don't give a maximum clearance it would depend on the total end play of the shaft.I don't disagree with anyone, just trying to get out the correct information.
john2747
|
|
By Ted - 8 Years Ago
|
Cliff. Thanks for sharing your findings. It does bring a potential problem to the forefront. This is lengthy so try to stay with me on this. I’ll try not to ramble.
Don’t take what I say as being okay with the distributor gears riding high. It’s the lesser of two evils when the other side of the coin has the distributor gear too low on the shaft which does create some extreme wear issues. To date, I’ve never seen a distributor gear or block wear issue with the distributor gear riding too high but have seen extreme wear problems when the distributor shaft is in a bind either from the gear being too low or the oil pump drive being too tight. The problem is that the distributor gear placement measurement is not looked at by the majority of people that simply stab the distributor in the hole and take it for granted that all is well. Whether by misinformation or by design, MSD has the Y distributor gears installed high on the shafts and they are simply not riding on the boss in the block. If they had gone with the original Ford Y spec, there would be some instances where the shaft would be in a bind simply due to block manufacturing variances.
Now that I’m talking block variances, I do run across Ford blocks where the distributor holes are shallower than stock. The factory obviously compensated for this with the original distributor installation and moved the gear upwards accordingly. Unfortunately when the distributor is replaced with one where the gear is located according to the repair manual specification, the shaft is in a bind and the distributor gear and/or camshaft gear wears out prematurely. In extreme cases, there is some galling going on at that lower distributor block boss. I’ve also seen the block galling on the FE blocks but without having the distributor that was in the block when the galling too place, it’s difficult to determine the exact cause for the wear.
My first instance with distributor gear placement was with a rebuilt 351W back in the Seventies that was continually wearing out the distributor gears. The original distributor was long gone and parts store distributors were being used. Once it was figured out that the block distributor cavity was too shallow, it was a simple matter in raising the gear. Since then, I’ve come across the same problem also with the 429/460 engines. One of the fixes simply involved making an aluminum washer to go under the distributor flange to raise the distributor rather than relocate the distributor gear higher. Pulling those gears off the shafts and relocating them can get dicey and especially where they’ve been off the shafts previously and already had new roll pin holes drilled in them. You only get so many tries at this before the shaft is weakened from the additional roll pin holes.
So that brings me to a 292 block currently sitting in the shop. The distributor hole on that block measures out at 4.975” rather than the desired 4.995-5.000”. That creates a problem with using a distributor where the distributor gear is installed at the factory dimension. Simply knowing the distributor hole depth in the block does allows me to insure that the distributor gear is at least not too low for that particular block.
For a stock application, I do prefer that the gear does rest ‘freely’ on the block boss but the end play in the distributor does force an exactness to the distributor gear location and not a lot of leeway for the shaft being in a bind versus the gear riding high. For an aftermarket distributor using bearings, then riding high for me is not a problem. Thrust bushings in a distributor does create some unwanted loading within the distributor which is better concentrated at the block instead which at least does at least have a constant supply of oil. Because the distributor shaft is end supported in the block, in my mind there’s no additional thrust load being imparted on the gear regardless of if the gear is at spec or riding slightly high.
I think the right answer to all this is for the gear to be resting on the blocks’ distributor pad while some distributor end play is still present. It will be interesting to see what the MSD response is.
|
|
By Cliff - 8 Years Ago
|
I agree 100% with Ted, we must remember we are dealing with 60 year old parts, I have noticed there are different lengths of oil pump drives, don't know why, maybe a running change? as far as MSD if the shaft was to long and the end play was large there would no problems, the cam gear would pull it down to the block, the upper movement does not matter (within reason, well maybe if the engine was run backward it would) LESSON check all things on all engines, I just put together a 428 Ford for my son, the intake valve pockets in the pistons were off about .030 who would think? how about all the drama in the rocker arms? how many timing sets are off ? I sent a block out to be bored and honed to match the pistons however he put the pistons in the order of a Small Block Ford (domes and valve pockets in wrong places) so matching the pistons to the bore was useless.
Cliff Murray
PS This is a good place to share ideas
|
|
By Cliff - 8 Years Ago
|
Bass at MSD has referred this to R&D, I think it's a way of putting me off and maybe I'll go away.
Cliff
PS https://performanceparts.ford.com/download/pdfs/DistributorGearInstallation.pdf
|
|
By Dave C - 8 Years Ago
|
An idea for Ted and Cliff for your performance builds.
Why not machine the gear or block for a thrust bearing. Eliminate the friction of the gear riding against a bushing or the block. We do this with our racing power glides.
Ray Barton built an oil pump for the hemi Stock/SS engines that had the oil pump drive gear supported on both ends by a bearing and a thrust bearing for the drive gear to run against.
It would be interesting if done for the Y.
It was expensive to buy but was an interesting piece, and showed out of the box thinking.
Unfortunately he has stopped producing them.
Dave
|
|
By Cliff - 8 Years Ago
|
Well a little more trouble, these heads have push rod tubes installed in the lower ports, 2 push rods rub on the tubes, so apart again
(I may try to rat tail file them on the engine)
|
|
By Hoosier Hurricane - 8 Years Ago
|
|
I thought of something else regarding the distributor gear/block juncture. Maybe I should stop thinking. Anyway, why would Ford spend the time and money to spot face the block and machine the bottom of the gear if they didn't intend for them to rub? Then they put the rocker arm drain tube back there to flood the area with lubricating, cooling oil. Have any of you guys who pressurize your rocker shafts noticed any distress in the block and on the gear? Jus' wonderin'.
|
|
By miker - 8 Years Ago
|
Good question. I’m still running the original 55 tach drive dist. in my 55 bird. It’s been rebuilt, probably 8000 or so miles ago. I had a lifter failure (#1 exhaust, head fractured into 3 pieces. Took out the cam, no wear on any other lobe or lifter. I think it was a fluke). We went over the engine real close before a complete rebuild, and there was no sign of galling on that surfaces. All those miles were with either a set of Mummert’s ported 113 heads or the aluminum ones, both using pressurized rockers. Just a drilled orifice no factory tubes.
The distributor is locked out, the computer controls the timing, before someone jumps on me.
|
|
By Cliff - 8 Years Ago
|
Hi, working all morning, I've been running a reamer through the sleeved push rod tube to get enough clearance for the push rod, been doing it by hand, I don't want to break through the sleeve, the mill would have been quick but if I went through big problem, I taking a break for a soda, here's the 428 I just built for my son, it's going into a 1957 Fairlane 500 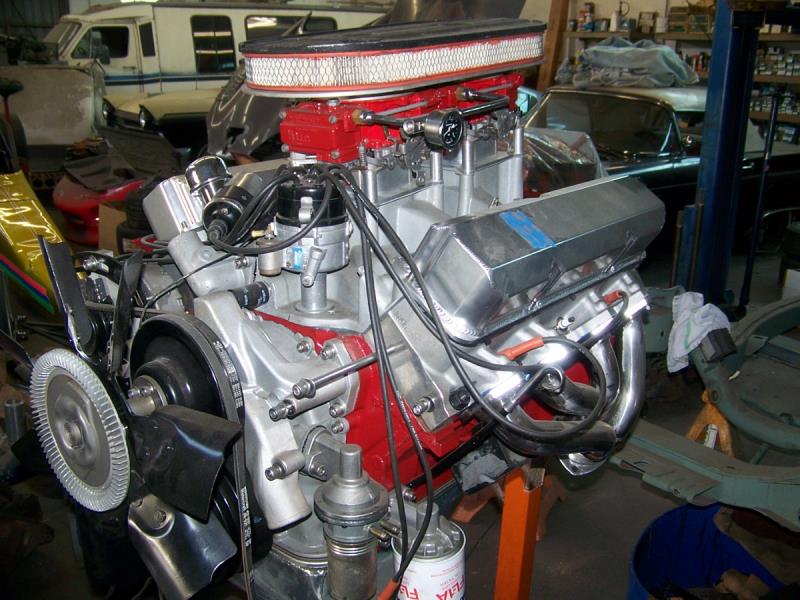
|
|
By Cliff - 8 Years Ago
|
|
Going home, worked like a horse, push rods still rub, grind and check over and over all morning.
|
|
By Shaggy - 8 Years Ago
|
Cliff (7/21/2018)
Hi, working all morning, I've been running a reamer through the sleeved push rod tube to get enough clearance for the push rod, been doing it by hand, I don't want to break through the sleeve, the mill would have been quick but if I went through big problem, I taking a break for a soda, here's the 428 I just built for my son, it's going into a 1957 Fairlane 500
What's with the trim on the engine vs the choice of distributor? I mean i run a lot of those mallorys but i would never dream of doing it on a motor running those valve covers. I cant imagine that is the best distributor for a modern dressed engine like that
|
|
By Cliff - 8 Years Ago
|
Well I have others, I may use a billet Mallory distributor that I have, this engine is 11-1 (a real 11-1) cast piston, stock crank and rods .060 over, the good stuff is the heads
(speed master), these heads were a lot better than I expected, I bought them bare, when I checked the valve seats they were perfect, check the guides they were perfect, when I CCd the heads I had to cut one more than the other (about .013) the even up the chambers, 30deg intake seats, 45deg exhaust (Ferrea Valves), Isky springs and retainers (8005), the cam is a Howards Mech flat tappet, the Intake is a real Holman an Moody 2x4, 2 600 Holleys, all good parts in this engine, this is a street engine, I like the the old and the new mixed up.
|
|
By Cliff - 8 Years Ago
|
After a lot of work today I had to remove one of the push rod tubes, and maybe one more, just to thick, I also see the head studs breaking through all the intake ports, I think I will make a half moon patch out of very thin stainless steel held in with JB Weld (push rod tubes), I also am of a mind to grind the intake ports and let the head studs show, I don't think the small amount of air transferring between the ports (top port to bottom port) will do anything, I couldn't get good pictures of the problems, funny thing, no problem with the head bolt holes on the bench, only after they were installed on the engine did they start to crack and show, I reached in with my finger nail and broke out a small piece of the port.
PS I guess sometimes you eat the bear and sometimes the bear eats you.
|
|
By Cliff - 8 Years Ago
|
Well the distributor now fits, the end play of the MSD is .030, when it's installed in the block it's .025, this took two .030 cuts and one .015 cut (finish cut) to achieve this, the distributor now has end play when installed (.025 up .005 down), MSD seems to not care about this problem (too bad).


|
|
By Cliff - 8 Years Ago
|
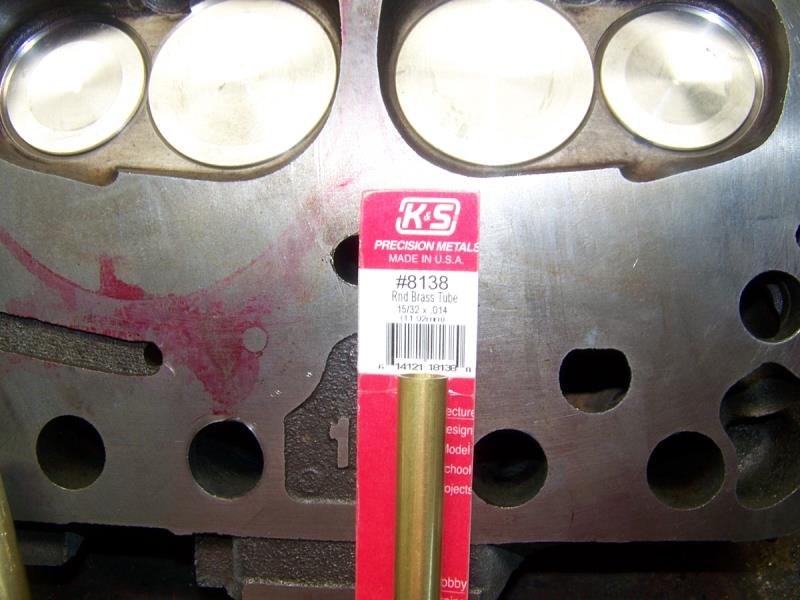
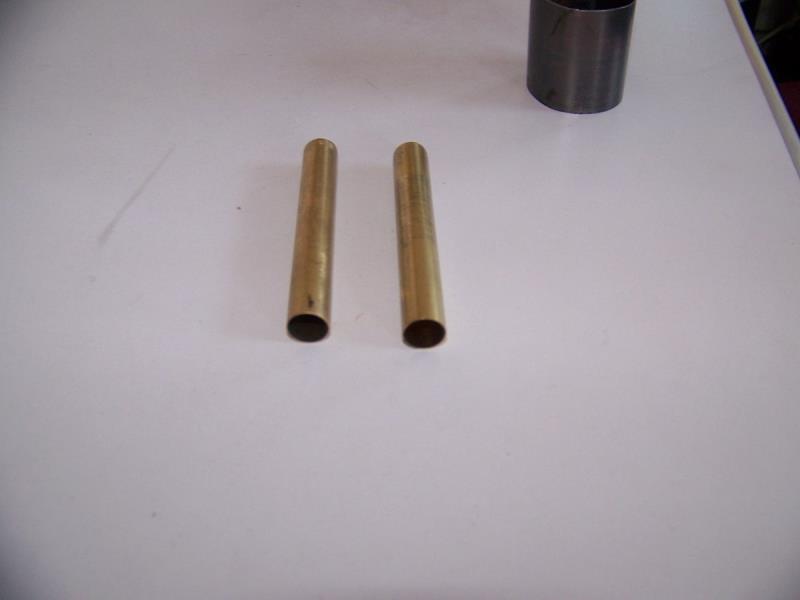
Hi guys, still working today, here's the head bolt sleeves, this material was hard to find, they need to be 3.250 long, they fit (tight) with no reaming needed.
|
|
By Cliff - 8 Years Ago
|
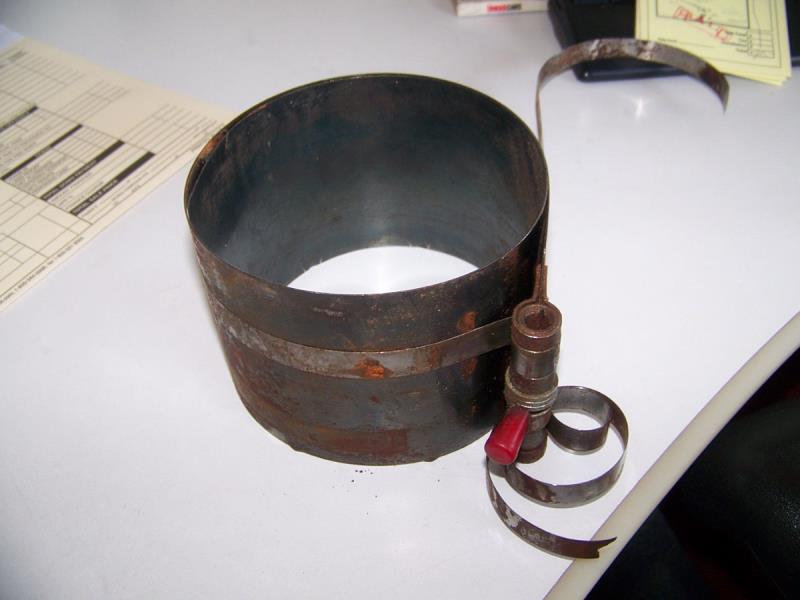
Here's the material I'm using for the push rod tubes, I tried to form this by hand (to hard), Monday I will make a tool and form it on the lathe.
|
|
By Cliff - 8 Years Ago
|
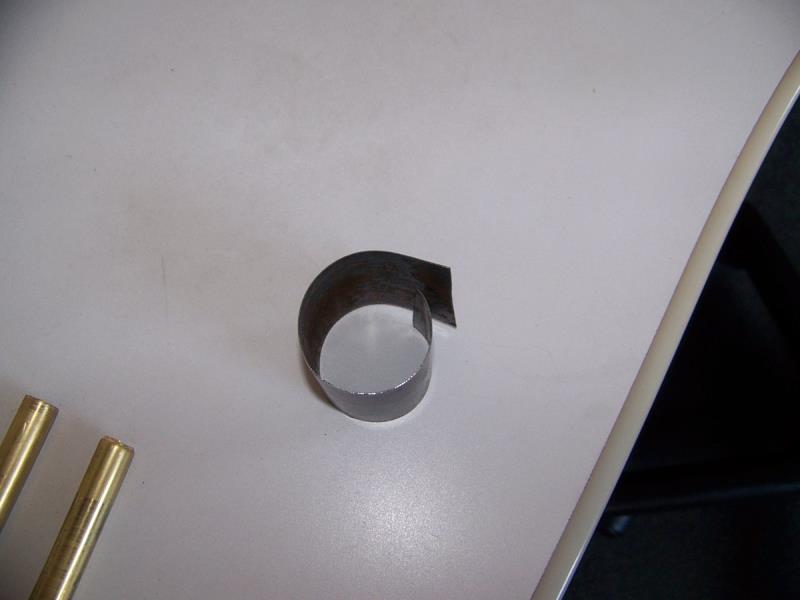
Ok, here's the sleeves for the head bolt holes, they had to be tapped in, only the ends needed to be dressed, heads fit over the studs with no problem, also this is the push rod 1/2 moon sleeve, I wound it on the lathe then cut it to length, glued it with JB Weld.
|
|
By Cliff - 8 Years Ago
|
Installed and spot faced.

|
|
By Cliff - 8 Years Ago
|
No photos today, time for final assembly, am checking all clearances 1 more time ( piston to head, push rods rubbing), so far all's good (I hope), next is the intake manifold (Lexan) have worked out
the nozzle placement (a lot of thought), will run a lot more pressure than most people and smaller nozzles, this helps the fuel to atomize better (raw fuel not running down the side of the port), going to Hawaii next week (!!!), no more work for a bit, will go to the swap meet in Hawaii (parts? well maybe a shirt),
|
|
By Hoosier Hurricane - 8 Years Ago
|
|
Cliff, are you sure you want to go to Hawaii with the Hurricane bearing down on it?
|
|
By Cliff - 8 Years Ago
|
I paid for the trip last year so I'm going, how did you get those big rear tires under you car, my son is putting together a 1957 Fairlane 500 with a 428 that I built and it's about time to pick the wheels and tires.
|
|
By Hoosier Hurricane - 8 Years Ago
|
Cliff:
I guess, since the car can no longer run NHRA stock class, I can tell how I did it. I had noticed how the inner wheel well leaned in a lot from the 1/4 panel, making the fit tight on the outside of the tread at the top. I cut the outer part of the inner fender along the outside of the seam where the inner and outer panels were joined. I separated the panel from the 1/4 panel, and fitted the inner half of a '56 inner fender in place, using the rh '56 panel on the left side and vice versa. That placed the weld on the outside of the original seam and invisible from the trunk A little undercoat hid the underside of the weld. This made the outer wall of the inner fender vertical instead of leaning in. The entire 1/4 panel and inner wheelhouse was then jacked out a little along the wheel opening. The inner flange junction to the trunk floor was hammered in flush with the frame rail. The springs were moved inboard a little too. It would be much simpler to just tub one now. Neither NHRA nor IHRA ever caught my modifications. The wheels are 10 x 15 with 6" backspace. Tires are Phoenix 10.5 x 29.5 x 15. Goodyear and Hoosier tires won't fit, the sidewalls are too wide. Clearance to the spring, frame, and outer panel are each no more than 1/2". Four link suspension keeps the axle from shifting side to side.
|
|
By Cliff - 8 Years Ago
|
|
Thanks John, I will pass this on to my son.
|
|
By NoShortcuts - 8 Years Ago
|
JOHN ! ! ! Has the statute of limitations expired on what you have shared with us OR will somebody be contacting you to repossess some of your trophies?
E-mail writings can be misleading. Know that I've been sitting here laughing after reading what you shared before I made the time to write back. I love this Internet Forum because of the great individuals who so generously share their expertise, knowledge, experiences, creativity, ingenuity, and hard-knocks with others.
Best Wishes, always!
Charlie Brown
|
|
By miker - 8 Years Ago
|
|
Love the story, John. The way racing was done in the day.
|
|
By Hoosier Hurricane - 8 Years Ago
|
|
I forgot to mention that I rolled the inner edge of the wheel opening so there was no sharp edge in case the tire sidewall touched it. I did all that to try to stay even with the Camaros in my class. With their radiused wheel openings, all they had to do was raise the rear slightly to get 10 inch tires on. 8 inch was about all I could get in my stock wheel wells. All was equal when NHRA had their 7 inch tire rule, but when things changed to "any size tire that fit within the wheel well", I was at a disadvantage (temporarily). Also, the spring shift amounted to moving the perches on the axle in about 1/2 inch and crowding the springs inboard there and on their shackle bushings.
|
|
By Cliff - 8 Years Ago
|
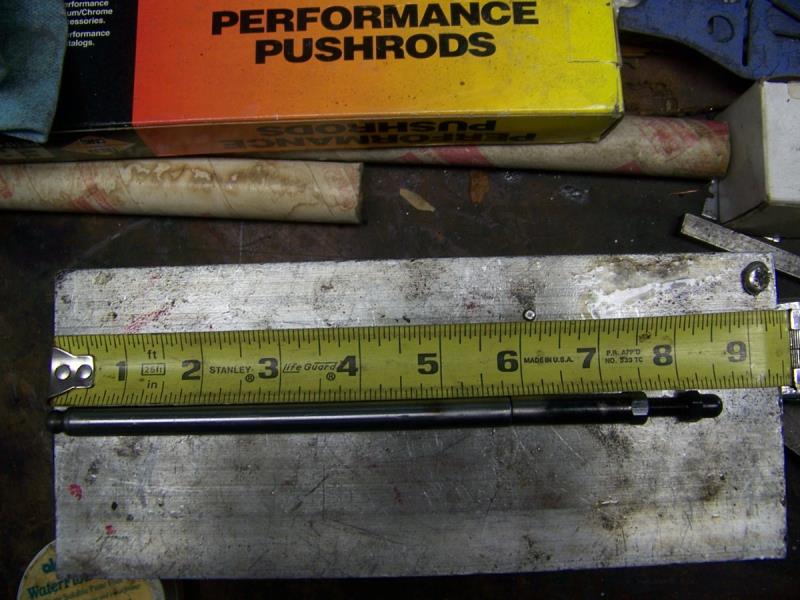
A little more, I bought 5/16 push rods, no more clearance problems, these are 8.500 long (.070 longer) 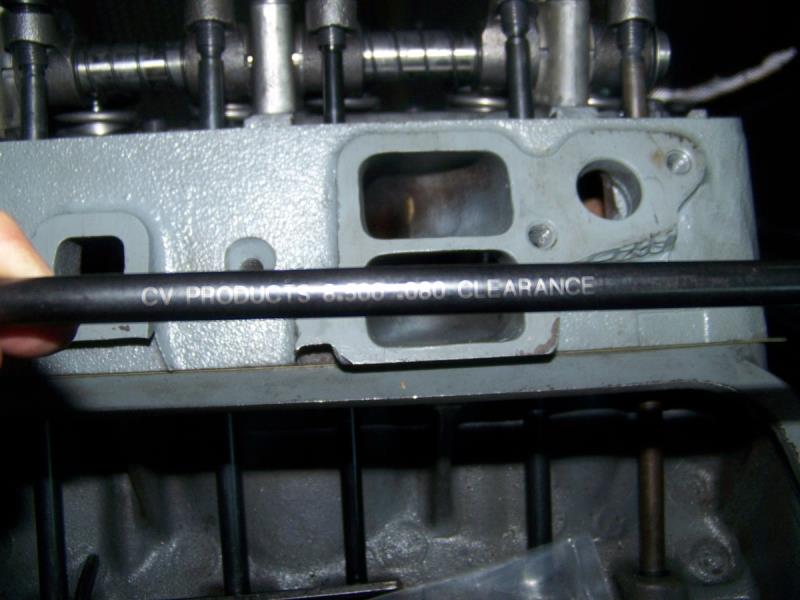 longer) longer)
|
|
By Cliff - 8 Years Ago
|
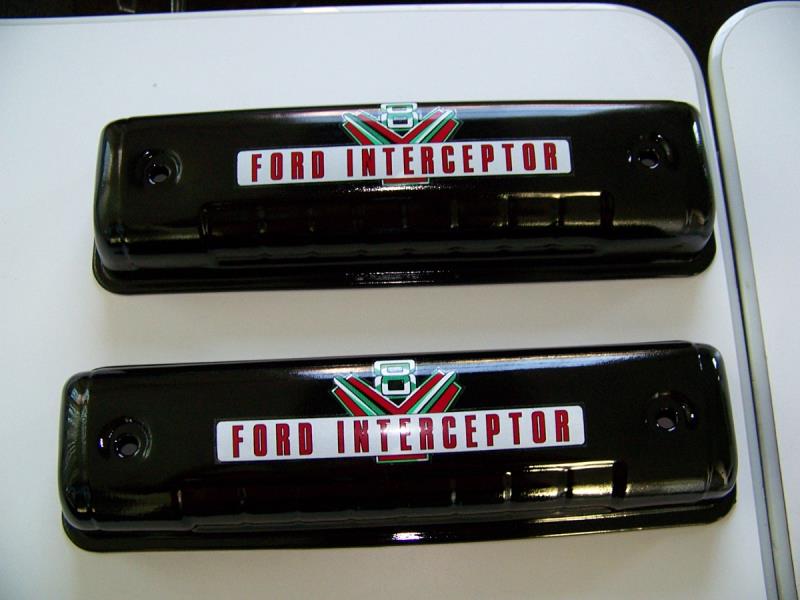
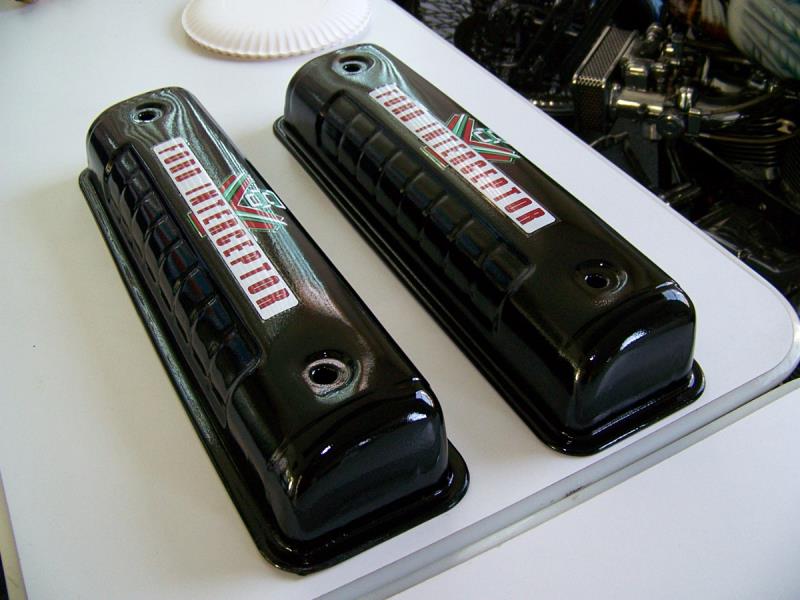
Back working, cleaned the valve covers, bead blasted them, I cut the rails 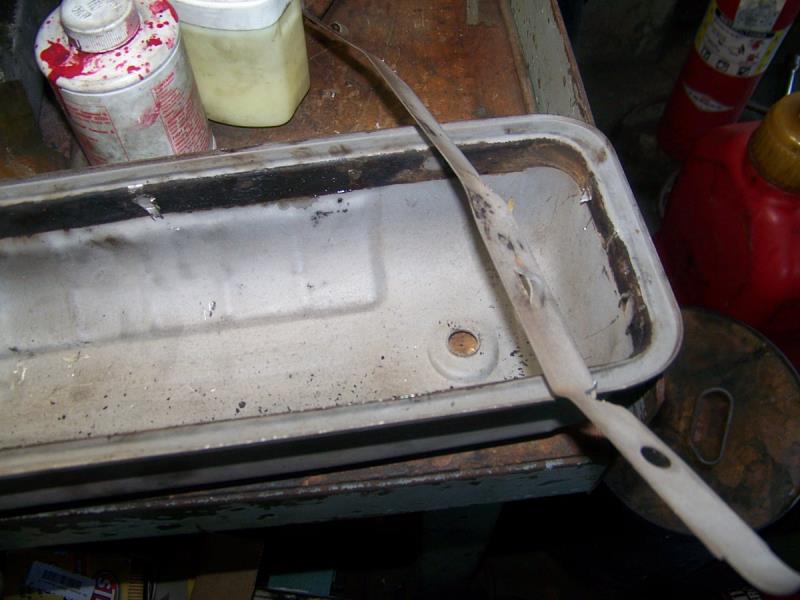 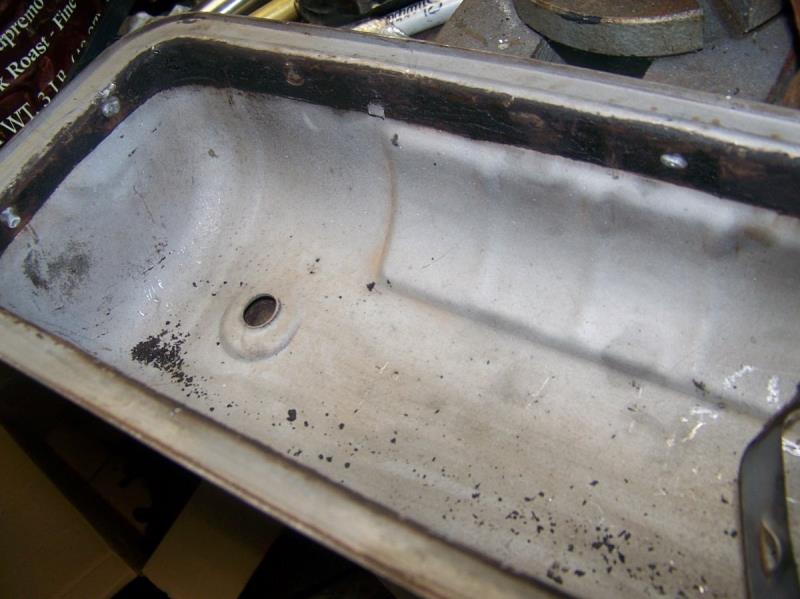 out of them and found a lot of crap, so look good at your parts, a lot of dirt was under those rails out of them and found a lot of crap, so look good at your parts, a lot of dirt was under those rails
|
|
By Cliff - 8 Years Ago
|
Sleeves added to second head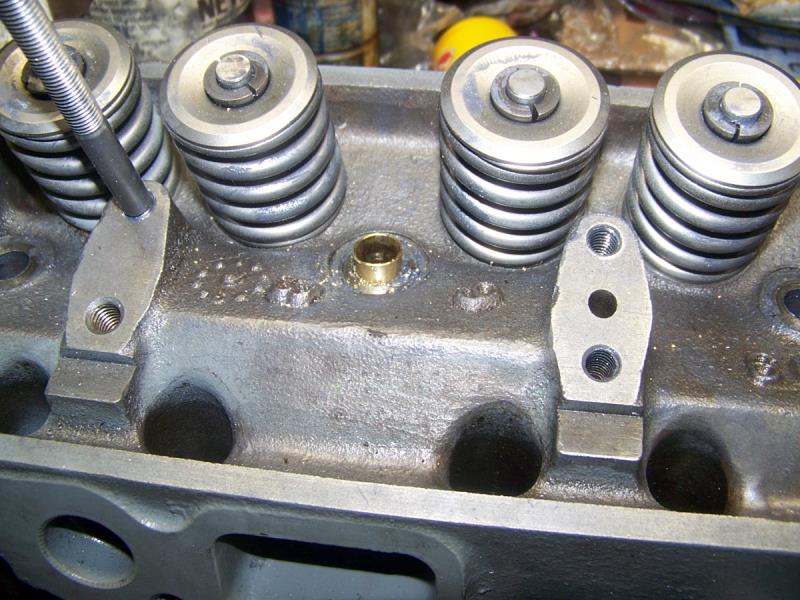 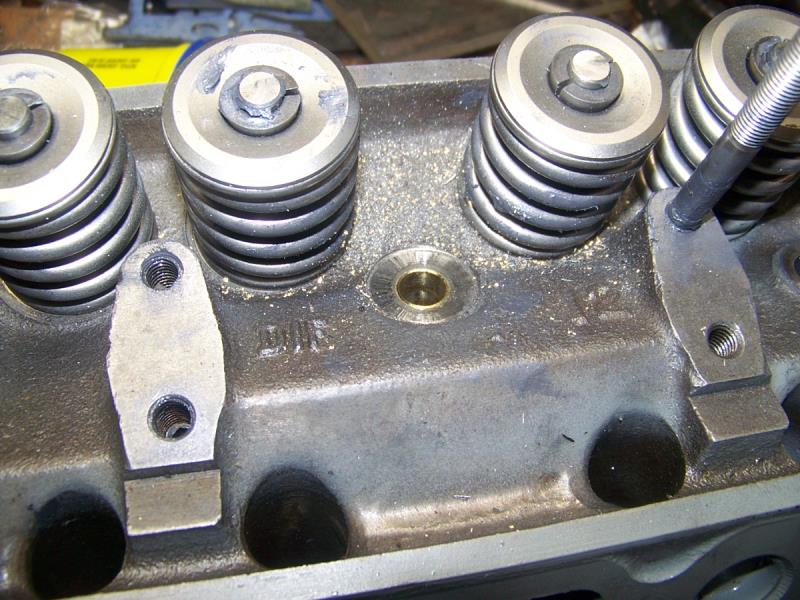
|
|
By Cliff - 8 Years Ago
|
Burning the night oil tonight, after all the work I did, I CCd the chambers one more time, 5= 72, 2=73, 1=74 it's going together for the last time, new push rods solved the clearance problems, piston to valve good, valve to block good, now for the bracket making, front motor plate, alternator bracket, fuel pump bracket, water pump cover, valley pan, rear motor plate, adapter Ford to powerglide, mount starter (?) and clean up the mess. 
|
|
By Cliff - 8 Years Ago
|
Here's where I ended up today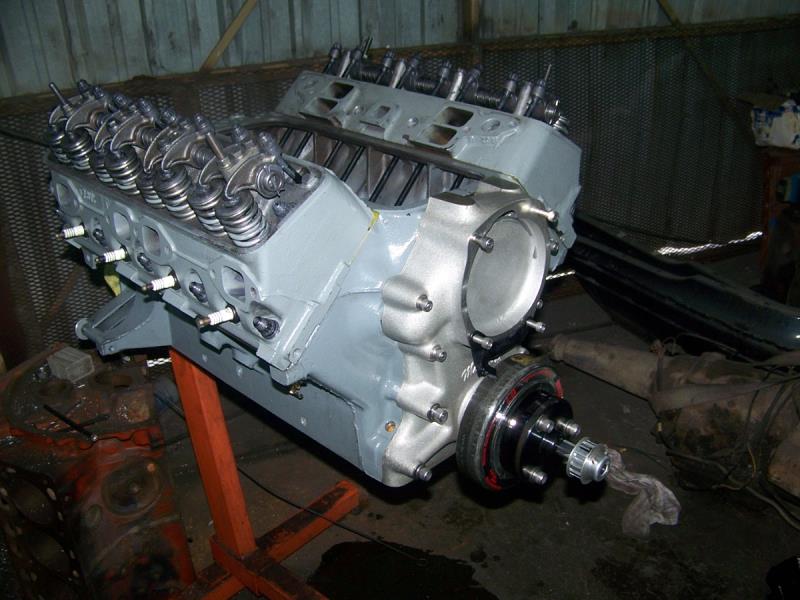 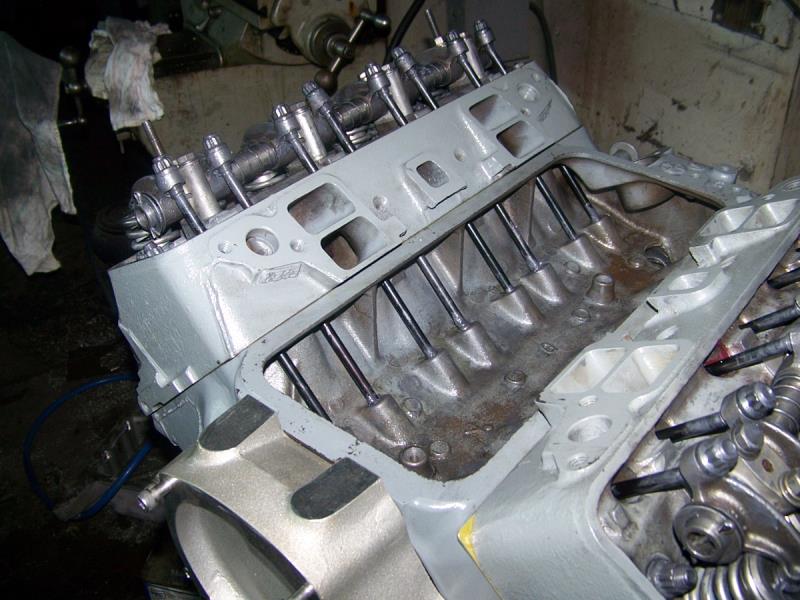 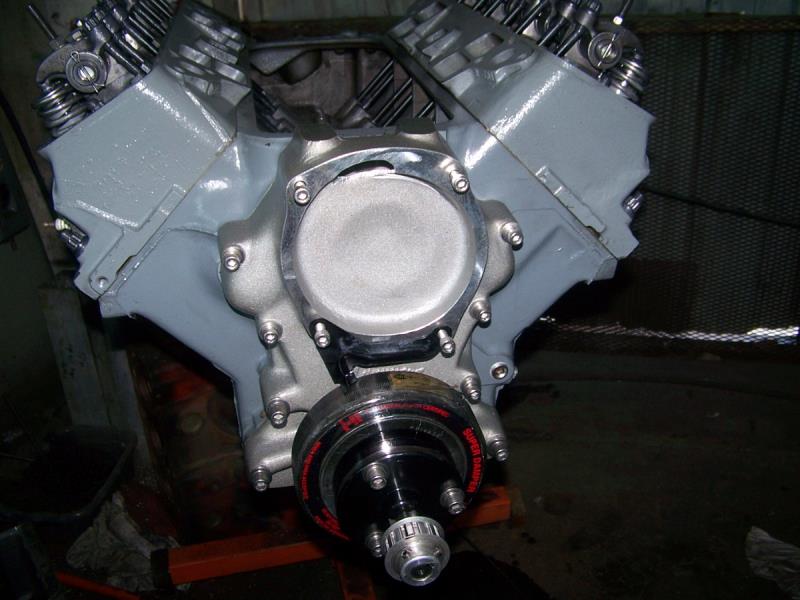
|
|
By Cliff - 8 Years Ago
|
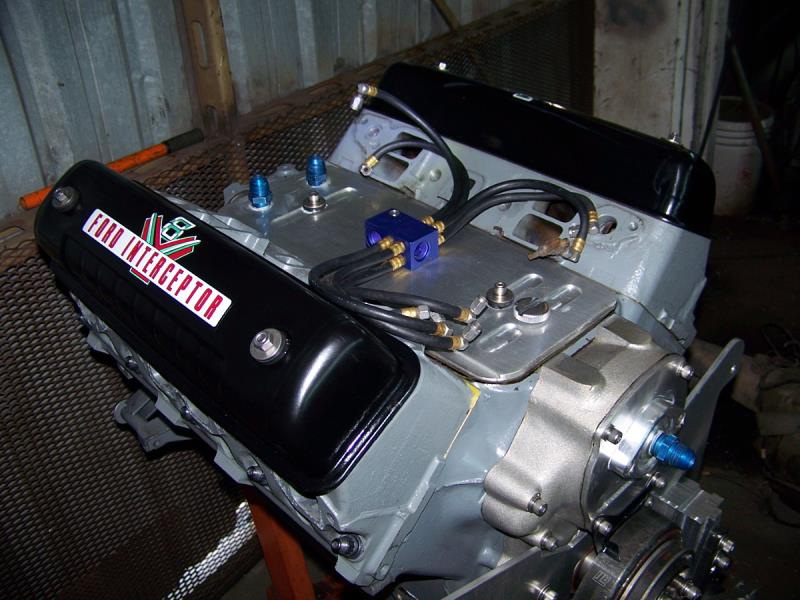
Valve covers done
|
|
By Cliff - 8 Years Ago
|
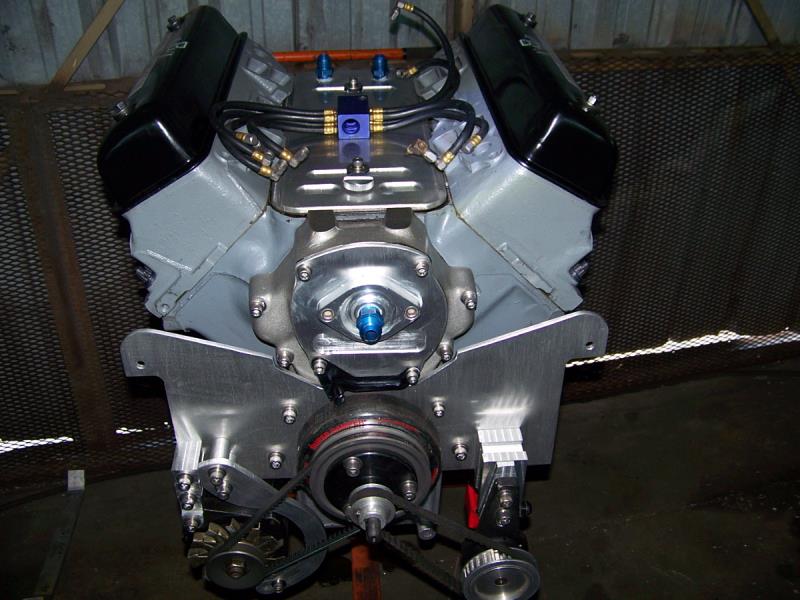
More work today, oil pump, valve covers, oil pump drive (made from a FE pump drive), oil filter and adapter, distributor, installed
|
|
By Cliff - 8 Years Ago
|
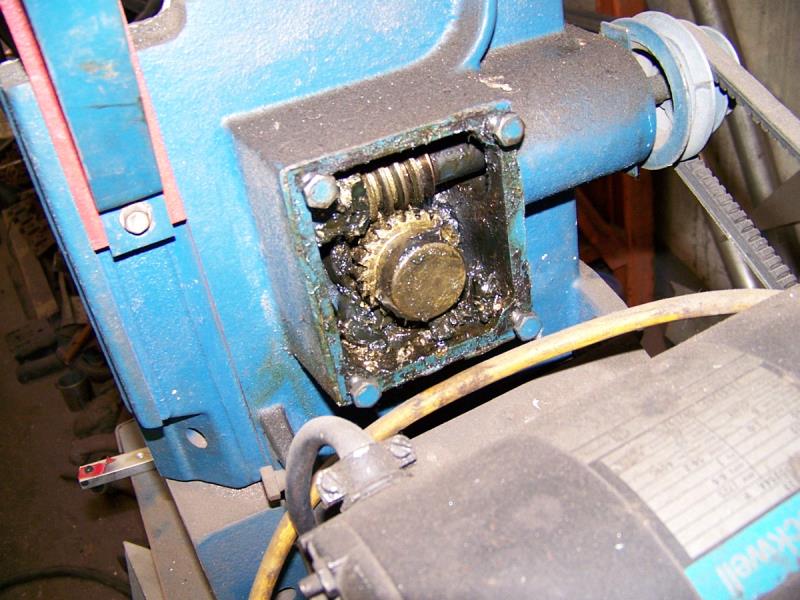
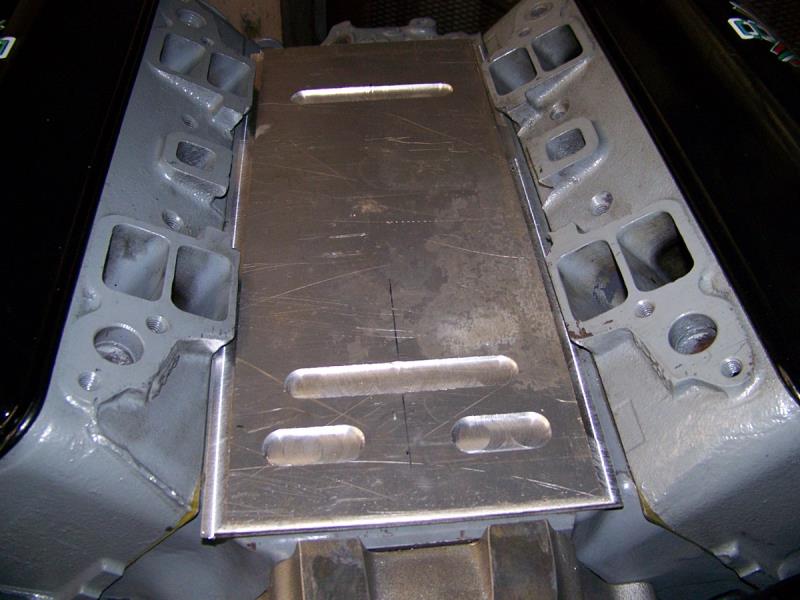
Making parts today, however the band saw broke, so I'm doing it the hard way, water pump plate and valley cover.
|
|
By Cliff - 8 Years Ago
|
Finished for the day, both parts rough cut

|
|
By LordMrFord - 8 Years Ago
|
|
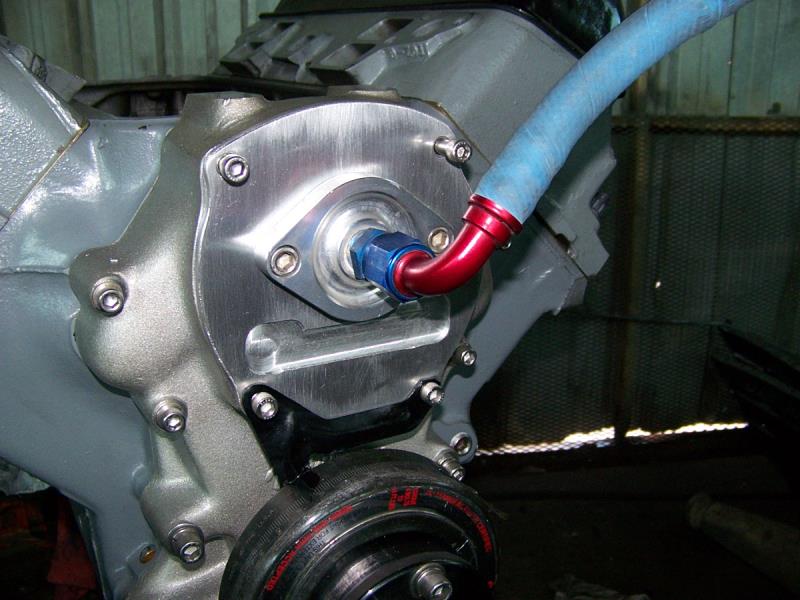
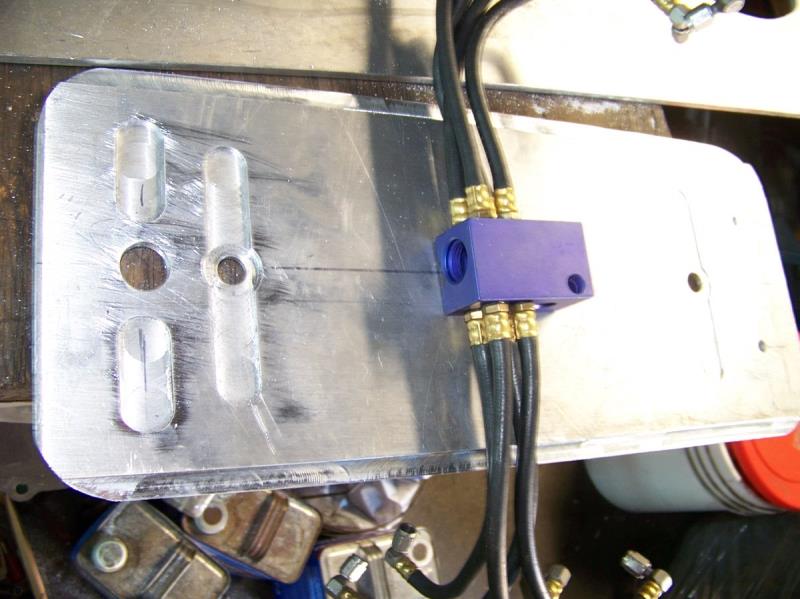
Electric water pump?
|
|
By Cliff - 8 Years Ago
|
|
Yes, a remote pump
|
|
By Cliff - 8 Years Ago
|
More work to night
|
|
By MoonShadow - 8 Years Ago
|
|
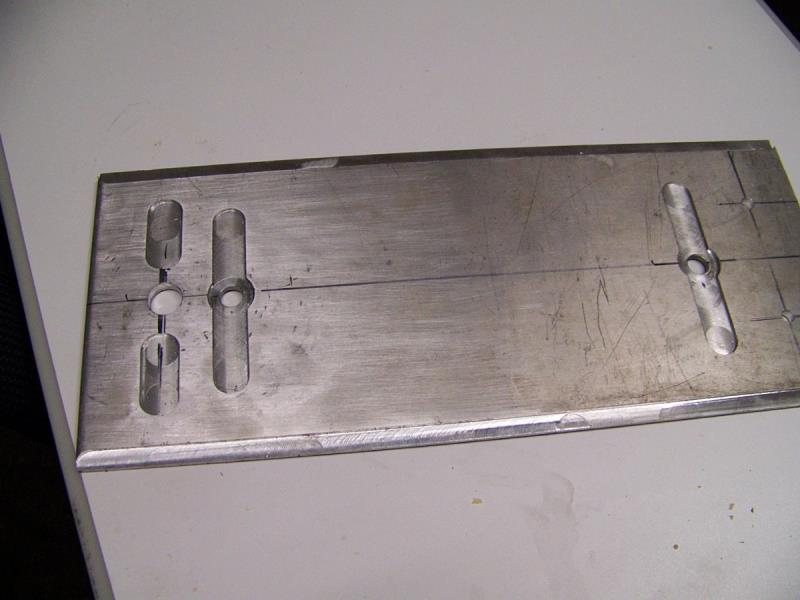
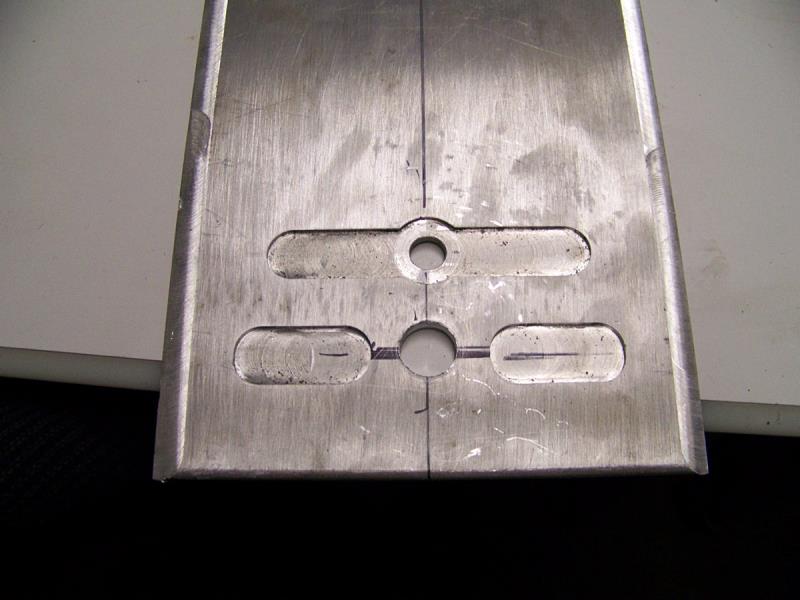
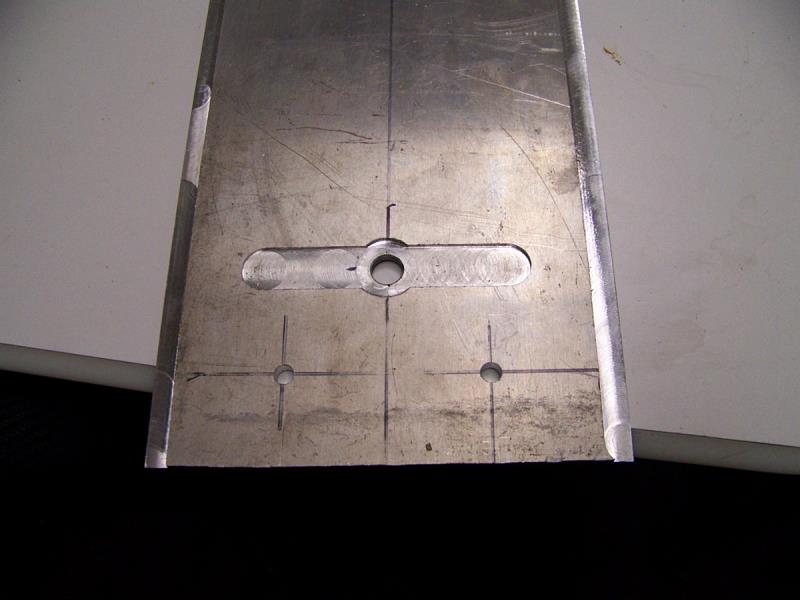
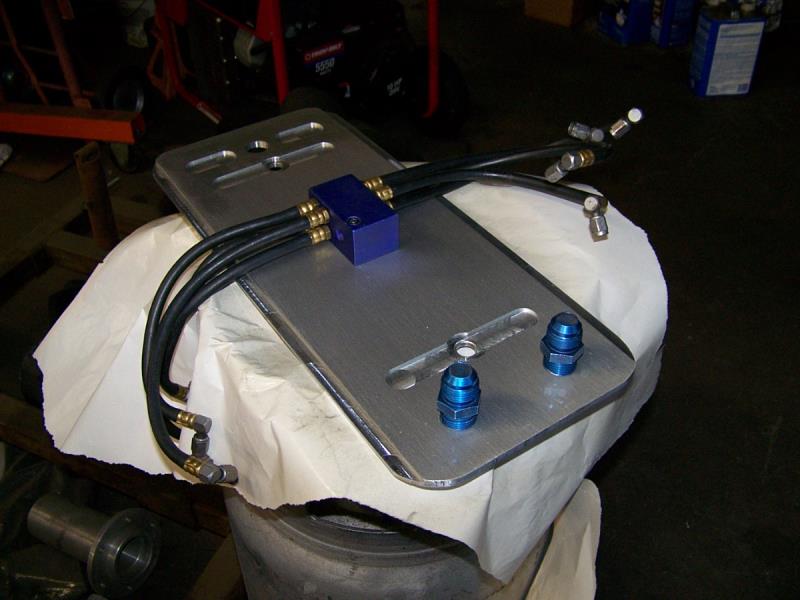
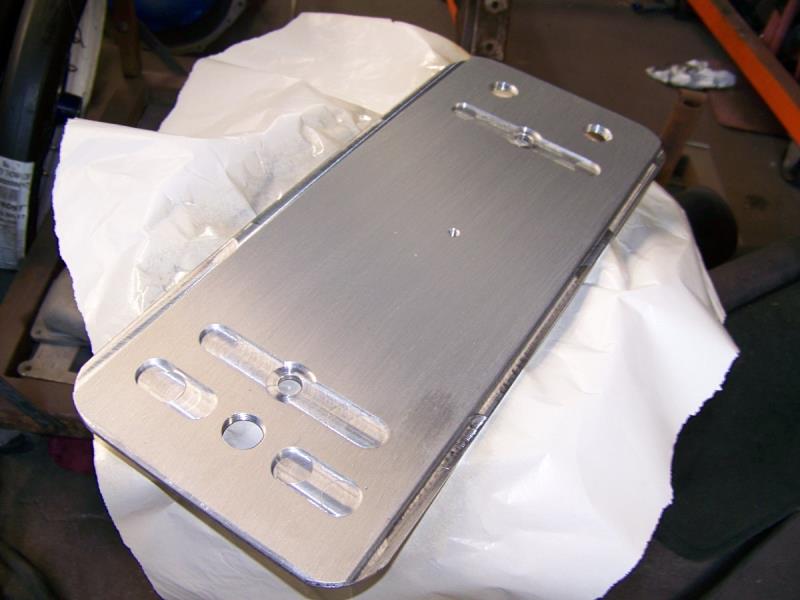
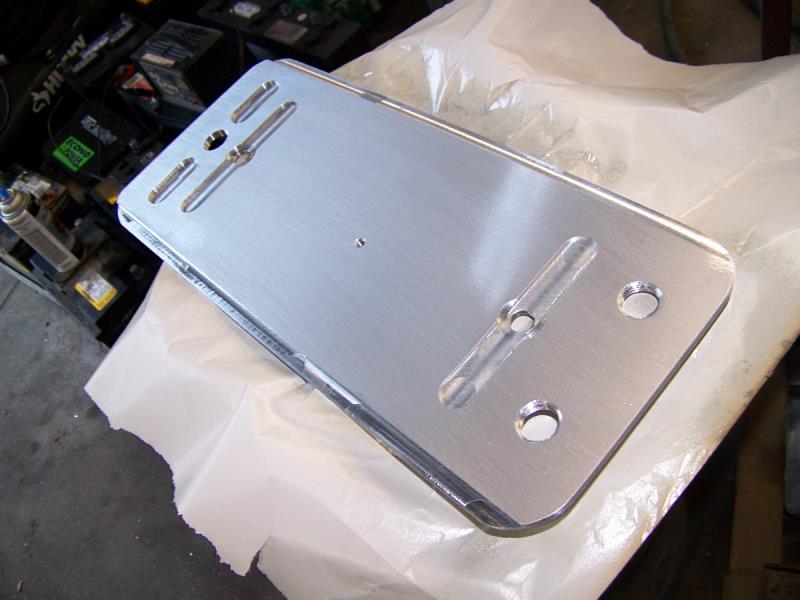
Got to ask, what are the machined slots for?
|
|
By Cliff - 8 Years Ago
|
|
So it doesn't look like a flat plate when it's done (lipstick)
|
|
By MoonShadow - 8 Years Ago
|
|
Oh, purty stuff. That works.
|
|
By Dave C - 8 Years Ago
|
Cliff,
Gotta ask. Where you getting the prints for the Y block to glide adapter?
I'm wanting to put a 700R4 in mine, which would be the same except for flex plate.
Dave
|
|
By Cliff - 8 Years Ago
|
|
I got the pattern from Ted Eaton, however you can buy the complete setup from Wilcap Co. Pismo Beach, CA http://www.wilcap.com/wilcapstore.html#!/312-350-AT/p/54397298/category=14420225
|
|
By Dave C - 8 Years Ago
|
Yeah. I know about the Wilcap adapter. But I'm like you. Why buy when I can make it myself.
I gotta go to Teds at some point, so I'll ask him about it then.
Thanks
Dave
|
|
By Cliff - 8 Years Ago
|
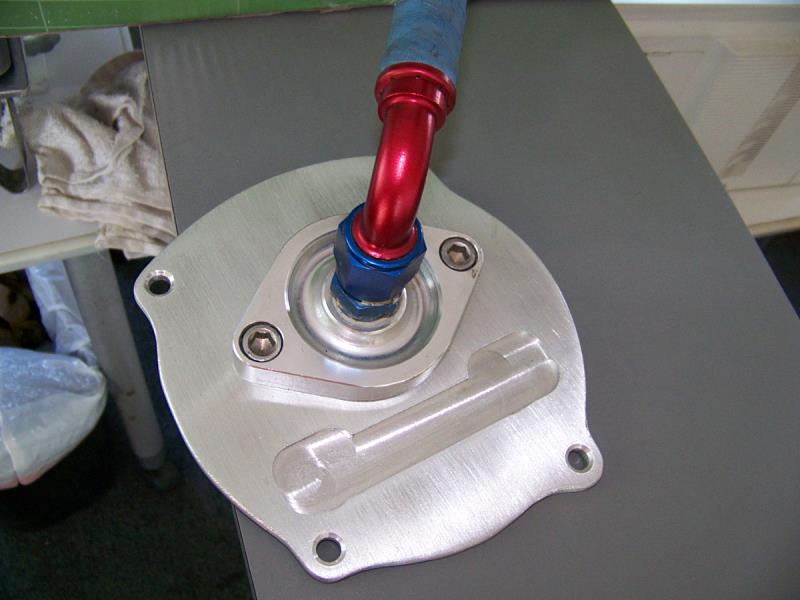
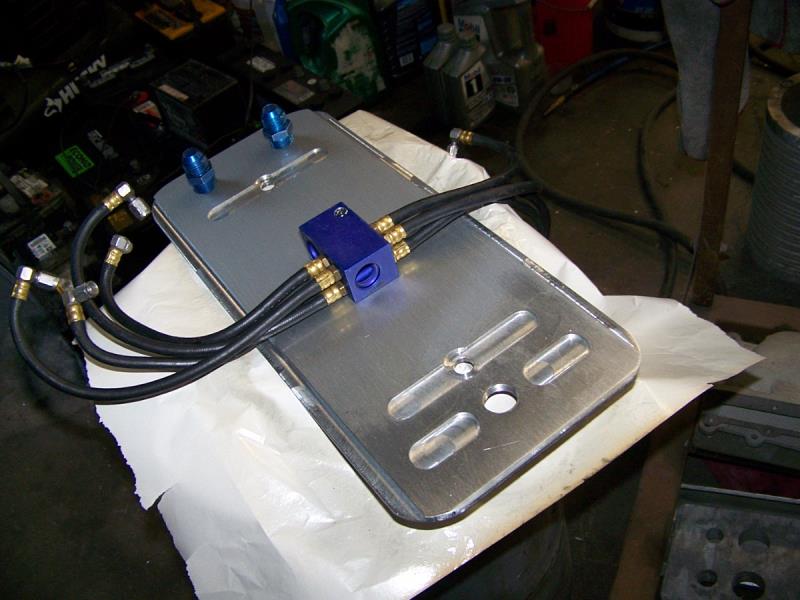
Water pump plate finished
|
|
By MoonShadow - 8 Years Ago
|
|
I haven't tried any of those push on lines. Are they good?
|
|
By charliemccraney - 8 Years Ago
|
Nice work.
|
|
By Cliff - 8 Years Ago
|
Yes their good, those are Teflon hoses, I had to finish that part with a set of files, and a sanding block with 80 grit paper, the shape would not work with any of my machines.
(Thanks Charlie)
|
|
By Cliff - 8 Years Ago
|
Some more work tonight.
|
|
By Cliff - 8 Years Ago
|
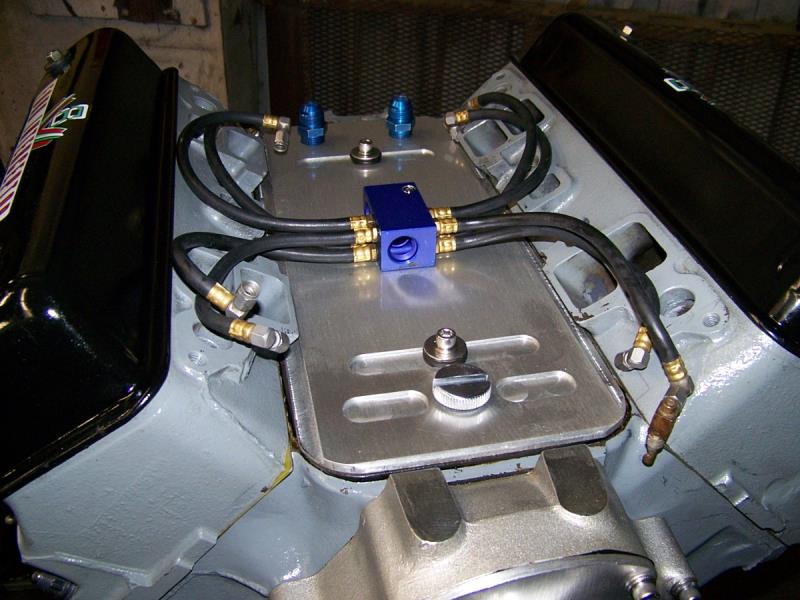
Getting close, had to clean up the shop (big mess), so not much time on the valley plate, the holes at the rear are for a e vac system.
|
|
By Cliff - 8 Years Ago
|
Valley plate done
|
|
By Cliff - 8 Years Ago
|
Installed
|
|
By Cliff - 8 Years Ago
|
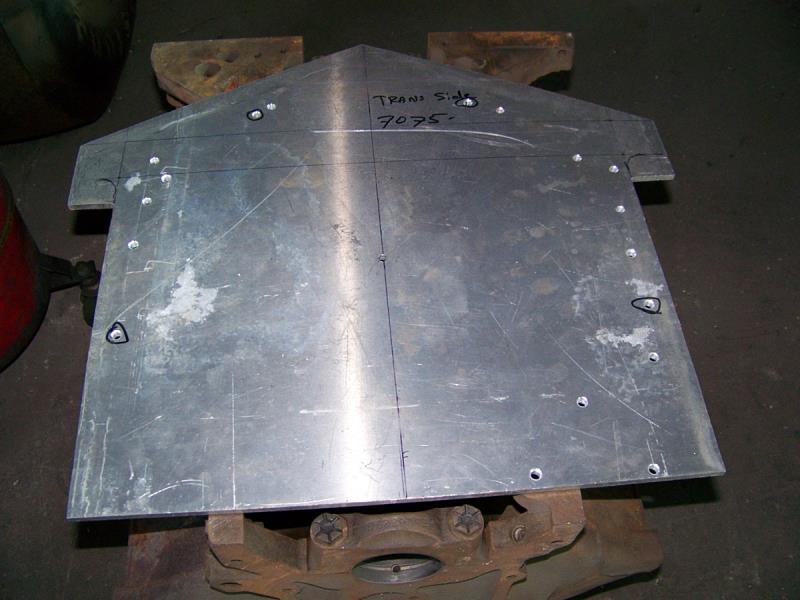
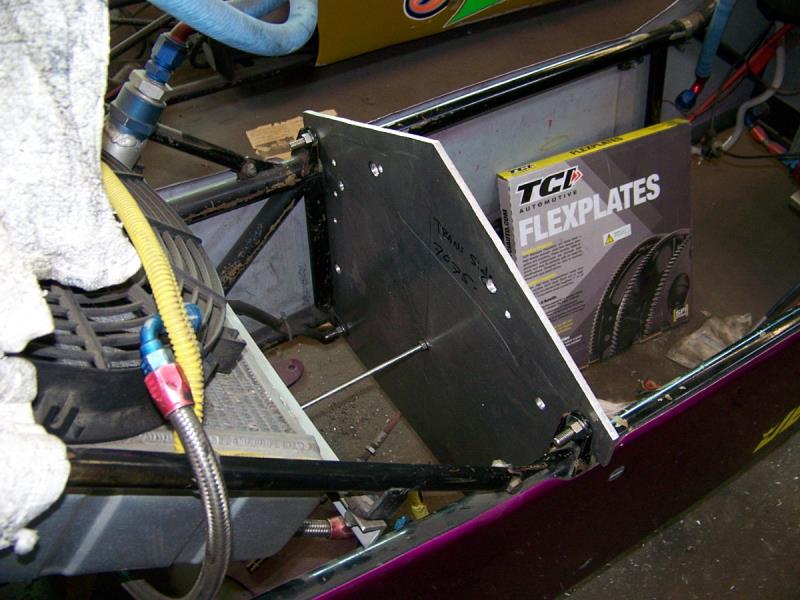
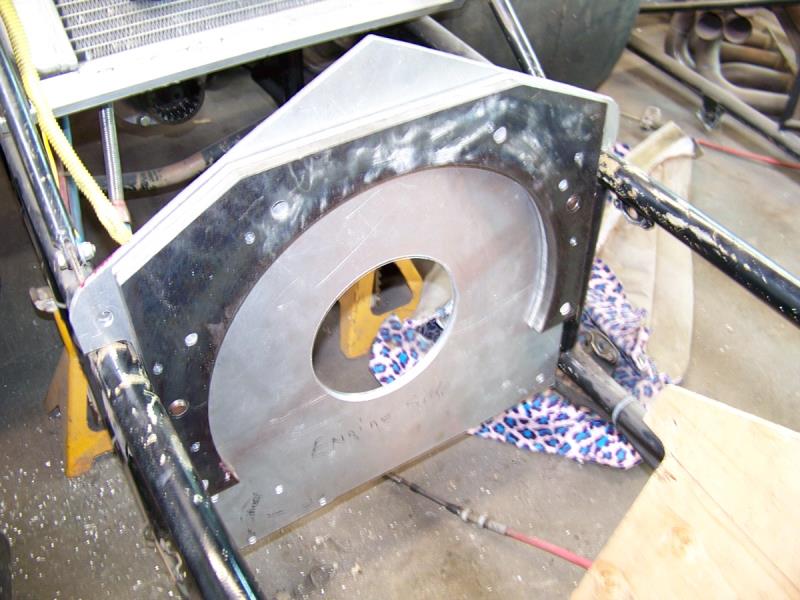
All day making a mock up motor plate, almost done, the hardest part was finding the crank center line in relation to the rear end, now to transfer it to make a real part.
|
|
By Cliff - 8 Years Ago
|
More work on the motor plate.
|
|
By Ted - 8 Years Ago
|
|
How thick is the material for your adapter plate? For aluminum adapter plates, I like using ½” thick.
|
|
By Cliff - 8 Years Ago
|
|
This is 7075 .250 thick, however there is a .750 adapter between it and the block (still need to make it)
|
|
By Cliff - 8 Years Ago
|
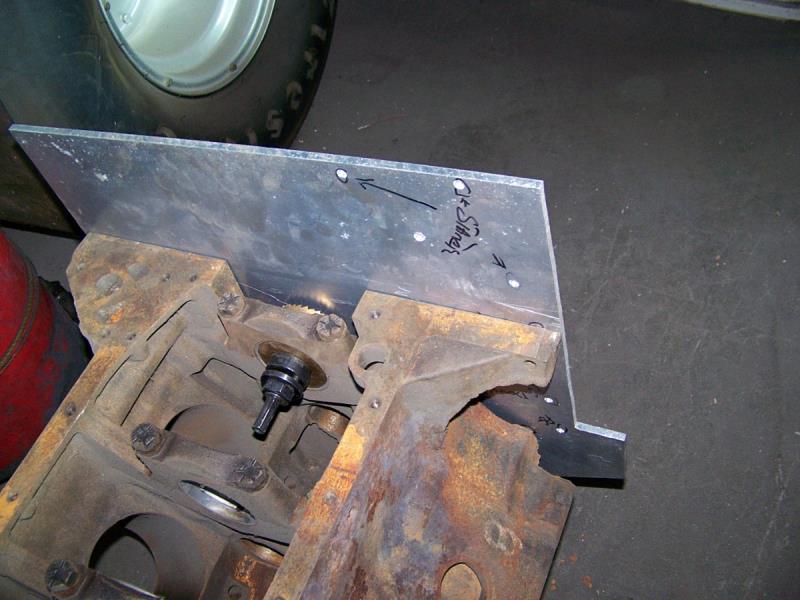
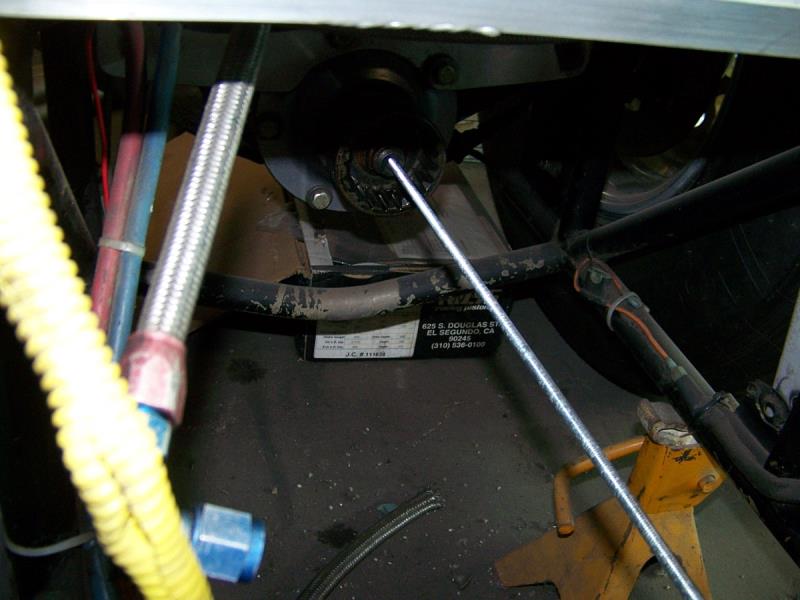
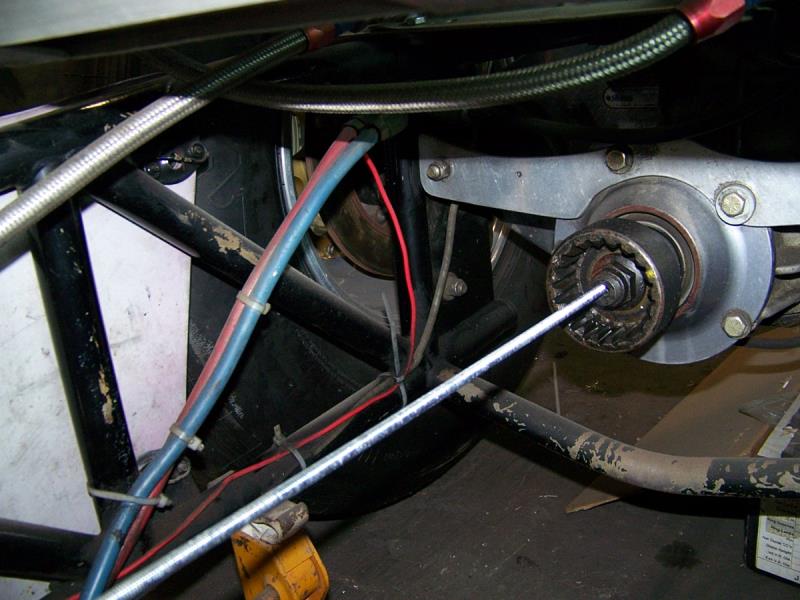
Here's a back yard trick, I used a 2 1/2" hole saw mounted in the rear main (with a bearing), with a centering drill bit, I then leveled the block on the shop floor, found the center of the motor plate
(used a template for the bolt pattern), slid the motor plate on the drill bit, perfect center, (block and motor plate level to the floor) found I needed to correct some of the holes (my poor work transferring them)
|
|
By Cliff - 8 Years Ago
|
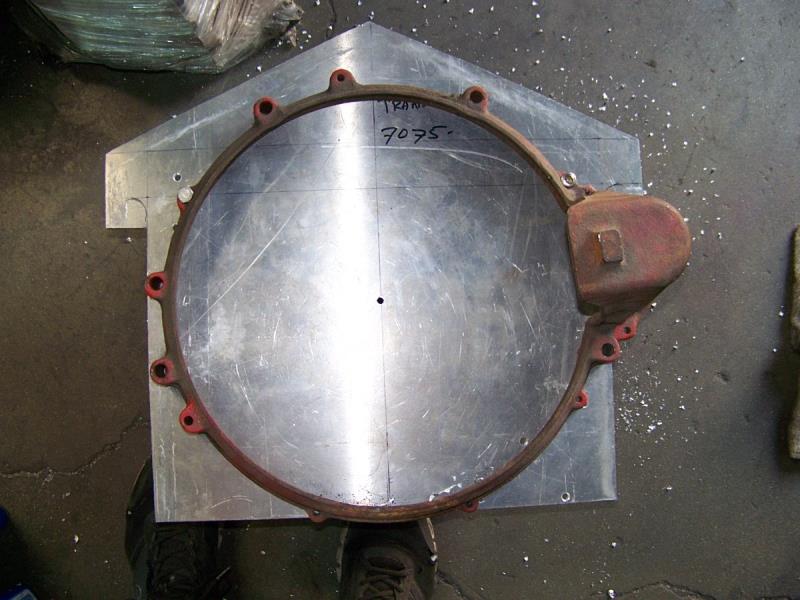
More, Y Block holes drilled, used part of a bell housing for pattern.

|
|
By Cliff - 8 Years Ago
|
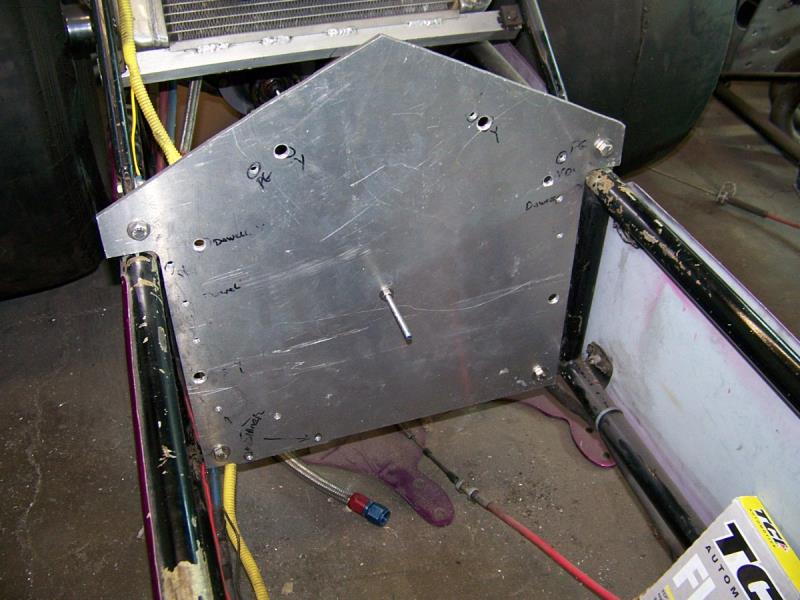
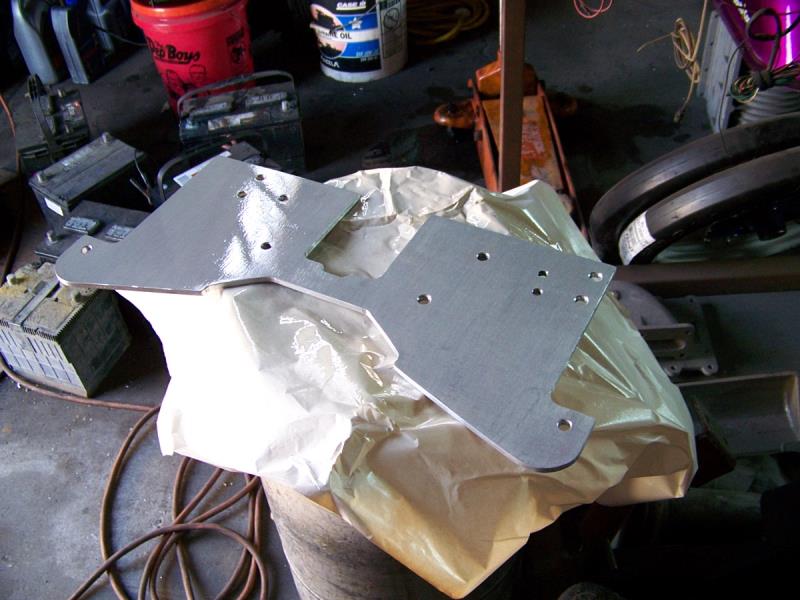
More work today, motor plate roughed in, took a long time.
|
|
By Cliff - 8 Years Ago
|
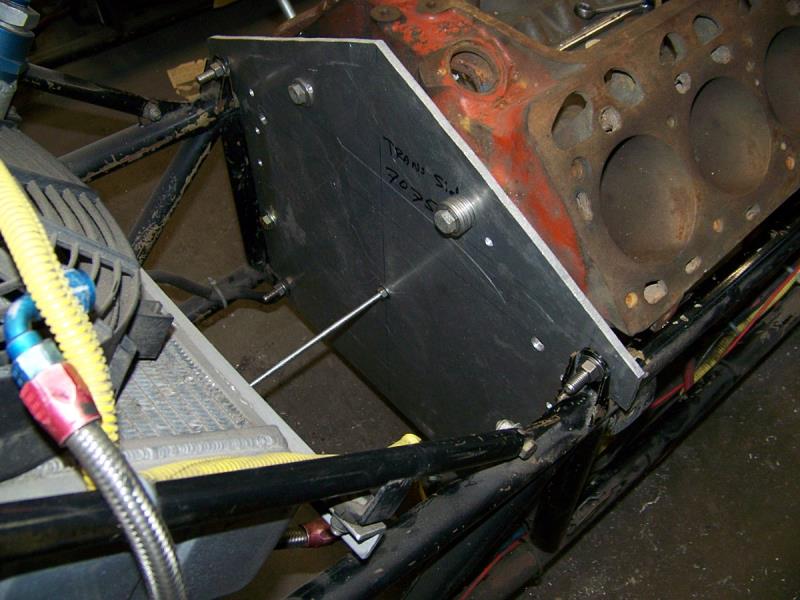
Fitting the engine today
|
|
By Cliff - 8 Years Ago
|
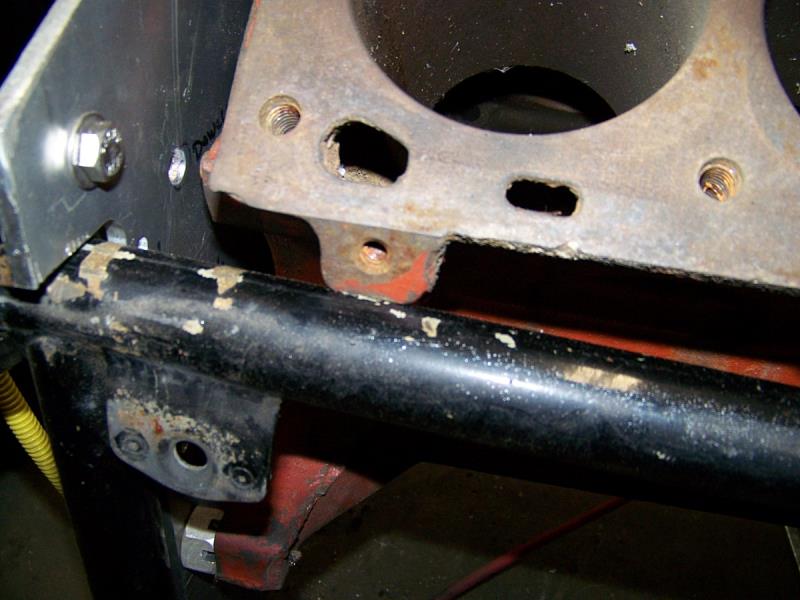
New problem, block hits the frame, I'll grind this off tomorrow.
|
|
By Cliff - 8 Years Ago
|
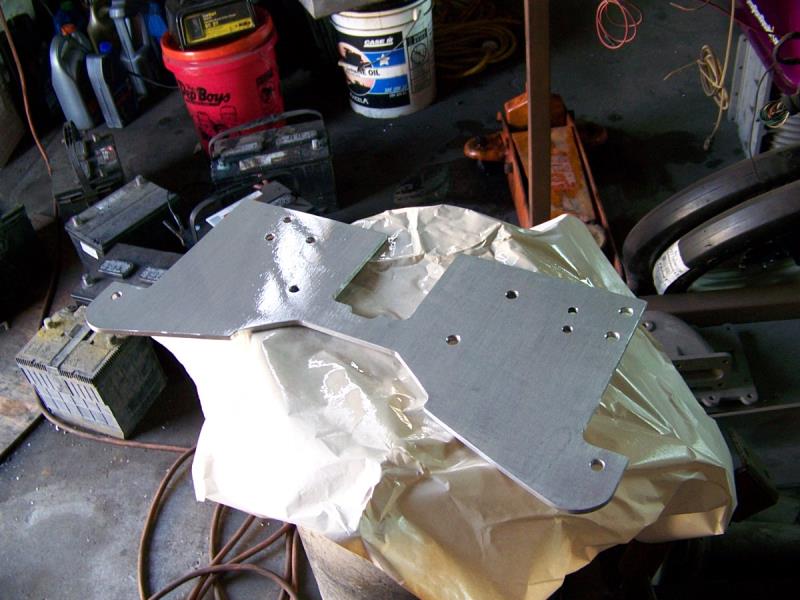
Almost ready to make a real part
|
|
By Cliff - 8 Years Ago
|
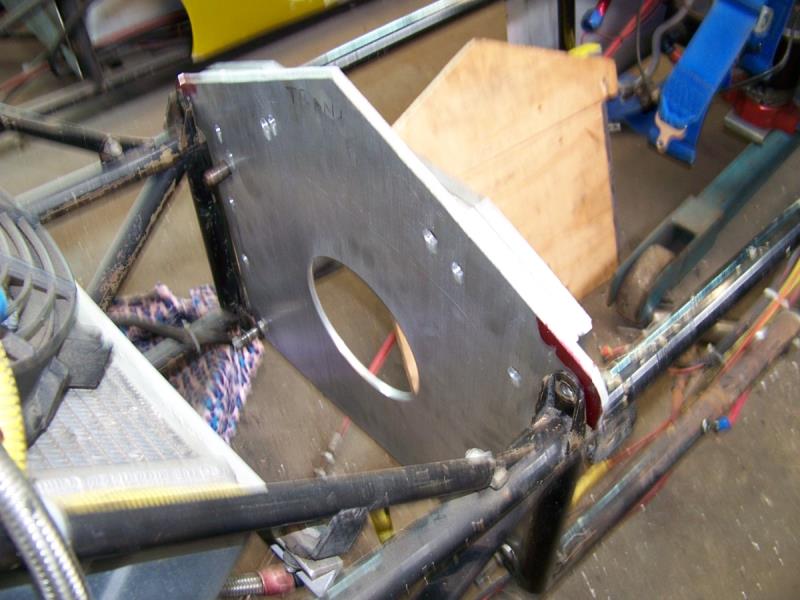
Front motor plate roughed in
|
|
By Cliff - 8 Years Ago
|
Fits the engine, now to mount the injector pump and the alternator
|
|
By Cliff - 8 Years Ago
|
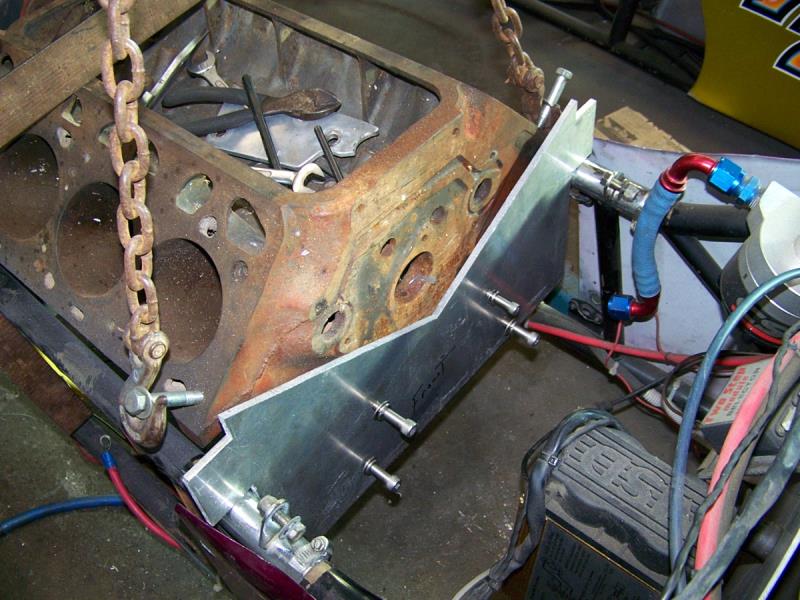
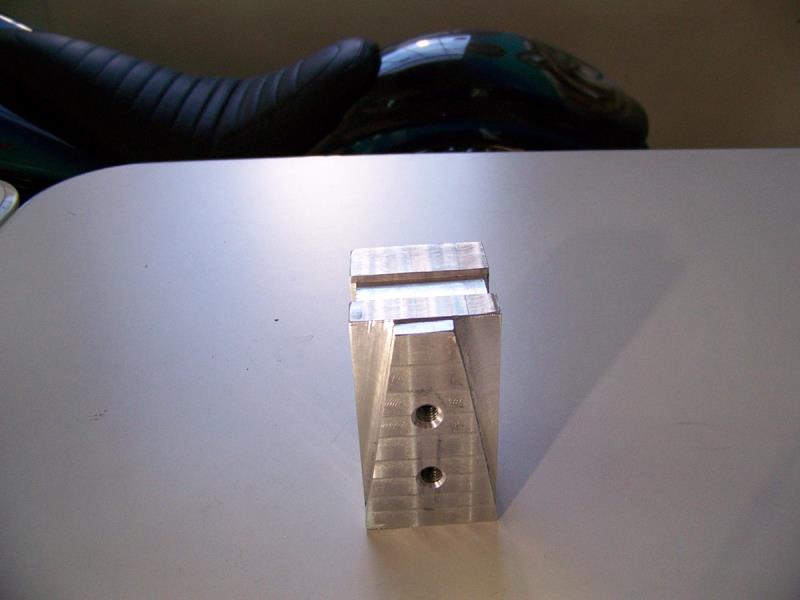
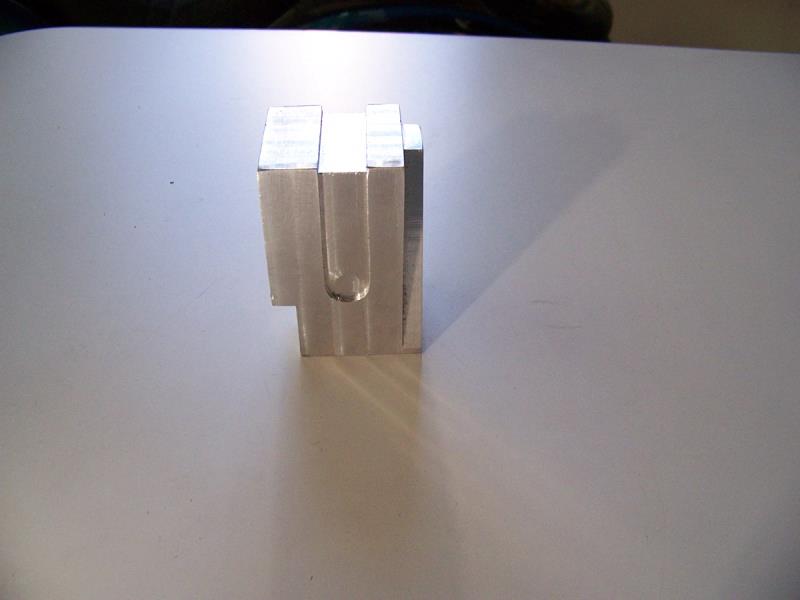
This will be the injector pump mount, I have to make everything.
|
|
By Ted - 8 Years Ago
|
Cliff. I see where you’re using one of those ½” blade band saws. I have a couple of those and both have issues with the cutting blade jumping off the drive wheels when putting any kind of serious pressure on the blades. Do you have that problem?
|
|
By Cliff - 8 Years Ago
|
|
Yes, and they don't cut straight, but it's what I have.
|
|
By Cliff - 8 Years Ago
|
Working on the oil pan, chopped the back off.
|
|
By Cliff - 8 Years Ago
|
Powerglide and Y Block now fit the motor plate, I'm working slow now, my brother passed away so I'm dealing with his house (well it's my house I let him live in), the house is a wreck and full of stuff (junk) so I have to look through everything throw away the bad, keep or donate the good.
|
|
By FORD DEARBORN - 8 Years Ago
|
Cliff: Sorry to heart about your brother, you were truly your brother's keeper. Keep us posted on your great project when able. Take care, JEFF.................
|
|
By Cliff - 8 Years Ago
|
|
Thanks Jeff
|
|
By Cliff - 8 Years Ago
|
Fuel pump mount done (well maybe a little fitting)
|
|
By Cliff - 8 Years Ago
|
More.
|
|
By Dave C - 8 Years Ago
|
Cliff,
Notice you are using an ATI dampner, and assume it is SBC honed to fit the Y?
What seal are you using?
Dave
|
|
By Cliff - 8 Years Ago
|
|
Yes a sbc damper, it's honed to fit, new key way broached and cut .330, I used a marine spacer that I shorted and used a marine seal.
|
|
By Dave C - 8 Years Ago
|
OK, gotta ask. Is the marine seal the same as a standard y block seal?
Dave
|
|
By Cliff - 8 Years Ago
|
|
No, I think it's a sbc seal, John gave me the part number when I received his timing cover. Part # HLI-0175-375-312F
|
|
By Dave C - 7 Years Ago
|
Thanks..
Dave
|
|
By Cliff - 7 Years Ago
|
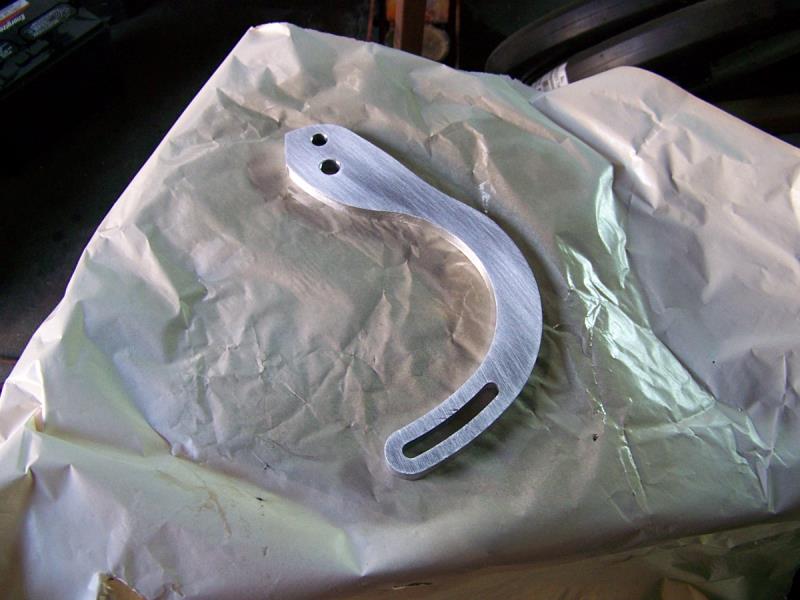
Soon to be alternator bracket
.
|
|
By Cliff - 7 Years Ago
|
Alternator bracket done

|
|
By 57FordPU - 7 Years Ago
|
I sure like your hard work and enjoy your continued report on the progress.
|
|
By Cliff - 7 Years Ago
|
Thanks Charlie, I met you at the San Diego meet a long time ago, I know you know how much work it takes to do this.
PS I watch the work you do on your truck
|
|
By Cliff - 7 Years Ago
|
More alternator bracket, finished detailing the mount, roughed in the adjuster ( I cheated, started with a powermaster adjuster)
|
|
By Cliff - 7 Years Ago
|
Starting to detail parts for the front of the engine, this takes a long time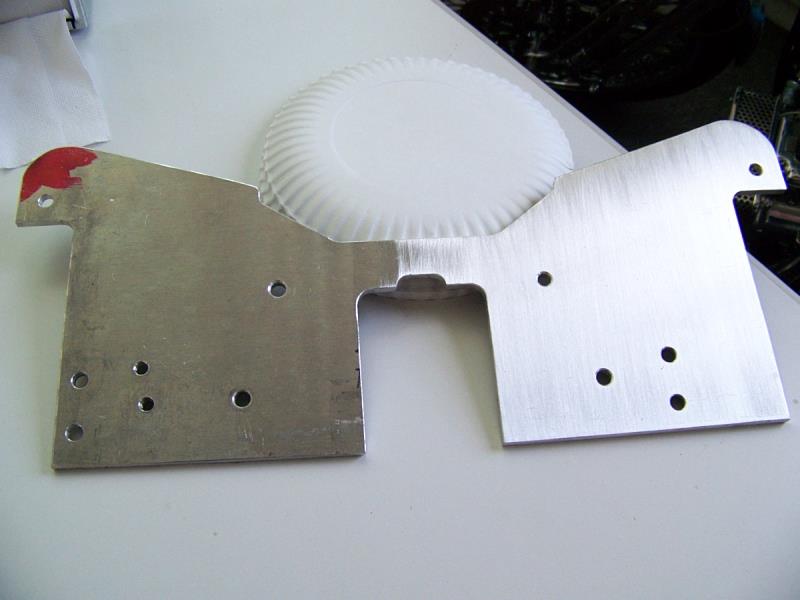
|
|
By Cliff - 7 Years Ago
|
This is what is going on top of the intake manifold that I'm making out of Lexan

|
|
By Cliff - 7 Years Ago
|
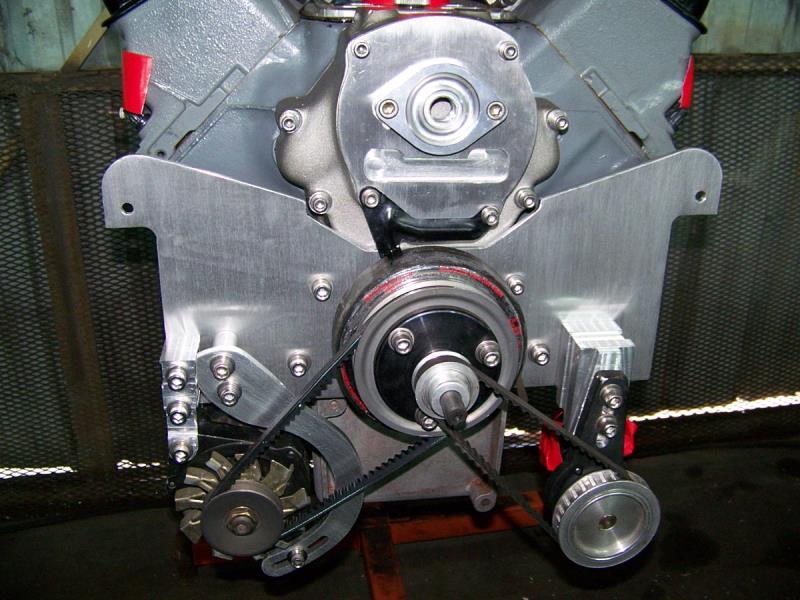
Front Motor plate finished
|
|
By Cliff - 7 Years Ago
|
Reworked alternator bracket
|
|
By Cliff - 7 Years Ago
|
Motor plate almost done
|
|
By Cliff - 7 Years Ago
|
Spacer for the motor plate roughed in, adapter will be made of 1/2 cold rolled steel.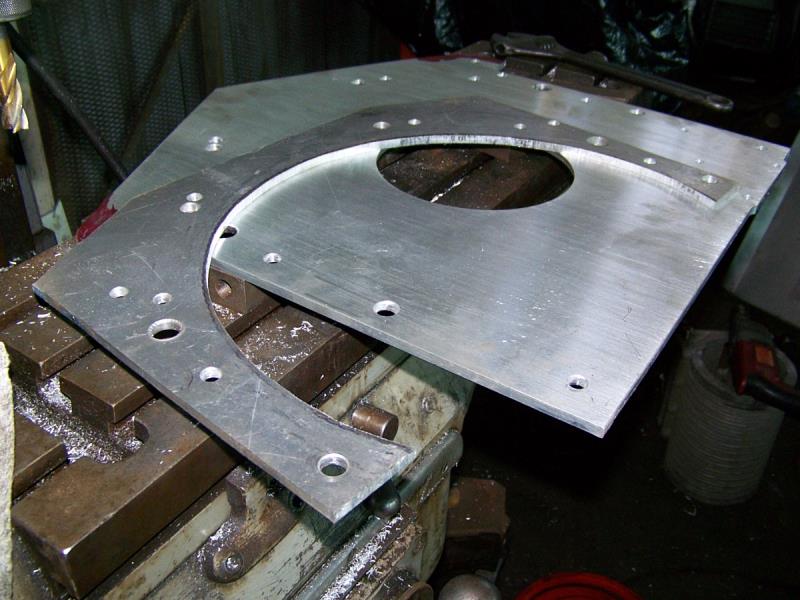 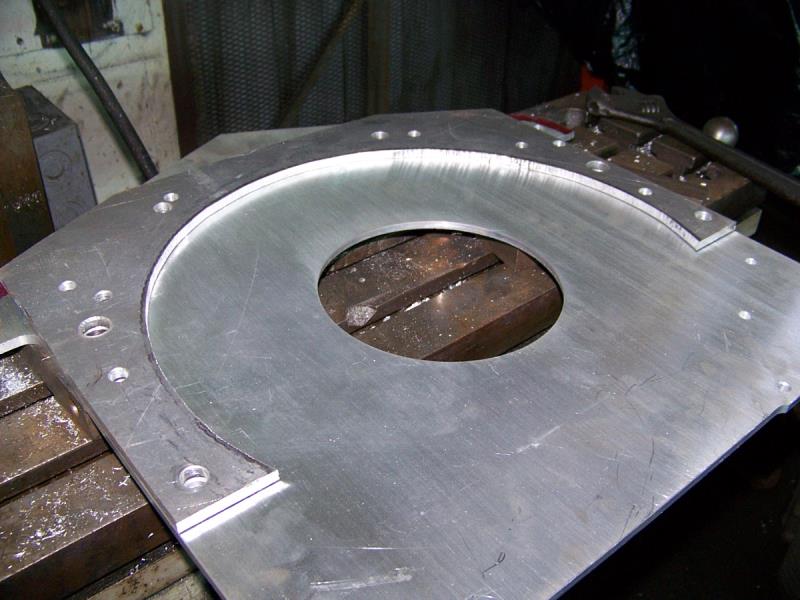 
|
|
By Cliff - 7 Years Ago
|
Working on the Engine adapter, it's made of 1/2" cold rolled steel, heavy and hard to cut.
|
|
By Cliff - 7 Years Ago
|
More work on the adapter (4 hours on the milling machine), next for the holes, studs and finishing  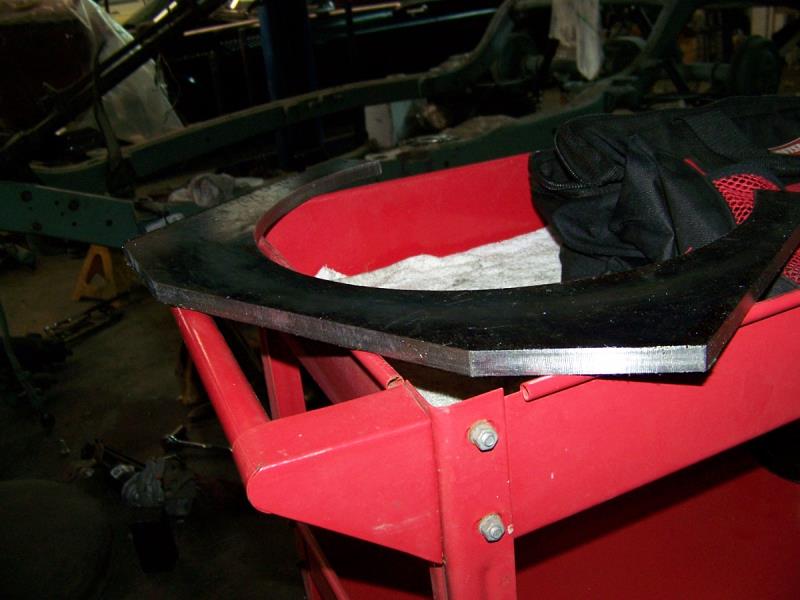
|
|
By Cliff - 7 Years Ago
|
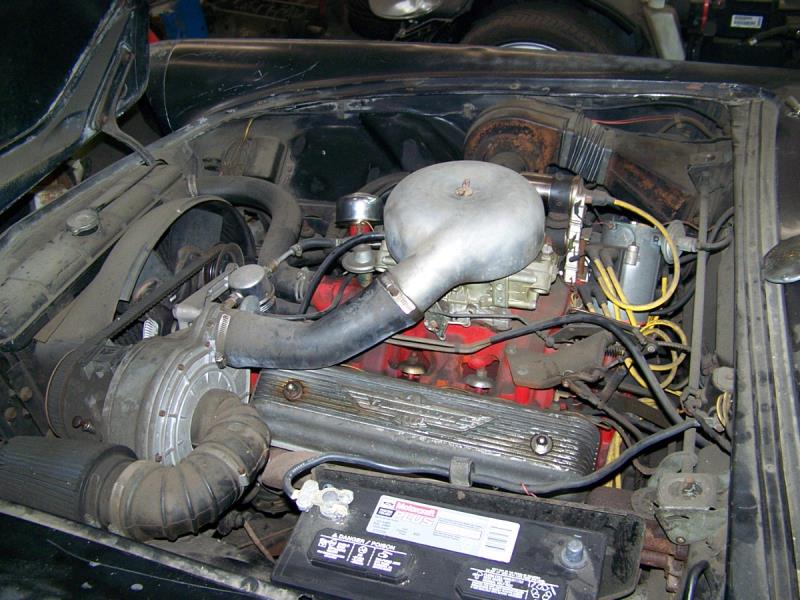
Here's a picture of my 57 Bird, it just sits, about 3000 miles on the engine (20 years ago), it's a B9EA block, Bryant did the crank, Isky RPM300 and kit, 471 cylinder heads (home porting), Spalding Flamethrower, all good stuff in the engine.
|
|
By Cliff - 7 Years Ago
|
More adapter work

|
|
By Cliff - 7 Years Ago
|
Working on the oil pan, welding and shaping done, needs detail, rear seal installed, crank adapter ready to go (mates Y Block to powerglide flexplate, made by Willcap took over 1 year to get it), a better look at the bottom end.
|
|
By Dave C - 7 Years Ago
|
Cliff,
Enjoying your progress so far..
But gotta ask. Why didn't you make your mid plate and adapter out of the same piece?
I ran a mopar with a glide and used a TCI adapter it was 1/4" plate aluminum. I have another made from 1/2".
Almost finished with the one for my Y block and I am making it from 1/2" aluminum.
A question about the flywheel/flexplate. Since you are using the Wilcap adapter you must be using their flexplate.
I was under the impression that the flexplate bolted directly to the Y block without an adapter. If it doesn't then I'm gonna have to rethink my setup.
Dave
|
|
By Cliff - 7 Years Ago
|
Well, the flex plate is a sb scruby 168 tooth (needed to be SFI), I was originally going to have a motor plate to mount the engine and the adapter, it turned out that the crank to flex plate adapter had to be thicker than planned (.990), so not wanting a 7/8" thick steel adapter (to heavy), I went with a 1/2" steel adapter and a 3/8 spacer (aluminium), as it is that thing is heavy. I also had a problem mounting the starter, if I used a thick motor plate it would move the starter to far from the ring gear, so I am mounting the starter to the motor plate at the bottom.
(I don't like the weight).
|
|
By Dave C - 7 Years Ago
|
Got ya.
I built mine for using a 130 tooth mopar.
The Wilcap setup looked to be about 1 inch thick, and according to Patrick McGuire
when I asked if they would sell just the flexplate I was told it was a 130 tooth mopar. So thats what I built mine to.
I didn't think to ask if an adapter was required.
So after seeing your pictures I got to thinking, and had one of those Oh Crap moments..
I have to drag out one of my out of date sfi flexplates and see what I'll have to do. This was next on my have to do list anyway..
Thanks for sharing..
Dave
|
|
By Cliff - 7 Years Ago
|
Oil pan and all small parts done.
|
|
By Dave C - 7 Years Ago
|
Ya got some skills there Cliff. 
Dave
|
|
By Cliff - 7 Years Ago
|
No more mock up, assembled for real, I don't trust the MSD, so I'm going to remove the module (this is a ready to run) and just use the pickup. The engine is lashed and ready, next install the transmission and check the alignment and free play of the converter (the moment of truth) if I measured right all should be good, if not?, I mounted the injector pump lower than the fuel tank for an easier prime.
|
|
By John Mummert - 7 Years Ago
|
|
Cliff we just machined a few tunnel ram bases. Possible back up plan for you. Lookin' good so far.
|
|
By Cliff - 7 Years Ago
|
|
Thanks John, however my plastic intake is next (I hope).
|
|
By Cliff - 7 Years Ago
|
Well after a bunch of work, the Wilcap flywheel adapter doesn't fit (it took a year to get) almost the only part I didn't make, so now a rework, took the transmission apart, it looks good (luck) I bought it from a guy that had it for a spare for his car, so the work goes on.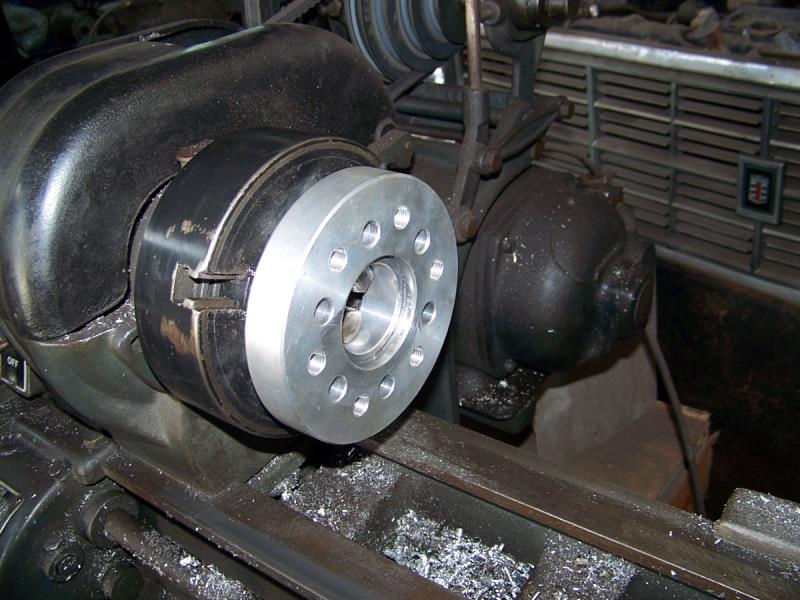 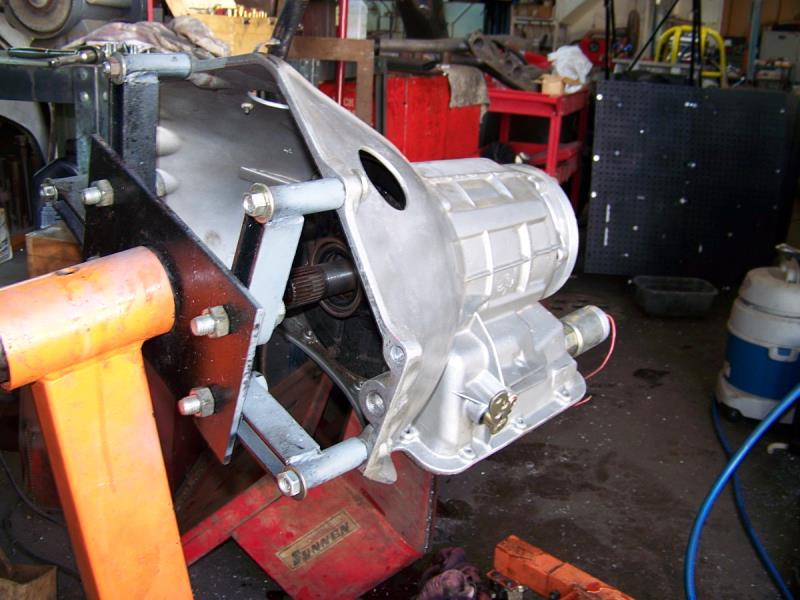 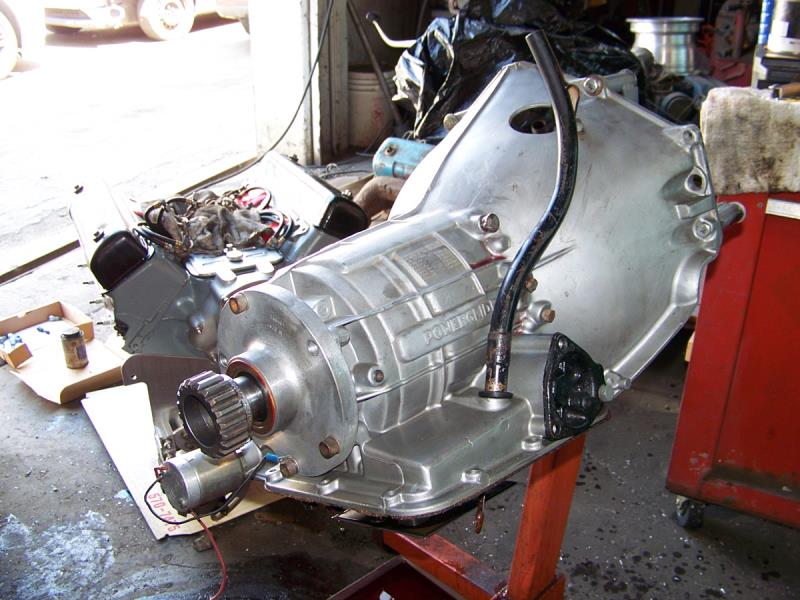
|
|
By MoonShadow - 7 Years Ago
|
|
My crank adapter for the AOD conversion also did not fit. Had to have the center machined out. Only problem I had though.
|
|
By Cliff - 7 Years Ago
|
|
Same problem, also the bolt pockets are not deep enough, the socket head bolts sit above the flange surface not allowing the flex plate to sit flush.
|
|
By MoonShadow - 7 Years Ago
|
Makes you wonder what crank they use for the measurements. Maybe they all get the adapter from the same Chinese company?
|
|
By Cliff - 7 Years Ago
|
|
Hi guys, I worked hard Saturday, the crank adapter now fits however the socket head bolts supplied with the adapter are to long (they hit the block) , when I removed the pan on the transmission I found 3 stripped bolt holes so I had to heli coiled them, next my brand new BTE input shaft would not fit into the converter (Huges) it slides in 1/2 the way and stops, I tried a used shaft and it fits fine, I tried the BTE shaft in a A-1 converter it fits fine (?) so I give up for today.
|
|
By Cliff - 7 Years Ago
|
Well after all morning, the input shaft fits (had to reduce the spline .010) mocked up the transmission with the converter it fits! nothing needed, stack up is good, converter spins nice (luck), now to take it apart and finish all the parts,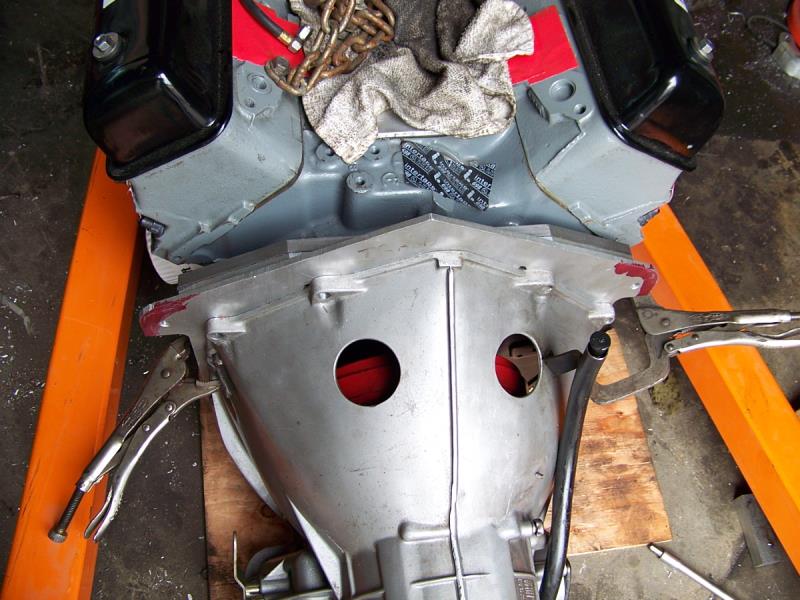 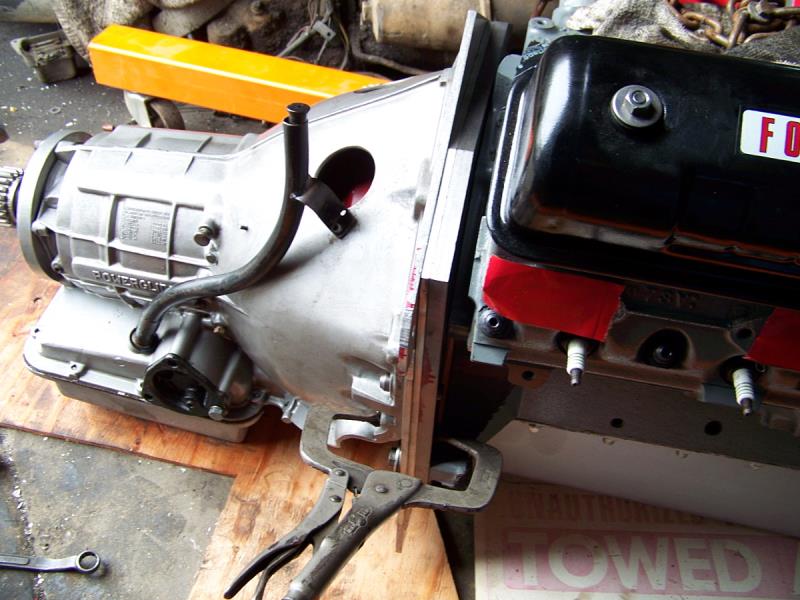 
|
|
By Cliff - 7 Years Ago
|
|
No work this weekend, going to the Y Block Races in San Diego
|
|
By Cliff - 7 Years Ago
|
Did some work today, almost done with the transmission adapter, still need to place the starter, not enough to photograph, some of this work is slow
takes a lot of measurement, so far I have not had to remake a part (luck)
|
|
By Cliff - 7 Years Ago
|
More work done, adapter done, spacer done (I may paint them one more time), working on mounting the starter next (Ford starter and scruby flex plate) 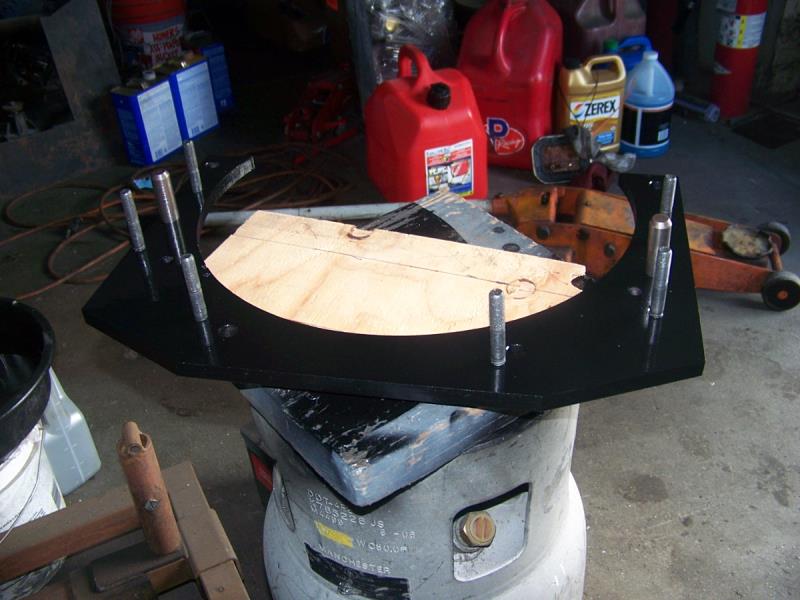 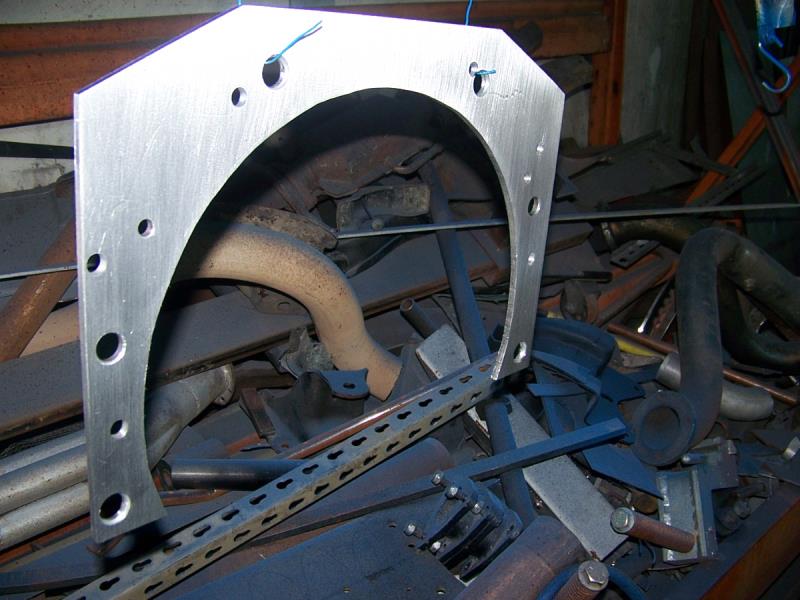
|
|
By Cliff - 7 Years Ago
|
Working today, stopped for lunch, test fit, sharp parts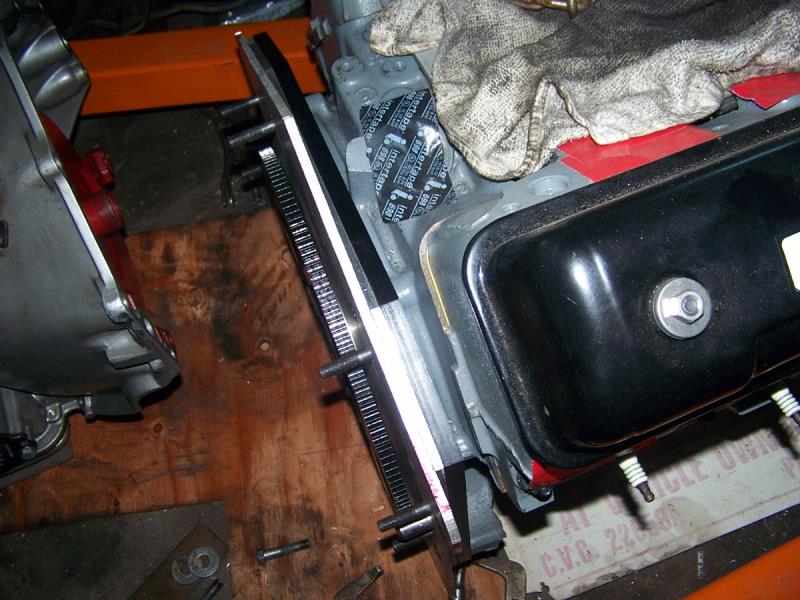 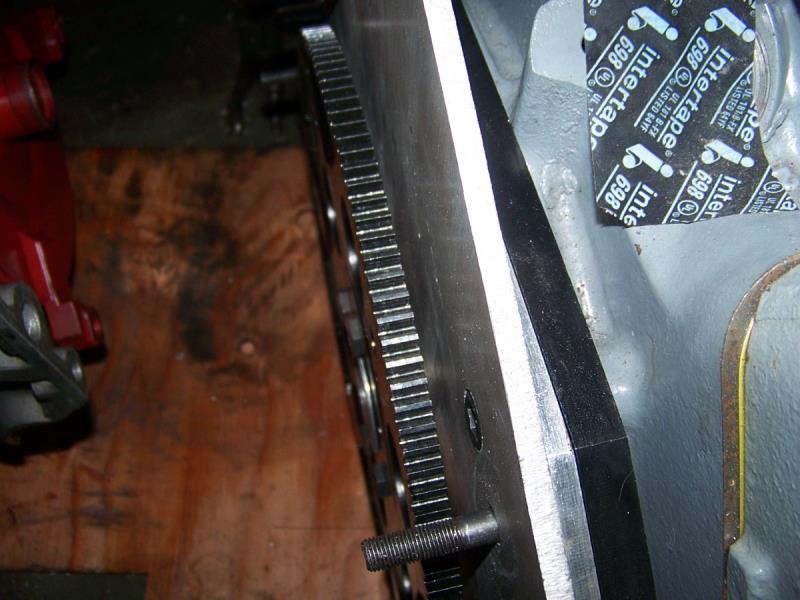 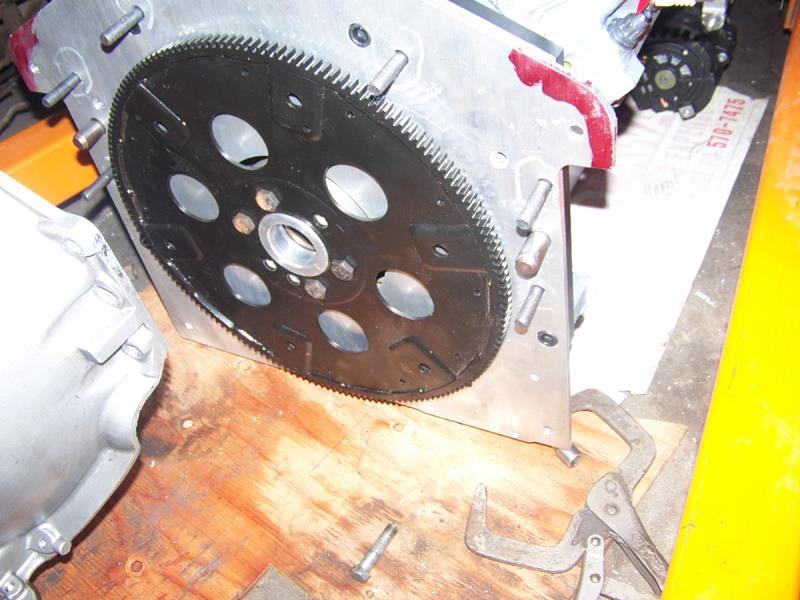 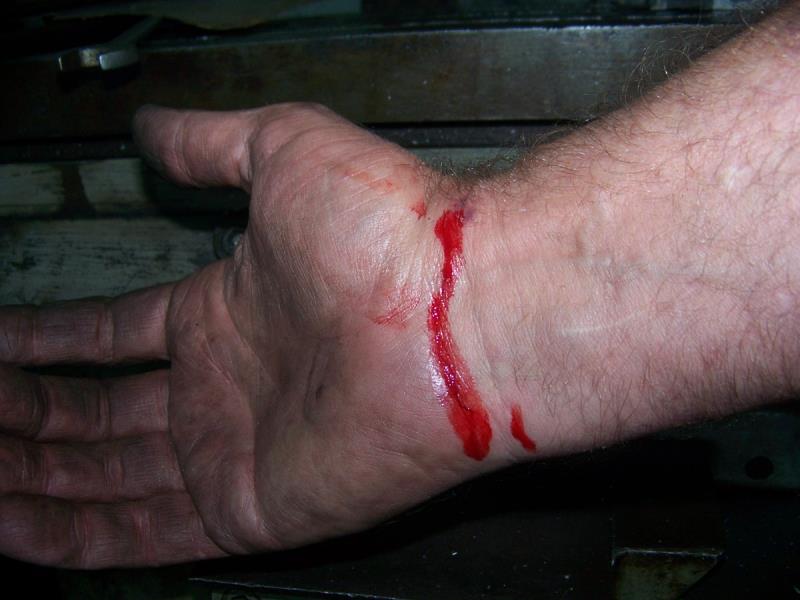
|
|
By Cliff - 7 Years Ago
|
|
Well after a lot of work the starter hits the oil pan, so now to look at smaller starters.
|
|
By Cliff - 7 Years Ago
|
Starting the intake manifold today, making the water cross over first, here is the material for job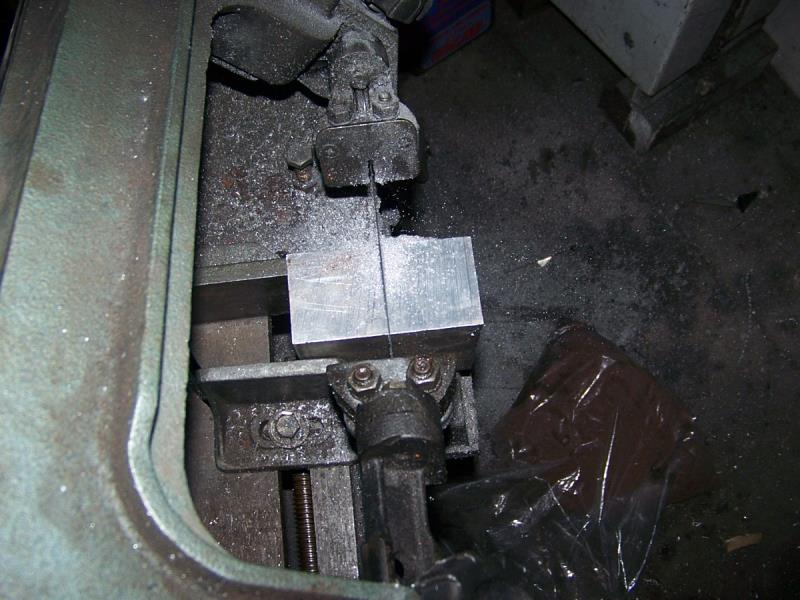 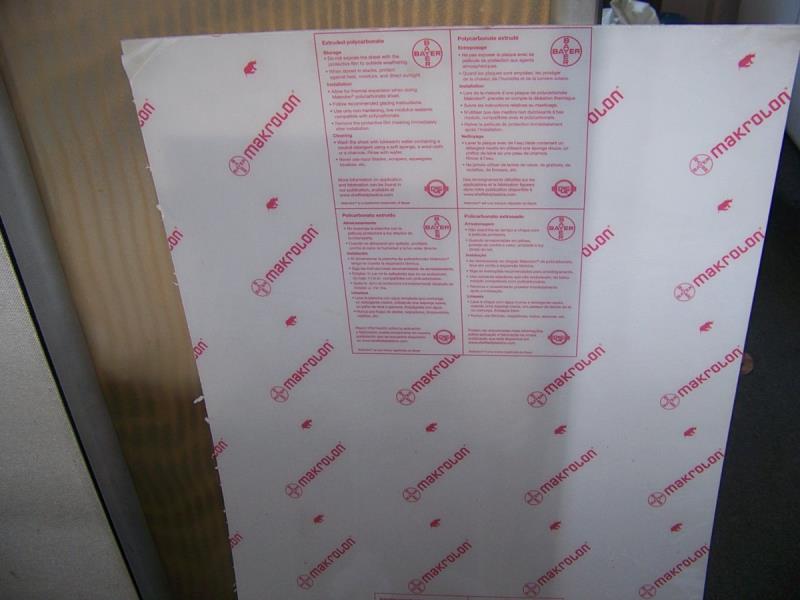 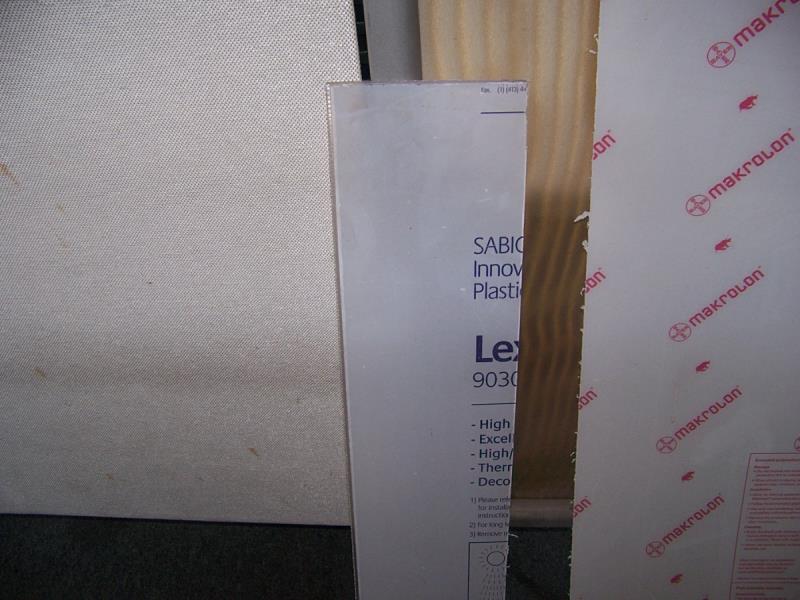 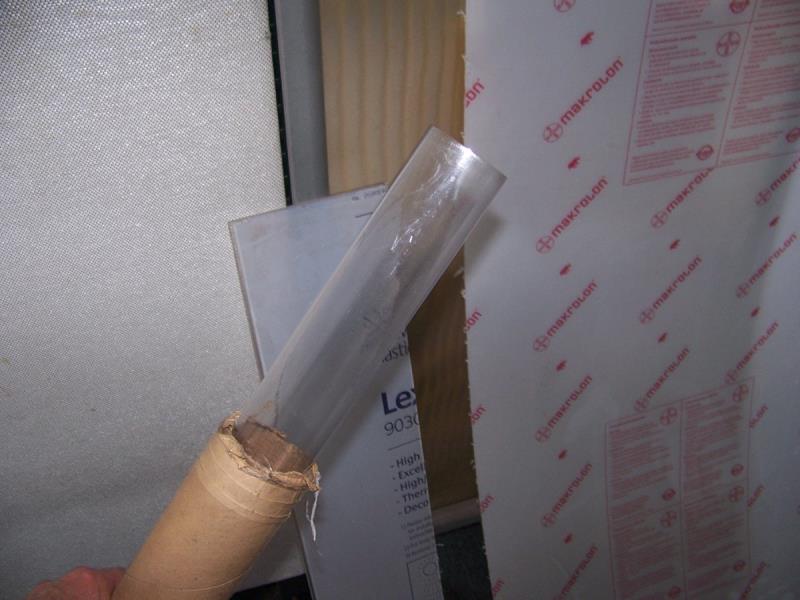
|
|
By Cliff - 7 Years Ago
|
Hi, starter now fits, had to grind the side of the starter, and the side of the oil pan, also I have to move 2 bolt holes over about 1/8", I think I can do this with a Heli Coil, the engine cranks over fine.
Now back to the intake manifold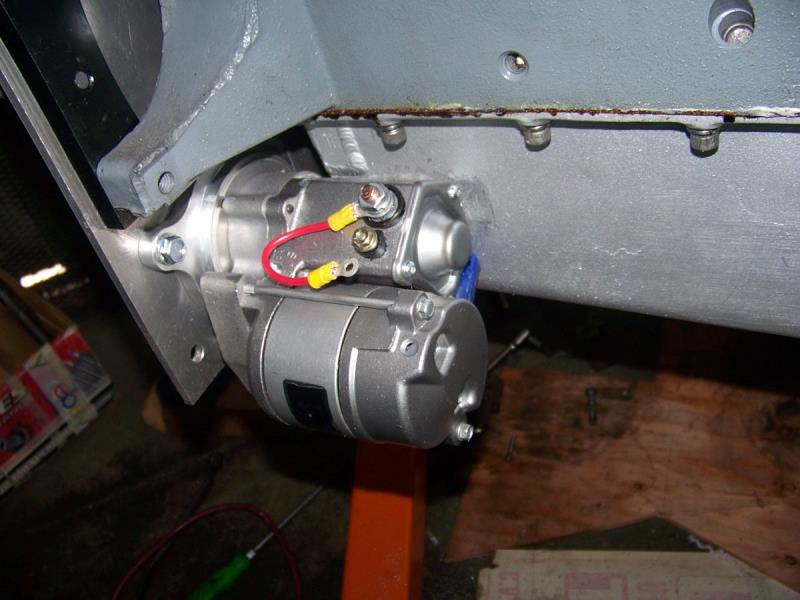 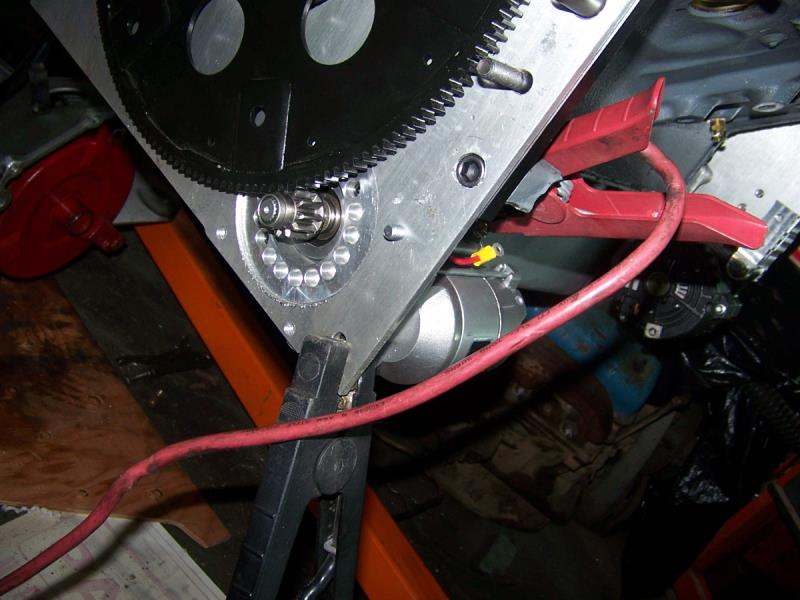 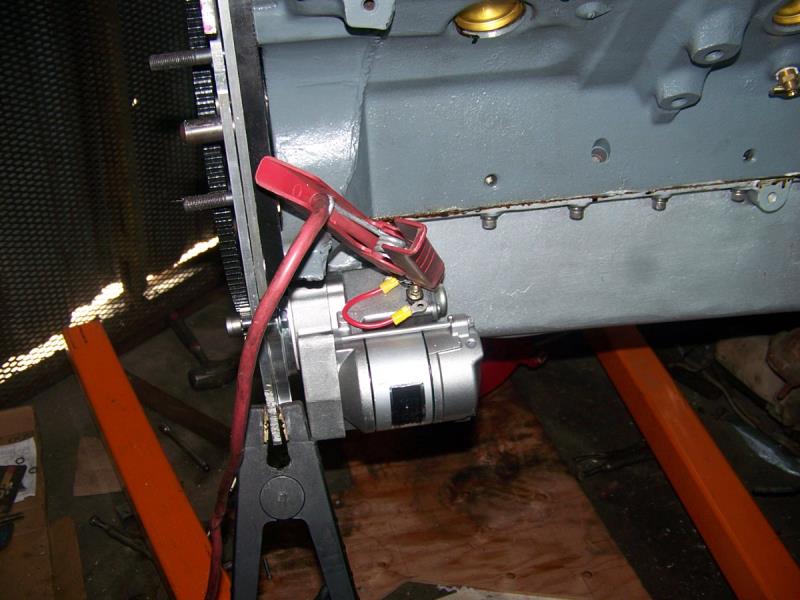 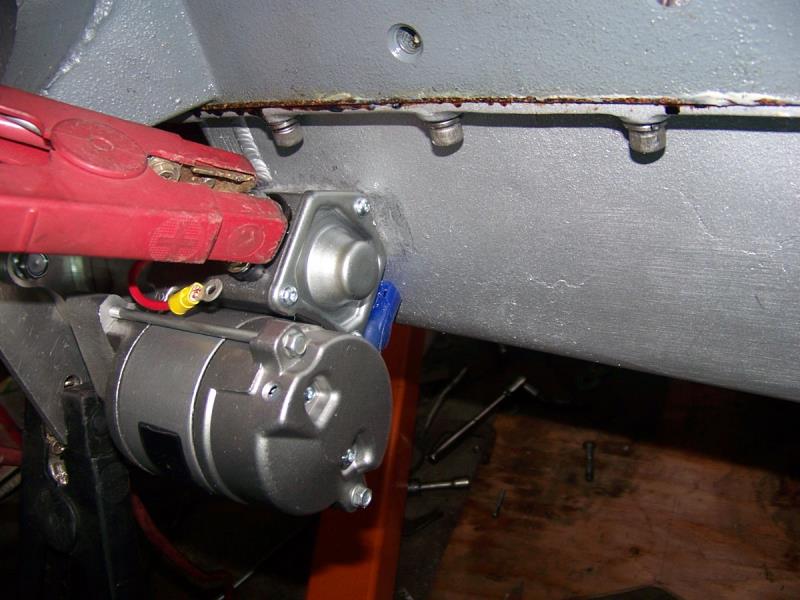
|
|
By Hollow Head - 7 Years Ago
|
|
Really hope it fits to the dragster frame! Tight spots….
|
|
By Ted - 7 Years Ago
|
Cliff (5/25/2019)
Working today, stopped for lunch, test fit, sharp parts
That’s an Ouch!
|
|
By Cliff - 7 Years Ago
|
|
I measured twice, should have at least 1/4" at the tightest point (I hope)
|
|
By Cliff - 7 Years Ago
|
Motor plate done (may paint it one more time)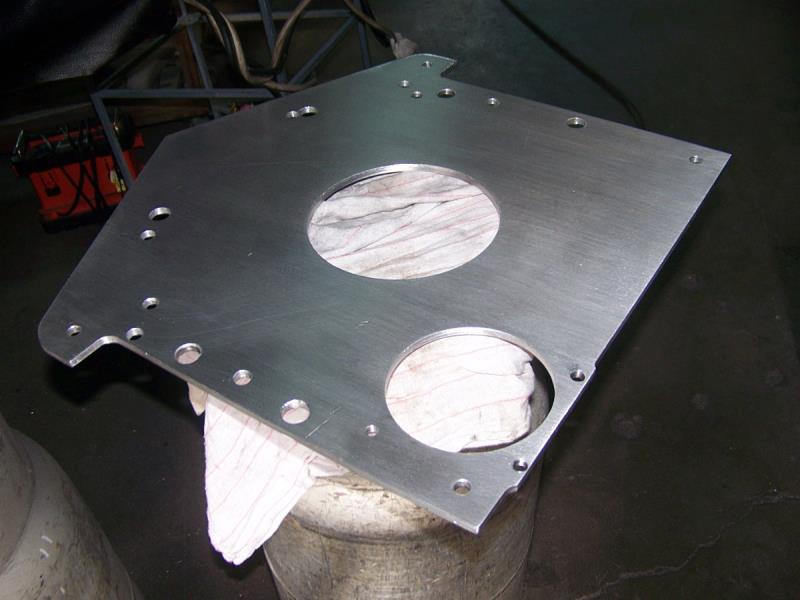 
|
|
By FORD DEARBORN - 7 Years Ago
|
Cliff, there are much easier ways to obtain red paint..................
|
|
By Cliff - 7 Years Ago
|
|
I know, after working on parts, I need to test fit before finishing (sharp on the edges).
|
|
By Cliff - 7 Years Ago
|
Engine and Transmission mated for good, now for fitting everything to the car and get rid of that seat upholstery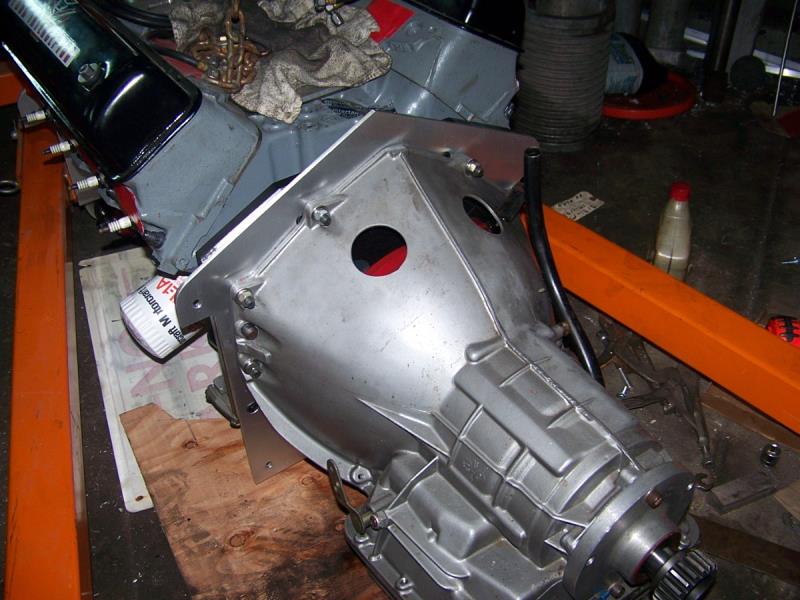 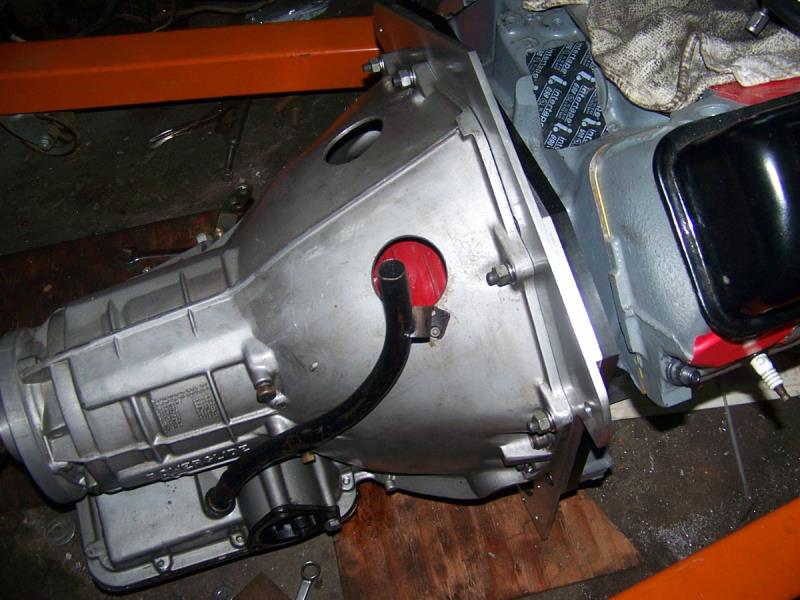 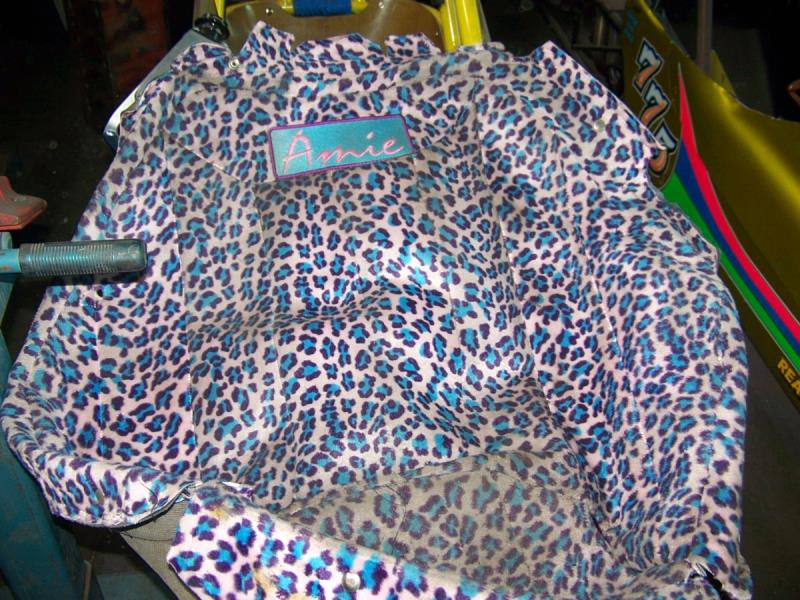
|
|
By Cliff - 7 Years Ago
|
Working on the car today, this car had a BB scruby and the alternator hit the frame (4130 material) so they cut out the frame and replaced the support with a mild steel tube (hack job), I removed the stubs of the old support and made a new one (4130), this took a long time (all day) however it's ready for welding now, will finish it up Monday night. 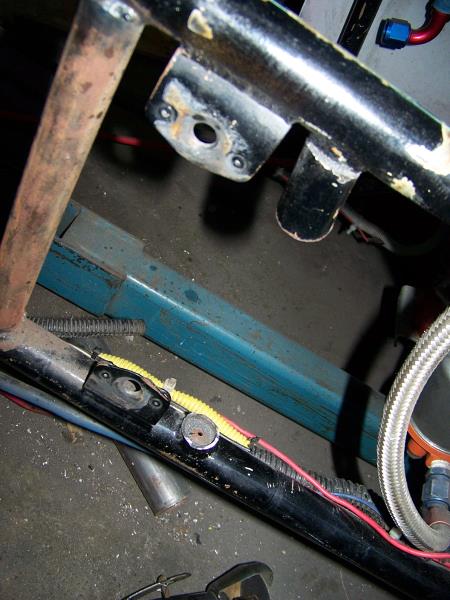 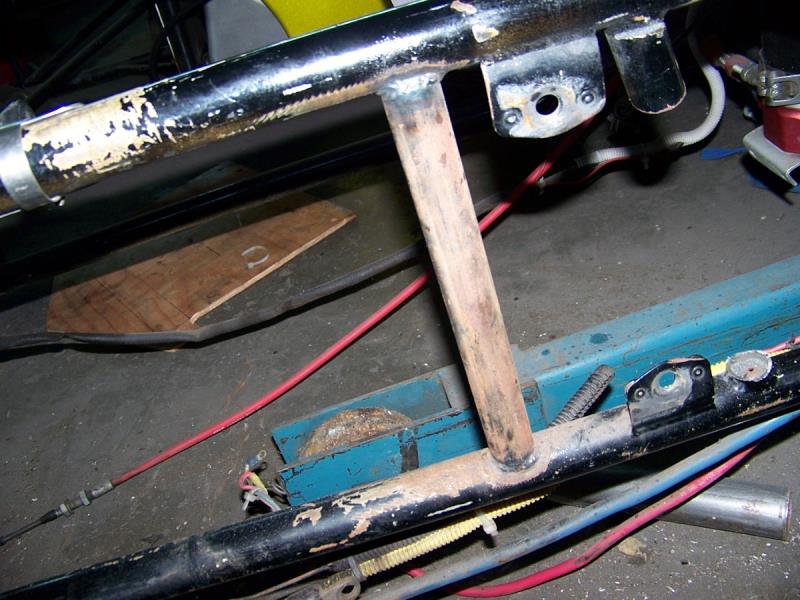 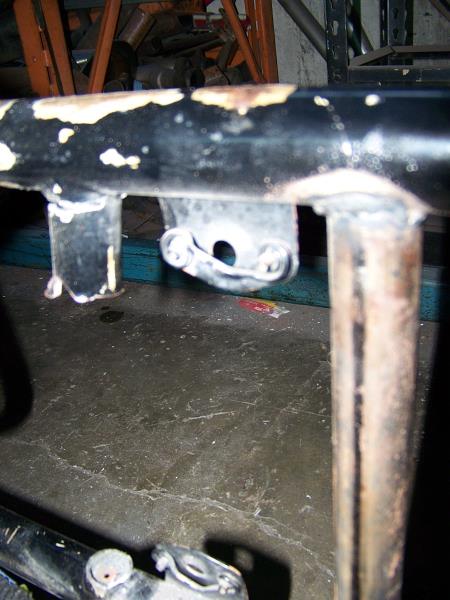 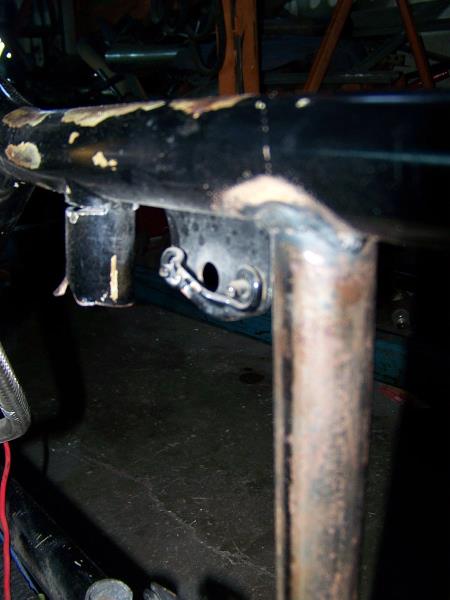 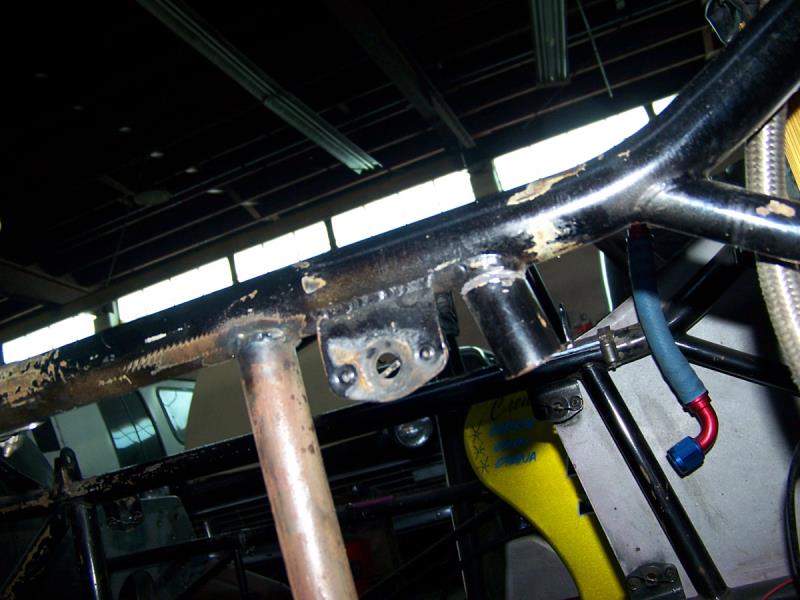 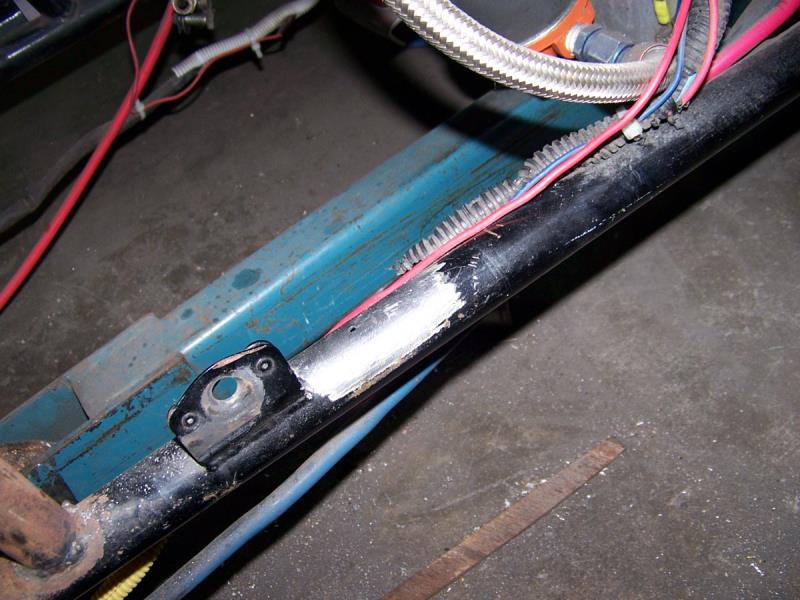 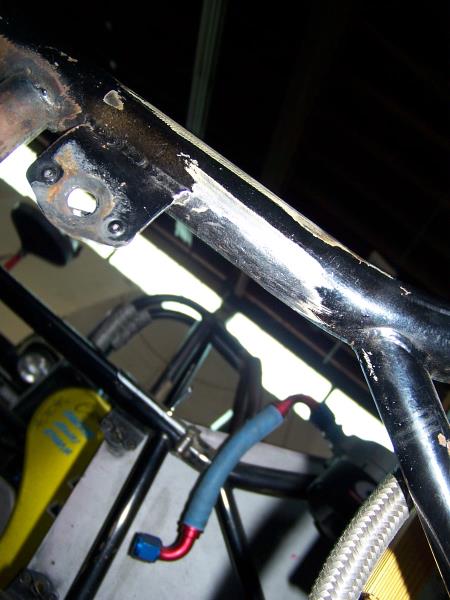 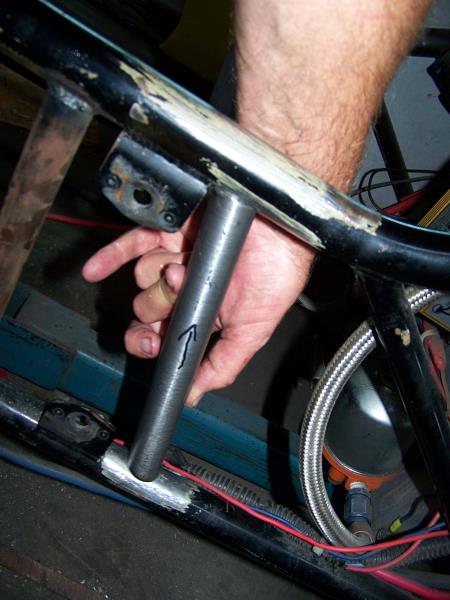
|
|
By Cliff - 7 Years Ago
|
Welding done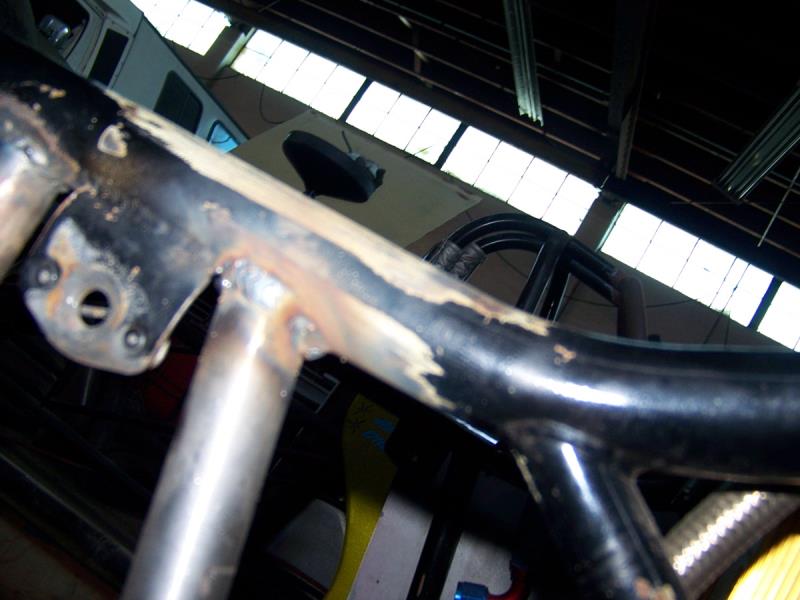 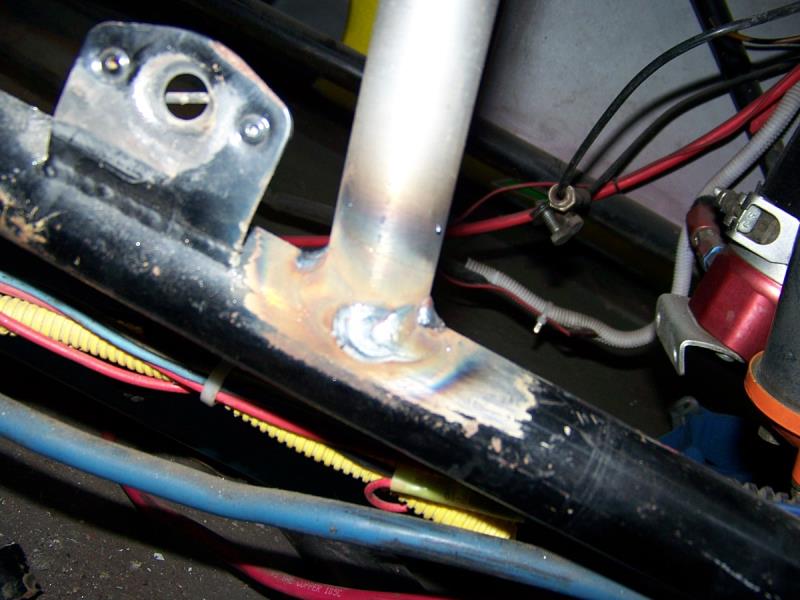
|
|
By Cliff - 7 Years Ago
|
|
Hi, no photos today (lazy), added tube removed, the hardest part is smoothing the chassis (no filler, just draw filing) so it looks like nothing happened Prepping the frame for paint, this thing is scratched to death all around the engine.
|
|
By Cliff - 7 Years Ago
|
 Hi guys, this where I stopped today, getting the car ready for paint and engine install, this thing was put together with zip ties and butt connectors, this was a nice car until bubba got to it, I will unbubba it (more work) Hi guys, this where I stopped today, getting the car ready for paint and engine install, this thing was put together with zip ties and butt connectors, this was a nice car until bubba got to it, I will unbubba it (more work)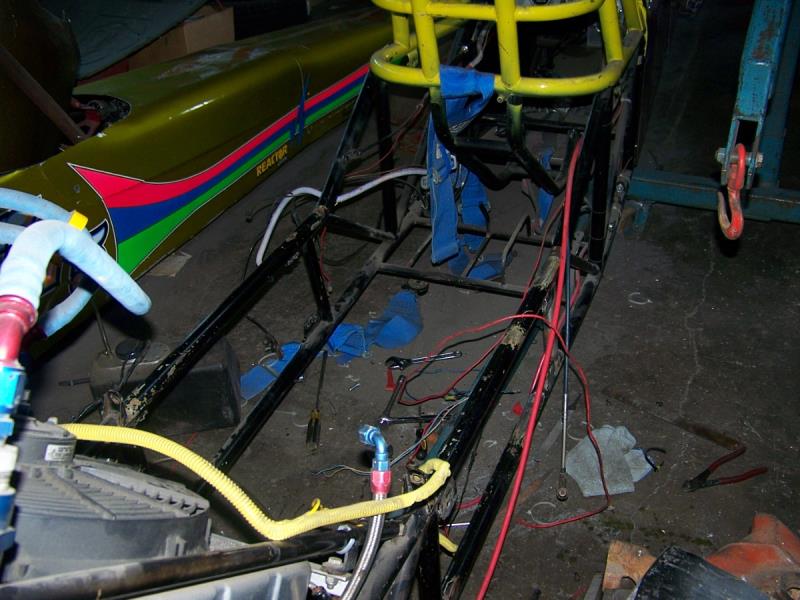  
|
|
By Cliff - 7 Years Ago
|
|
No work today, found a lot of Y Block parts on Face Book Market Place, for $250.00 I bought a 292 block with a new 3.800 bore (EDB) new cam bearings installed, 312 crank with a new grind the mains turned down to 292 (still has the oil slinger) a new set of cast pistons to fit the bore, a set of 2 molly rings, a new set of Milling lifters (Chilled Iron), 4 bbl manifold (large flange) 2 sets of ECZ-G heads one set stripped and crack checked, one set complete and not checked, 2 1957 distributors (one rebuilt with new cap and all small parts), 5 sets of valve covers, 2 valley pans, 1 pair of exhaust manifolds (mismatched), a stick flywheel and a worn out clutch , a set of reman rods with bearings to fit the crank, a brand new water pump, starter, generator (used), an engine cart, a set of .030 292 forged pistons (maybe used but nice) and a bunch of small parts, this took all my work time, I'm in Long Beach and the parts where in San Diego (next to John Mummert and a free Mig Welder.
|
|
By Dave C - 7 Years Ago
|
Nice score.. Never anything for Y blocks listed around here..
Dave
|
|
By Cliff - 7 Years Ago
|
Working on chassis today, aluminum floor pans in rough shape (from standing on)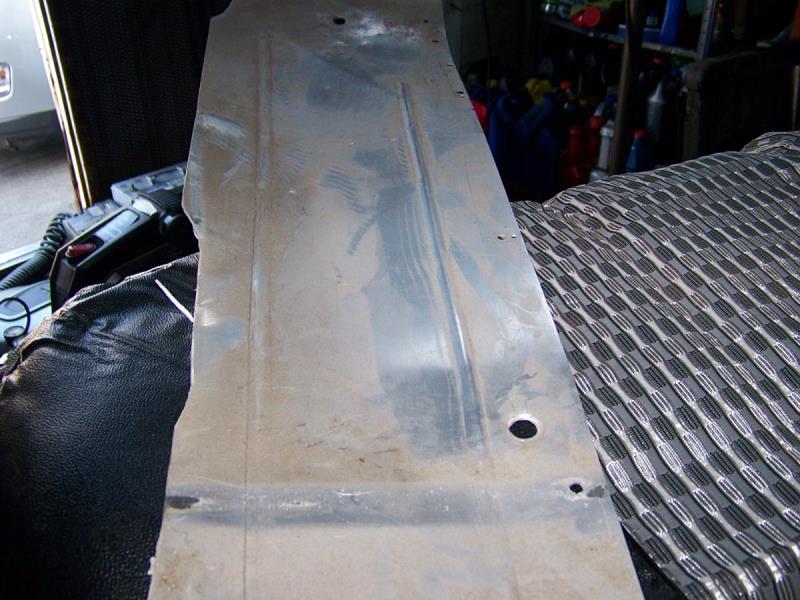 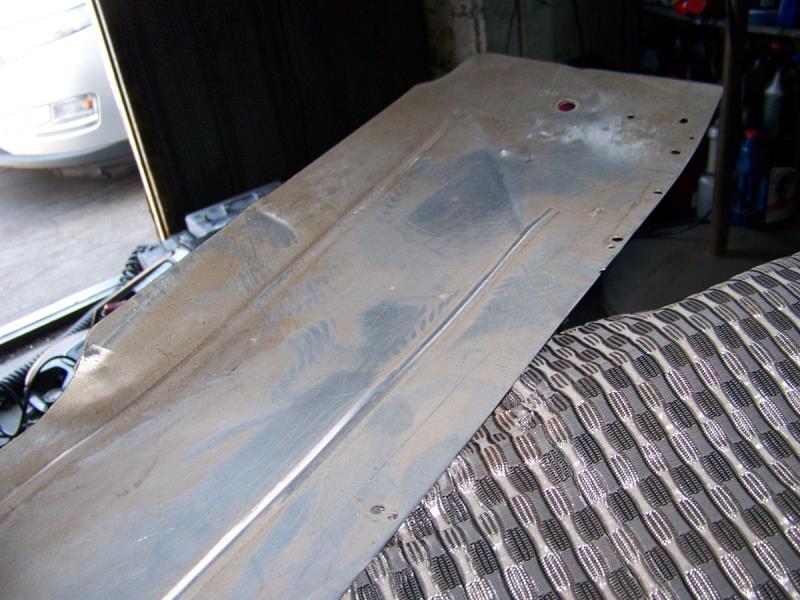 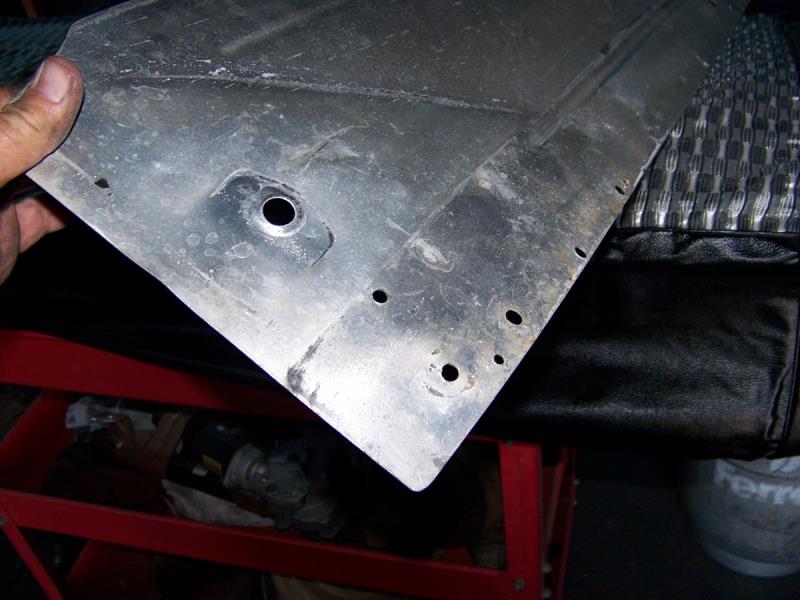 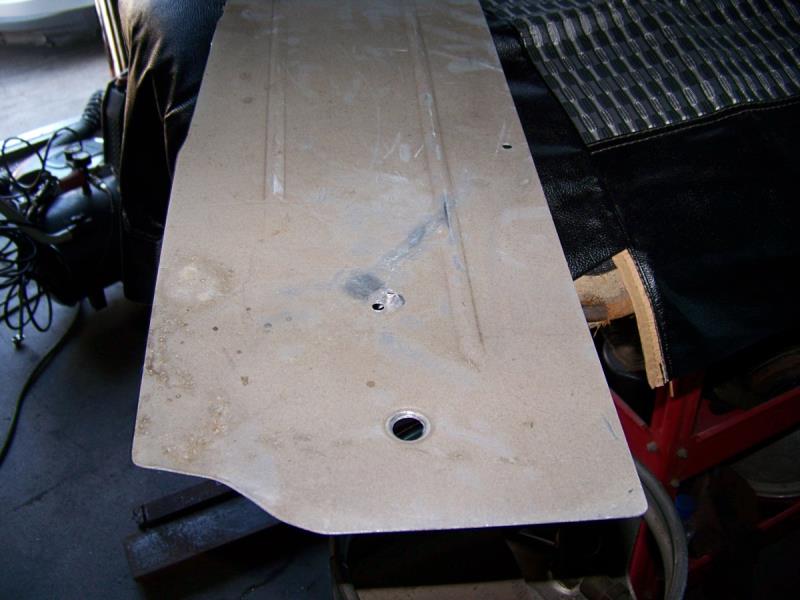
|
|
By Cliff - 7 Years Ago
|
|
Now sanding the frame for paint, this is hard have to sand all around the tubes.
|
|
By Cliff - 7 Years Ago
|
This is a hard job, I don't like doing it, I want an unpainted frame, so I'm stripping it.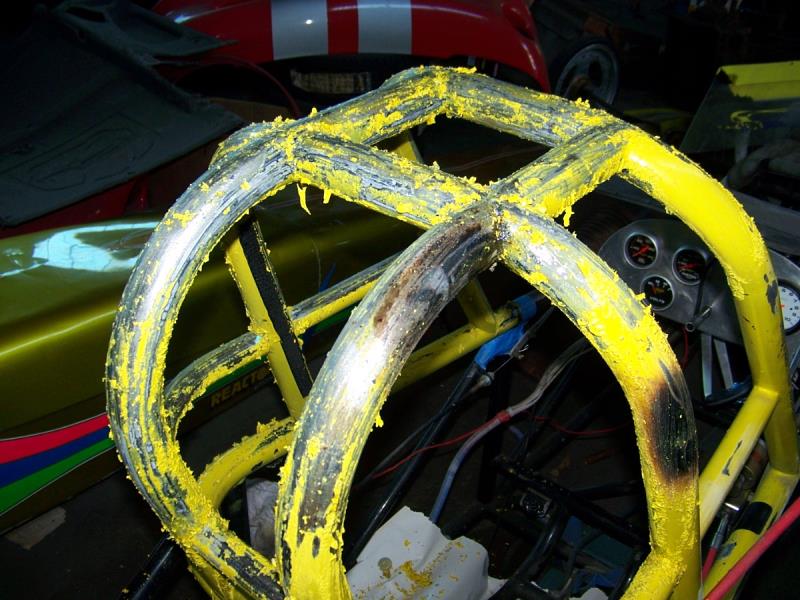 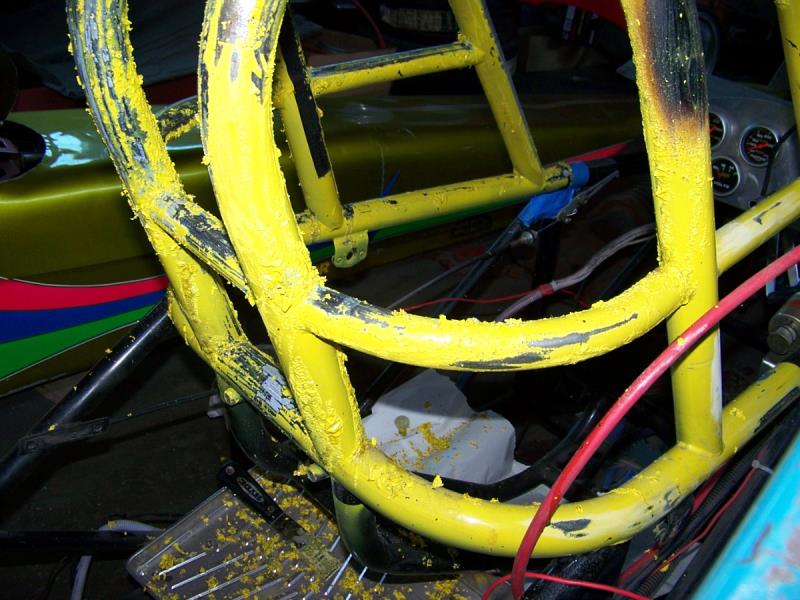 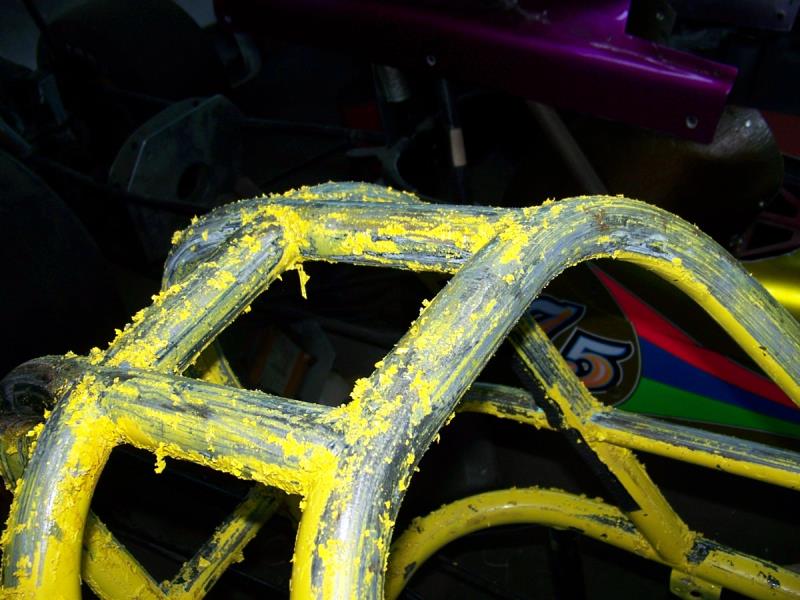
|
|
By Cliff - 7 Years Ago
|
|
This is a bad job
|
|
By Cliff - 7 Years Ago
|
I think there is a better way than paint stripper, I'm going to Harbor Freight and get a cone shaped brass brush for my angle grinder (?)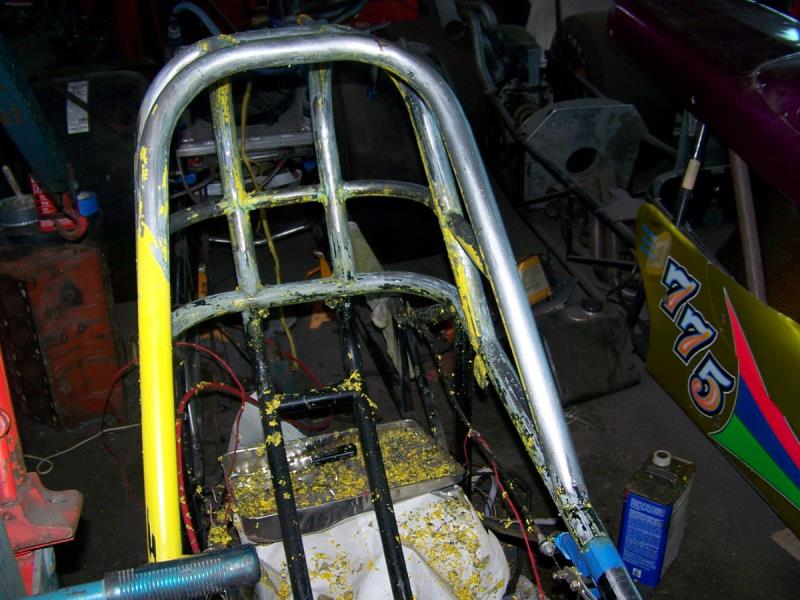 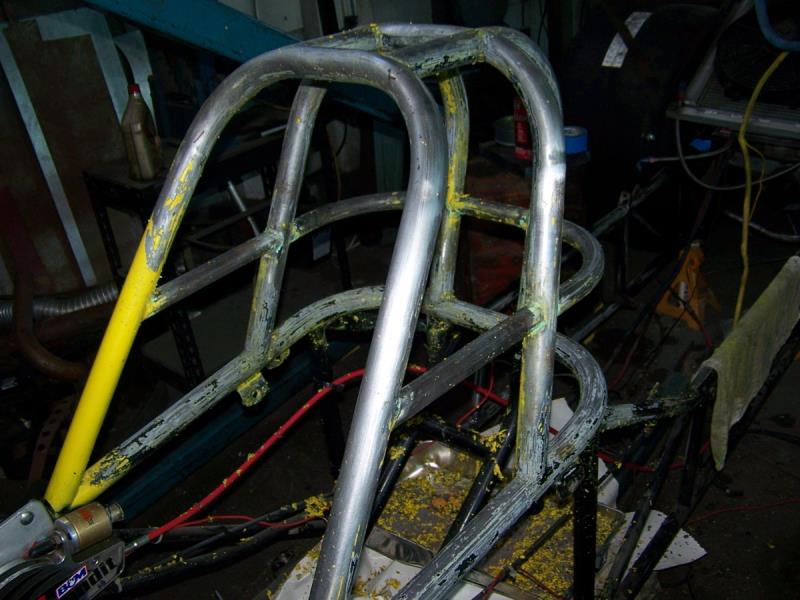
|
|
By ian57tbird - 7 Years Ago
|
|
I'm not a fan of paint stripper. Very corrosive if not completely cleaned off.
|
|
By Cliff - 7 Years Ago
|
More work done, don't use harbor freight 4" wire brushes, they fly apart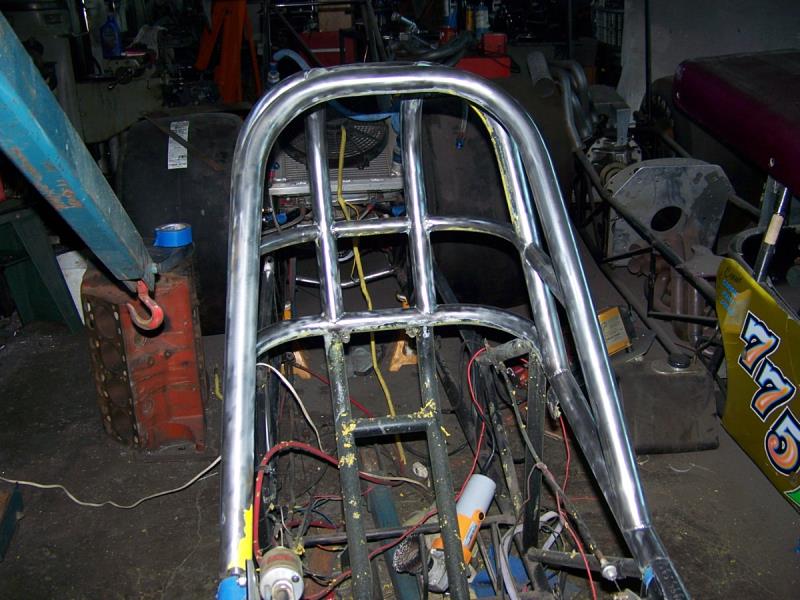 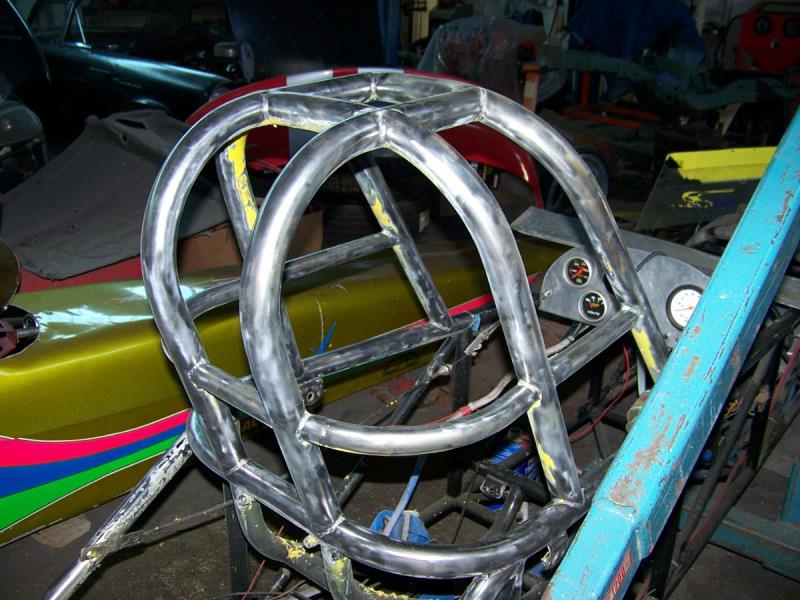 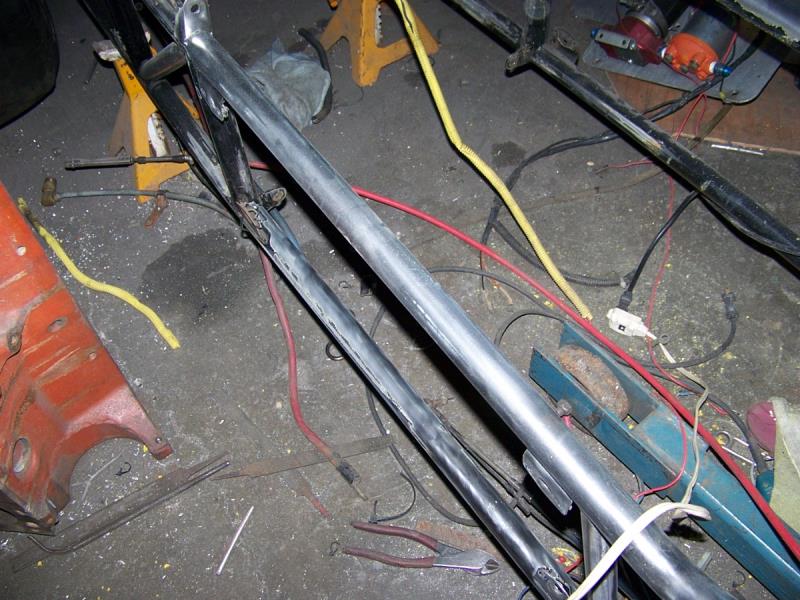
|
|
By Dave C - 7 Years Ago
|
There is an easier way to do this Cliff.. Hire someone...lol
Dave
|
|
By Cliff - 7 Years Ago
|
More work done today, this is a BIG JOB (real big), it's going to the stripper as soon as I can get it apart.  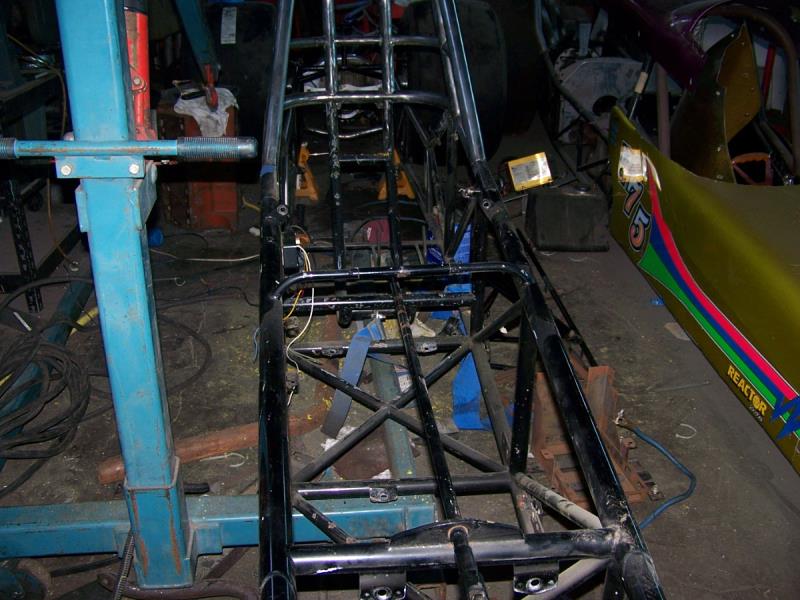 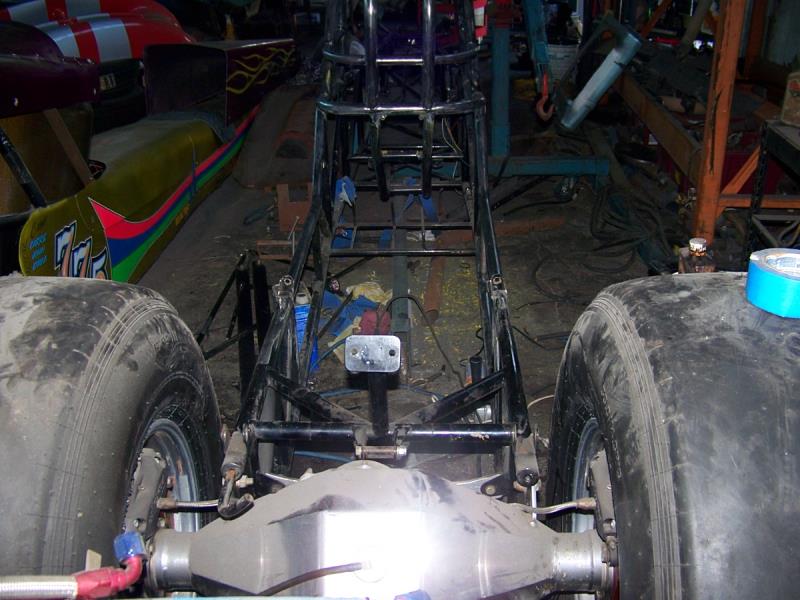 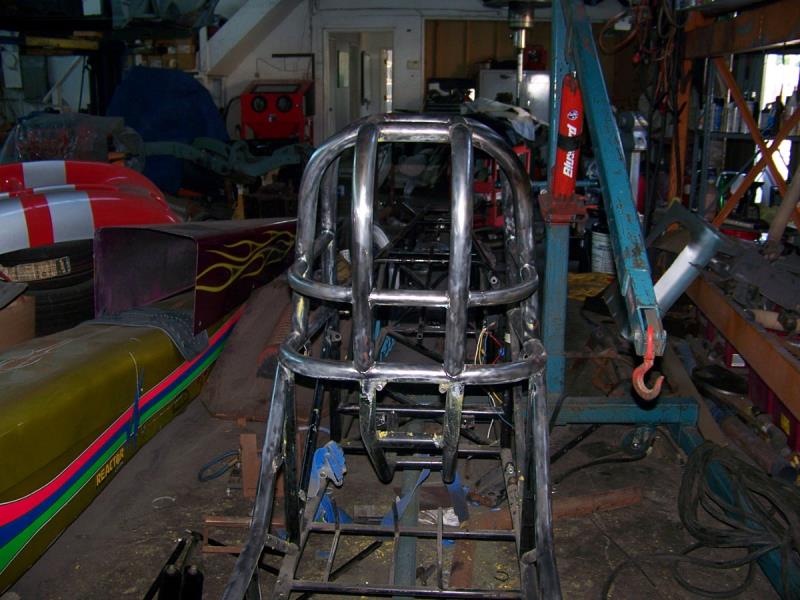 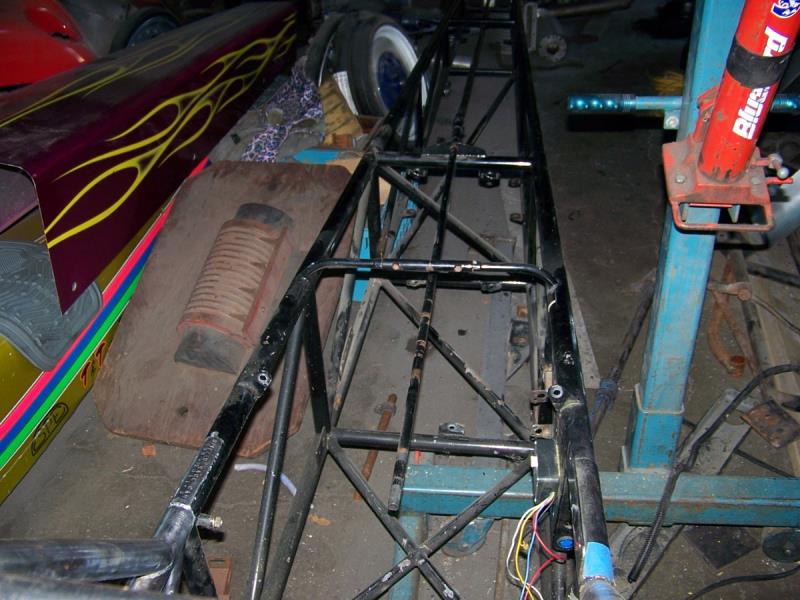 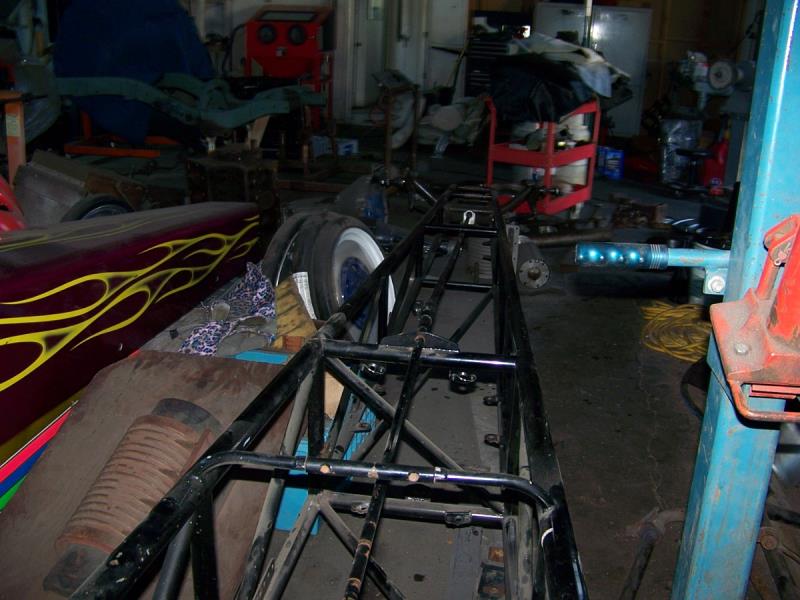  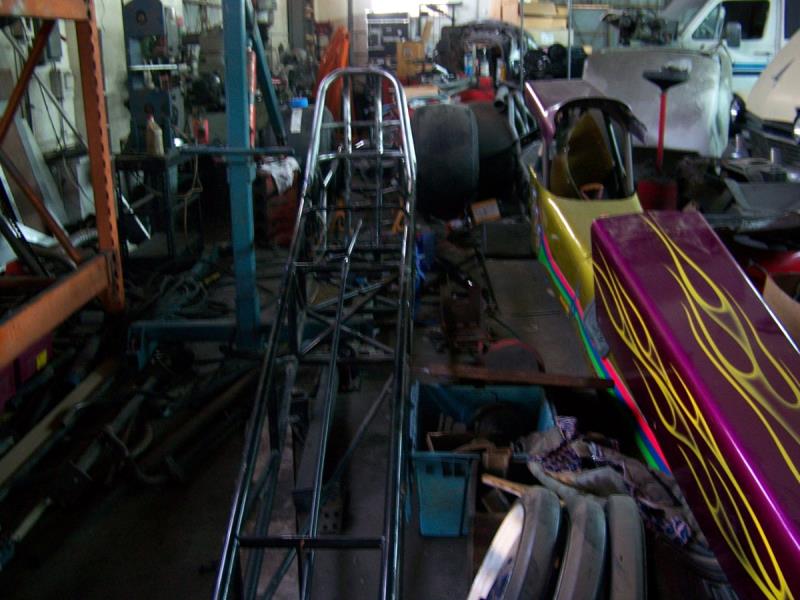 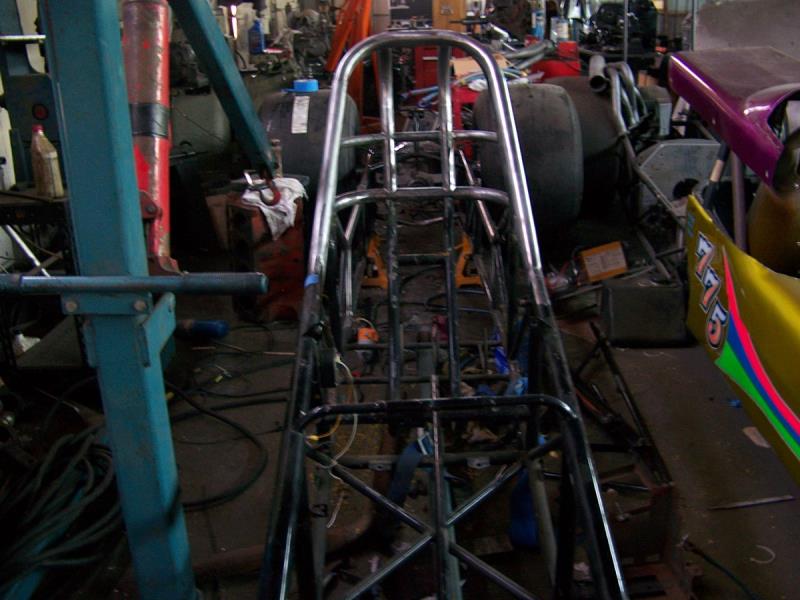
|
|
By Cliff - 7 Years Ago
|
|
A lot of work yesterday, getting the frame ready to go to the stripper (walnut blast), then a coating of Sharkhide.
|
|
By Cliff - 7 Years Ago
|
Ok worked Saturday and Monday, top of the car done, now working on the bottom, fixing all the poor repairs.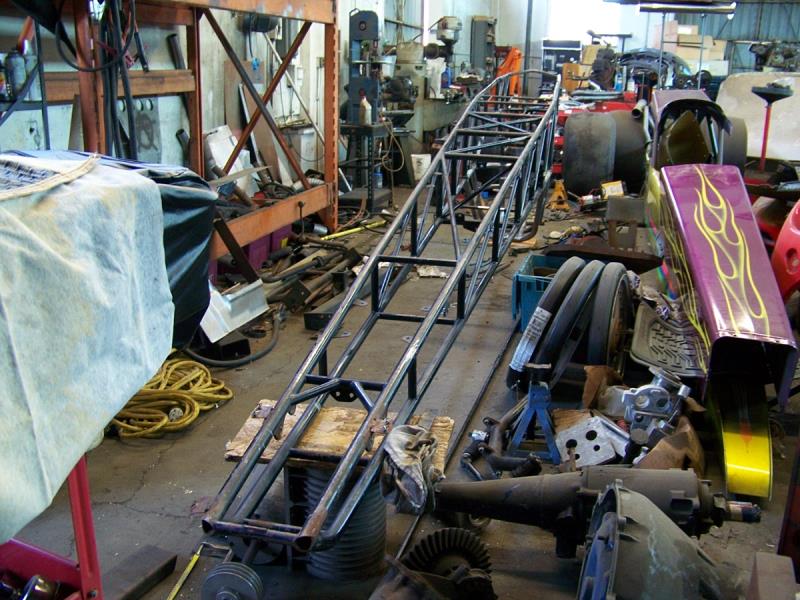  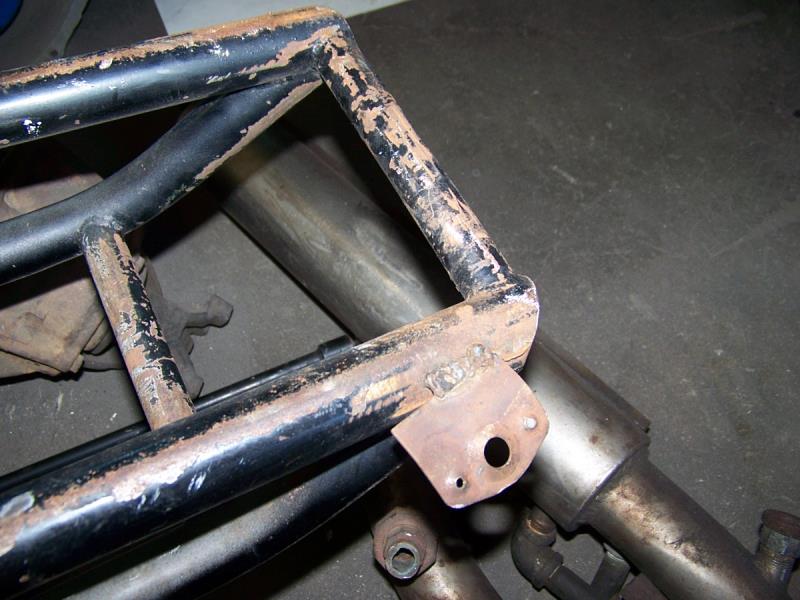 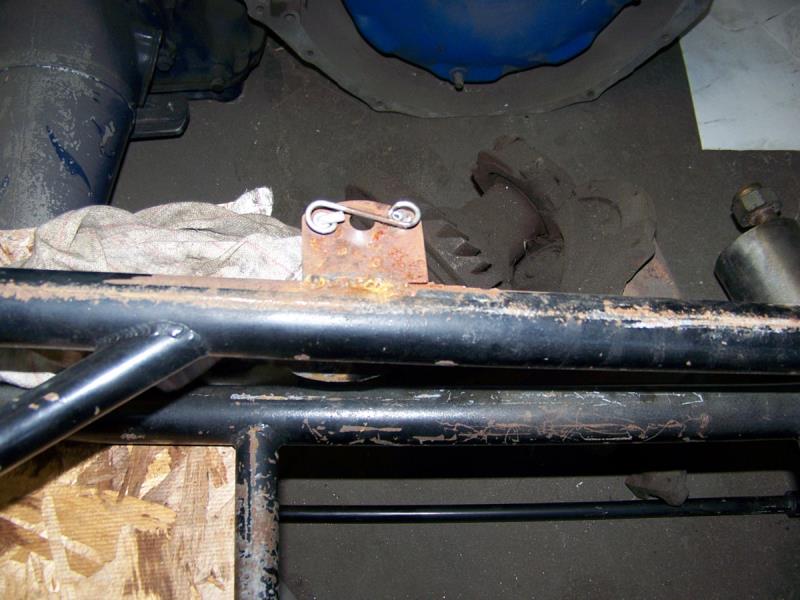  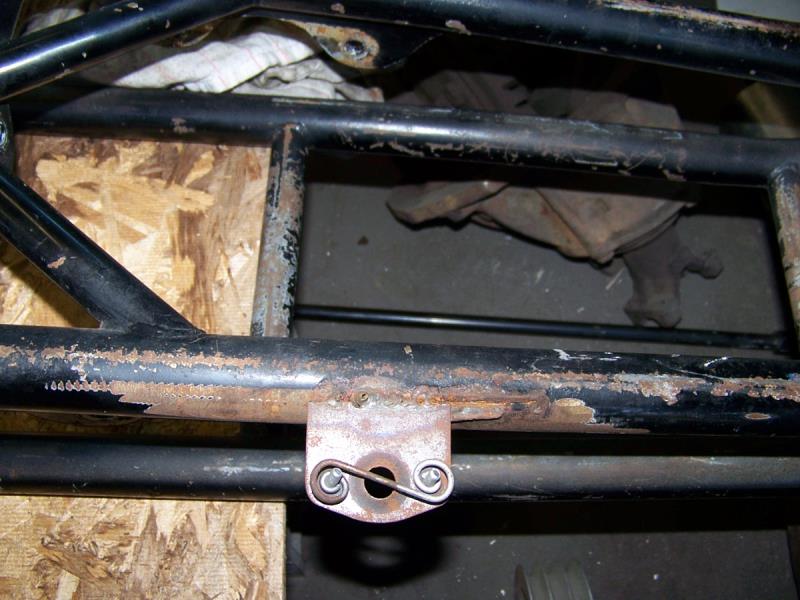 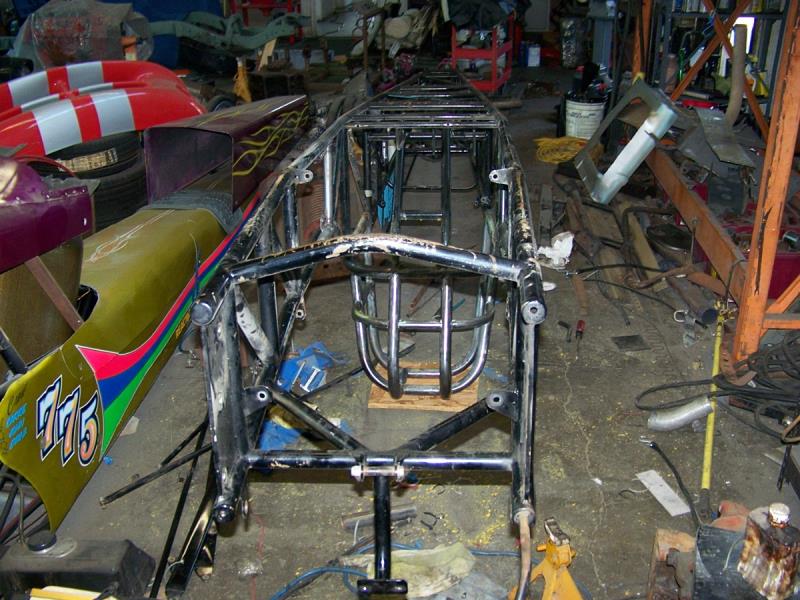 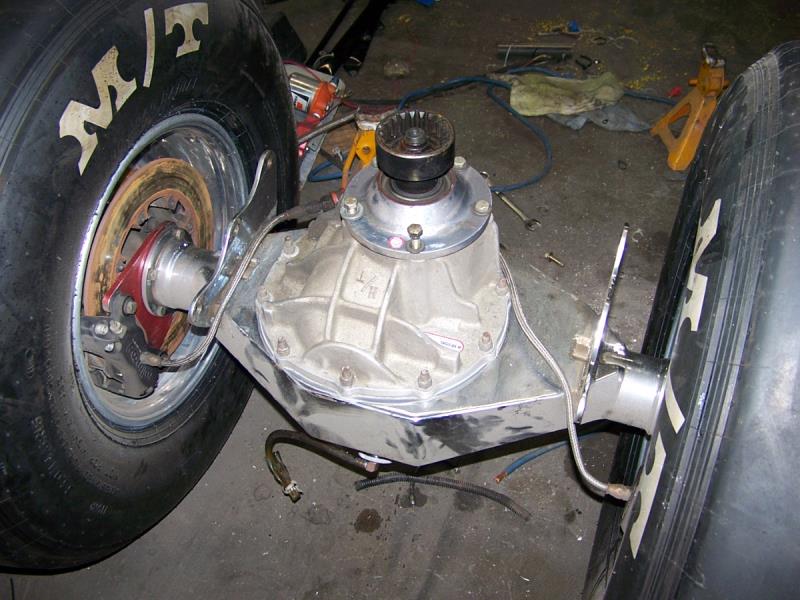
|
|
By Cliff - 7 Years Ago
|
Working today, repairing cracke   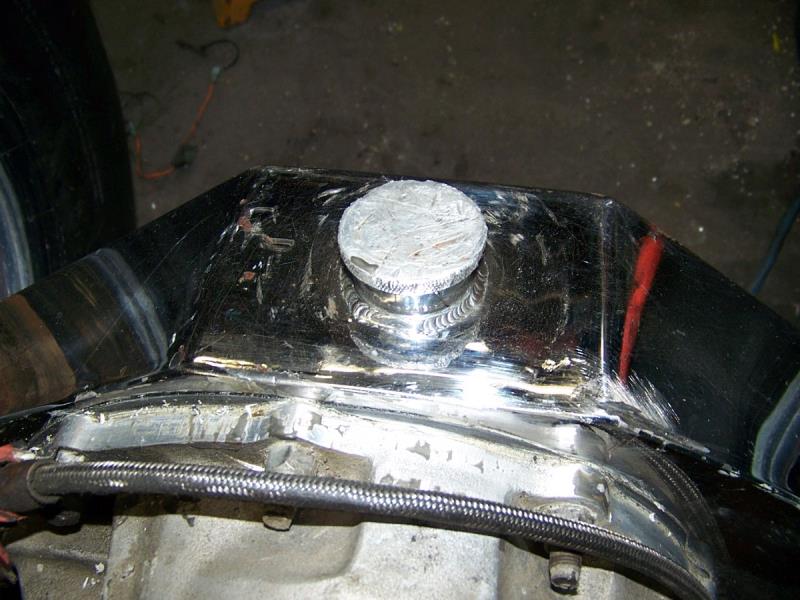 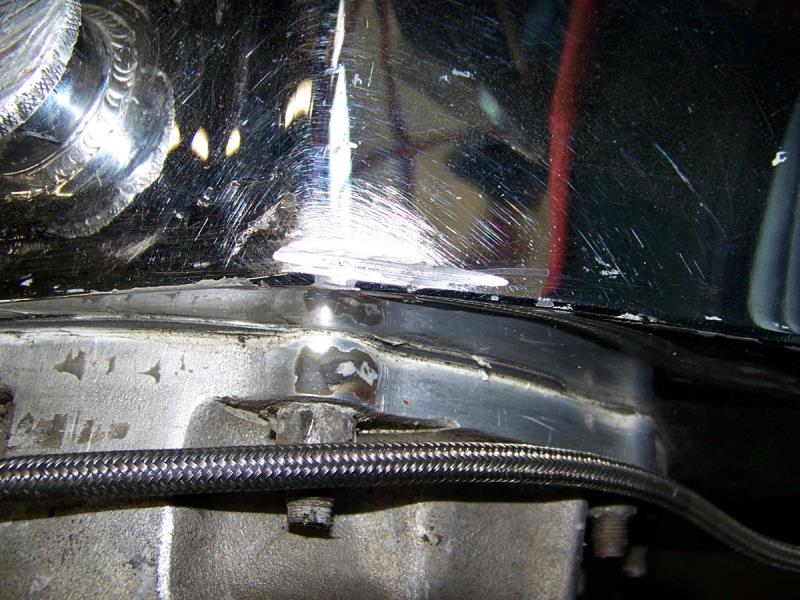 d nose (mounting points), leaking rear end housing (crack), this has been jacked up under the rear end, it's beat up, the drain plug has been removed with channel lock pliers (mangled) d nose (mounting points), leaking rear end housing (crack), this has been jacked up under the rear end, it's beat up, the drain plug has been removed with channel lock pliers (mangled)
|
|
By Cliff - 7 Years Ago
|
All chassis repairs done, also added skid pad.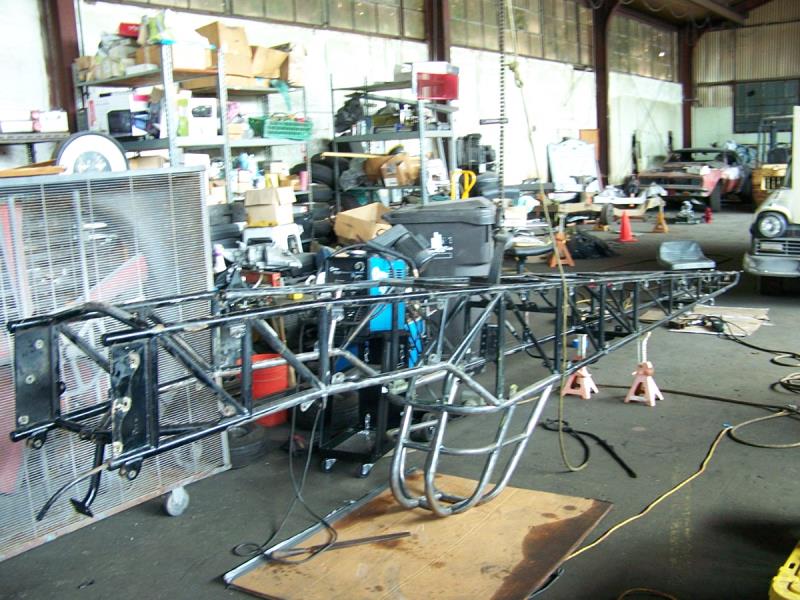 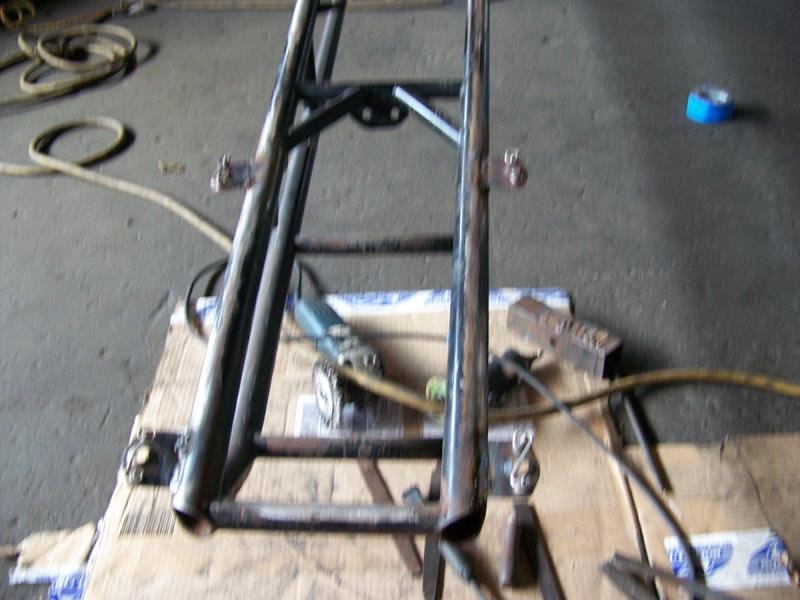 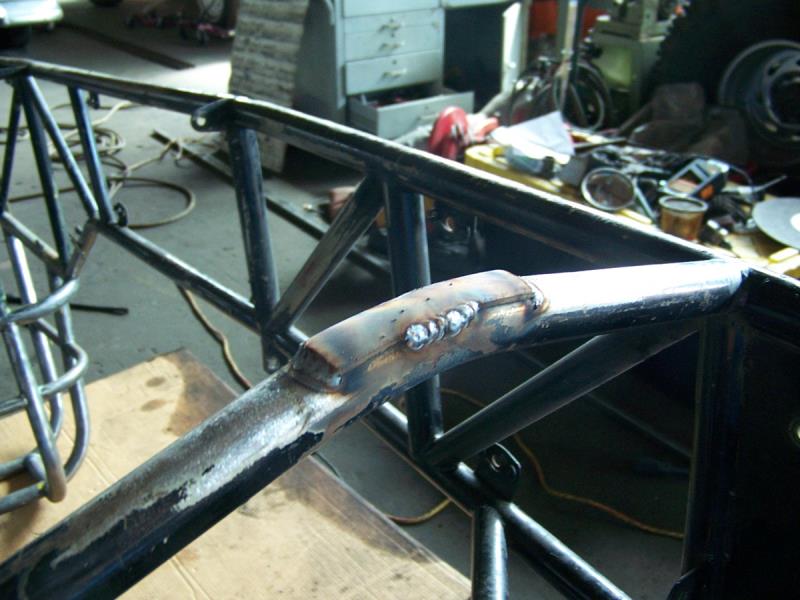
|
|
By Cliff - 7 Years Ago
|
Now starting to refinish all the small parts, finished with Sharkhide $65.00 a quart plus shipping.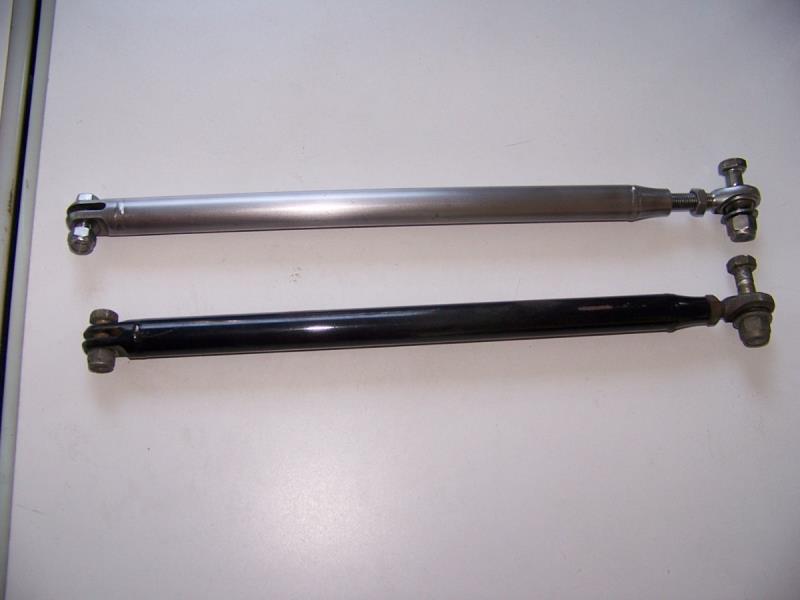 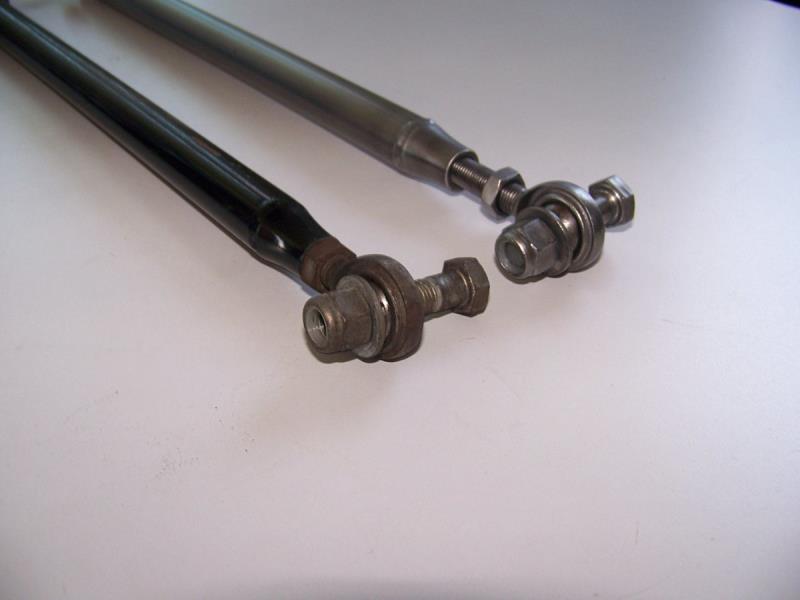 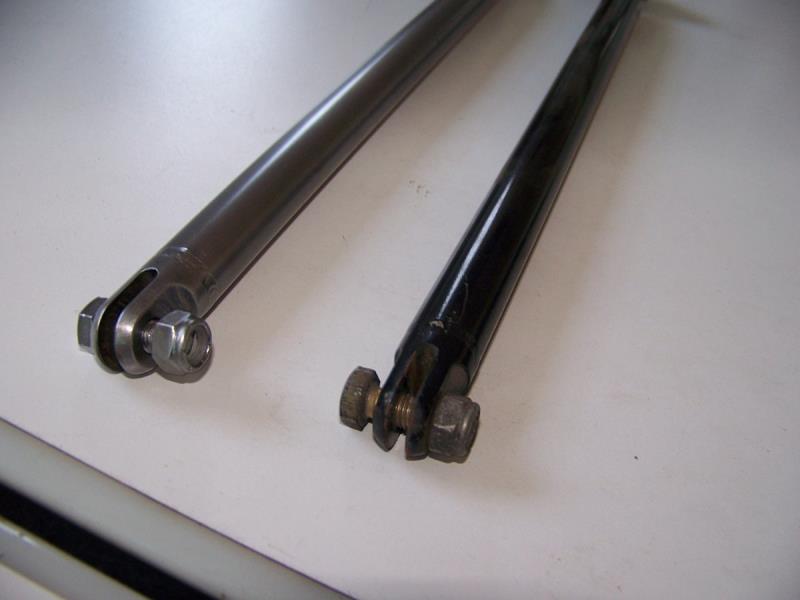
|
|
By Cliff - 7 Years Ago
|
On the way to the stripper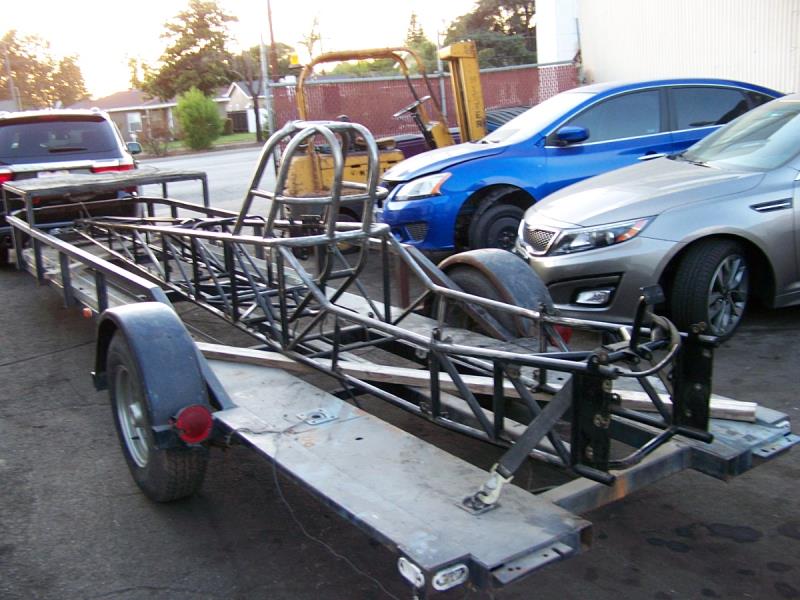 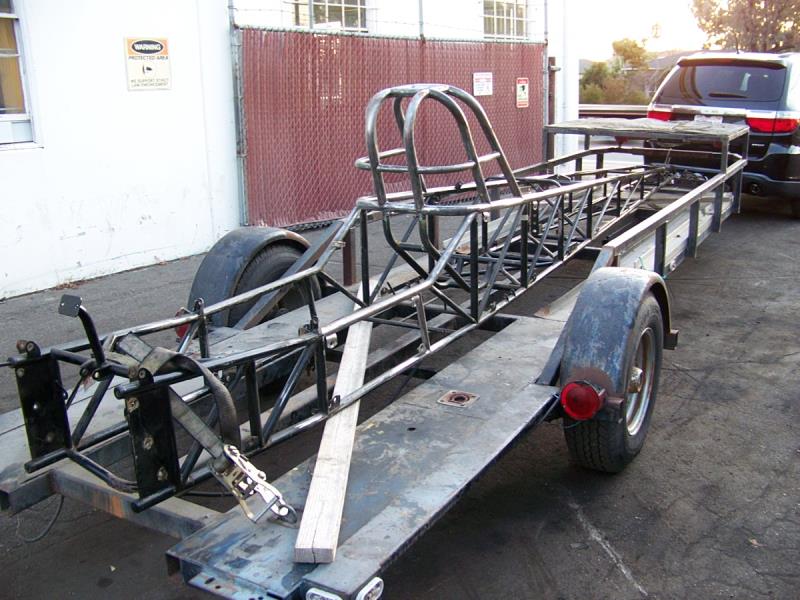
|
|
By Cliff - 7 Years Ago
|
Back from the stripper 
|
|
By Dave C - 7 Years Ago
|
Paint or powder coat?
Dave
|
|
By Cliff - 7 Years Ago
|
|
Hi, Sharkhide http://sharkhide.com/
|
|
By Dave C - 7 Years Ago
|
Thanks..
Dave
|
|
By Cliff - 7 Years Ago
|
Hi Guys, sorry about the long time with no postings, I am scuffing the entire frame with Scotch Brite pads then a 2nd coat of SharkHide should be done today (hope),his stuff is good no chips or scratches when done.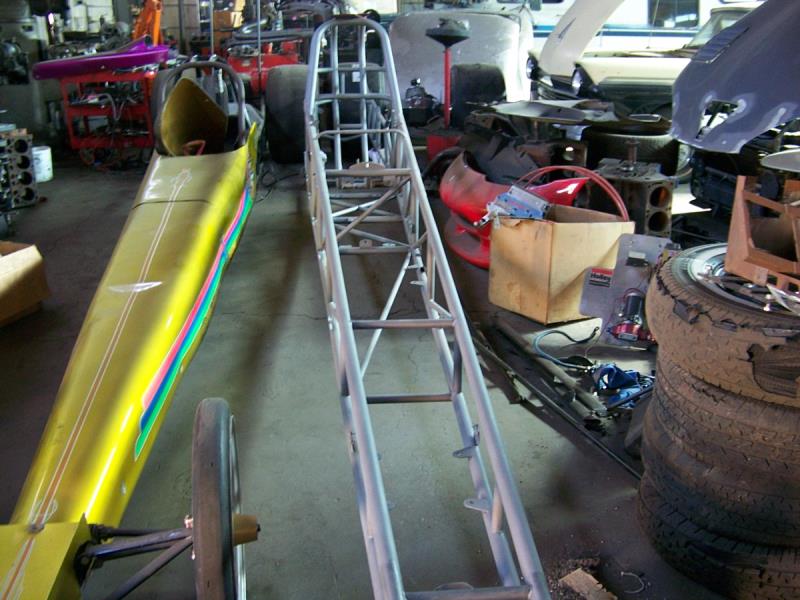  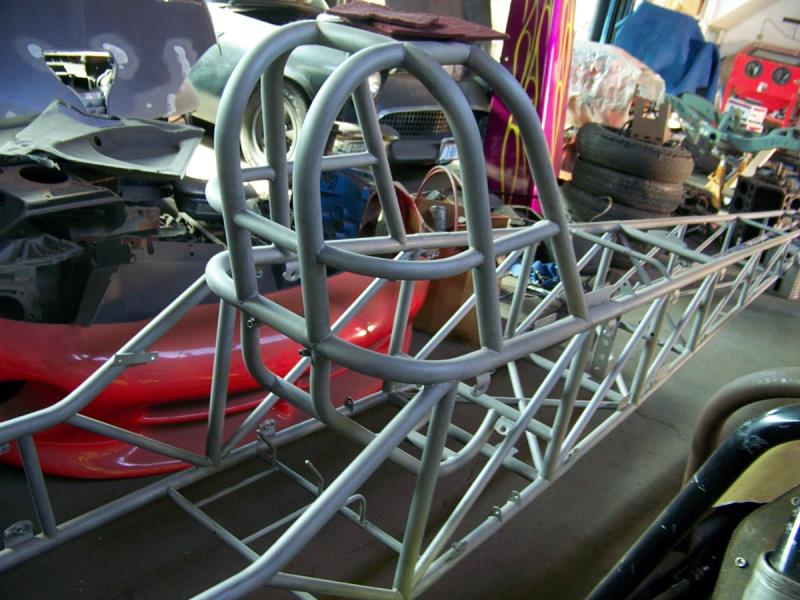 
|
|
By suede57ford - 7 Years Ago
|
It's really starting to come along. Great Job!
|
|
By Cliff - 7 Years Ago
|
Ok, chassis is ready to go, all repairs done, Sharkhide done (good stuff), now starting to assemble.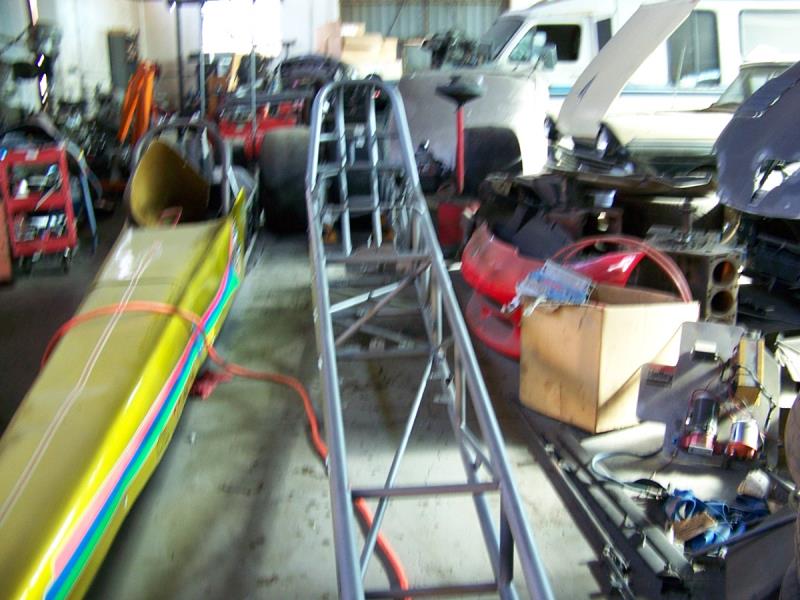 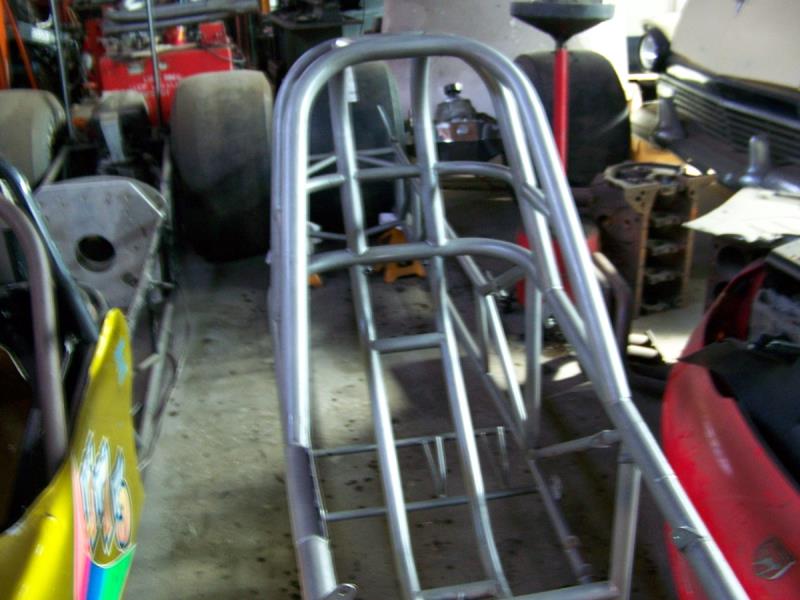 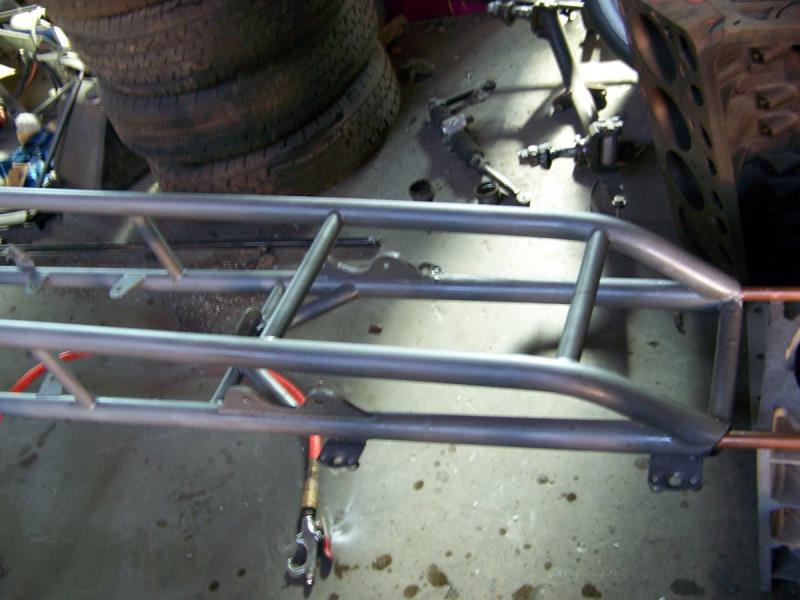
|
|
By Cliff - 7 Years Ago
|
Better pictures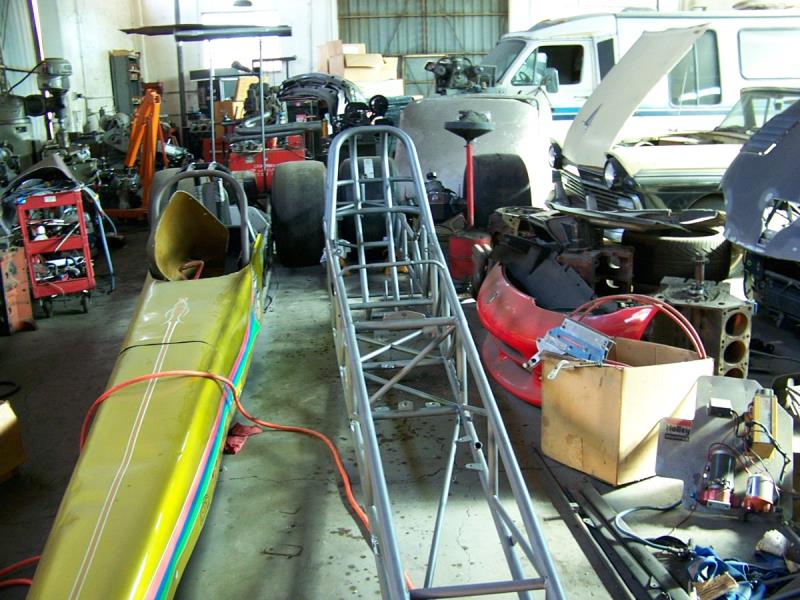 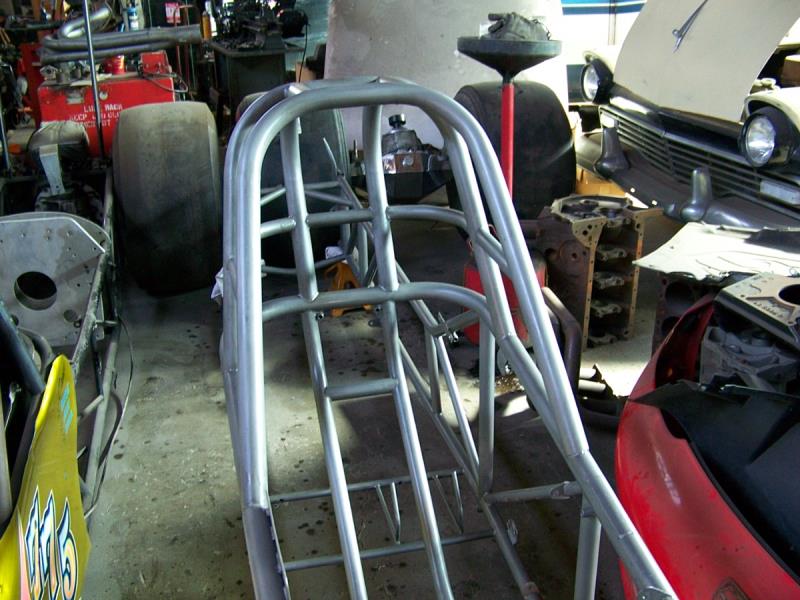
|
|
By Cliff - 7 Years Ago
|
More work, front axle going in, all parts refinished, all grade 8 hardware, bare metal finished with Sharkhide.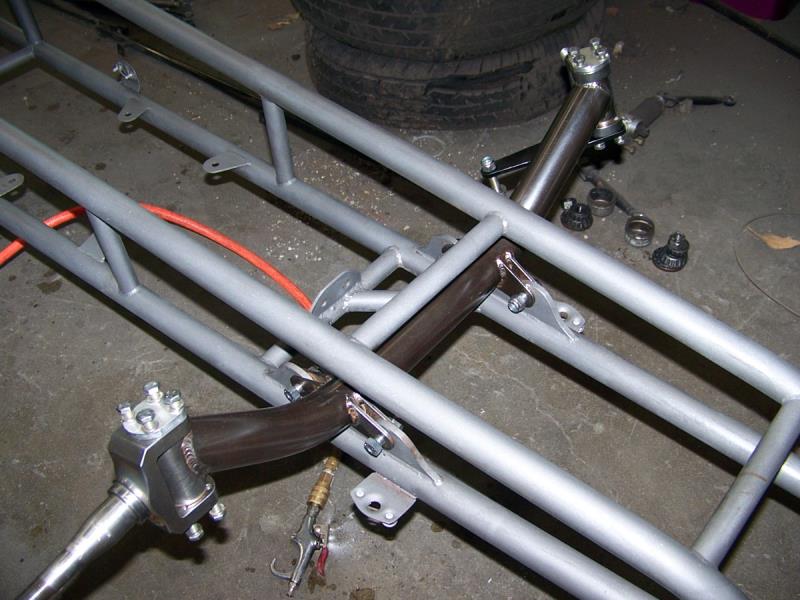  
|
|
By Cliff - 7 Years Ago
|
Here's what I did today, will install it tomorrow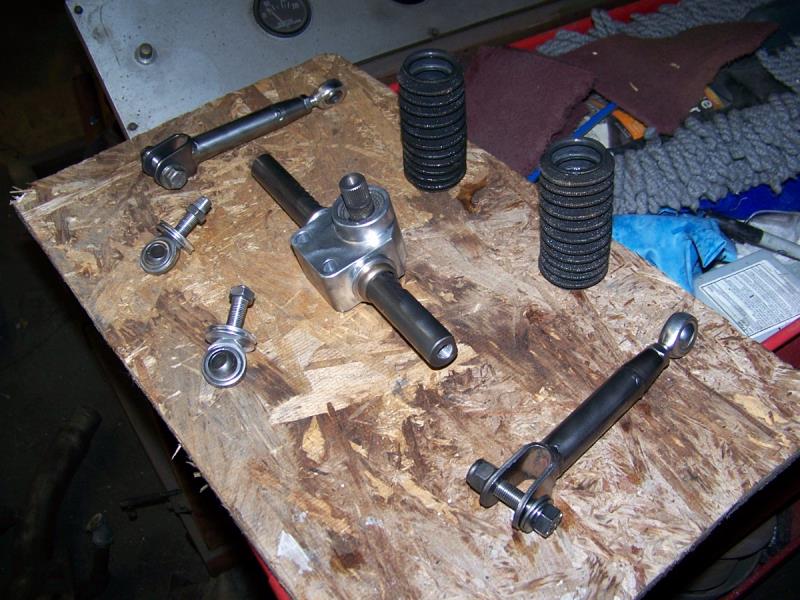
|
|
By Cliff - 7 Years Ago
|
Installed 
|
|
By Cliff - 7 Years Ago
|
Update, working on all small parts, cleaning repairing and refinishing (long time), I am replacing the gas tank going from 2 1/2 gal to 4 gal, however it won't fit the car, so some more work, added a bushing to the steering rod, was metal to metal before.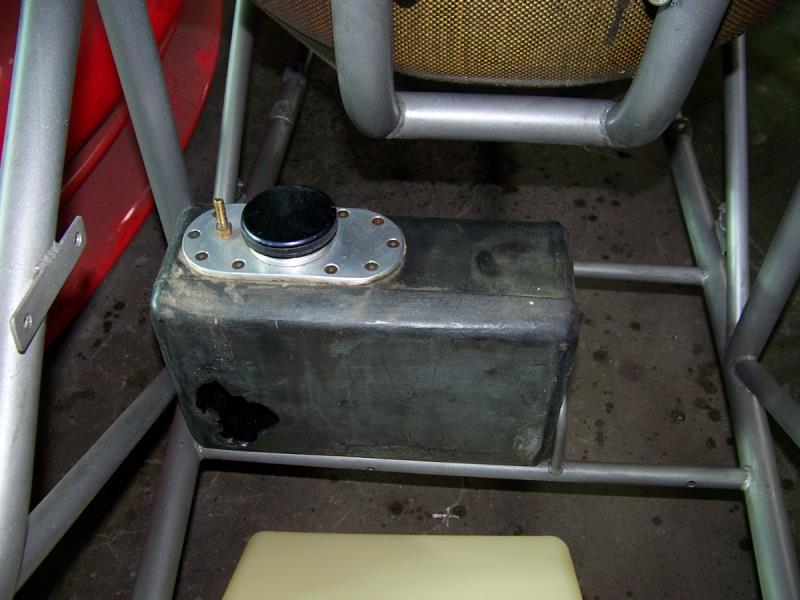 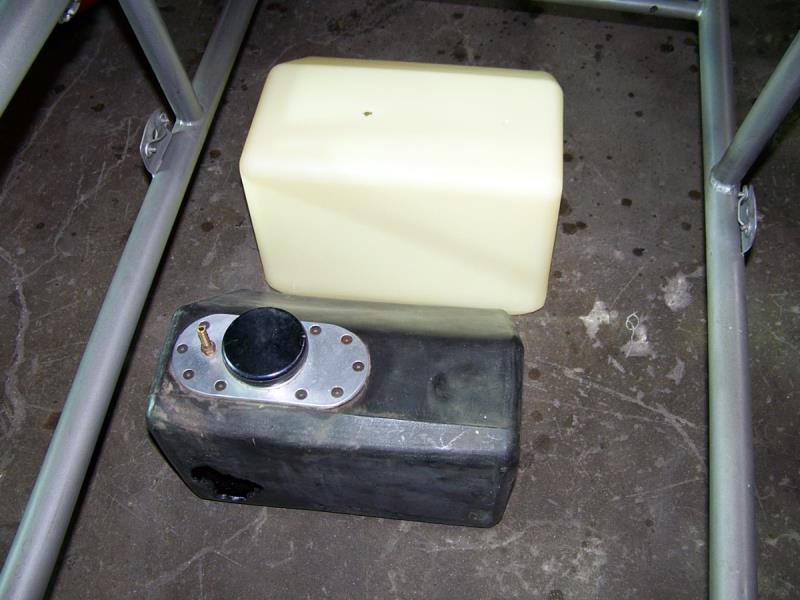 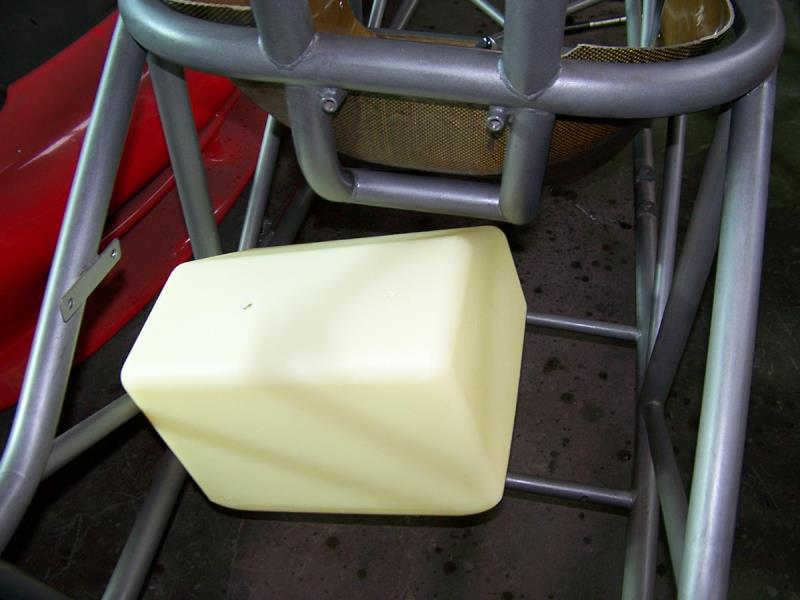 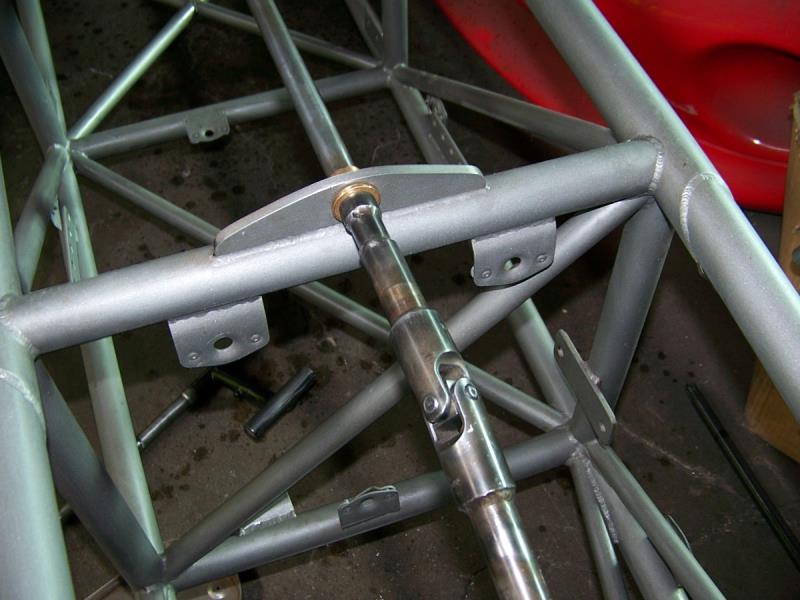
|
|
By Cliff - 7 Years Ago
|
More work, this work is slow, front wheels installed, cleaned all parts, new seals, fit gas tank (hard job), refinished the mount for the shifter,, started rebuilding the shifter.
Going home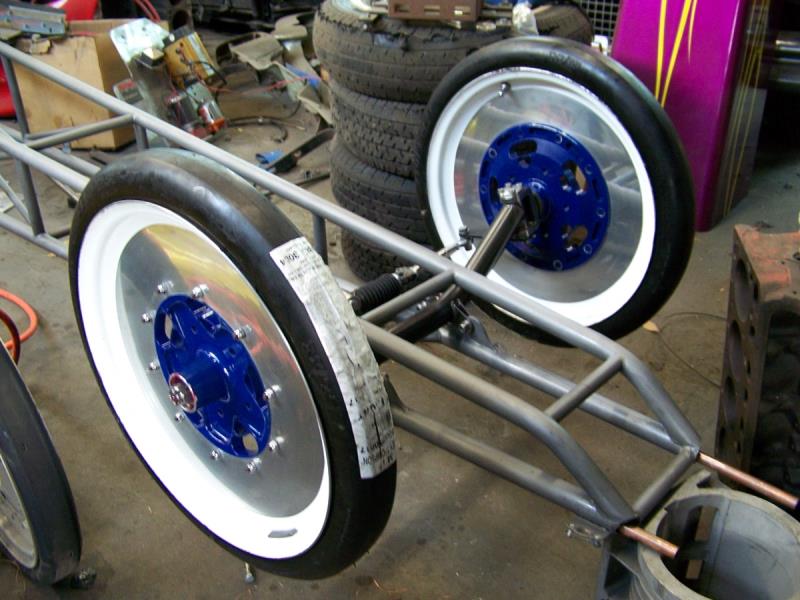 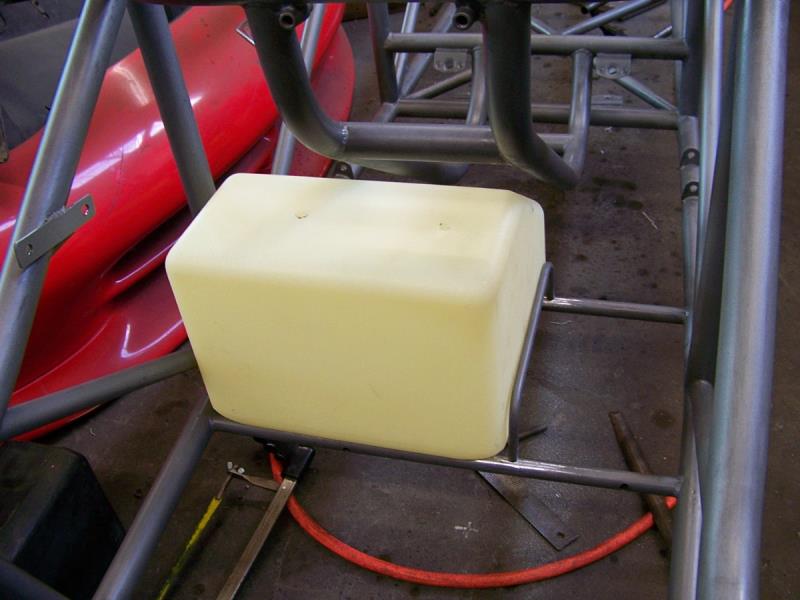  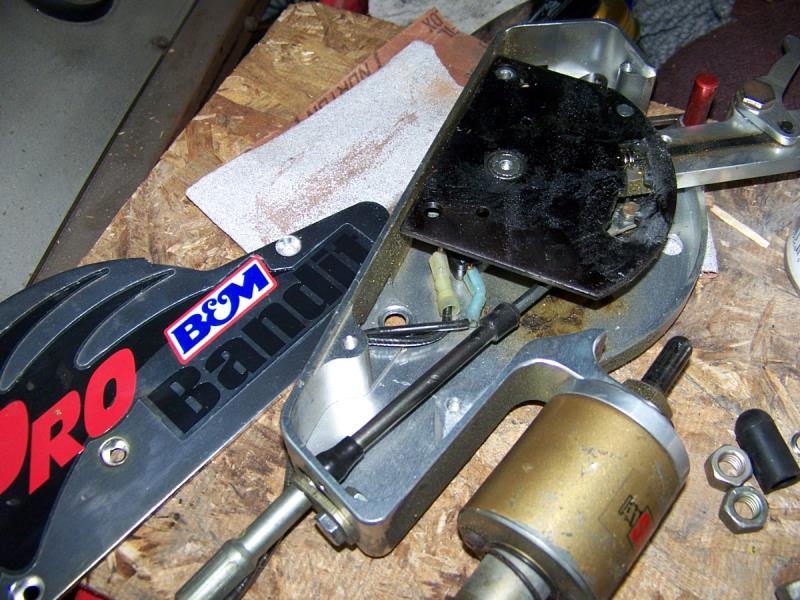
|
|
By Cliff - 7 Years Ago
|
Shifter done and installed, the solenoid was a hard job (finished with Sharkhide)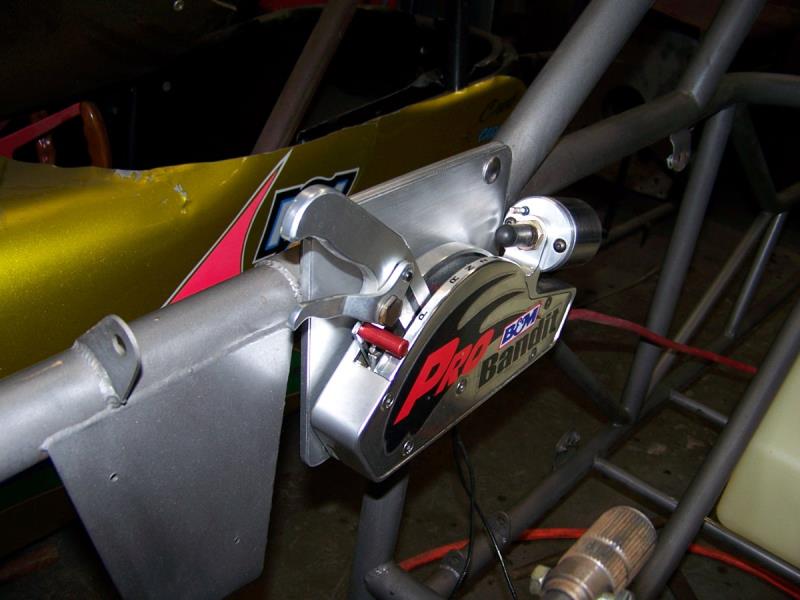 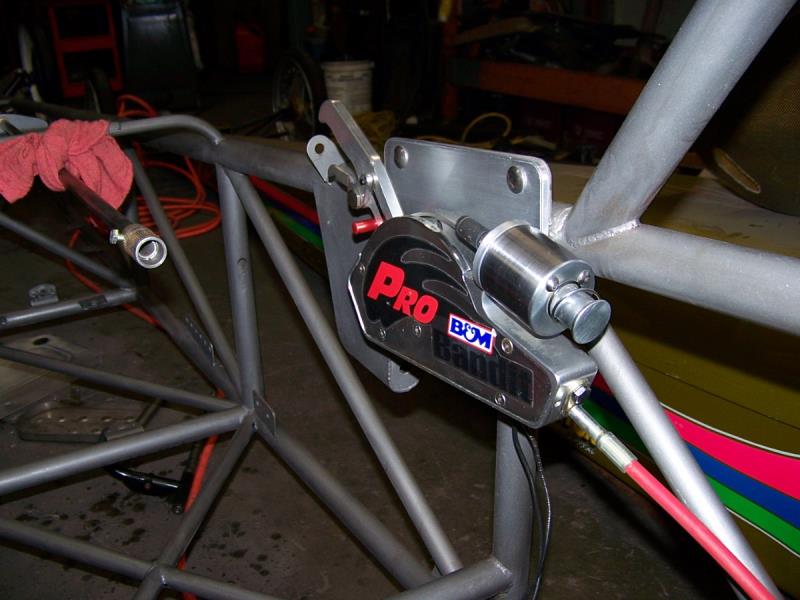
|
|
By Cliff - 7 Years Ago
|
Working today, new stainless brake line (20ft) routes through the frame (hard to do), master cylinder cleaned, painted and installed, new brake push rod made (stainless) the old one was a pipe, with nuts welded on each end (poor work), reworking the brake pedal. 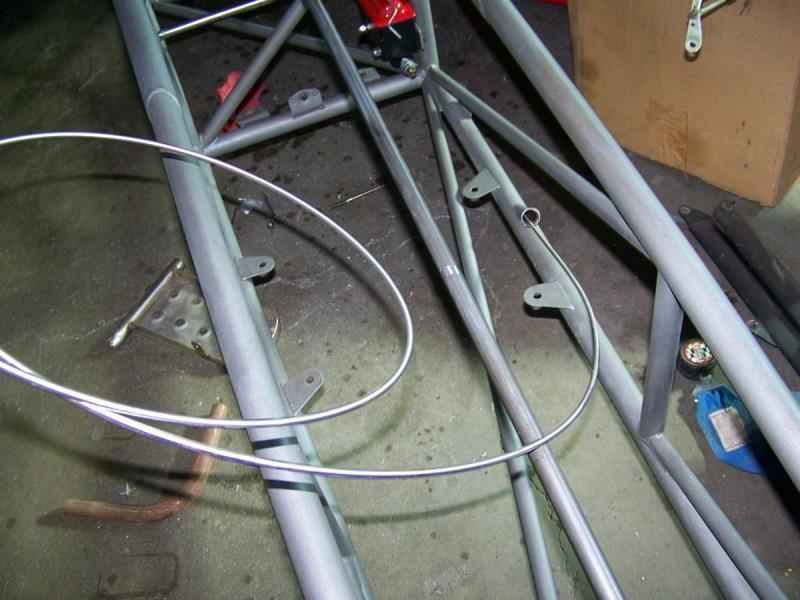 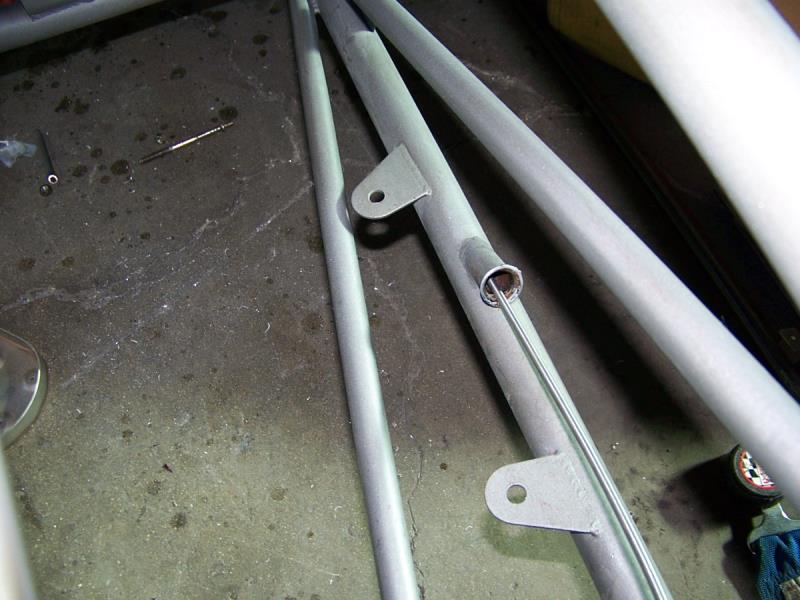 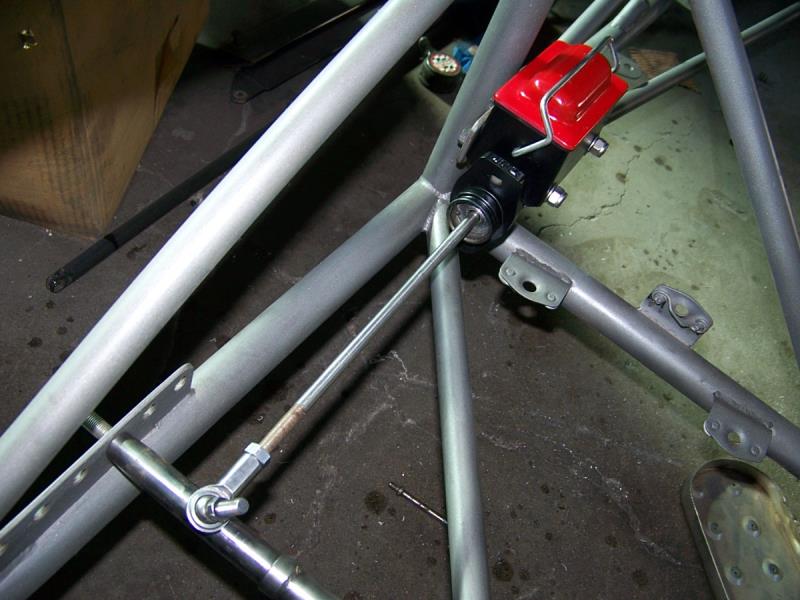 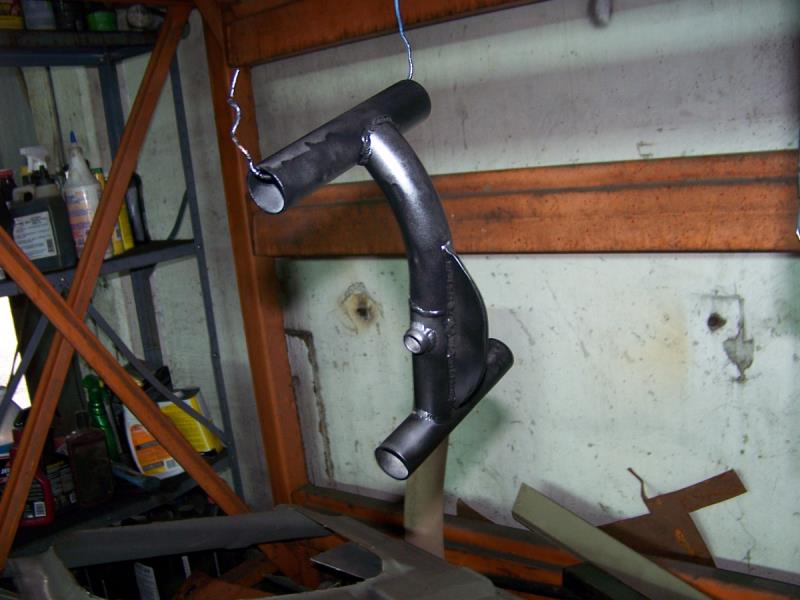
|
|
By Cliff - 7 Years Ago
|
Now the dash, this thing is CRAP, I'm going to make a new one, the wire loom looks like the phone wires in my house. so all will be new.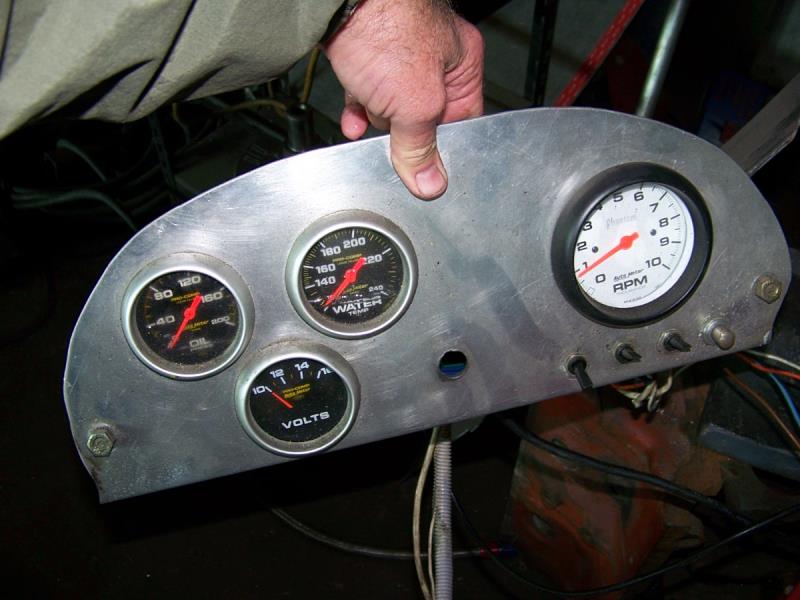 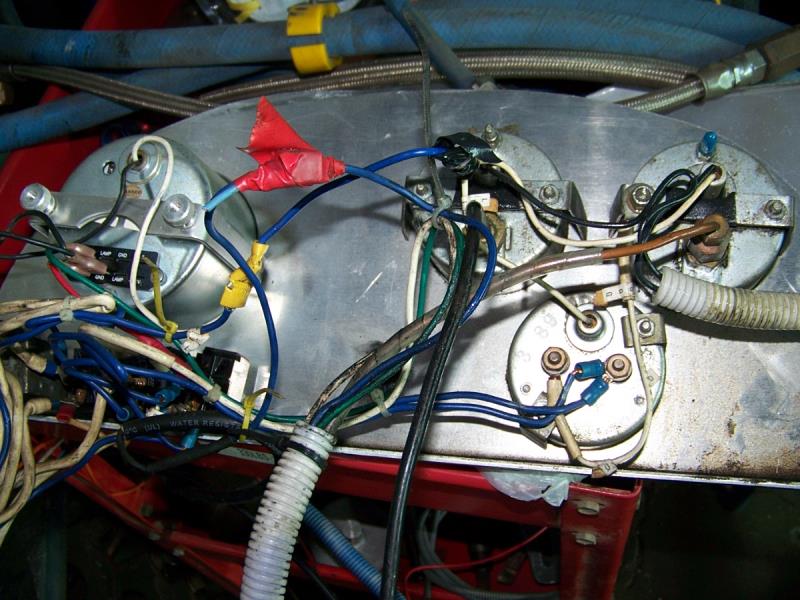 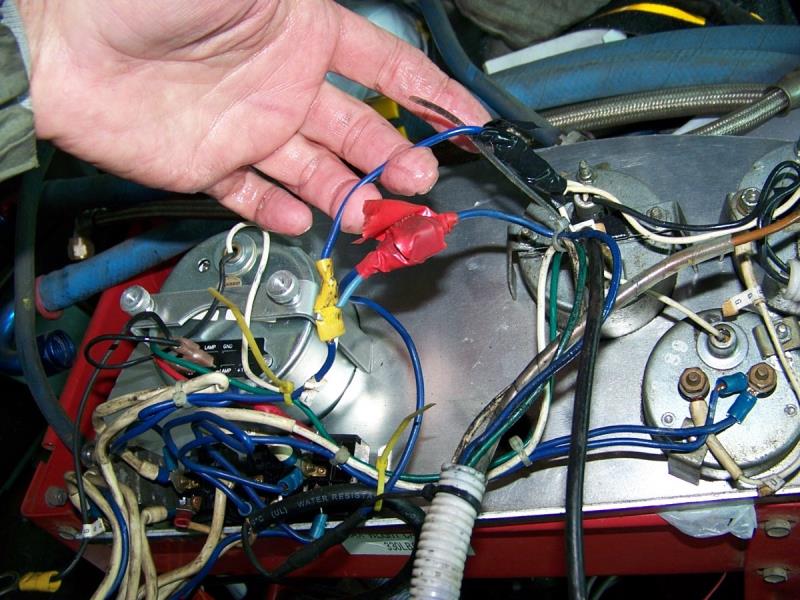
|
|
By Cliff - 6 Years Ago
|
Short note, started to make the dash, this is cut out of an old off road race truck part (carbon fiber), switch plate mocked up, switches used to be mounted in the dash.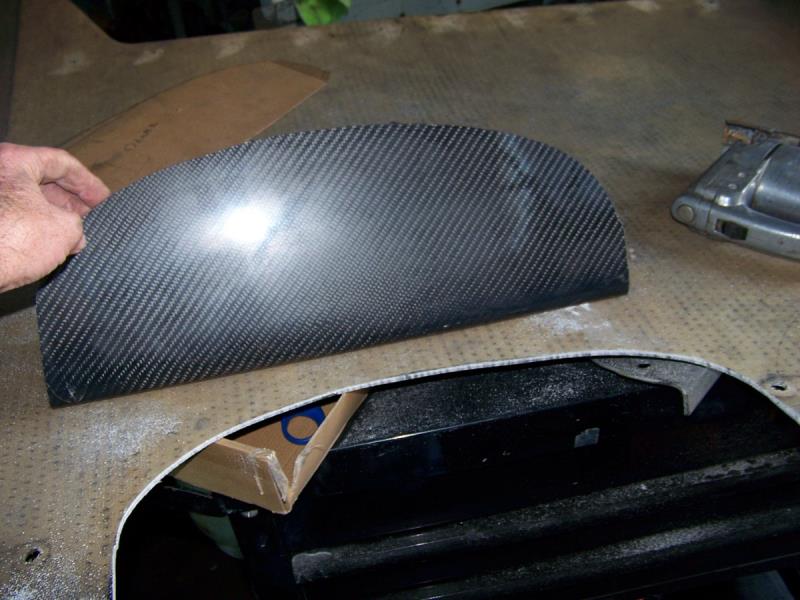 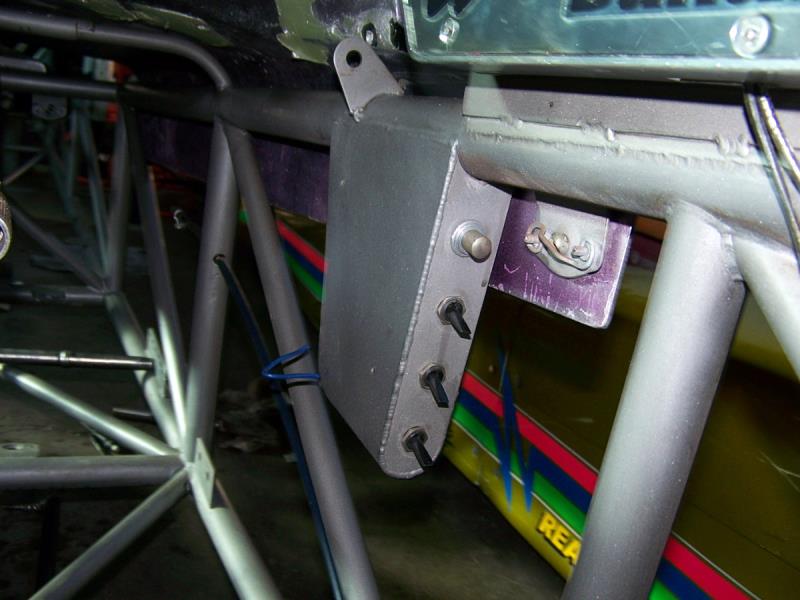
|
|
By MoonShadow - 6 Years Ago
|
I have to ask what are the tubes sticking out of the front of the dragster frame?
|
|
By Cliff - 6 Years Ago
|
|
I stuck them in there so I could suspend the frame with out touching so I could apply the Shark Hide, sorry about the slow progress, I have been in working to buy the property my business is at, I have been there 21 years and all they do is raise the rent, last time was 40% (approx) or get out, I tried for 5 years to buy but no luck, my son worked it for 6 months and we opened escrow last Thursday so I gave him 25% ownership, this is the largest purchase of my life, the property is polluted and I will be responsible for the cleanup (part of the buy).
|
|
By Cliff - 6 Years Ago
|
Hi guys, working again (did not close escrow yet, lawyers fighting) took all day to fit the dash, I had to reshape the cowl (hard, it's 5/16 thick 6061 I think) only the part in front of the driver and under the wind screen is thick.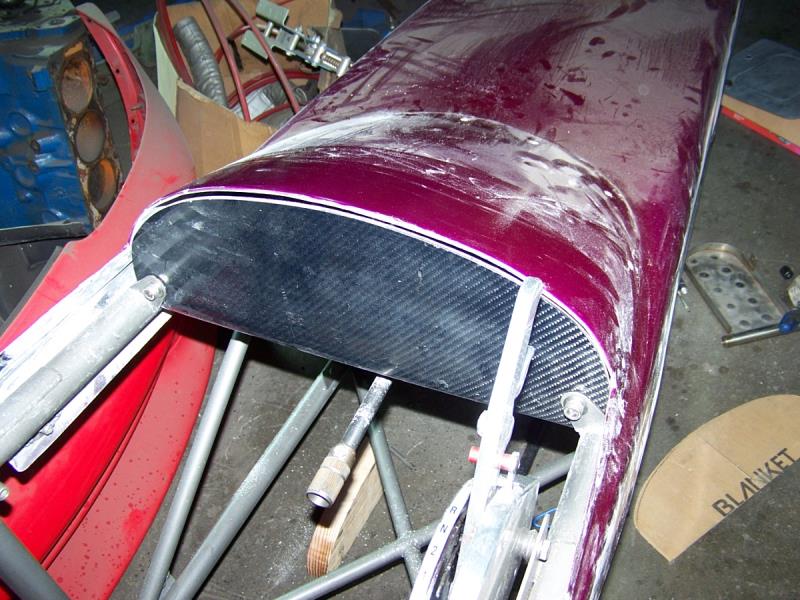 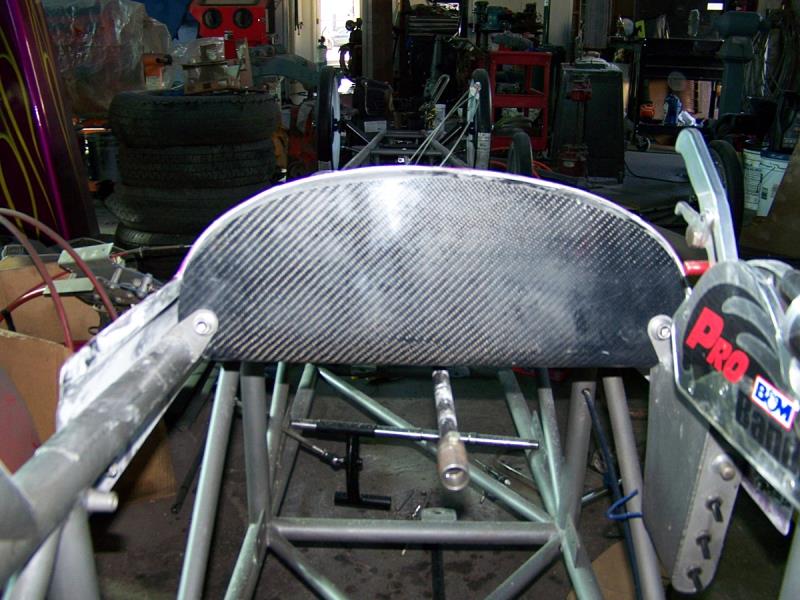
|
|
By Cliff - 6 Years Ago
|
Soon to be battery tray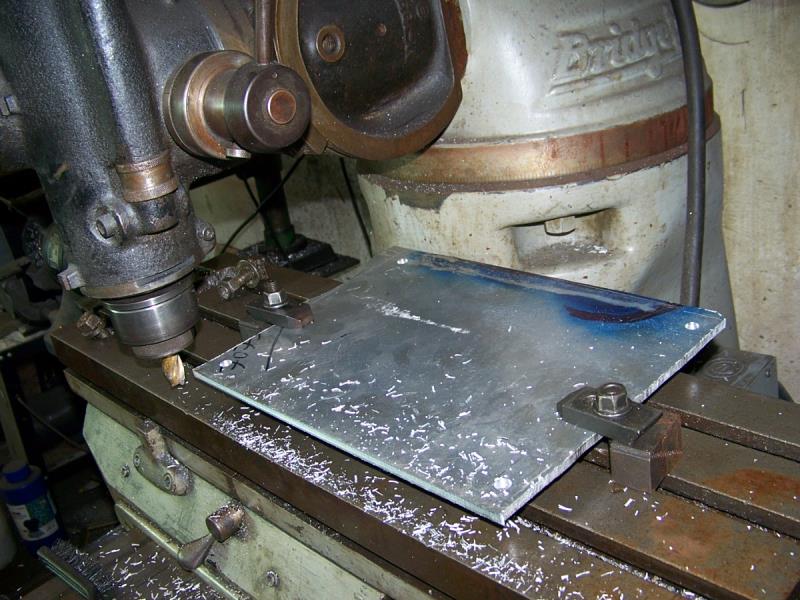
|
|
By Ted - 6 Years Ago
|
Will that be half the weight or less of the one you removed?
|
|
By Cliff - 6 Years Ago
|
The one I took out was steel, wait till I put some holes in it.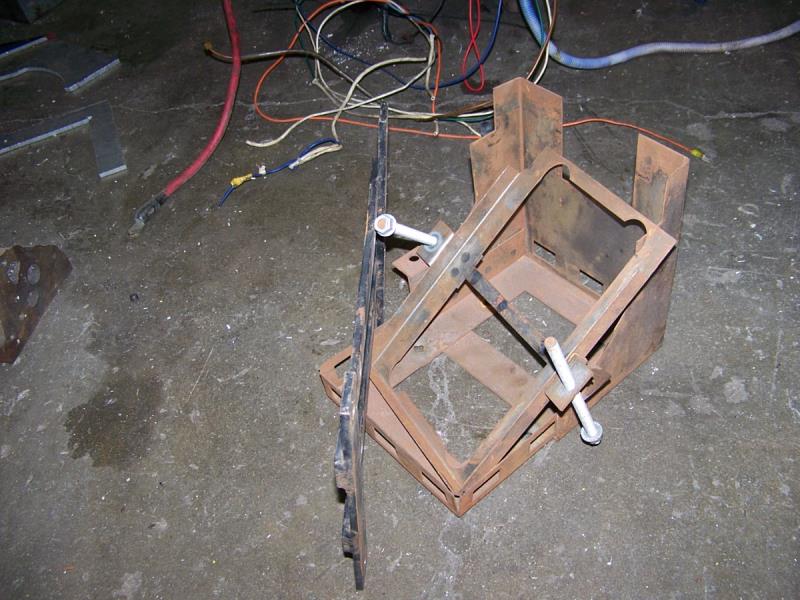 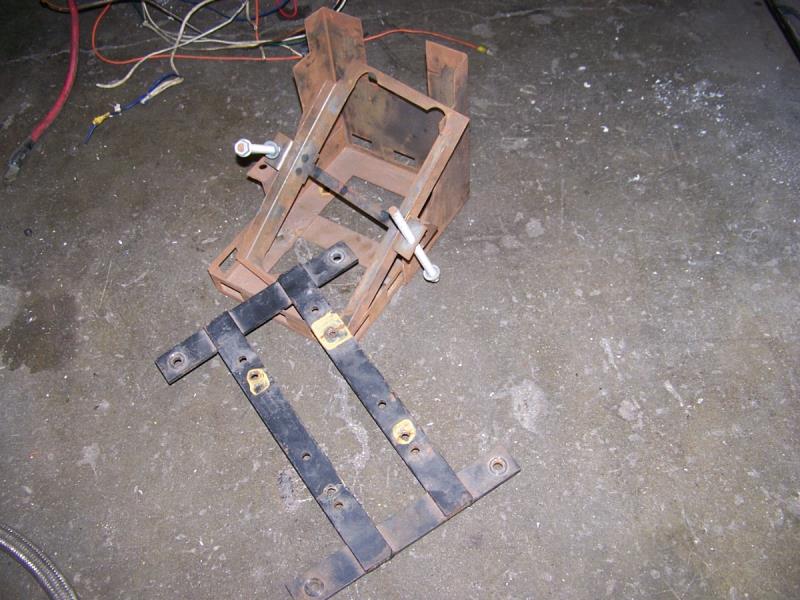 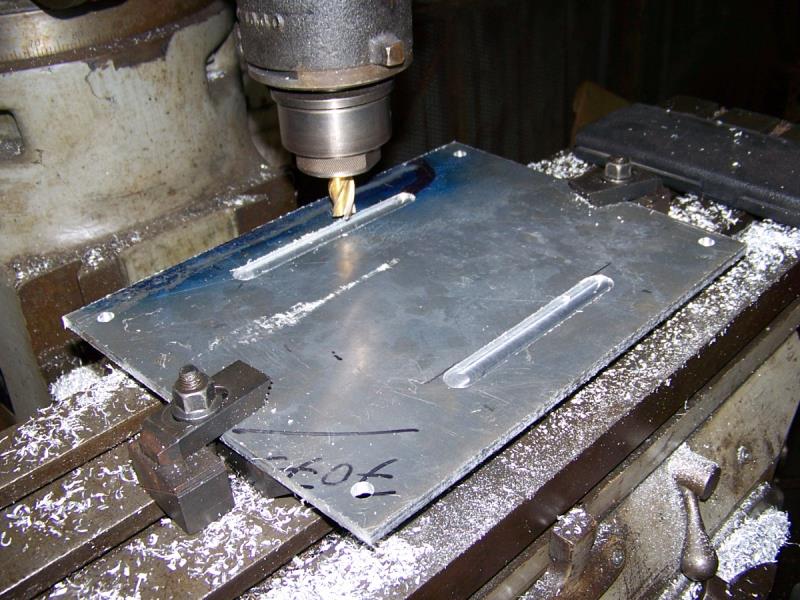 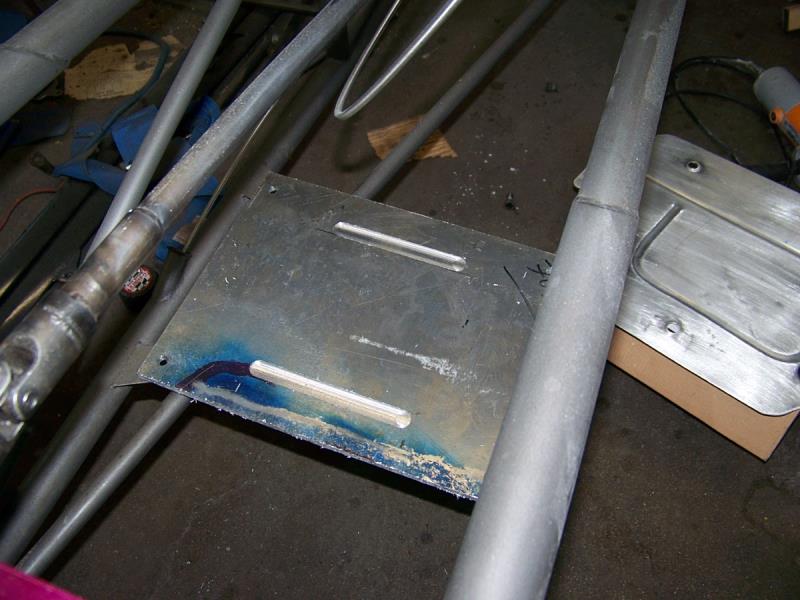
|
|
By Cliff - 6 Years Ago
|
|
Update, I closed escrow on my 2 buildings, I'm now an owner, and upgrading my mill, lathe, and both band saws, should have everything installed this week (I hope), 4 days after the close of escrow, California announced a stay at home, no work (crap), hope to start working on the dragster soon.
|
|
By Cliff - 6 Years Ago
|
Machines in place, not wired yet.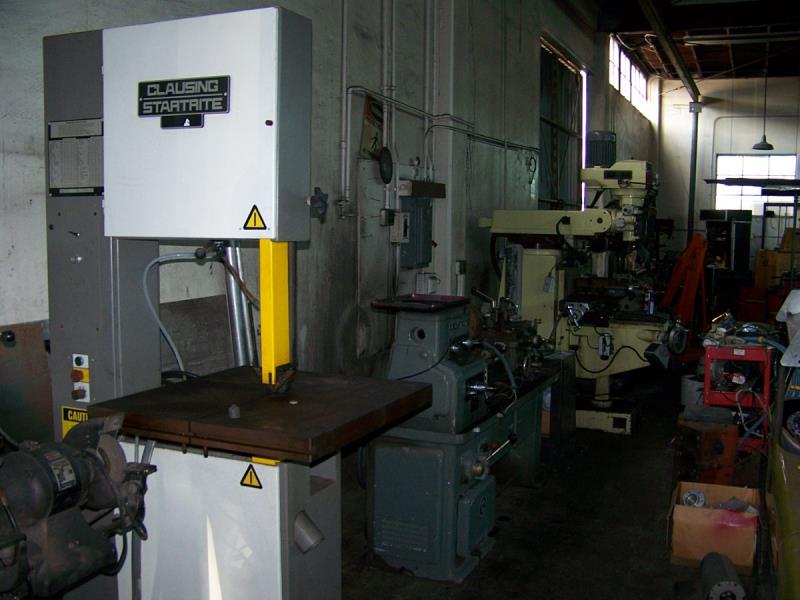 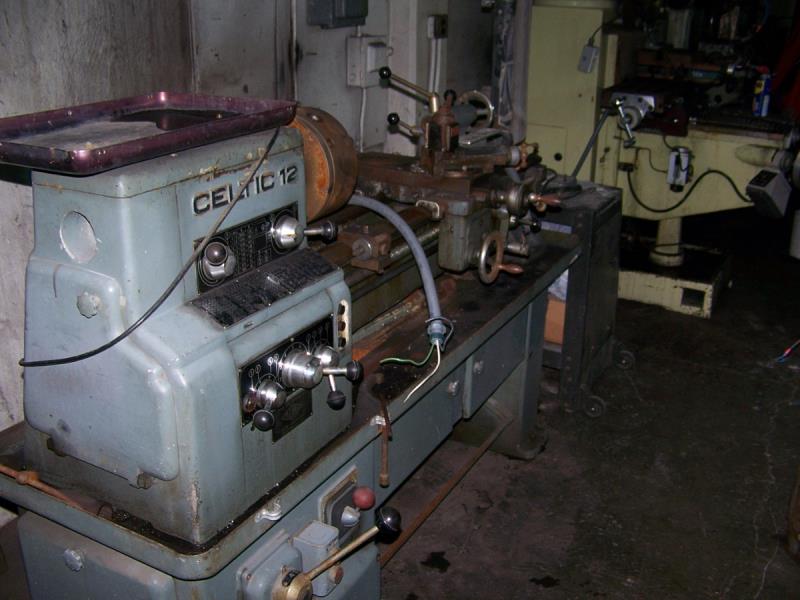 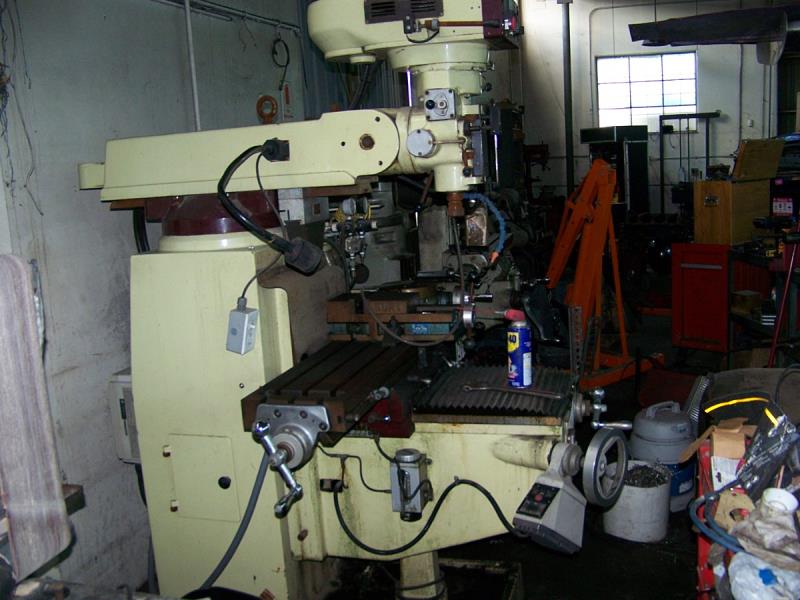
|
|
By Cliff - 6 Years Ago
|
Back on the dragster today, rear axle stripped today, Monday going to the plater, there's a black lives parade of cars in front of my business right now, I hope they go away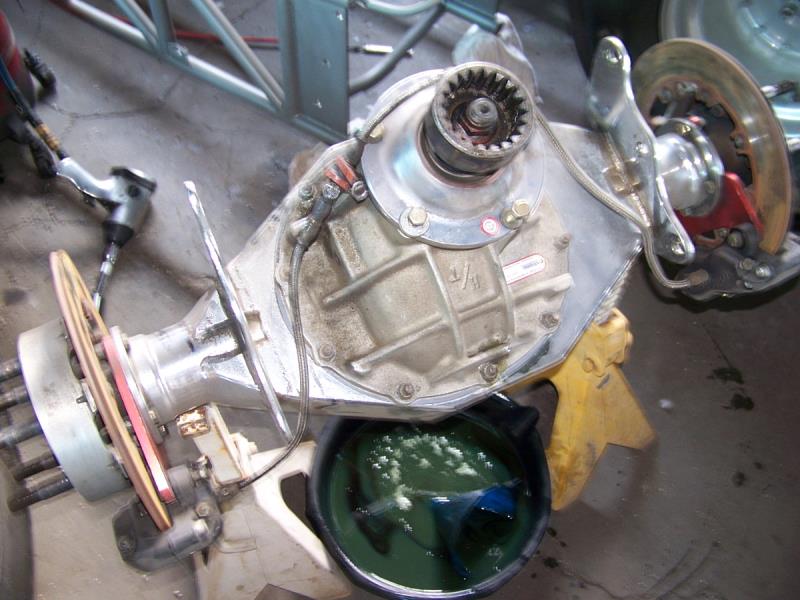 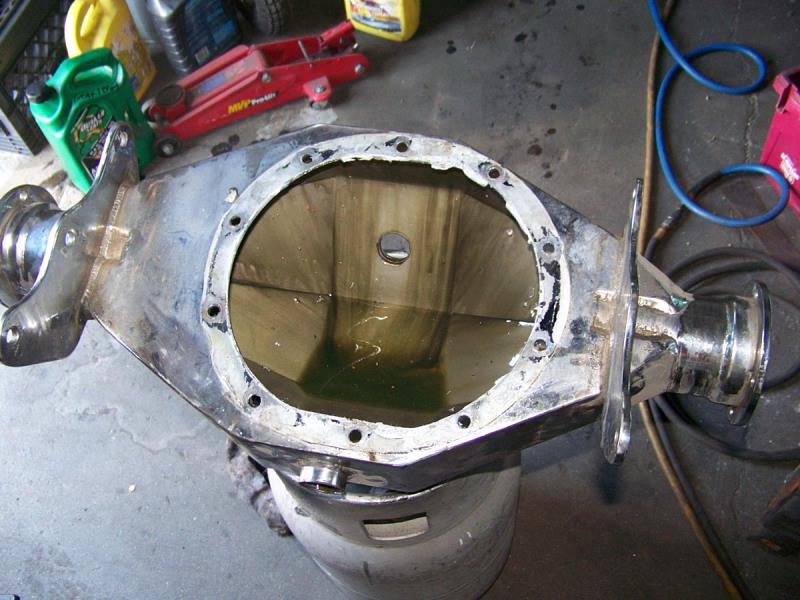 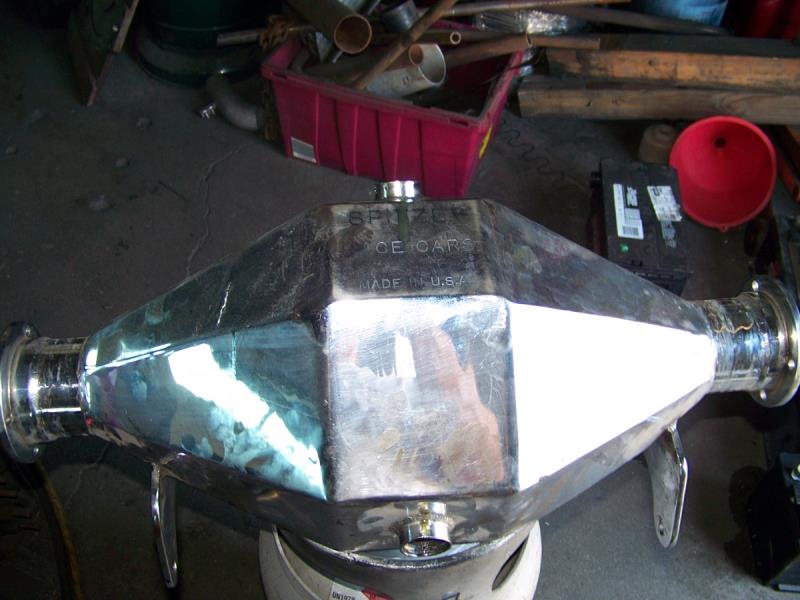
|
|
By Cliff - 6 Years Ago
|
|
The black lives people left (GOOD)
|
|
By Lord Gaga - 6 Years Ago
|
What color are you, Cliff baby?
Cliff (6/6/2020)
The black lives people left (GOOD)
|
|
By patm - 6 Years Ago
|
I read the statement and I acknowledge the question; a rhetorical question, how does this connect with a Y-block?
Pat in AZ
|
|
By Cliff - 6 Years Ago
|
I don't mind the protest in fact I may agree, however I don't want them to tear up my business or the ones around me.
This is me.
https://www.facebook.com/cliff.murray.988/videos/3451483474880220/
|
|
By patm - 6 Years Ago
|
Sounds OK to me.
Pat in AZ
|
|
By Cliff - 6 Years Ago
|
Adding parking lifts to the inside of my shop, the late model cars are for test only, these will be filled with Y Block cars (save for  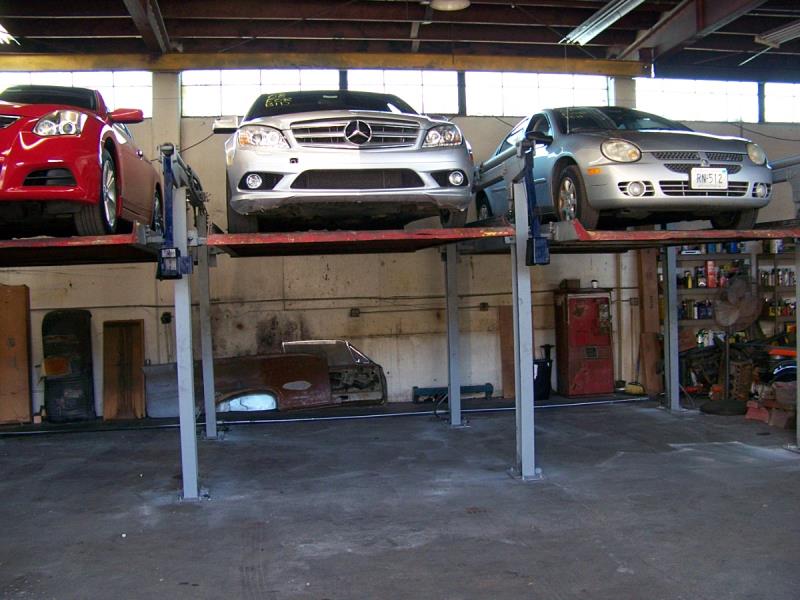 2 Vipers) 2 Vipers)
|
|
By Ted - 6 Years Ago
|
|
I envy the high ceiling where you can do that. Looks good.
|
|
By FORD DEARBORN - 6 Years Ago
|
Cliff: How does the lifting mechanism work in this design? Looks like the inside columns are supporting and lifting 2 platforms? I have to agree with Ted in that the high ceiling is great - nice arrangement.
|
|
By Cliff - 6 Years Ago
|
Hi, there is one large ram at the top, it pull cables at the 4 legs, these are parking lifts (1 on top 1 under), I'm having 5 more installed outside. When all this stuff is done I'll get to start working on my race car again. my whole shop is a mess, all my machines had to be moved into a big pile to install the lifts, with my race car in the middle.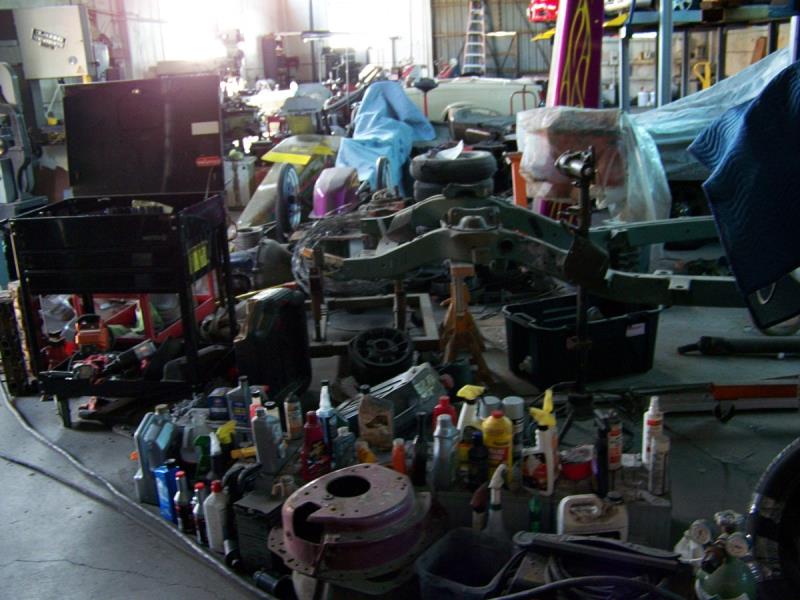 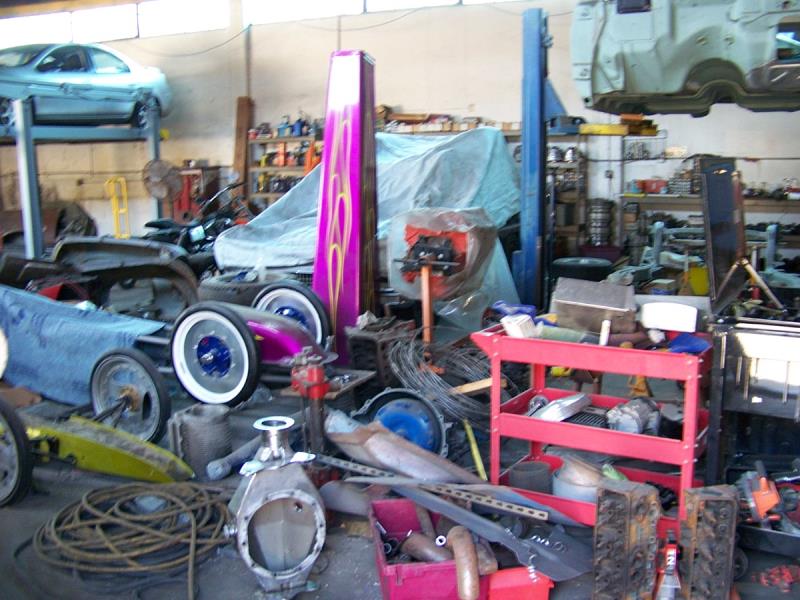 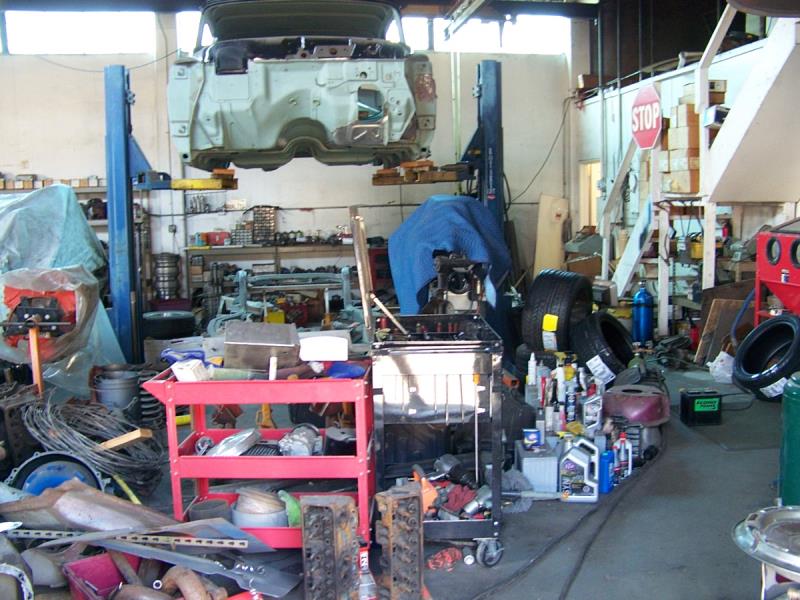
|
|
By MoonShadow - 6 Years Ago
|
I hope they are securely bolted to the floor. I recently saw a picture on a nearly identical setup that had failed and pushed the legs sideways. Not a good outcome.
|
|
By Cliff - 6 Years Ago
|
|
Yep, bolted to the floor
|
|
By Cliff - 6 Years Ago
|
More lifts going in (out side)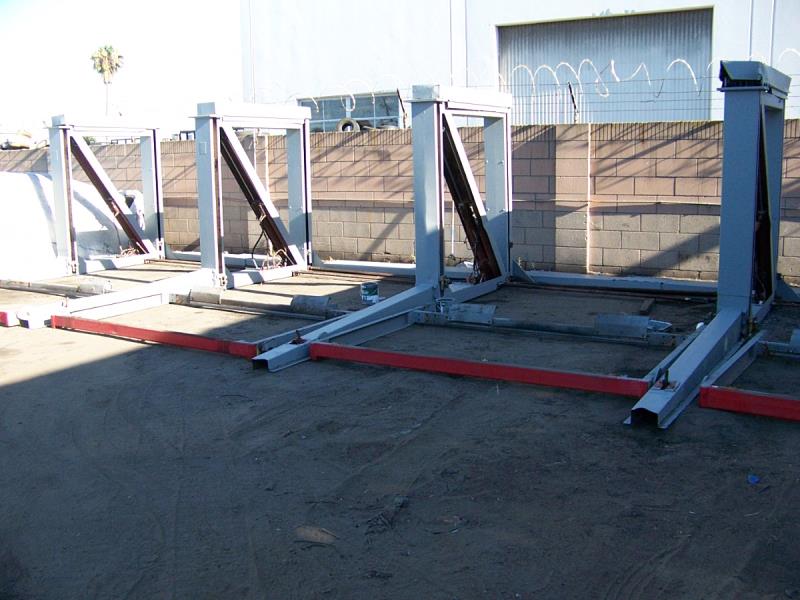 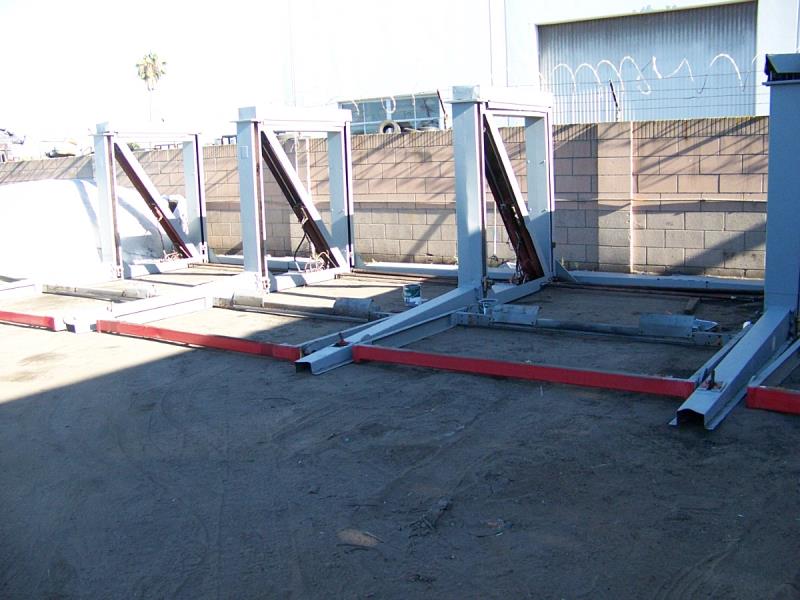 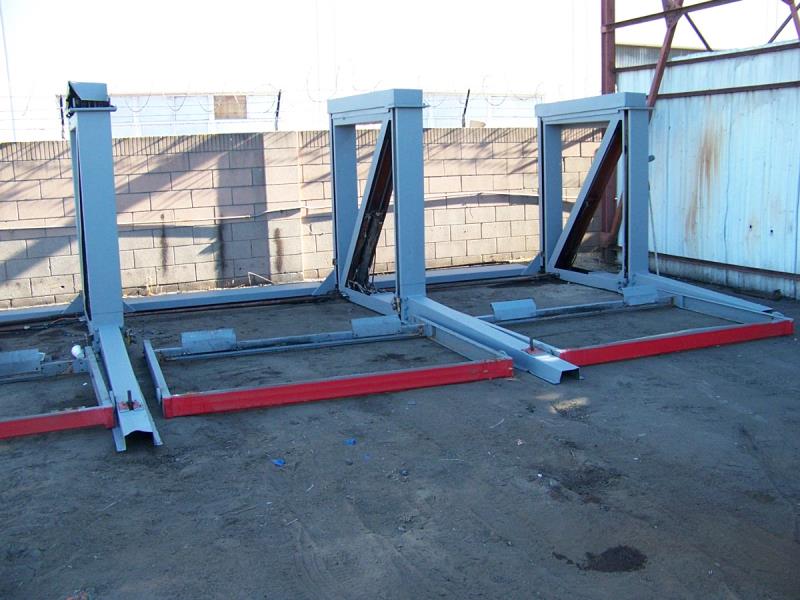
|
|
By Cliff - 6 Years Ago
|
Back to work!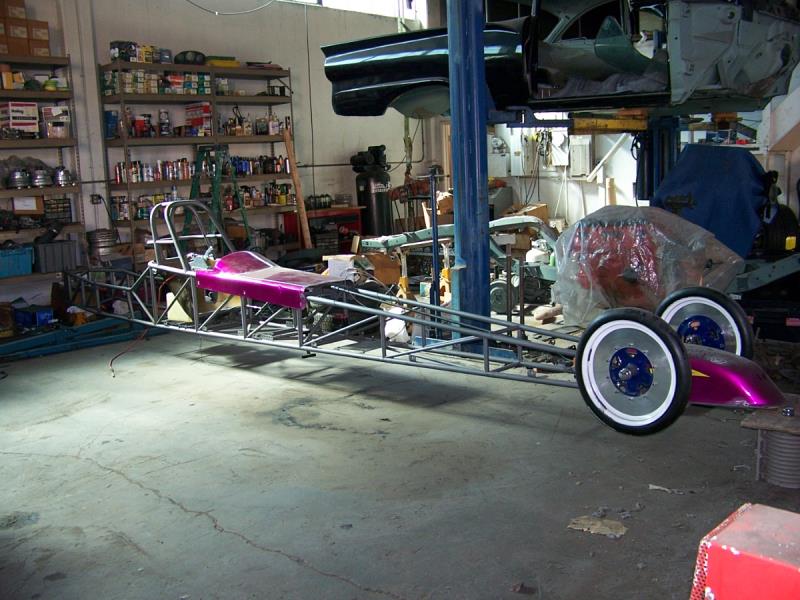
|
|
By Cliff - 5 Years Ago
|
More work today, welded crack in rear axle, welded in gas tank supports, normally my son does the welding however it's time for me to learn (ugly welds but will work) just stopped for lunch.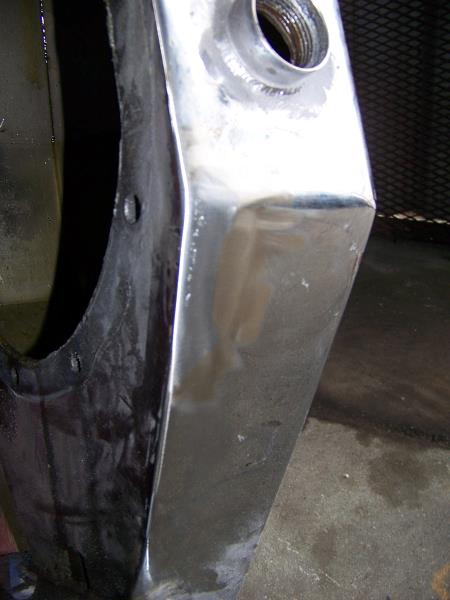 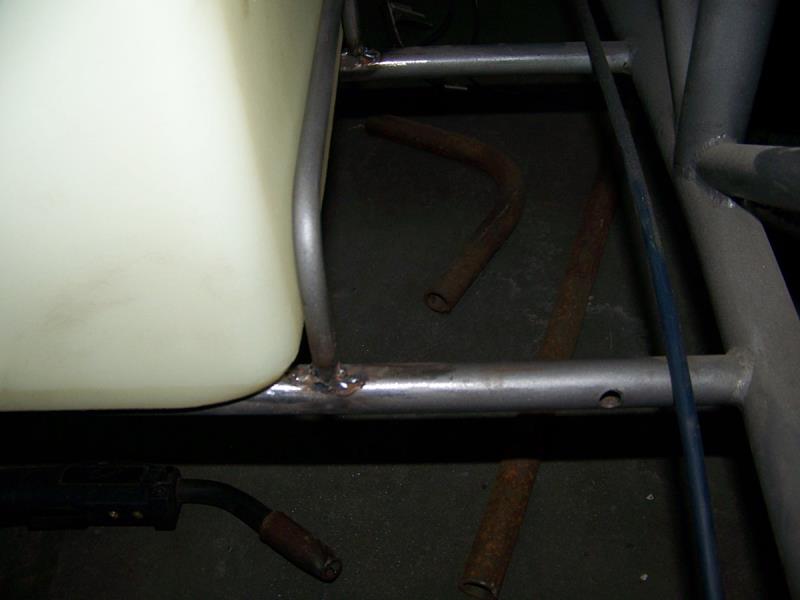
|
|
By Cliff - 5 Years Ago
|
More work, fitting the new gas tank (cutting holes), now time to refinish all the parts and install.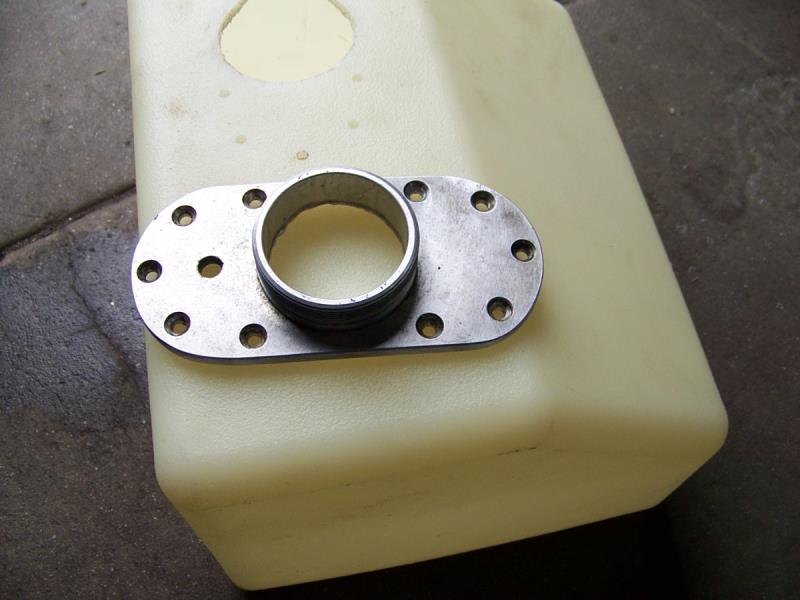 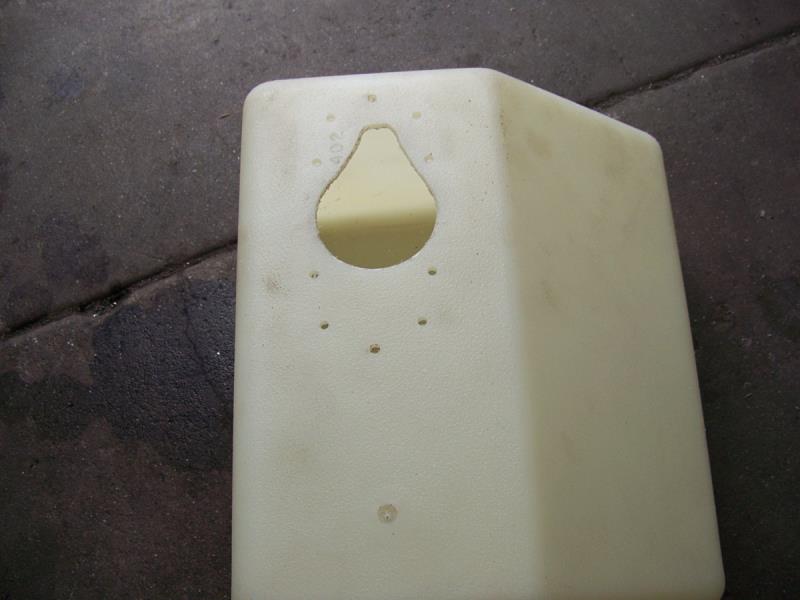 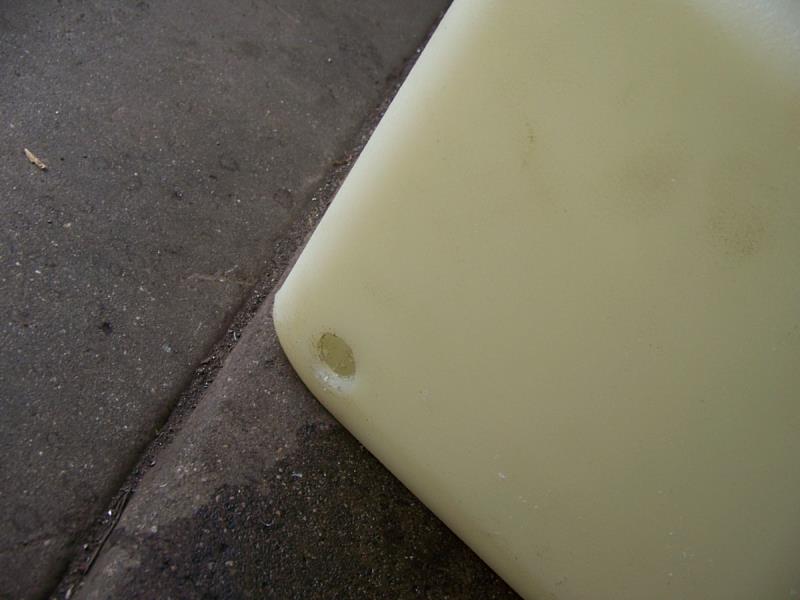
|
|
By Cliff - 5 Years Ago
|
Gas tank done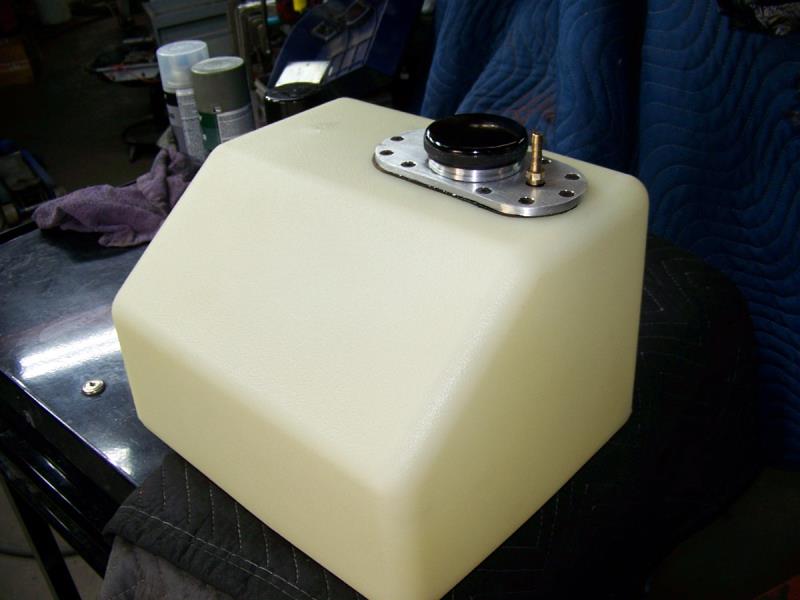 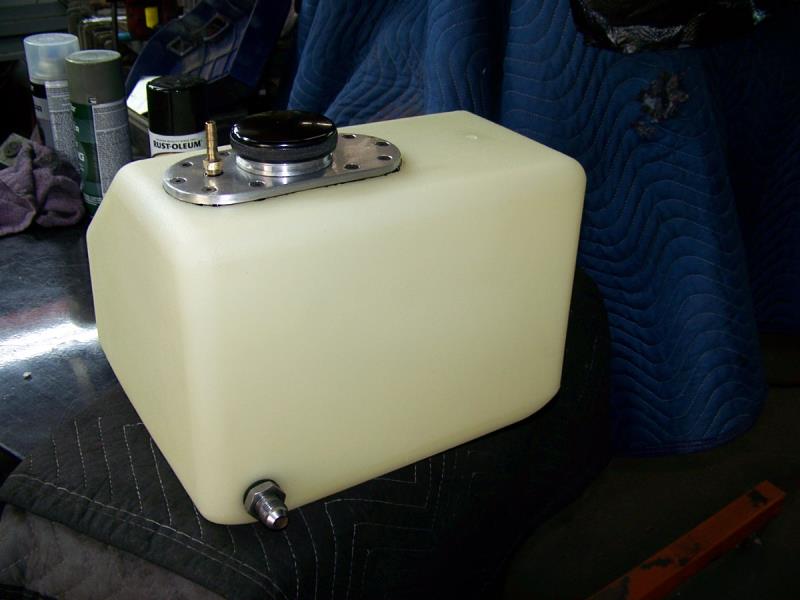
|
|
By Cliff - 5 Years Ago
|
Well, rear axle is at the plater, starting to make a new firewall, this one is sh-t, full of crappy poorly drilled holes.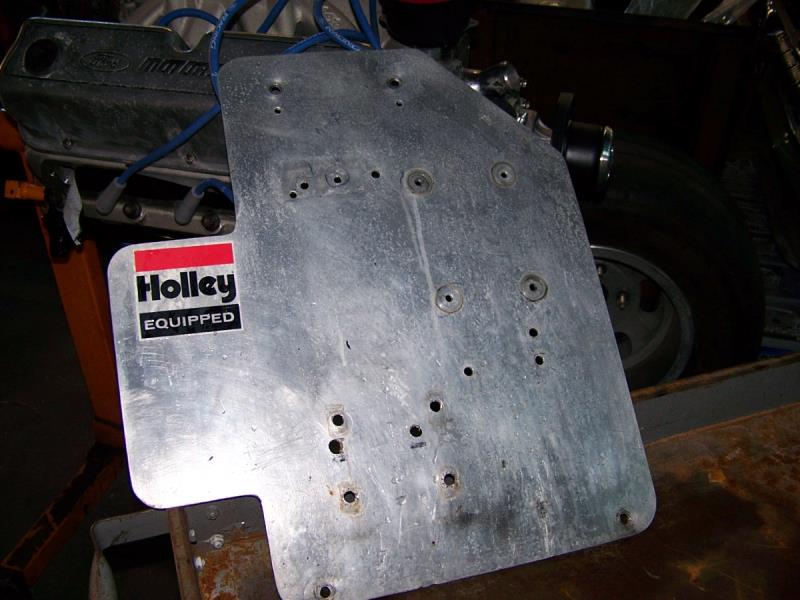 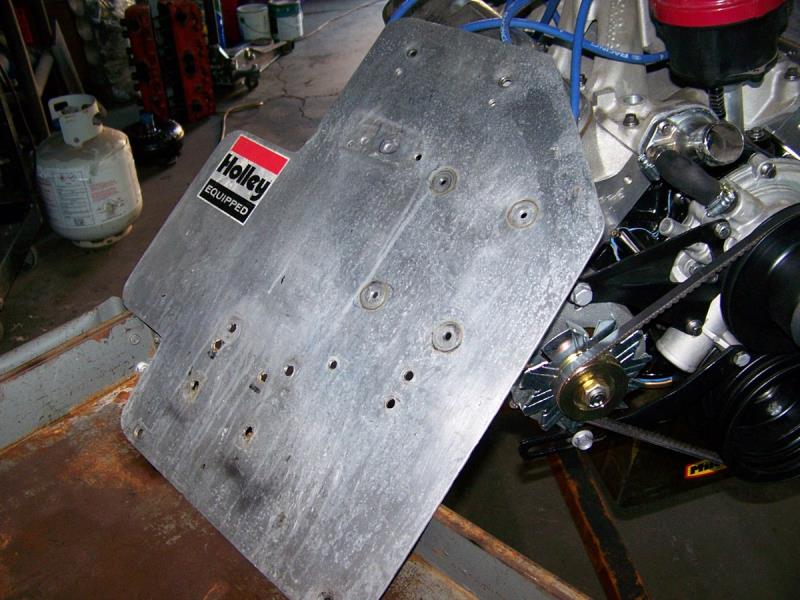
|
|
By FORD DEARBORN - 5 Years Ago
|
Firewall could be recycled as a good cheese grater.........(sorry guys)
|
|
By Cliff - 5 Years Ago
|
|
That's what I think, sorry about being so slow on the pictures, but it's hard to make money now I have to watch what I do, also all the tracks around me are closed.
|
|
By Cliff - 5 Years Ago
|
|
Hi, started my little bird today https://youtu.be/fJr7fFmbTwo
|
|
By Cliff - 5 Years Ago
|
Back from the plater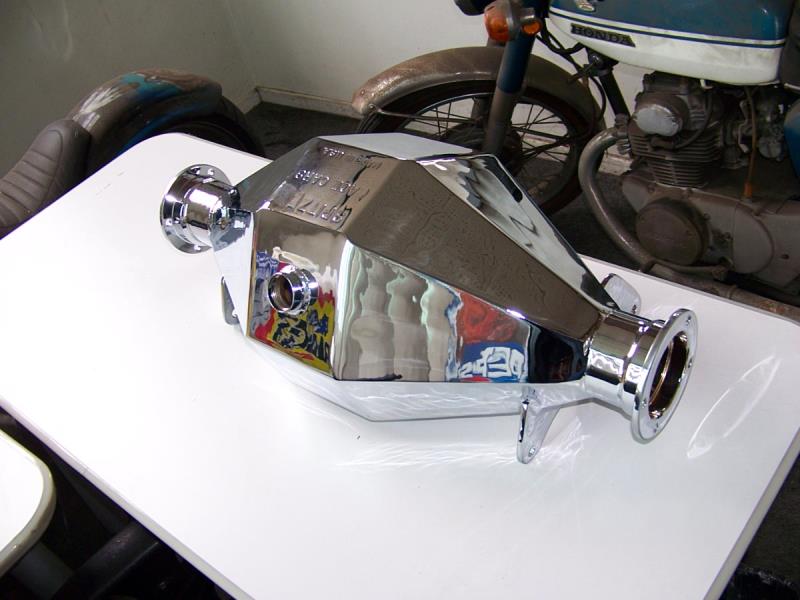 
|
|
By Cliff - 5 Years Ago
|
Soda break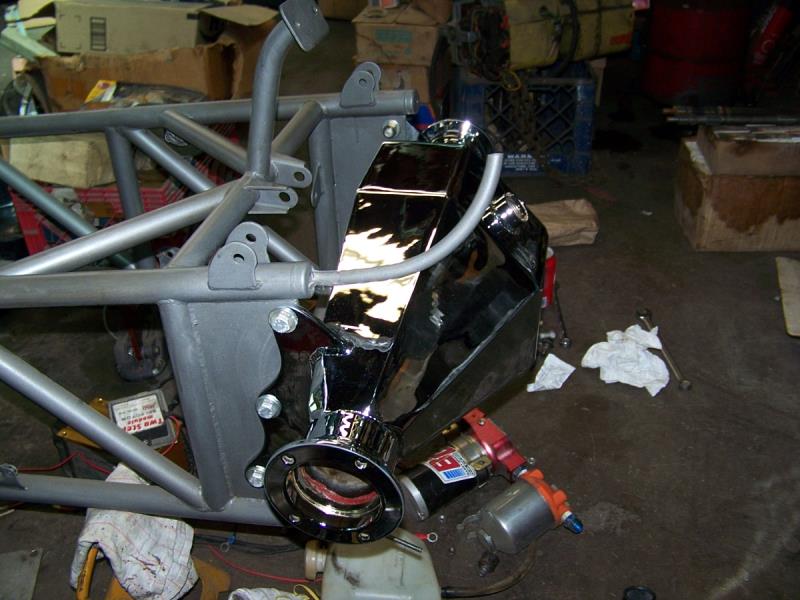 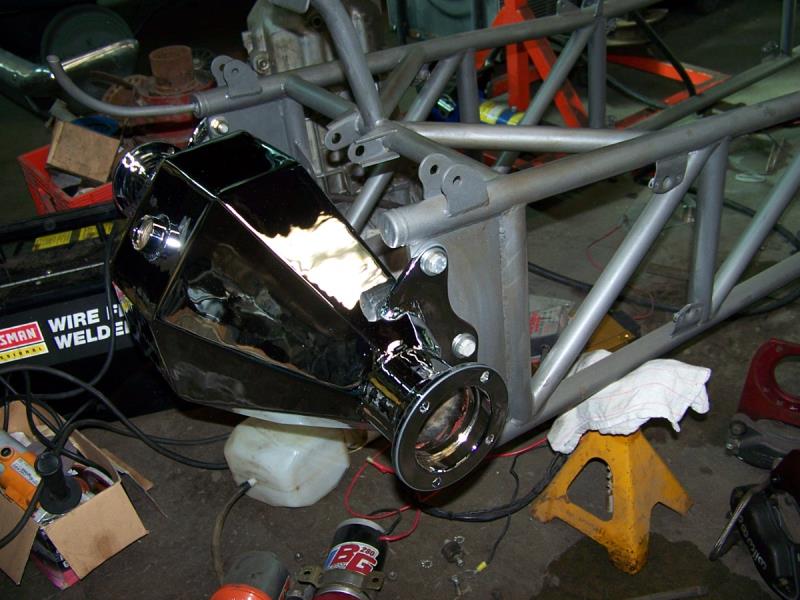 
|
|
By Cliff - 5 Years Ago
|
Just about to install this, Strange aluminium case and spool, 4.30 pro gear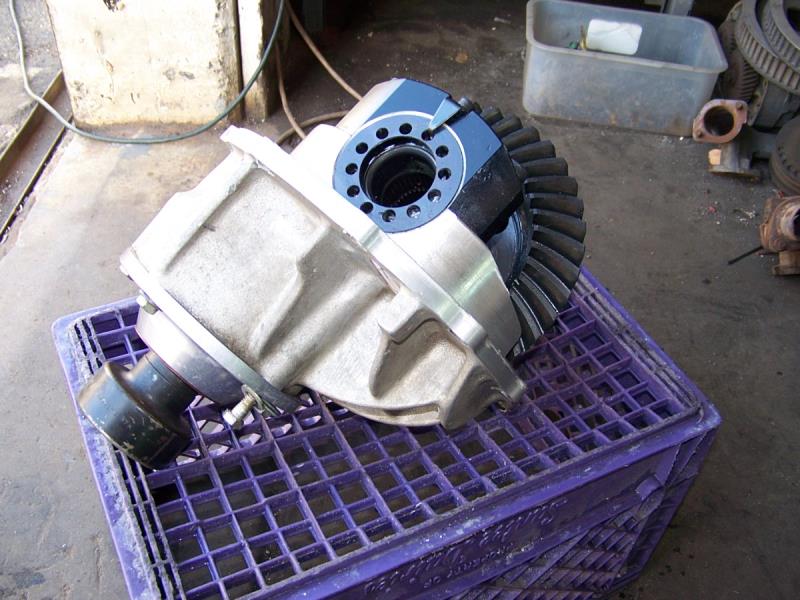 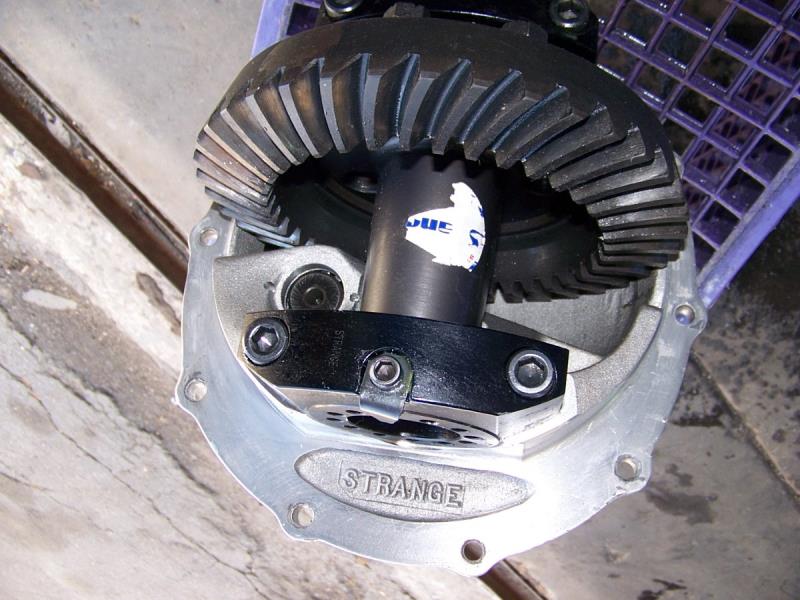
|
|
By Cliff - 5 Years Ago
|
Ok, done for today.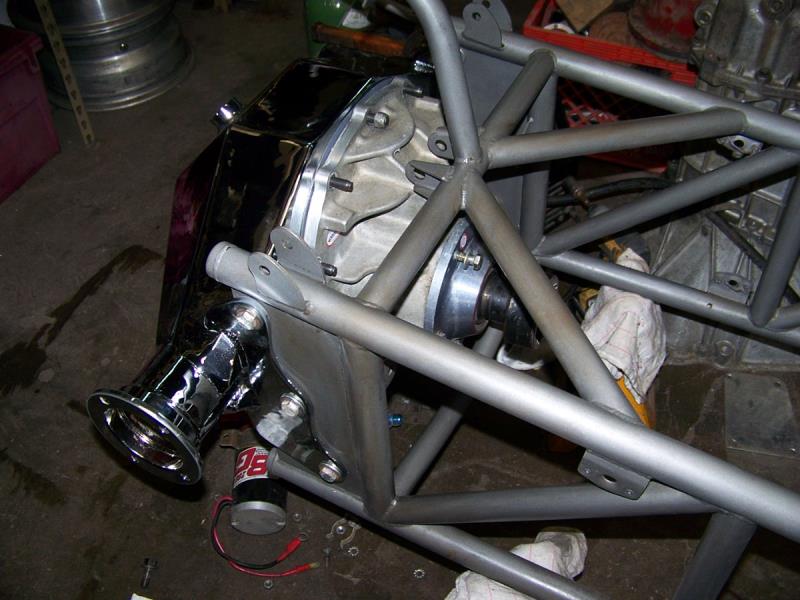 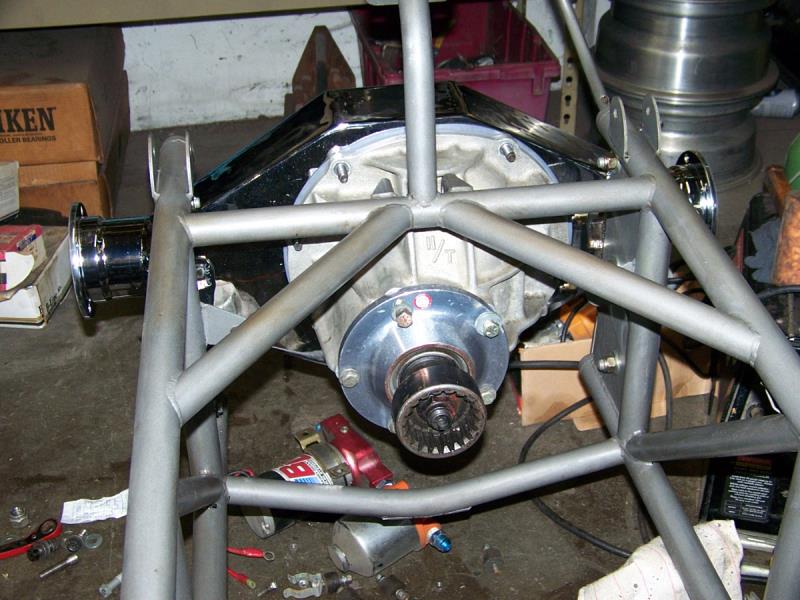
|
|
By FORD DEARBORN - 5 Years Ago
|
Is that joint at the pinion a CV joint? Even though the housing is aluminum, the milk crate looks quite stressed. Getting close to rolling and all looks super!
|
|
By Cliff - 5 Years Ago
|
That's a drive coupler, yes that thing is heavy.
|
|
By Cliff - 5 Years Ago
|
Working today, rebuilding the axles, they are 35 spline, the lug studs are 5/8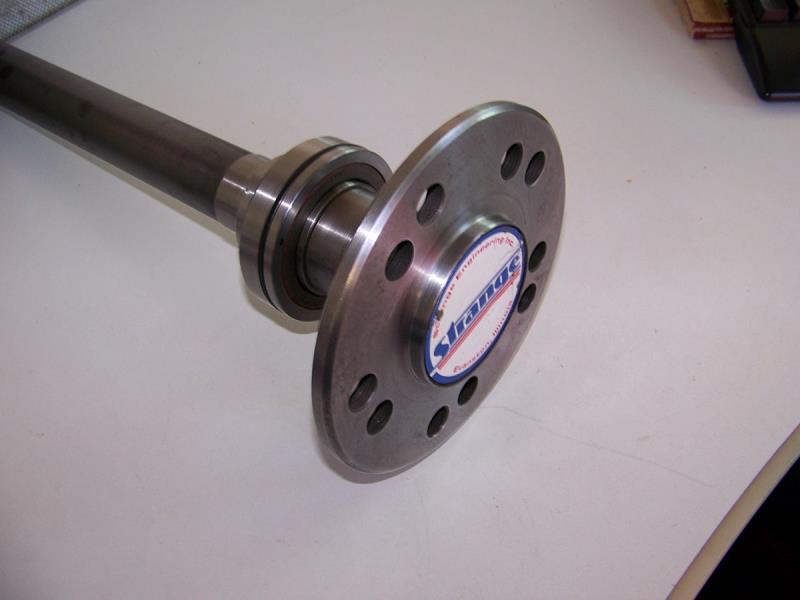 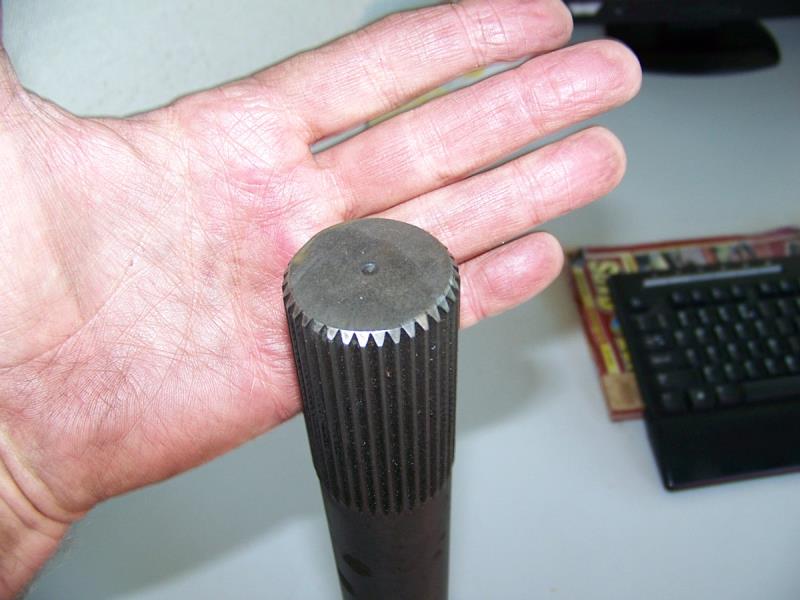 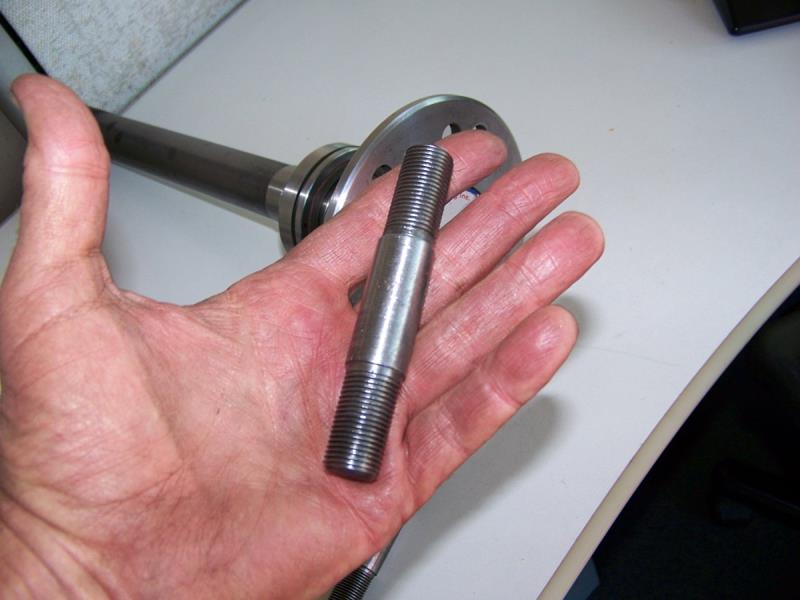
|
|
By Cliff - 5 Years Ago
|
Added 1 more lift it's huge!! 3 car, 2 inches from the roof.
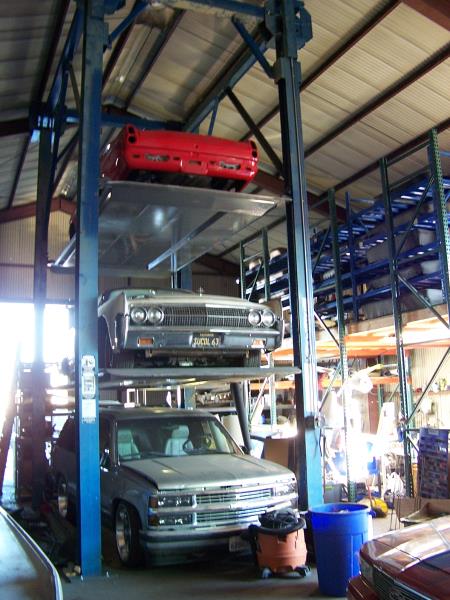
|
|
By Cliff - 5 Years Ago
|
Starting work today, repairing damaged caliper bracket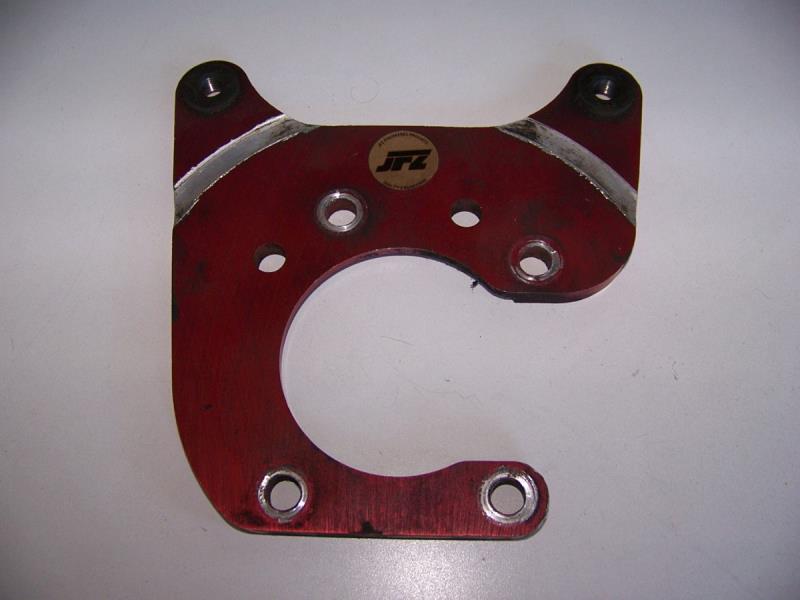 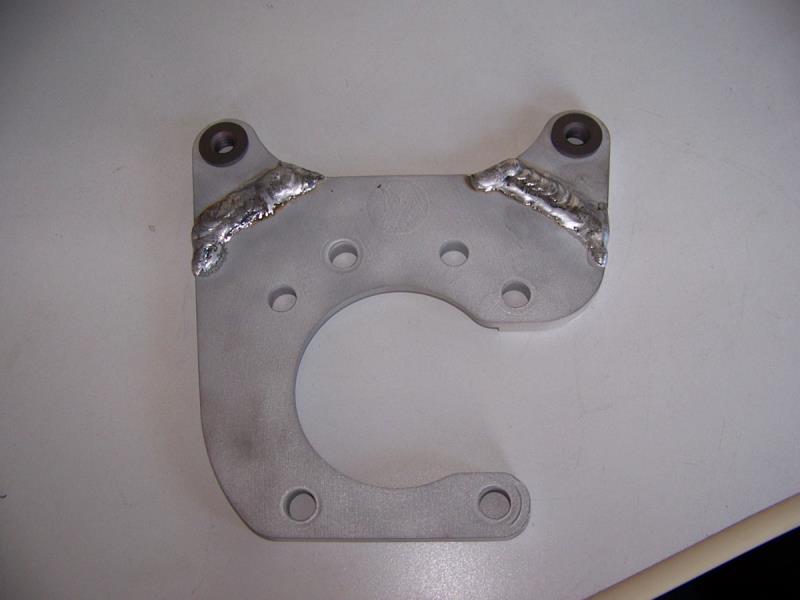
|
|
By Cliff - 5 Years Ago
|
More work, roughed in the firewall, more work on the rear axle (cleaned and checked hardware) 1 lug stud needs replacement (not true when run on the lathe) can not buy this stud, so I bought one from Mark Williams that I will have to  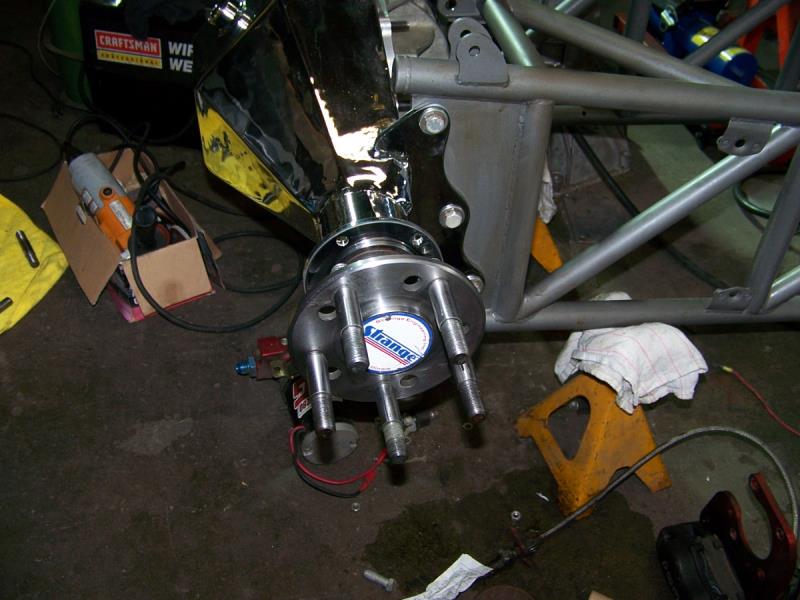 cut down. cut down.
|
|
By Cliff - 5 Years Ago
|
A little more work tonight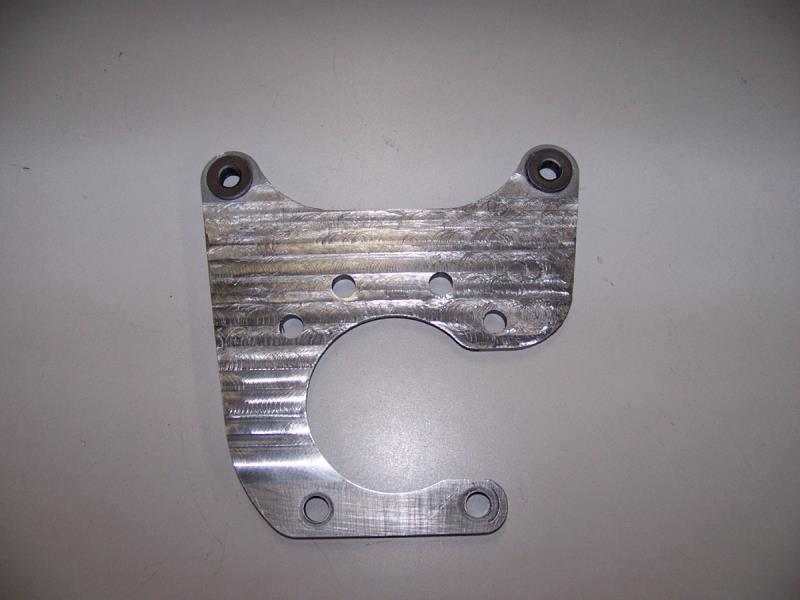
|
|
By Cliff - 5 Years Ago
|
Worked all day, refinishing parts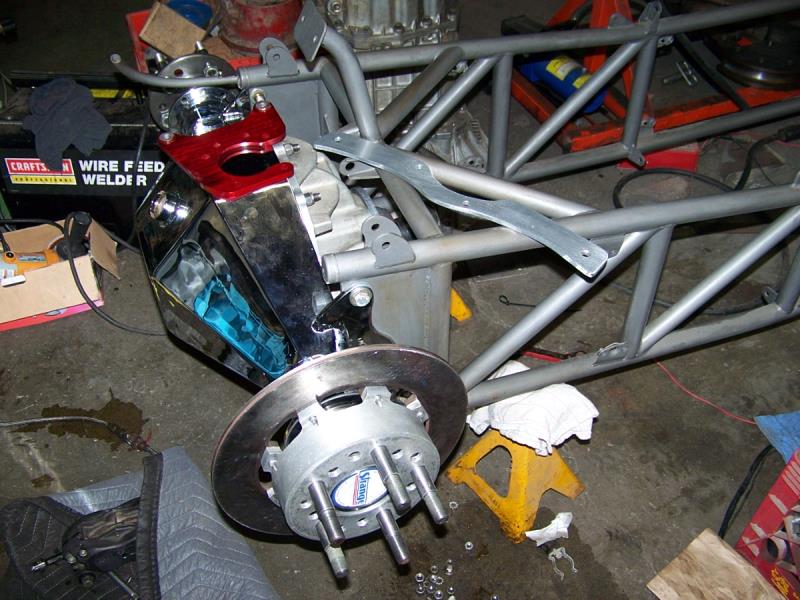 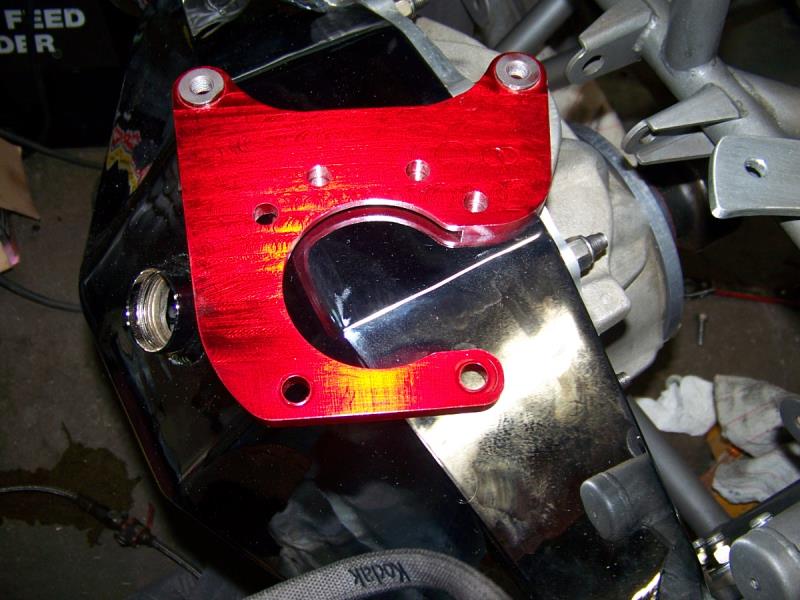 
|
|
By Cliff - 5 Years Ago
|
Well worked all day, when I started to assemble the brakes I found out the holes were to small for the bolts (chrome buildup) so took it apart reamed all the holes then put it back together.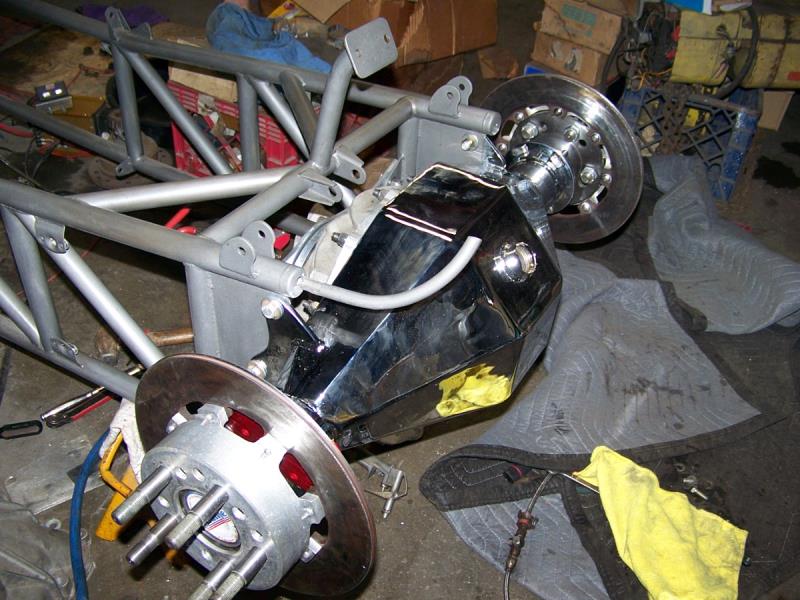 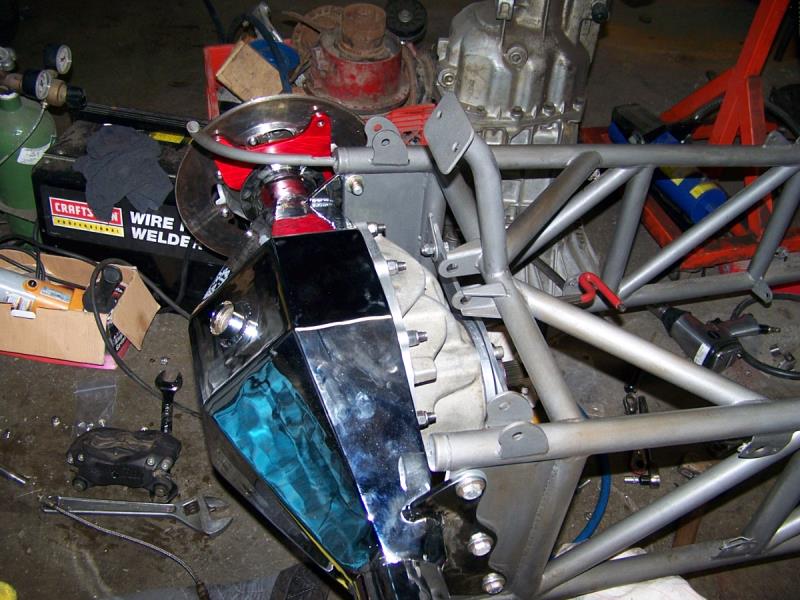 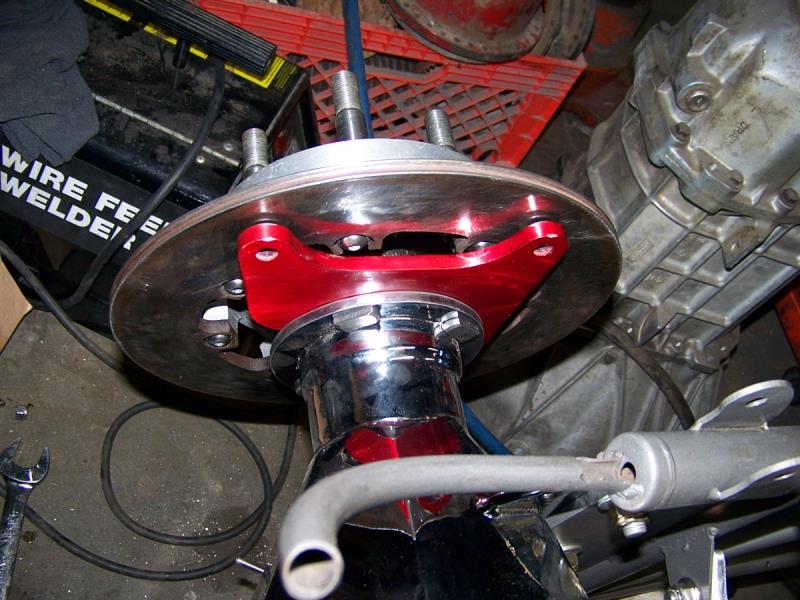
|
|
By Cliff - 5 Years Ago
|
Small amount of work tonight, had to rework the pinion support, it was crap, it's finished in 80 grit and cleared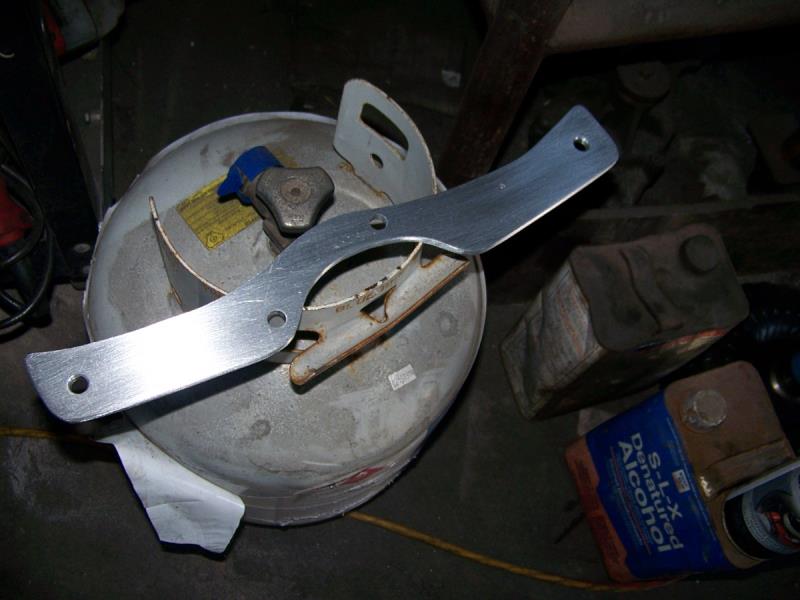
|
|
By Cliff - 5 Years Ago
|
|
I finished the pinion support before, however I did not try to fit it, it came off the car so I only cleaned it up, the bolt holes were off, so 2 hours later and a refinish, it's good to go, guess I should fit all parts first, even if they came off the car.
|
|
By Cliff - 5 Years Ago
|
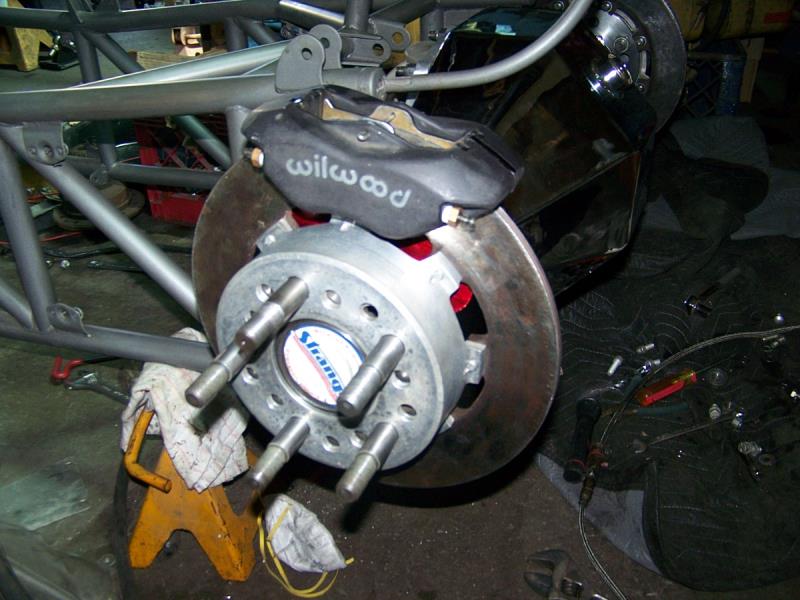 What did I do today, well refinished brake calipers (long time), took apart shop air compressor (bad valve), I'm going home, picture tomorrow. What did I do today, well refinished brake calipers (long time), took apart shop air compressor (bad valve), I'm going home, picture tomorrow.
|
|
By Cliff - 5 Years Ago
|
Brakes done, all new stainless hardware (aircraft surplus), all steel parts black oxide finished, all stainless parts polished (brush finished), next the lines and fittings (most refinished and 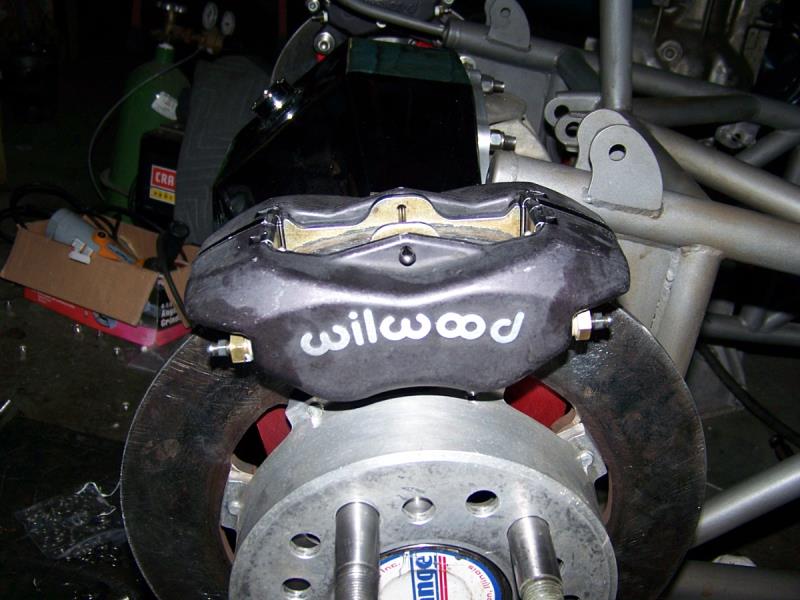 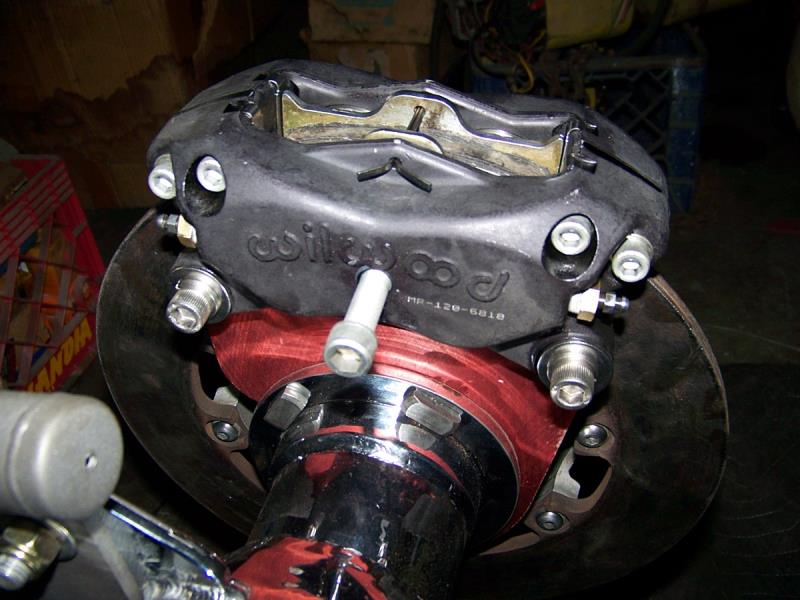  ready to install) ready to install)
|
|
By Cliff - 5 Years Ago
|
Fitting the firewall today, trimmed up the edges, profiled the corners, fitting the electronics.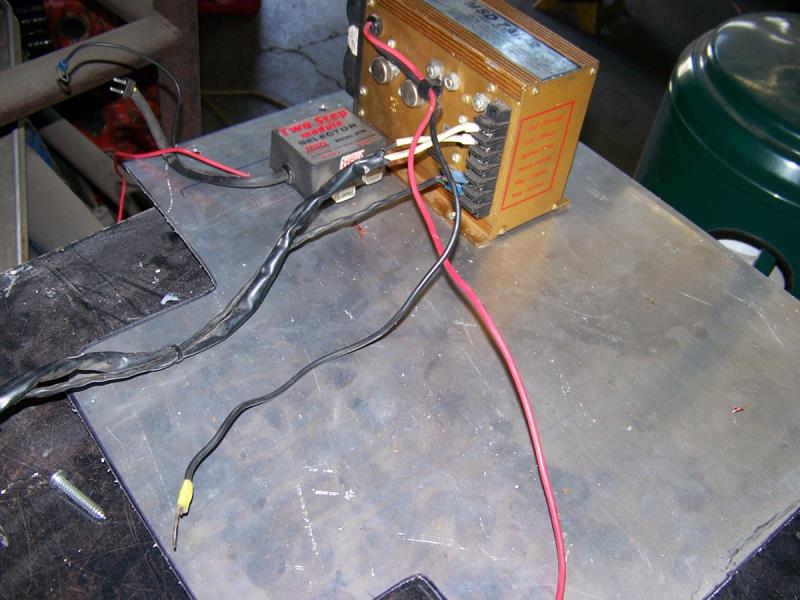 
|
|
By Cliff - 5 Years Ago
|
Fitted, now starting to finish, 80 Grit and clear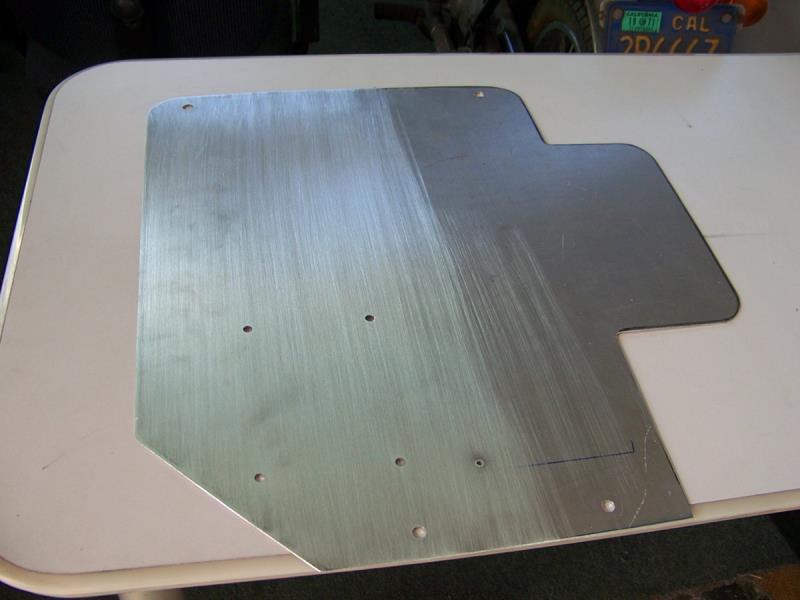
|
|
By Cliff - 5 Years Ago
|
Firewall done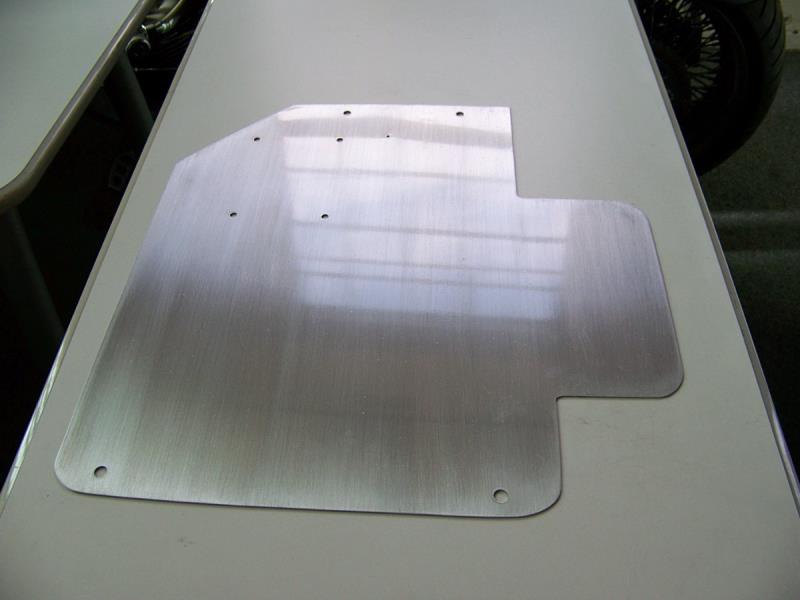 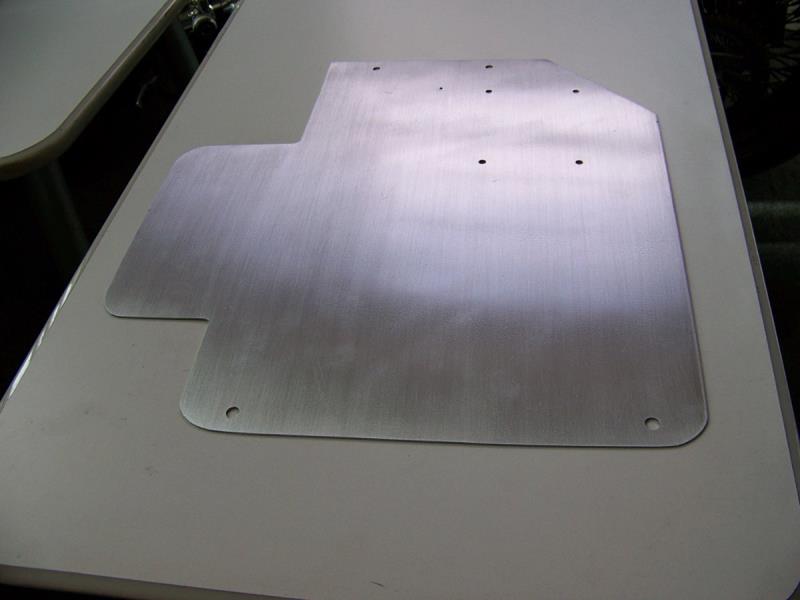
|
|
By Cliff - 5 Years Ago
|
Making the center firewall (between battery and cockpit)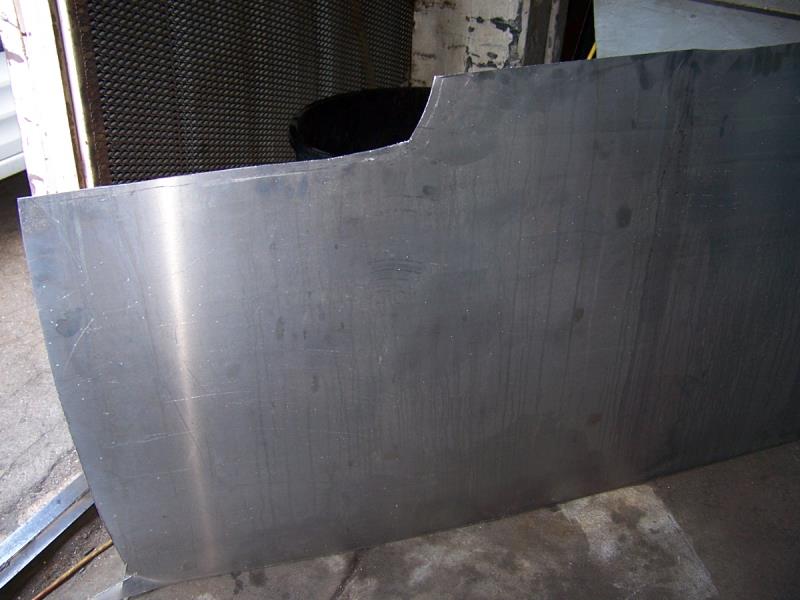 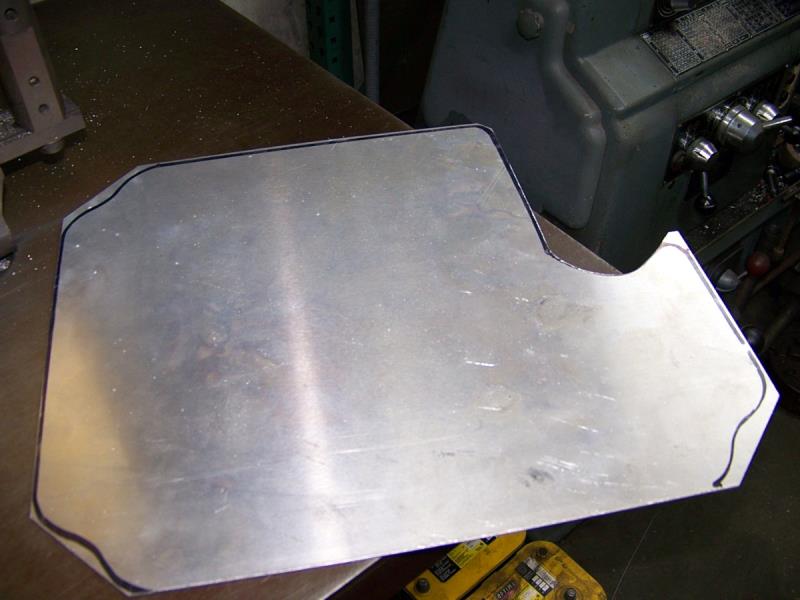
|
|
By Cliff - 5 Years Ago
|
What I did today, 1 put rings in my shop air compressor, fitted the firewall, now to finish and paint (80 grit and clear)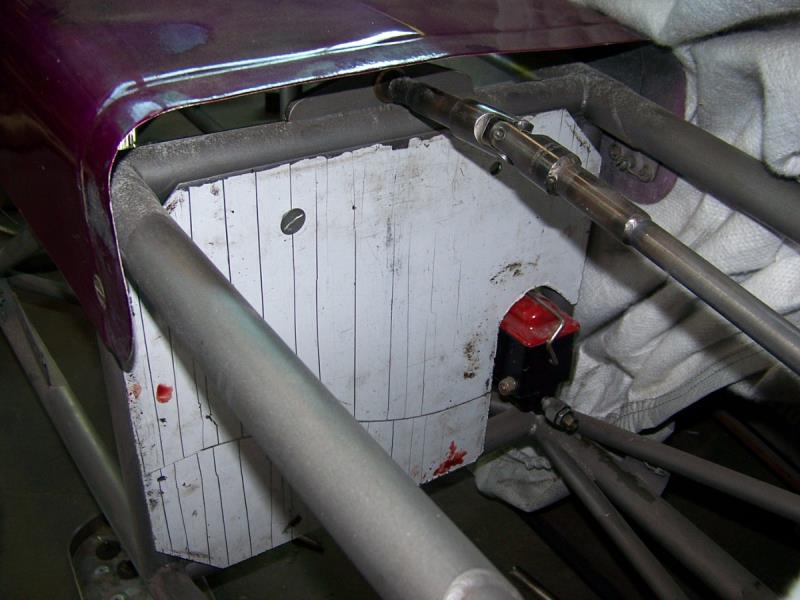 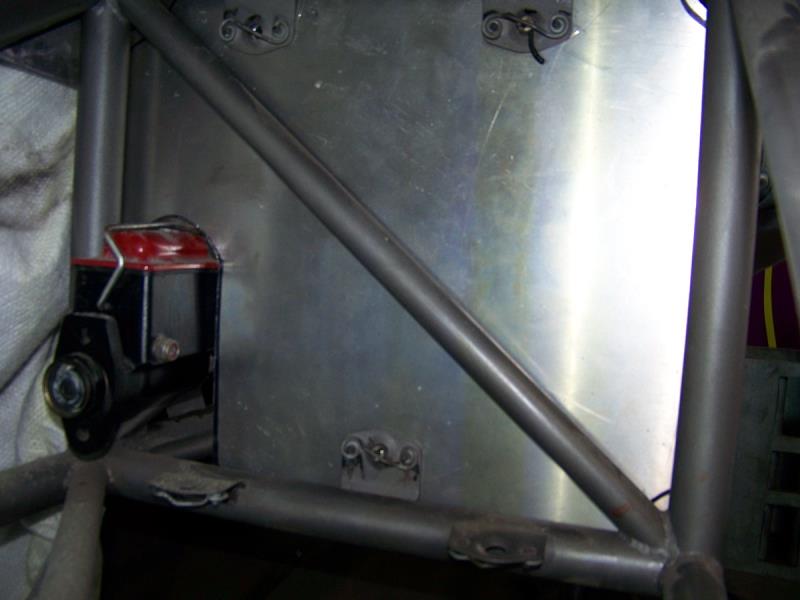
|
|
By Cliff - 5 Years Ago
|
Firewall done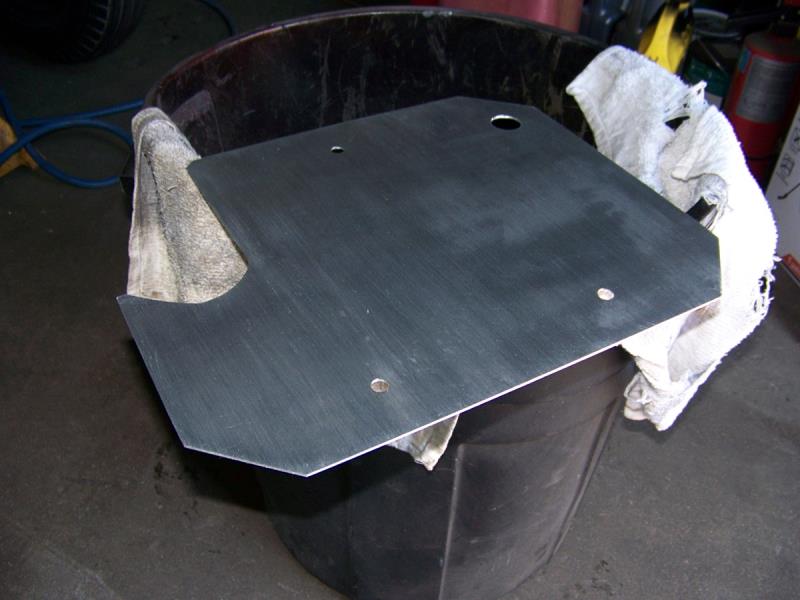 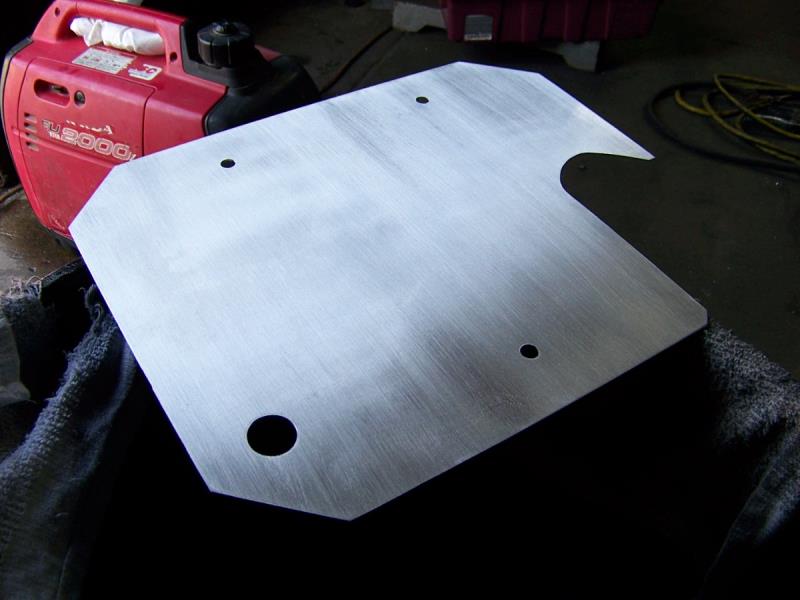
|
|
By Cliff - 5 Years Ago
|
Start of a new floor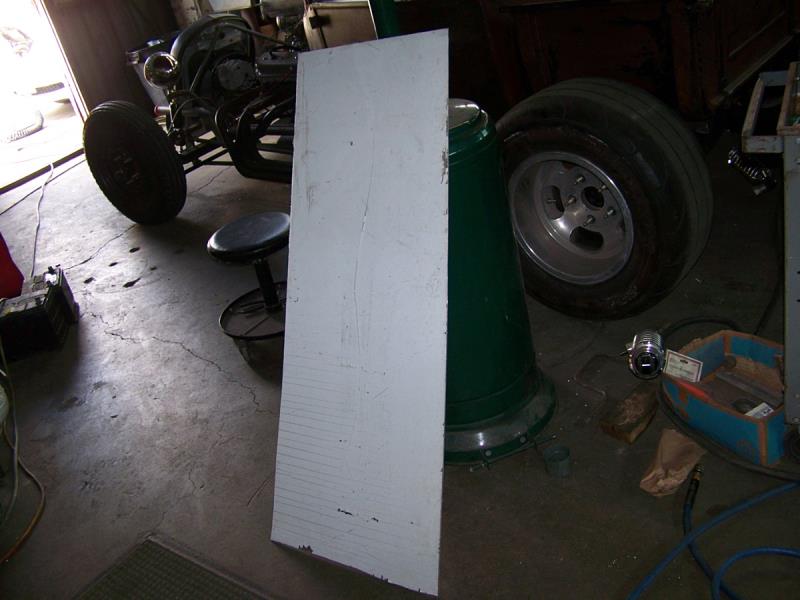
|
|
By Cliff - 5 Years Ago
|
Floor roughed in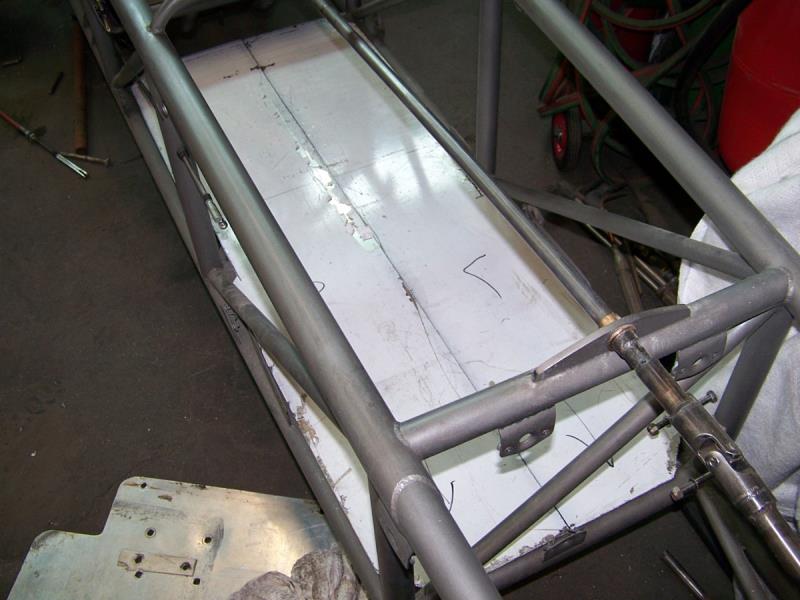 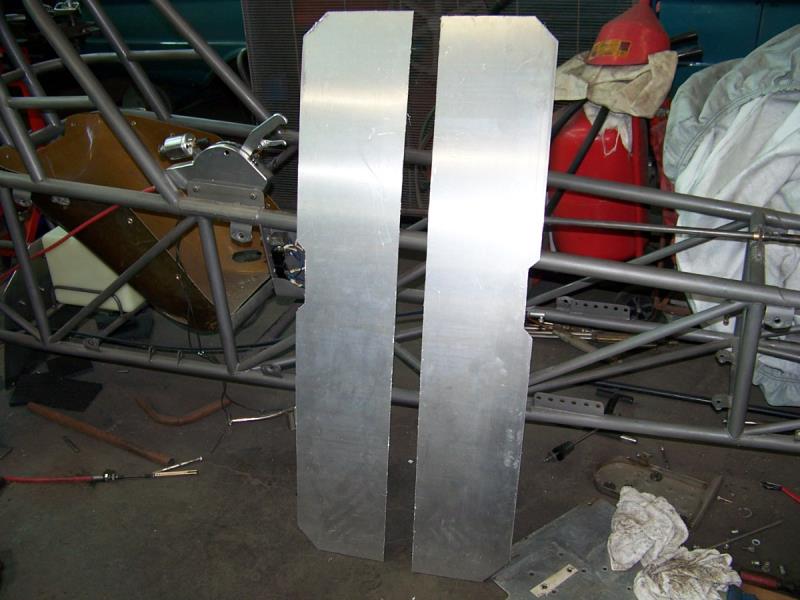
|
|
By Cliff - 5 Years Ago
|
|
What have I been doing? well plumbing the car, cutting holes for gauges, running brake lines, finishing small parts, none of these warrant pictures just a lot of small things, stuck on how to make the pedals, NHRA wants the throttle pedal to hook over my foot (so I can pull it back if I need to) I'm almost ready to install the engine maybe in 2 weeks (hope), the property that I bought (thanks to my son) was found to have a pollution problem, that was the main reason they sold it to me (they wanted out) so after a bunch of work it turned out to be a oil barrel buried in the ground that was used as a drain for metal shavings (cutting oil) now the huge problem that everyone was scared of (me also) turns to be a small problem (I hope) they start removal next week still these guys get a lot of money for what they do.
|
|
By Cliff - 5 Years Ago
|
Here's a picture of the dash 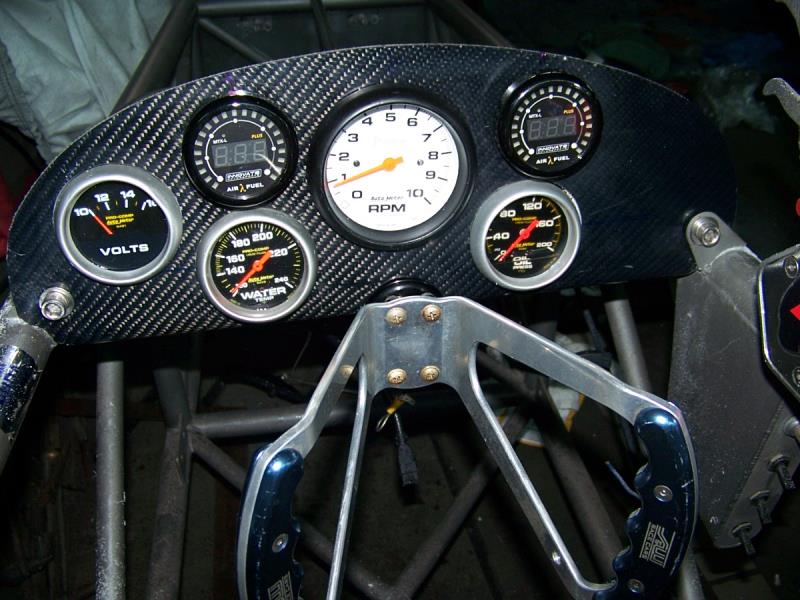
|
|
By Cliff - 5 Years Ago
|
Floors done, installed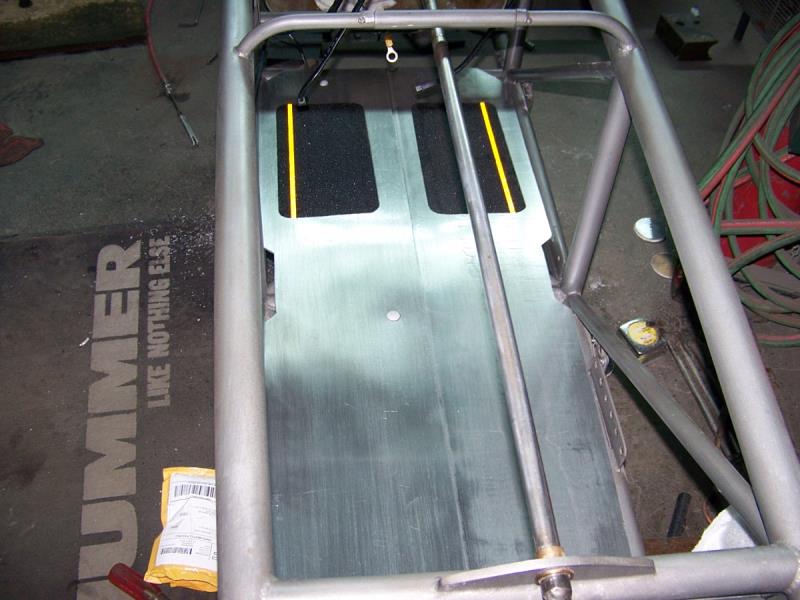 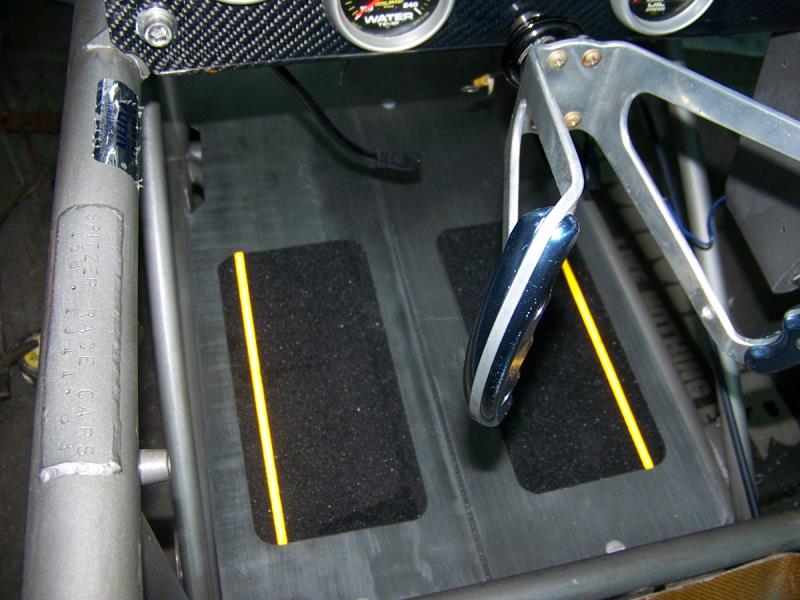
|
|
By Cliff - 5 Years Ago
|
Lunch break, this morning 2 steps forward 1 step back, electronics going in, the 3rd member did not turn right to me so I took it apart, I had assembled it wrong, a shim slipped out of the cage causing to much end play so a little more work.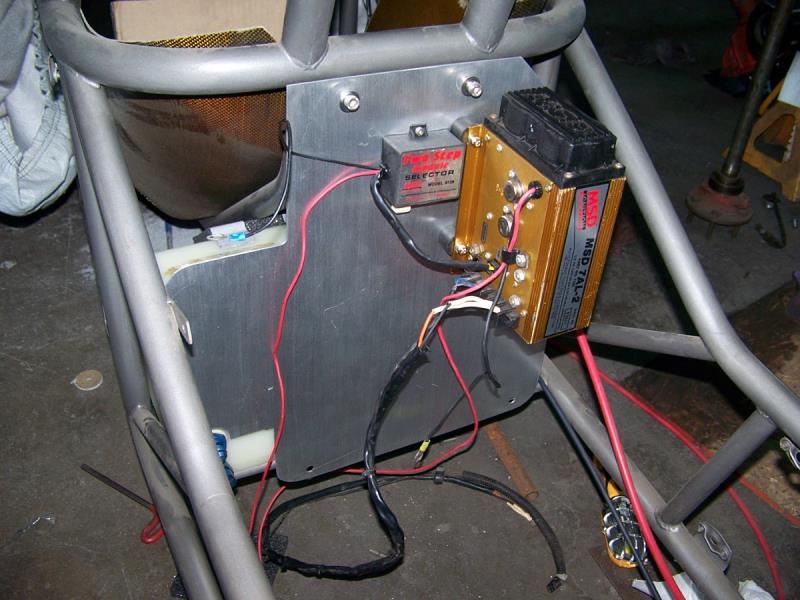 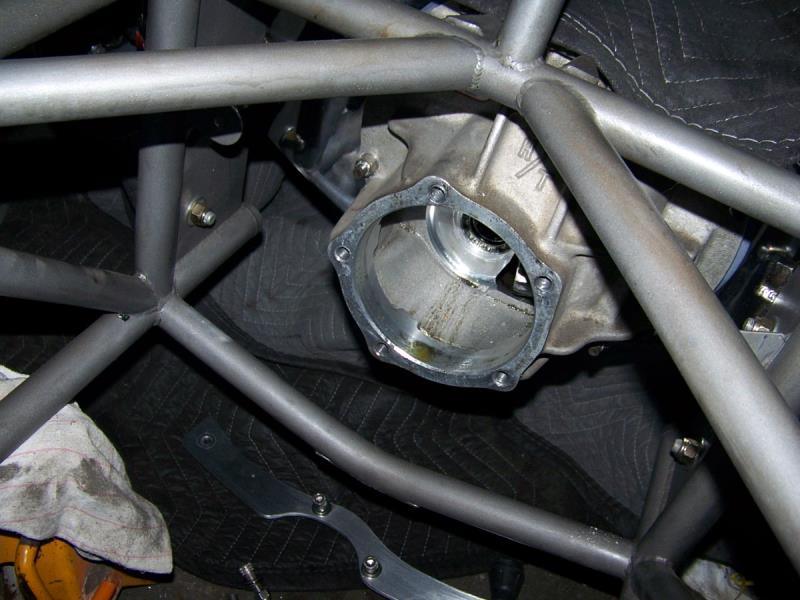
|
|
By Cliff - 5 Years Ago
|
Installed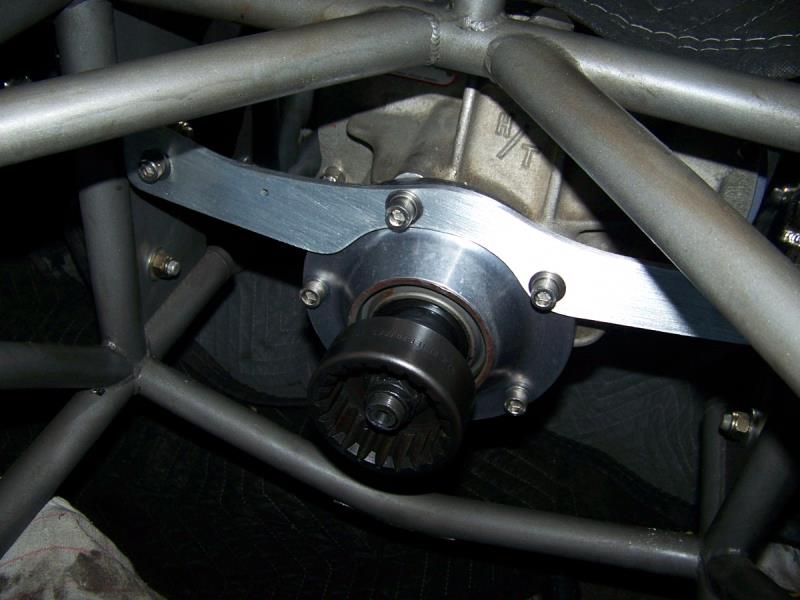
|
|
By Cliff - 5 Years Ago
|
Reworking the drain and fill plugs for the read end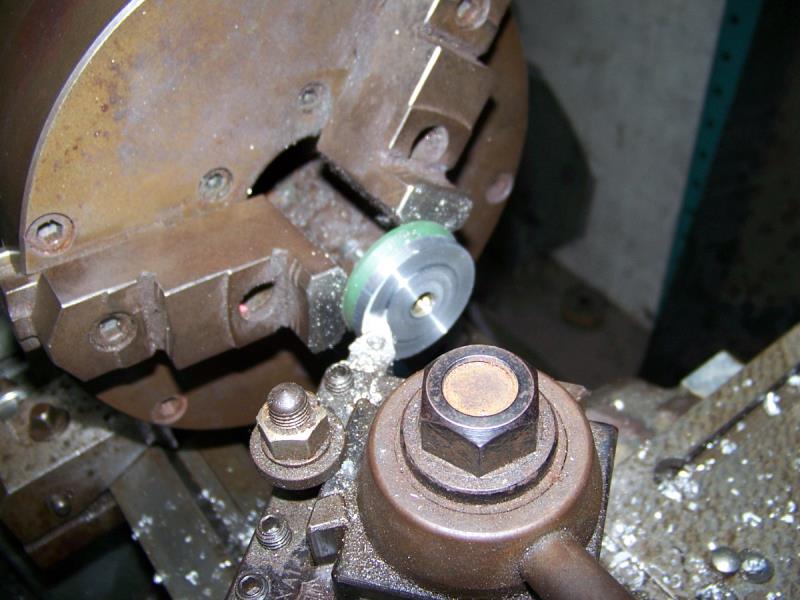 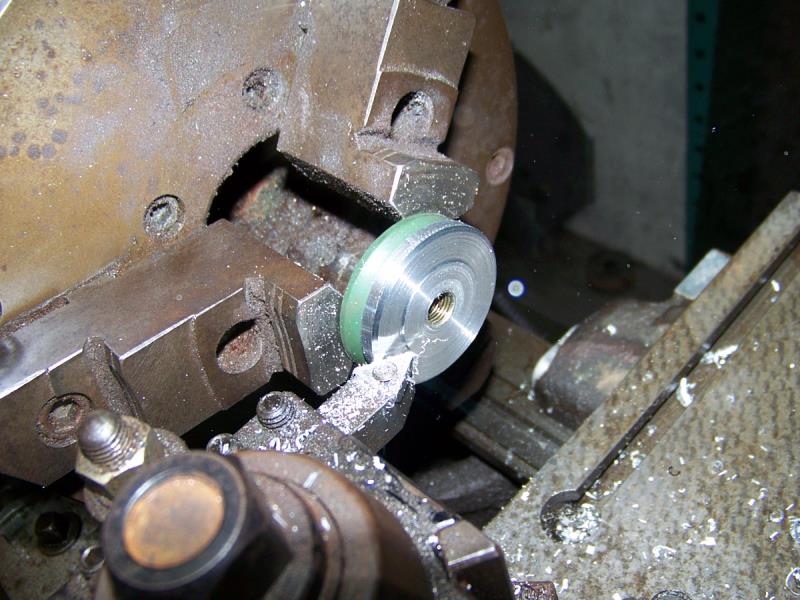 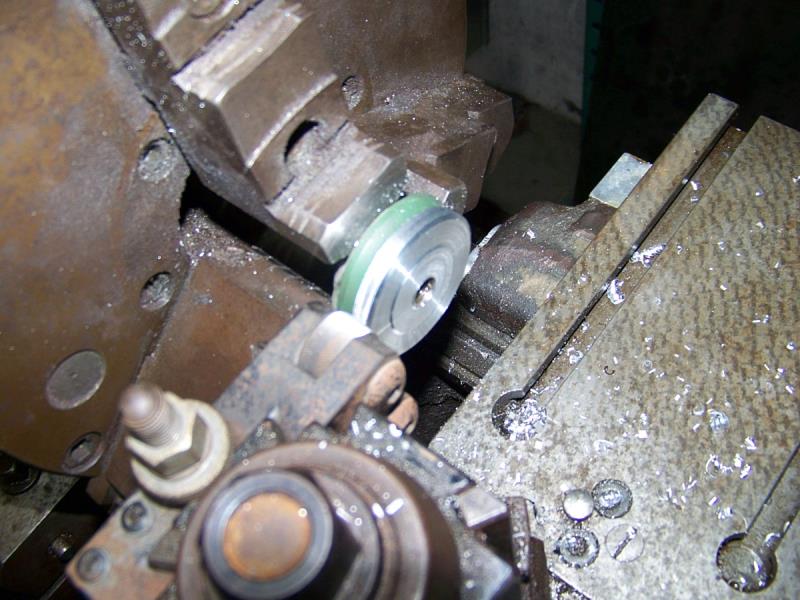 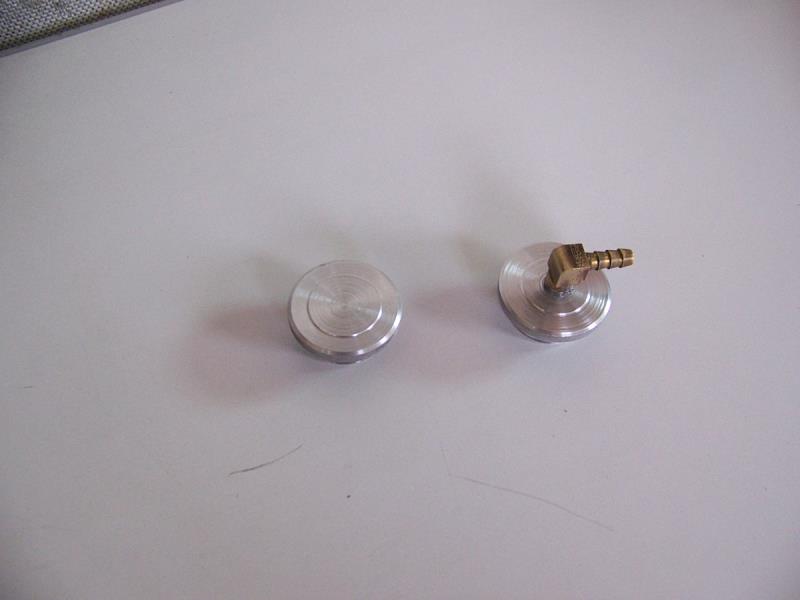
|
|
By Cliff - 5 Years Ago
|
Gas tank finished and installed for the last time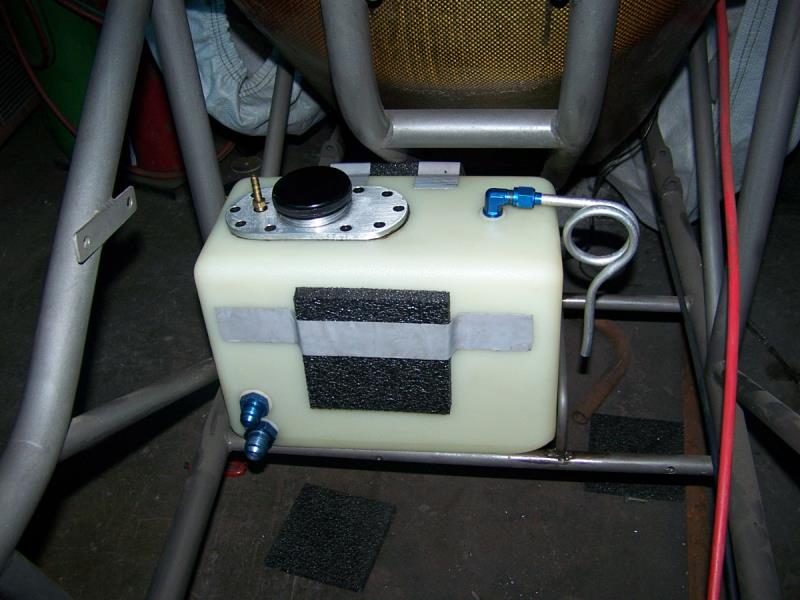
|
|
By Cliff - 5 Years Ago
|
Soon to be battery box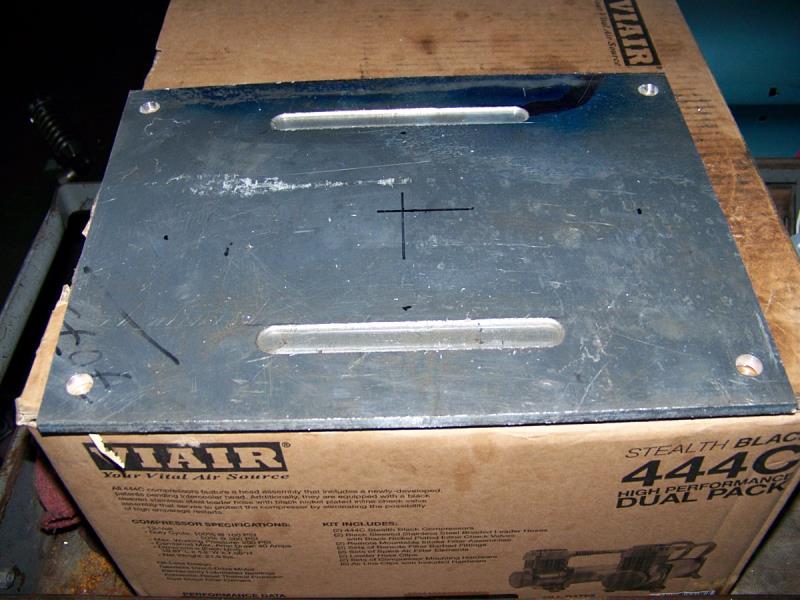 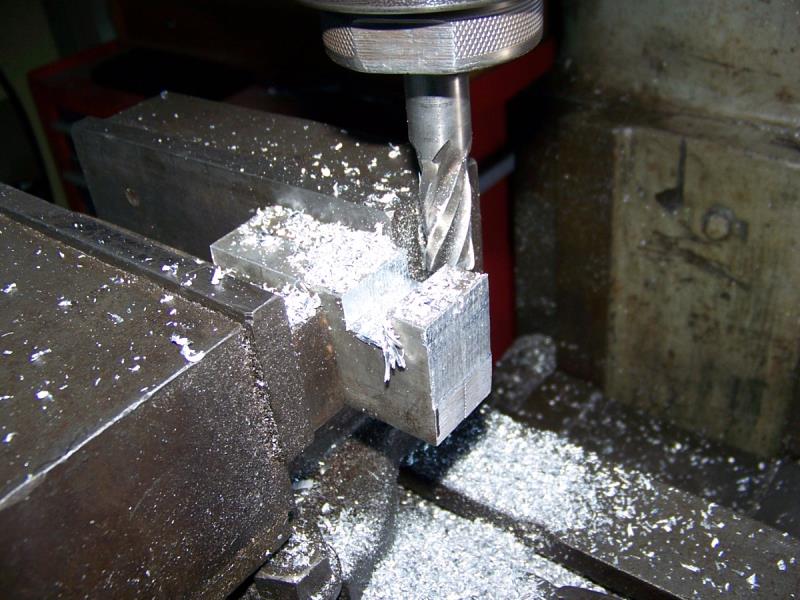 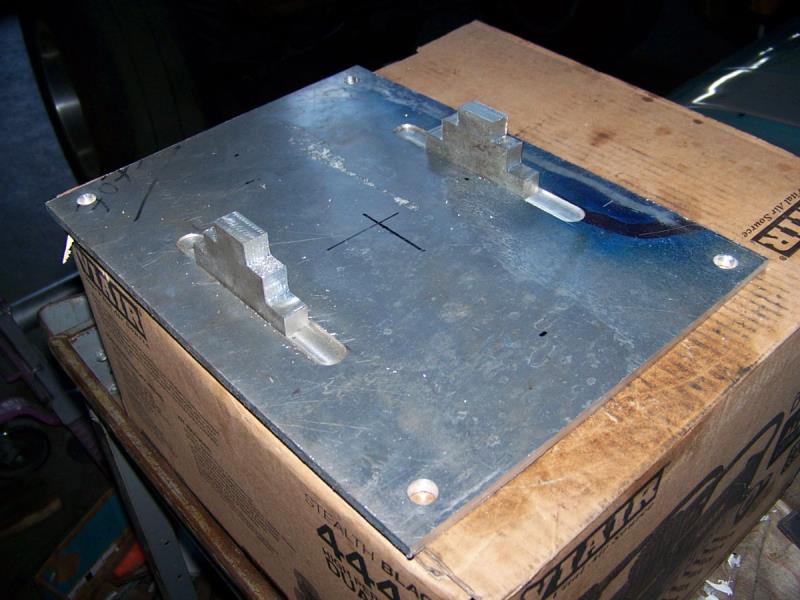
|
|
By Cliff - 5 Years Ago
|
Had to shorten the coupler, engine going in (have to remove the oil filter first), this thing is tight, I hope I measured right.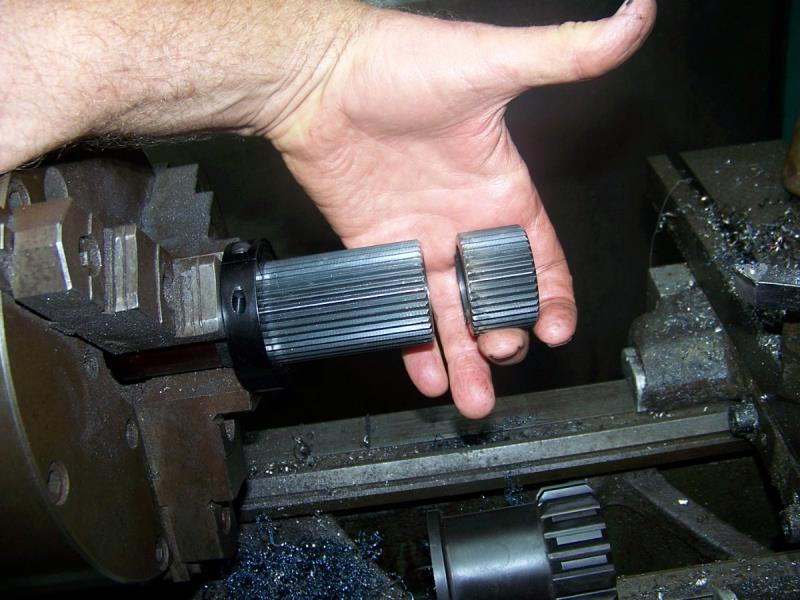 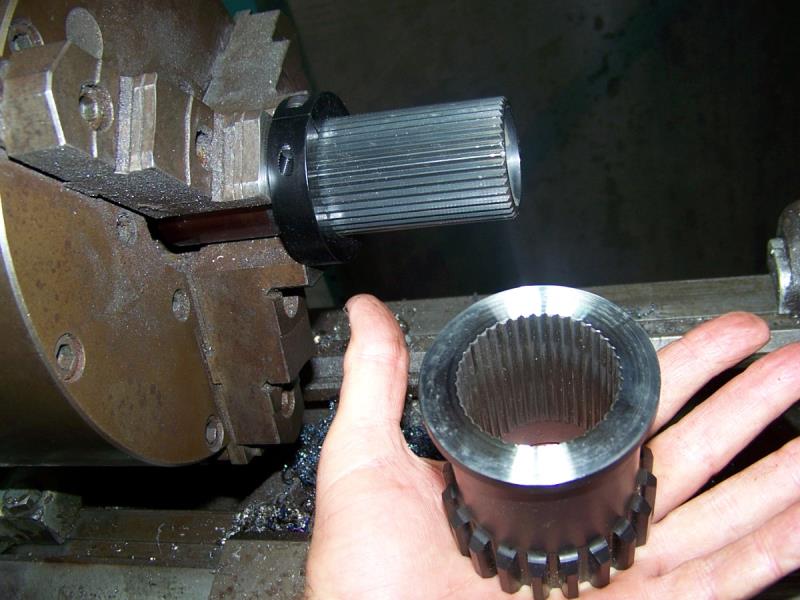 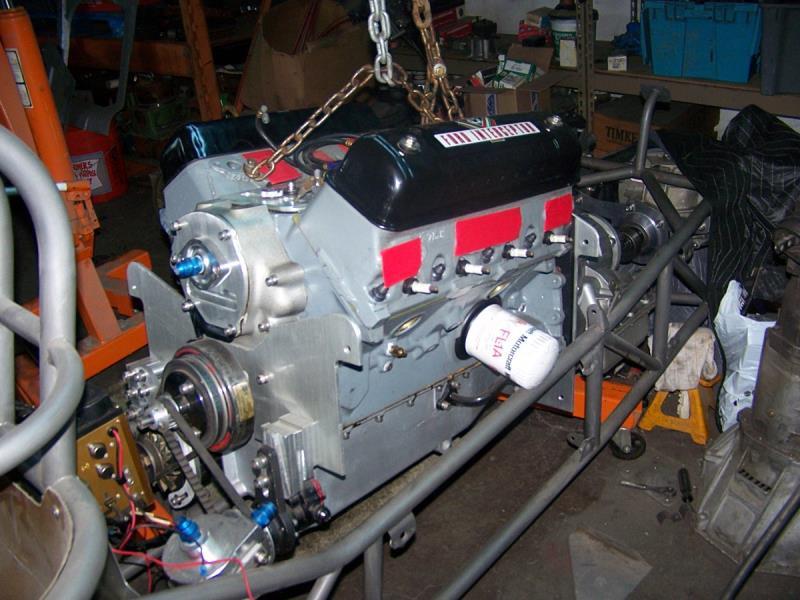 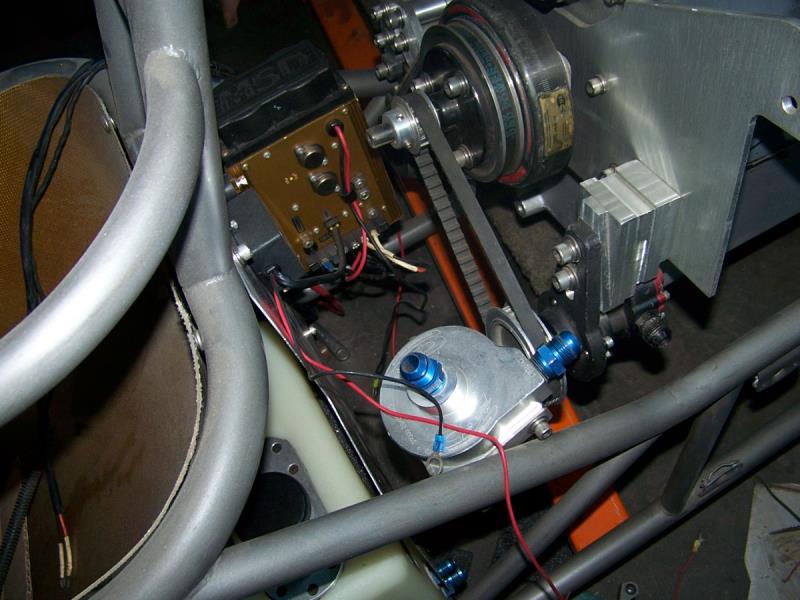 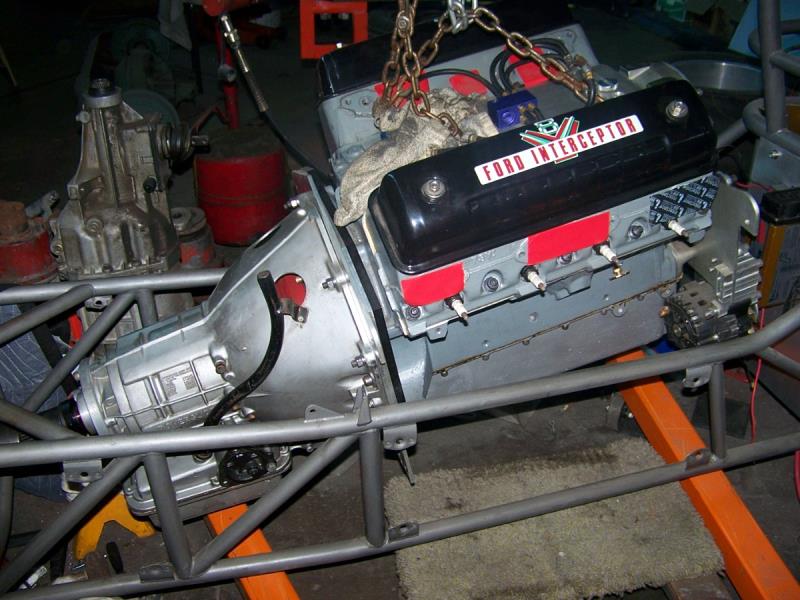
|
|
By Cliff - 5 Years Ago
|
In, forgot to grind off a small part of the block (hits the frame), all measurements look good (so far), going home, no more work today.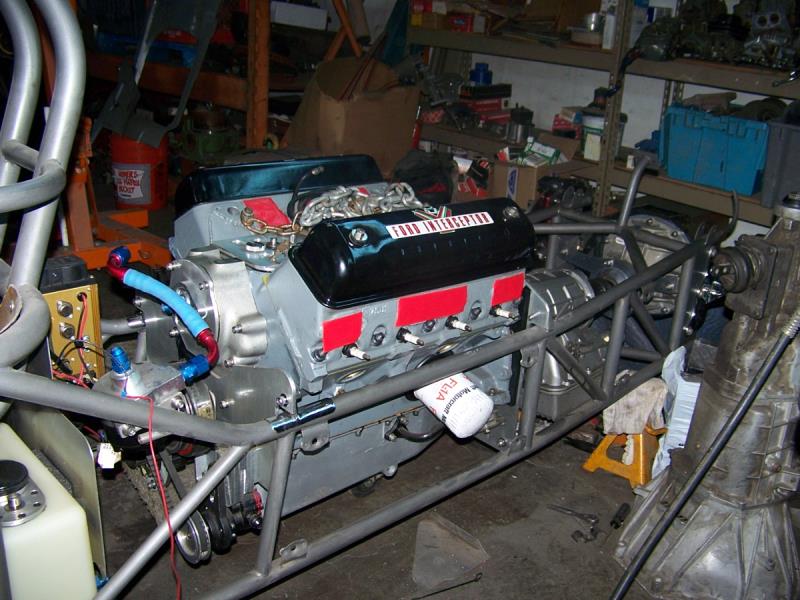 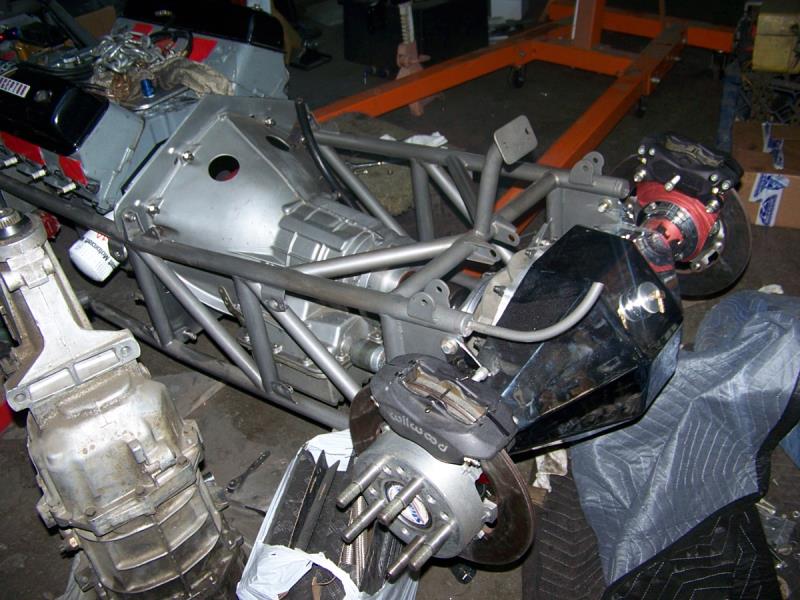 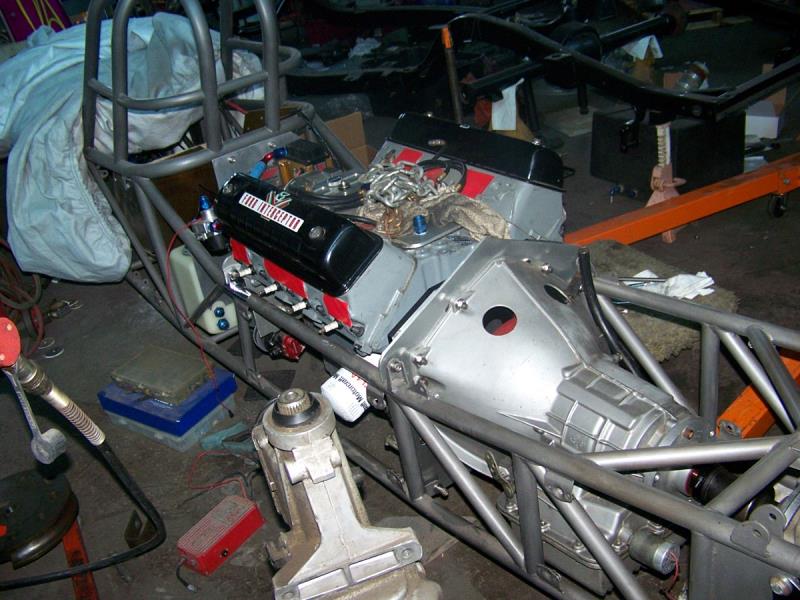 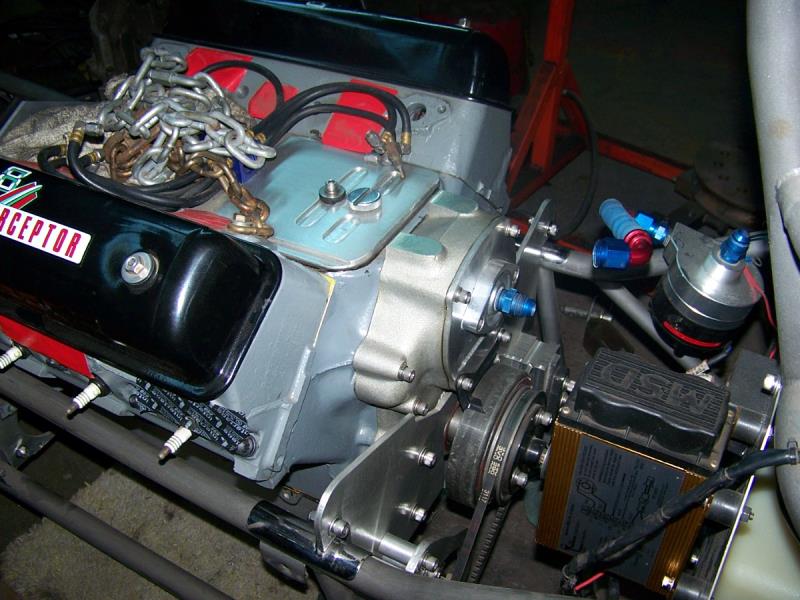 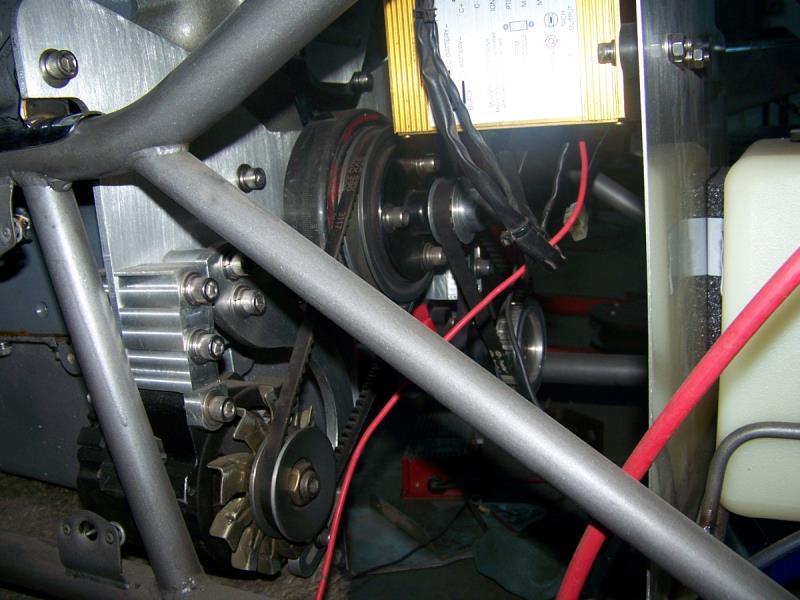 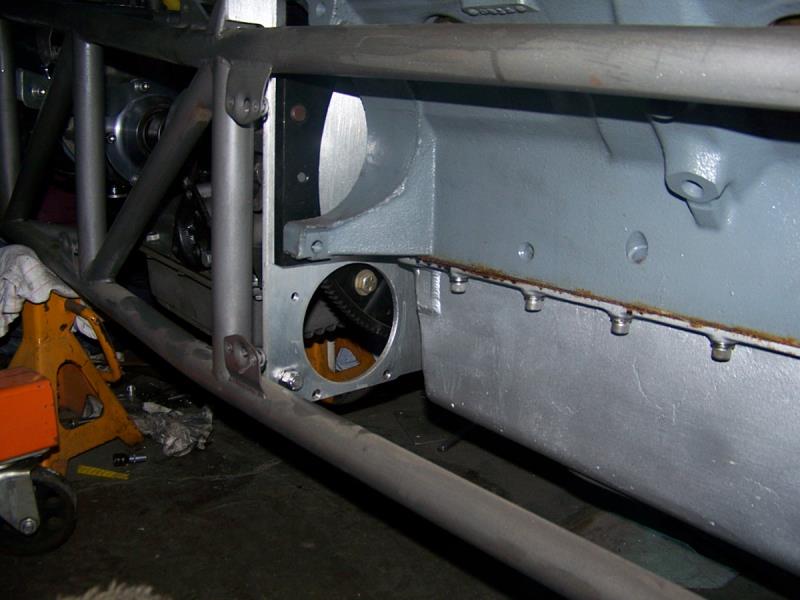 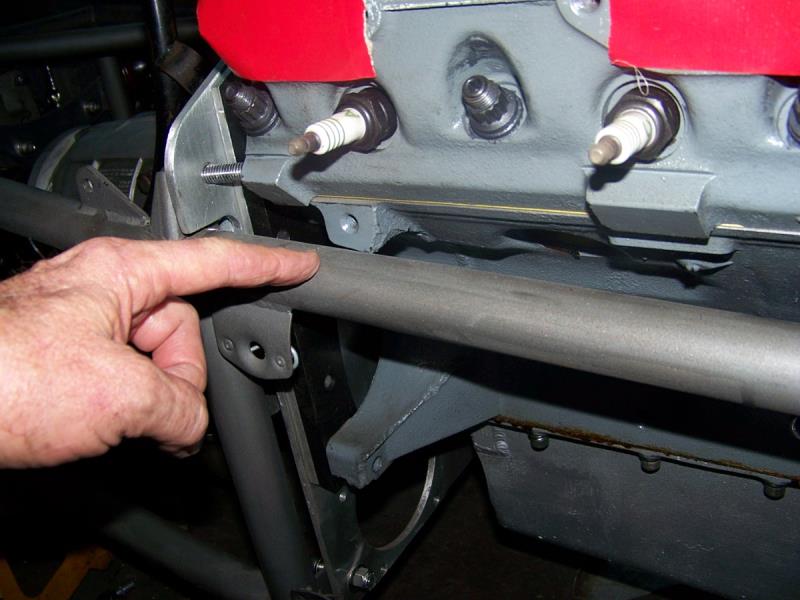
|
|
By Cliff - 5 Years Ago
|
No work today, this is in front of my house
https://youtu.be/yCBl2UTtr9Q
|
|
By Cliff - 5 Years Ago
|
1/2 the day on the milling machine making a battery box (I could have bought one), however this is not square, the frame is tapered, now time to finish (80 grit and clear), going home, this took to long to do.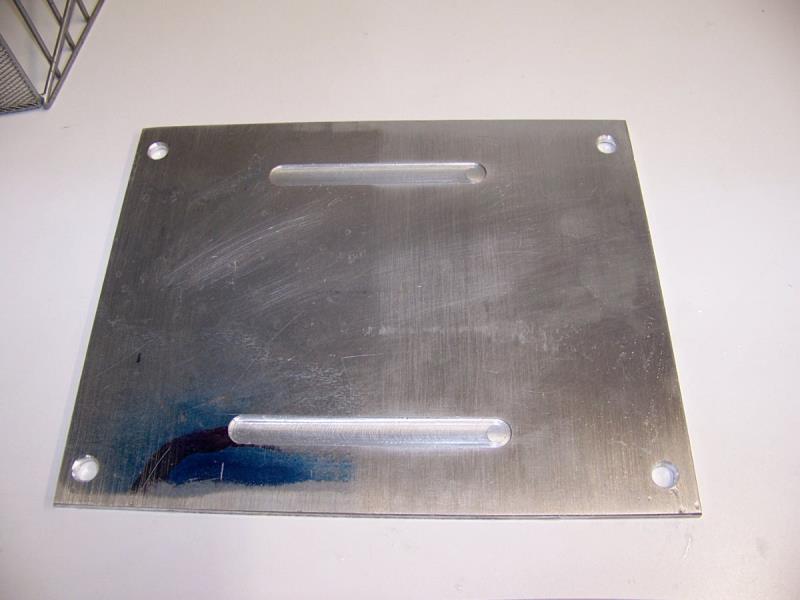 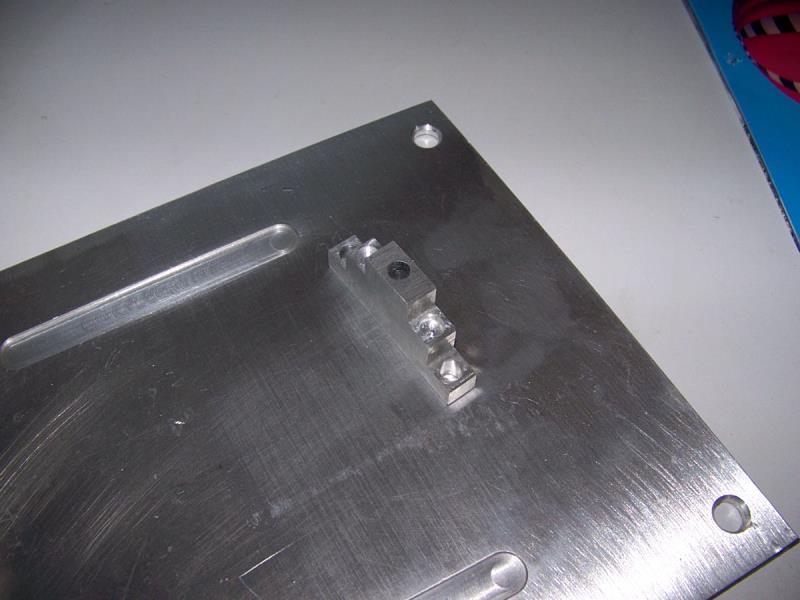 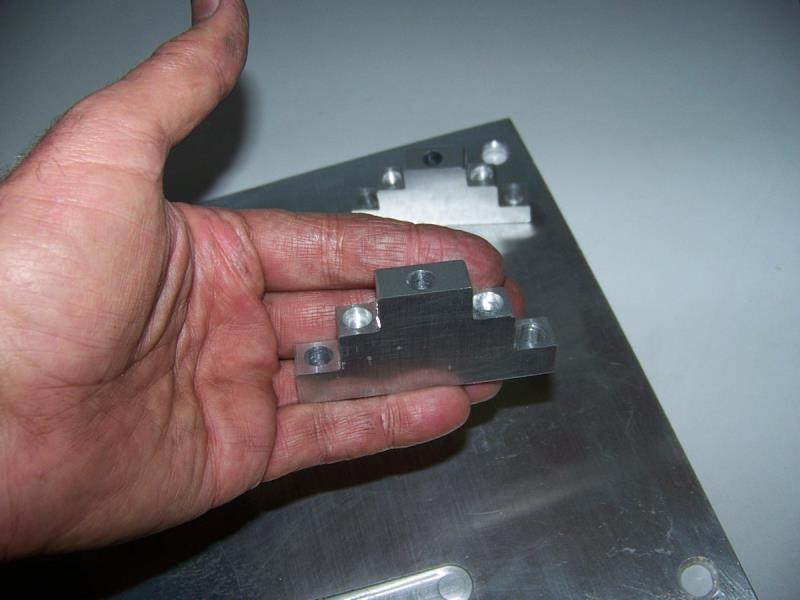 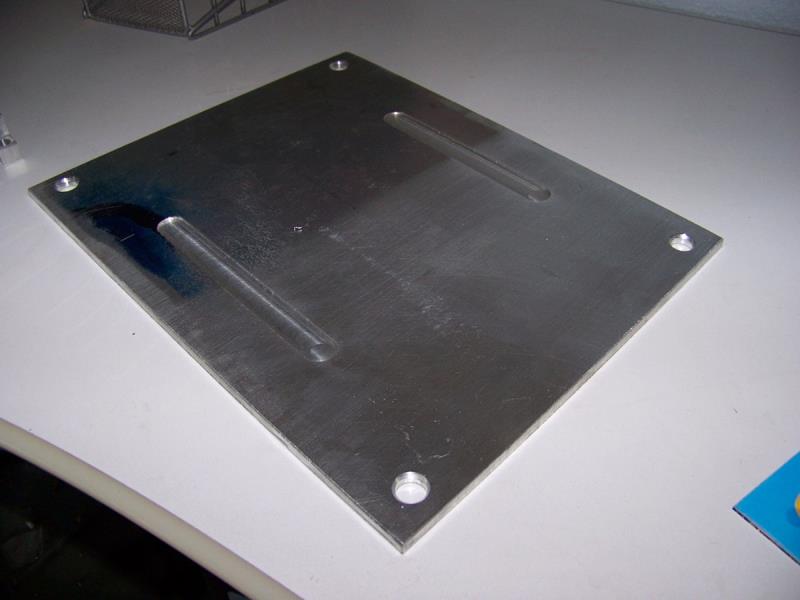
|
|
By Cliff - 5 Years Ago
|
Battery box (tray) done, I could have bought one for $35.00 on E Bay, however I just did not want china crap on my car.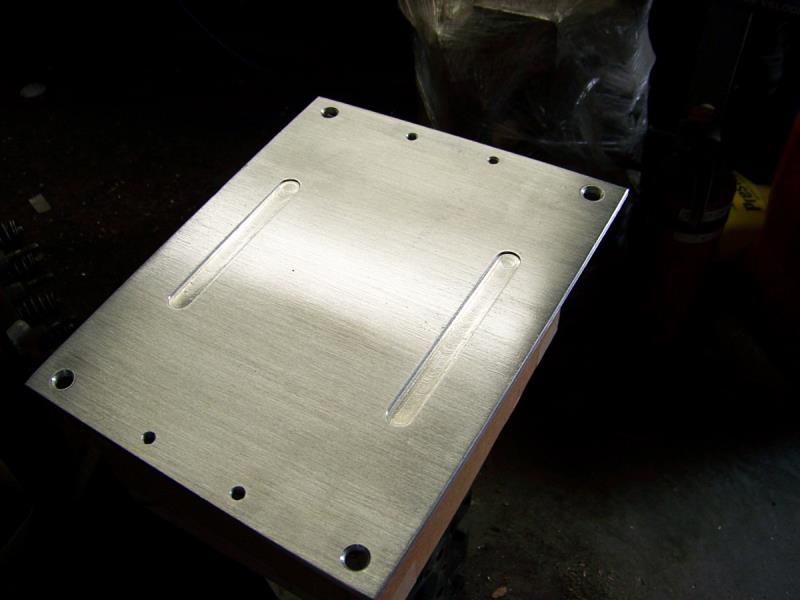 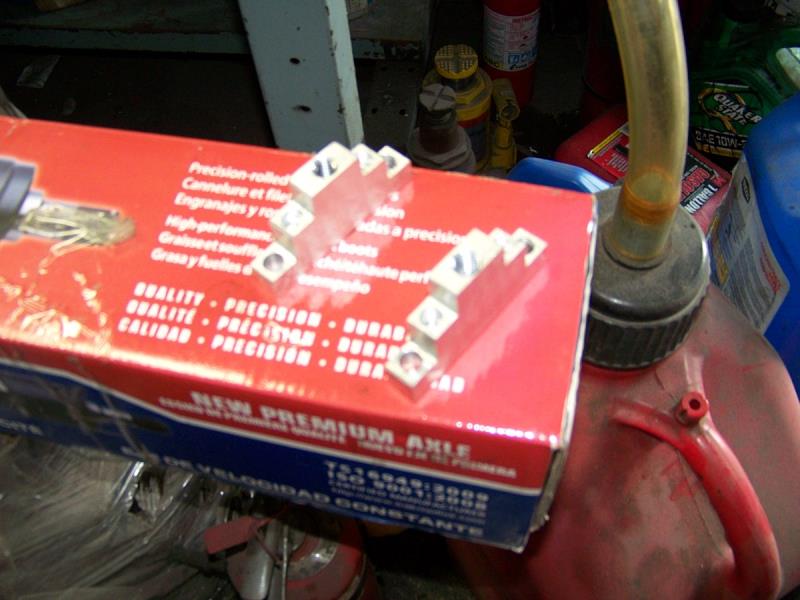  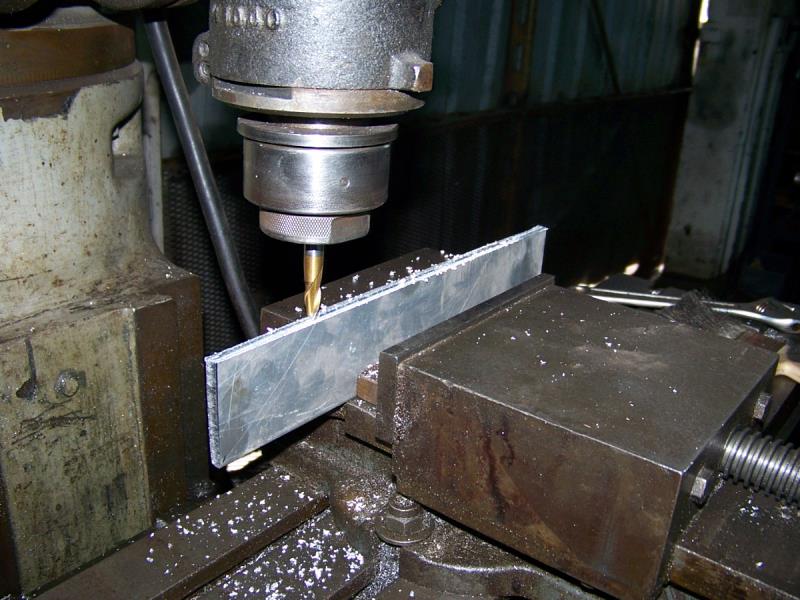 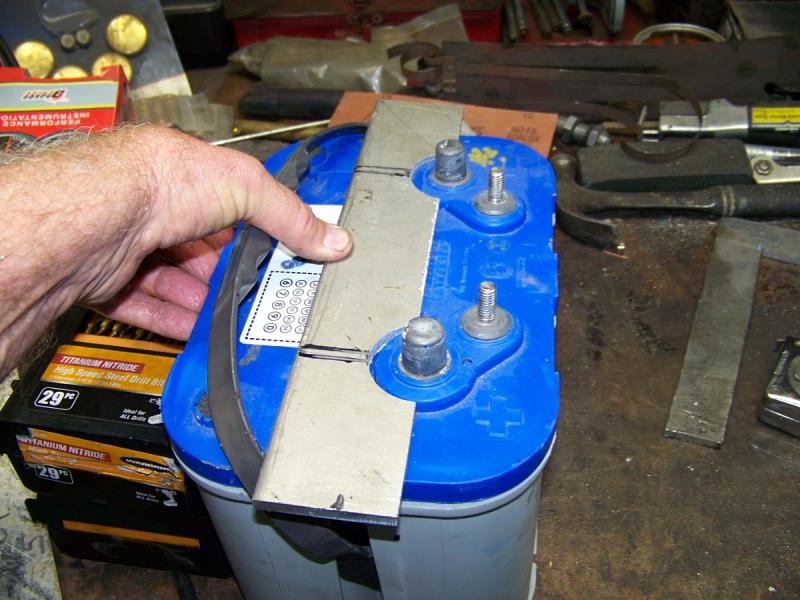 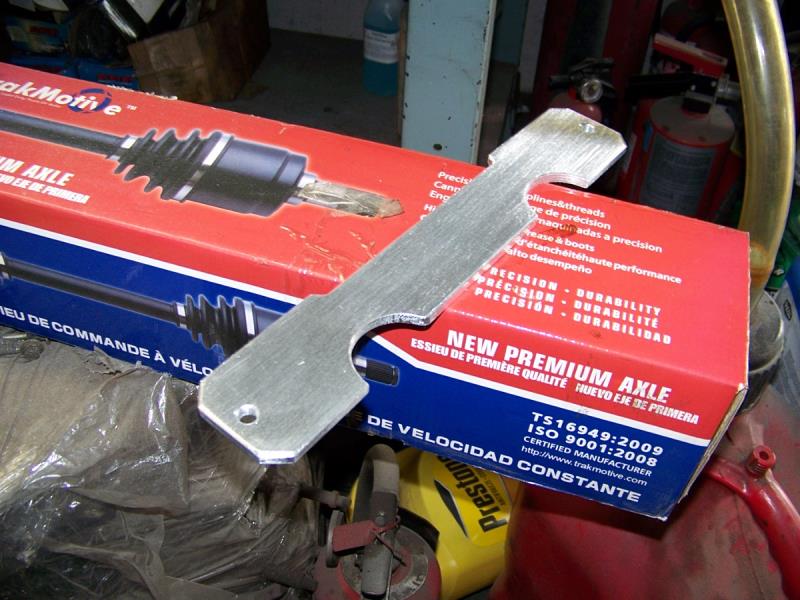 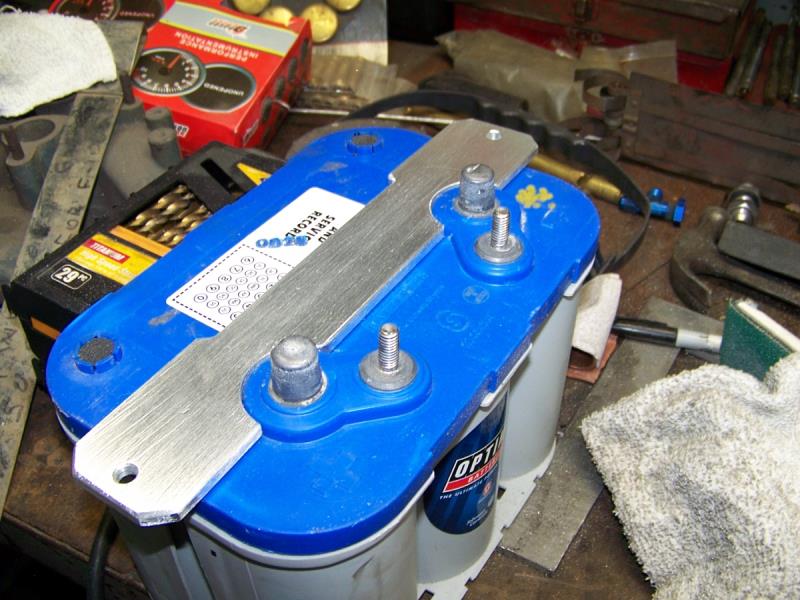
|
|
By Cliff - 5 Years Ago
|
One more photo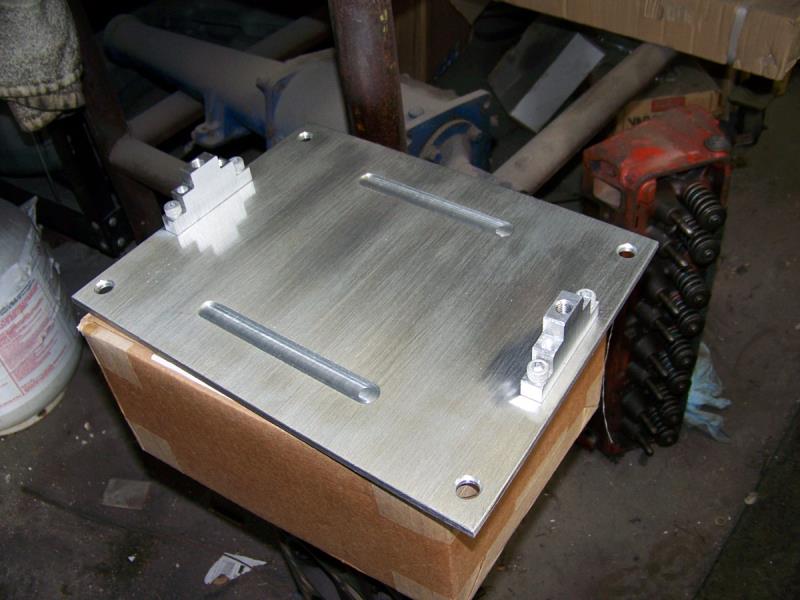
|
|
By Cliff - 5 Years Ago
|
Working today, this thing is done, ready to install, don't know why it 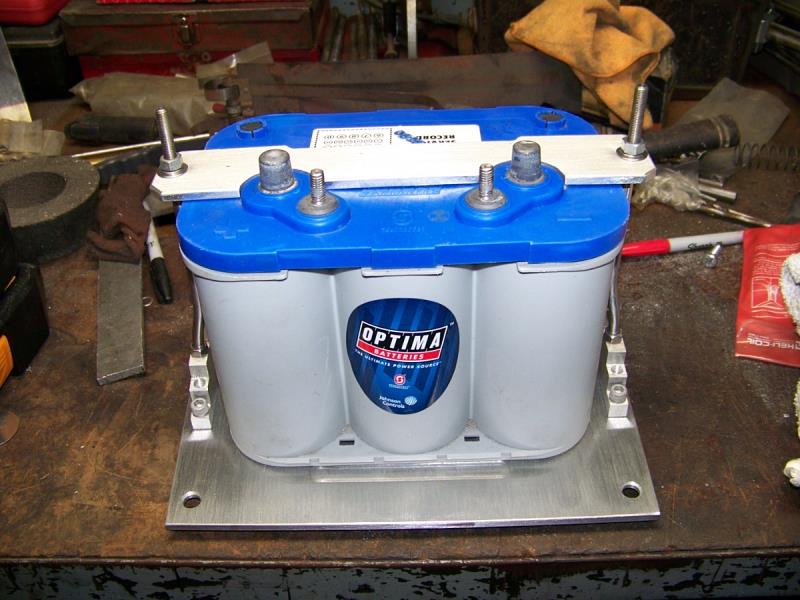 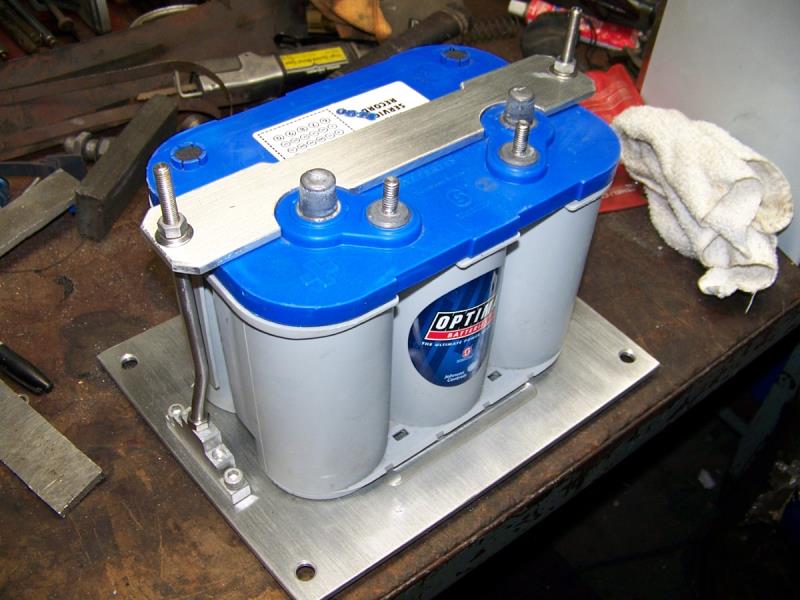 look so long but it did. look so long but it did.
|
|
By Cliff - 5 Years Ago
|
New problem, flex plate shield hits the frame.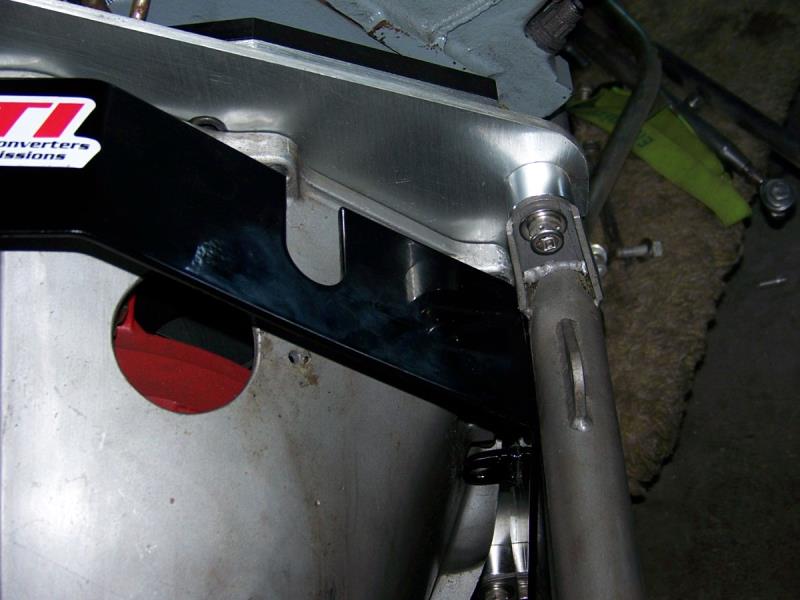 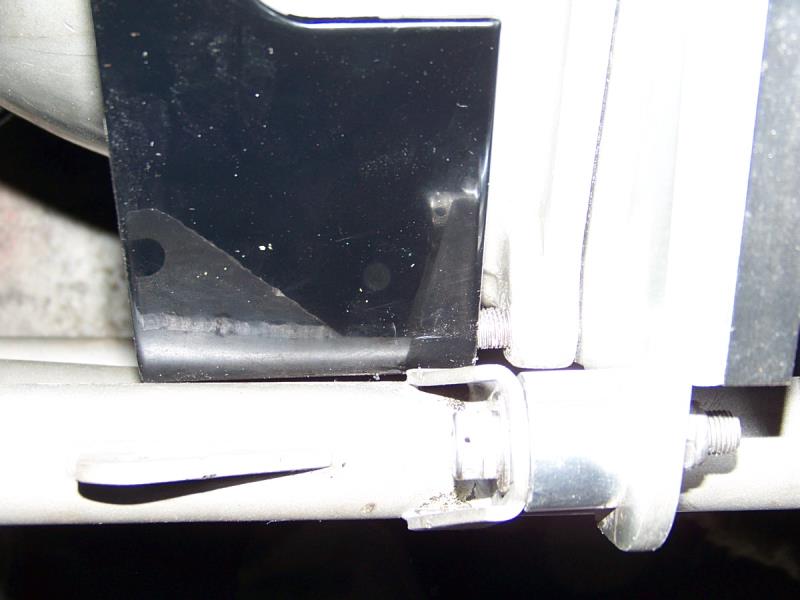
|
|
By Cliff - 5 Years Ago
|
OK, battery installed with tray and hold down, starter installed, look at how much room is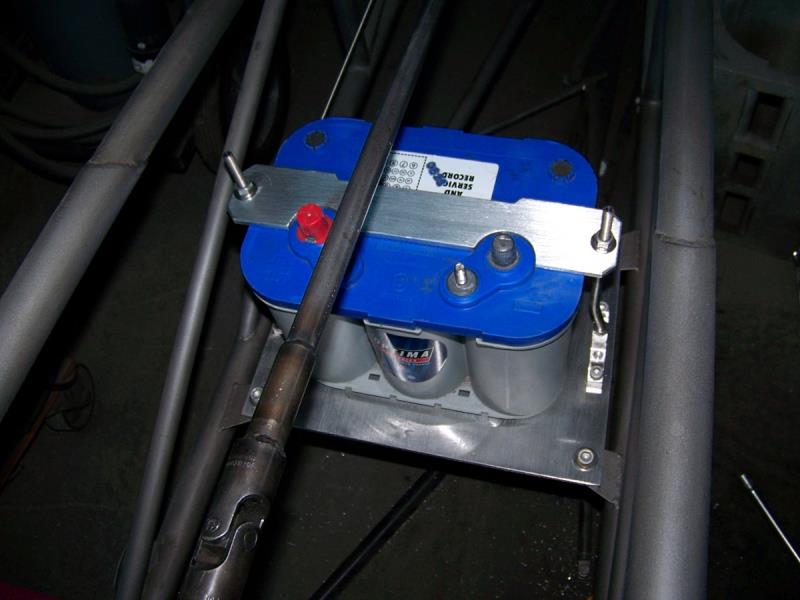 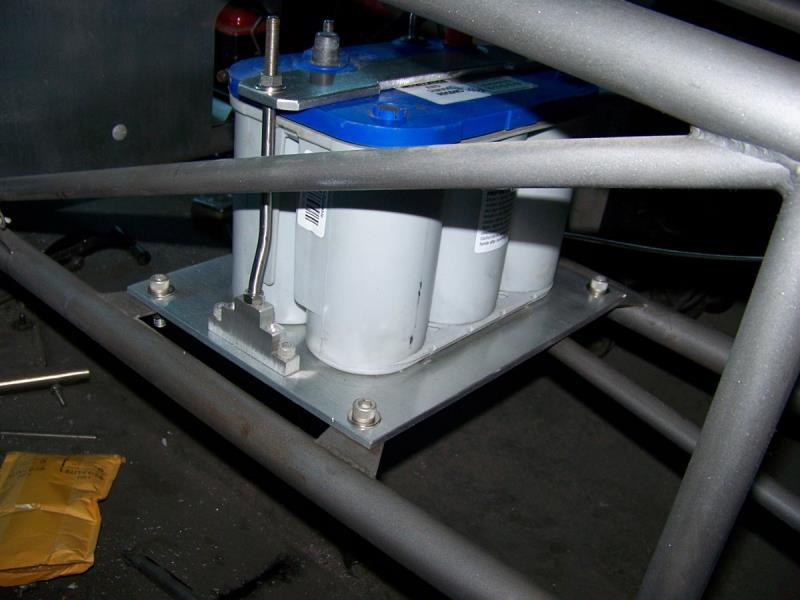 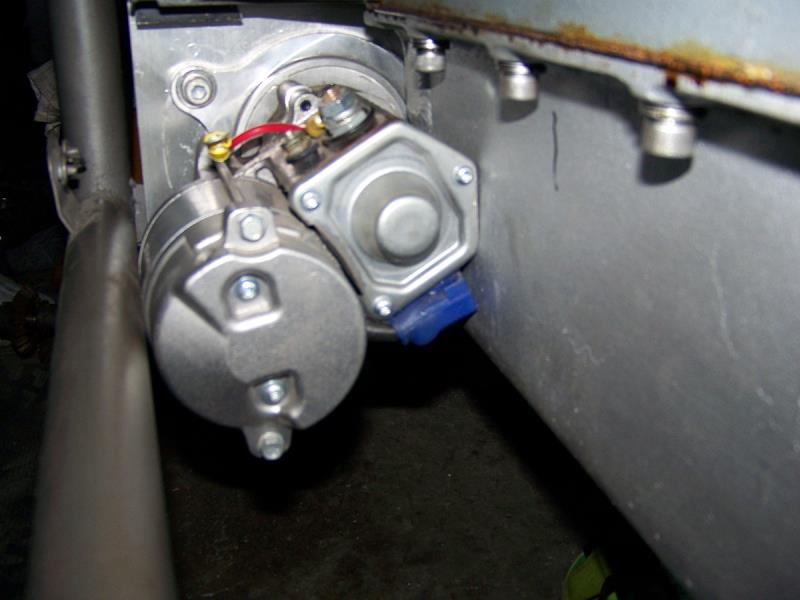  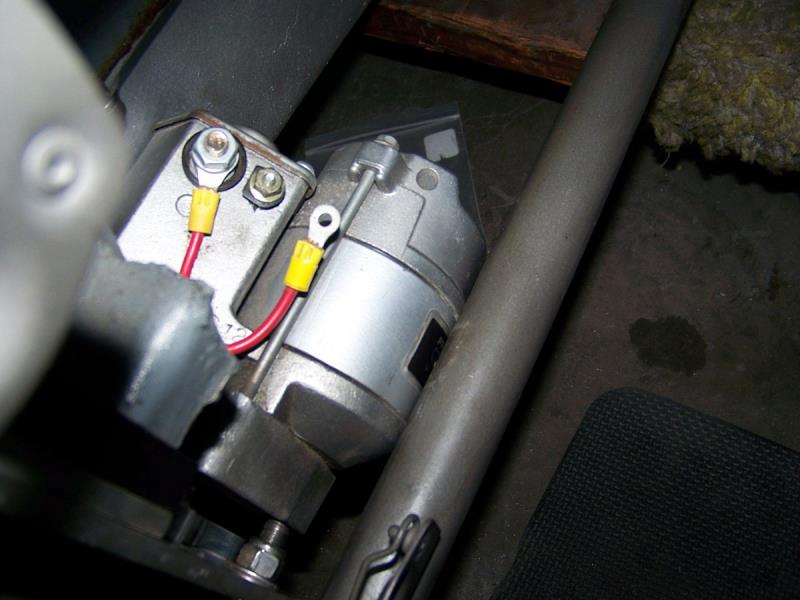 between the engine and the frame, I did this by measuring not trial and error, the starter touches the pan and the frame rail (just a little) between the engine and the frame, I did this by measuring not trial and error, the starter touches the pan and the frame rail (just a little)
|
|
By Cliff - 5 Years Ago
|
Now mocking up the wing and radiator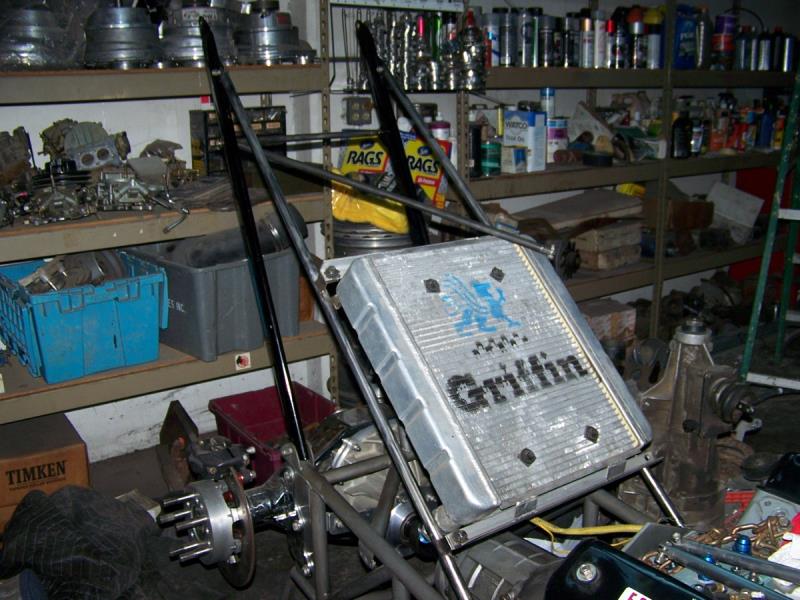 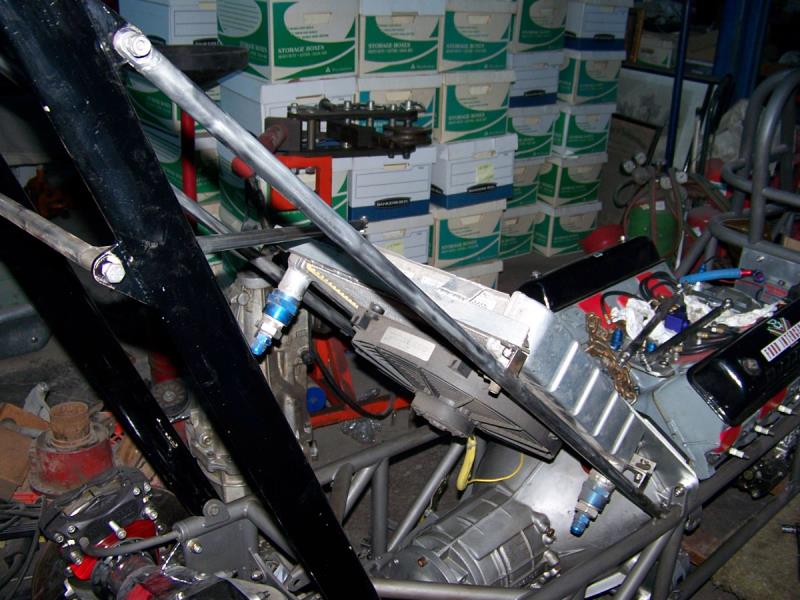
|
|
By Cliff - 5 Years Ago
|
What am I doing? refinishing parts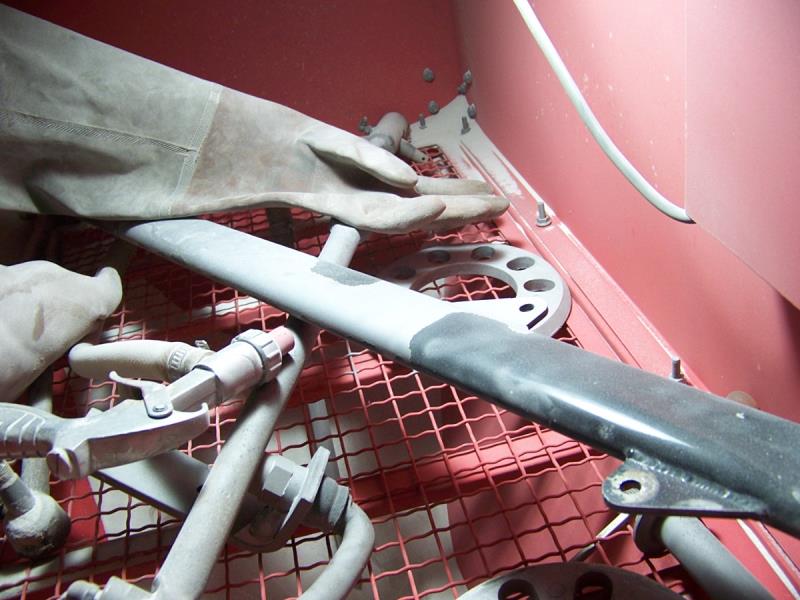
|
|
By Cliff - 5 Years Ago
|
More work, refinished the wing and all small parts, finished with Sharkhide, all hardware replaced with aircraft stainless socket head bolts (fine thread) 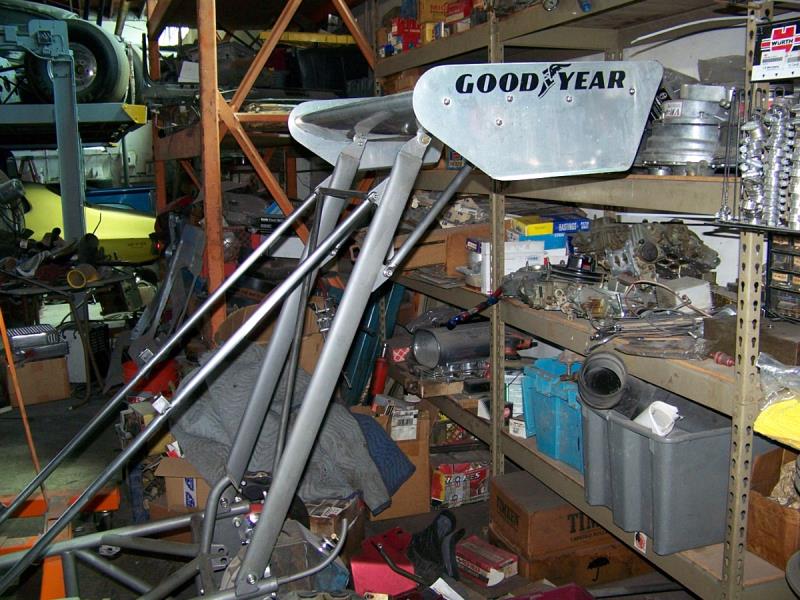 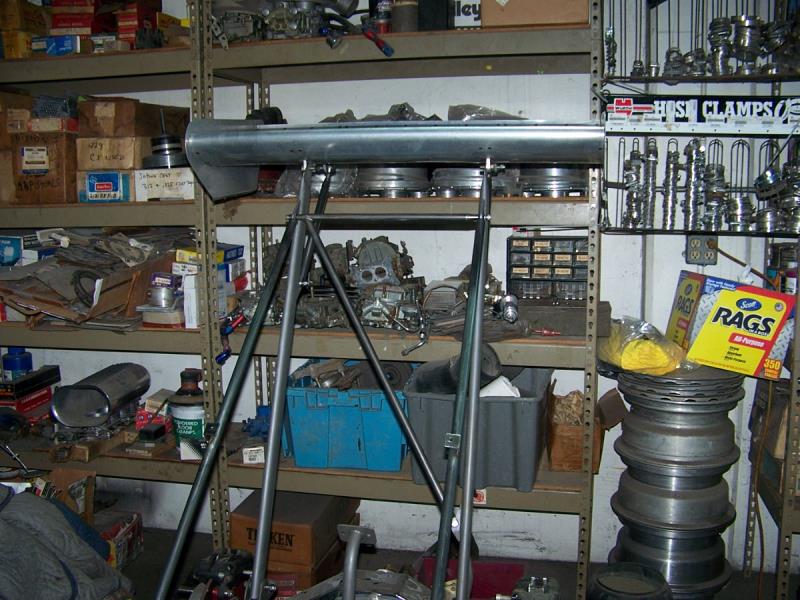 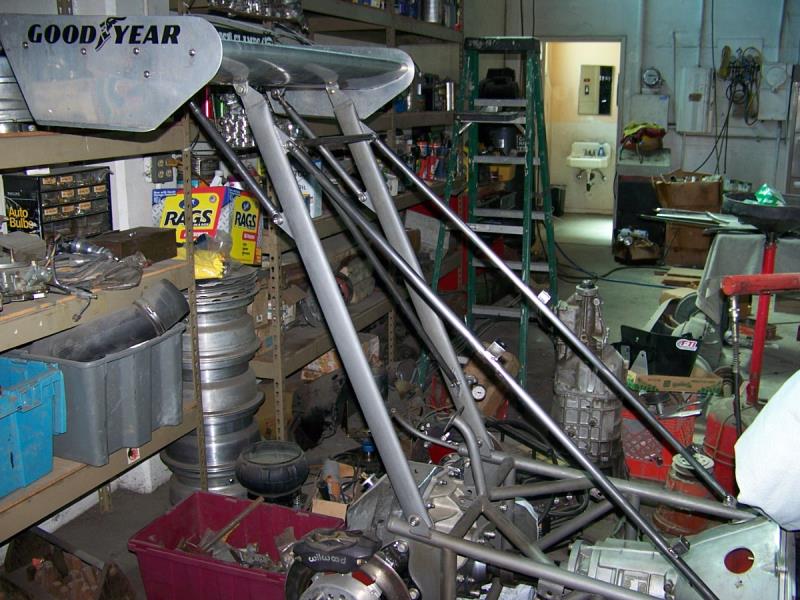 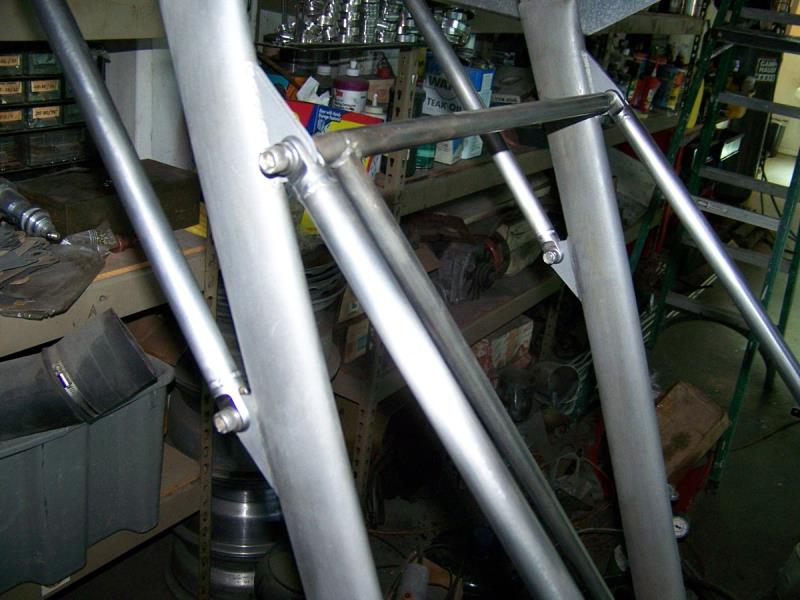
|
|
By Cliff - 5 Years Ago
|
I have a legal flex plate shield that fits, parts are hard to get now (long wait)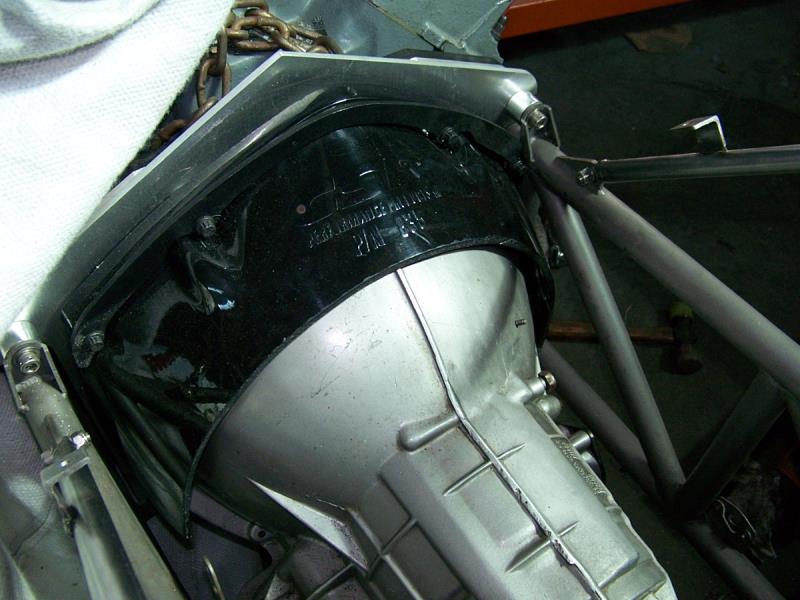
|
|
By Cliff - 5 Years Ago
|
Radiator, cleaned and installed stainless hardware, new problem
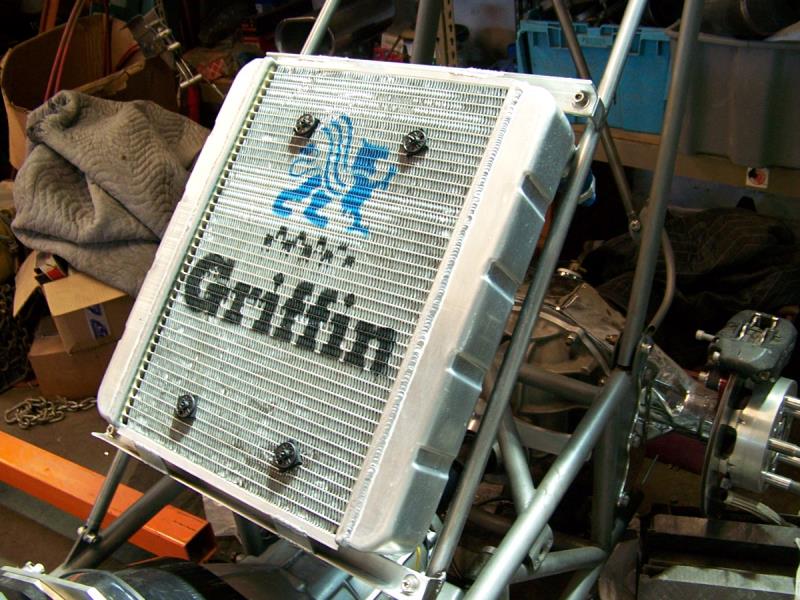
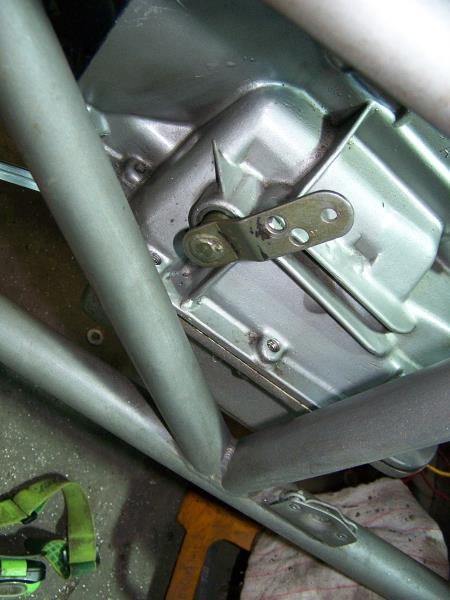
shift leaver points up I need it to point down, so now to pull the pan and see what to do.
|
|
By Cliff - 5 Years Ago
|
Ok, that took an hour laying on my back on the ground and digging into the transmission.
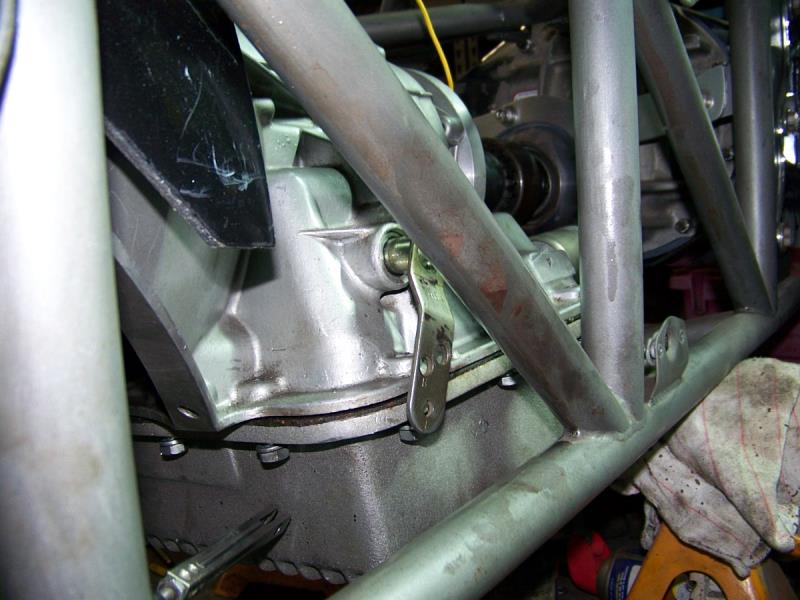
|
|
By Cliff - 5 Years Ago
|
Shift cable installed, runs through the gears with no problems, still need to find the correct pin for the end of the cable and a bushing,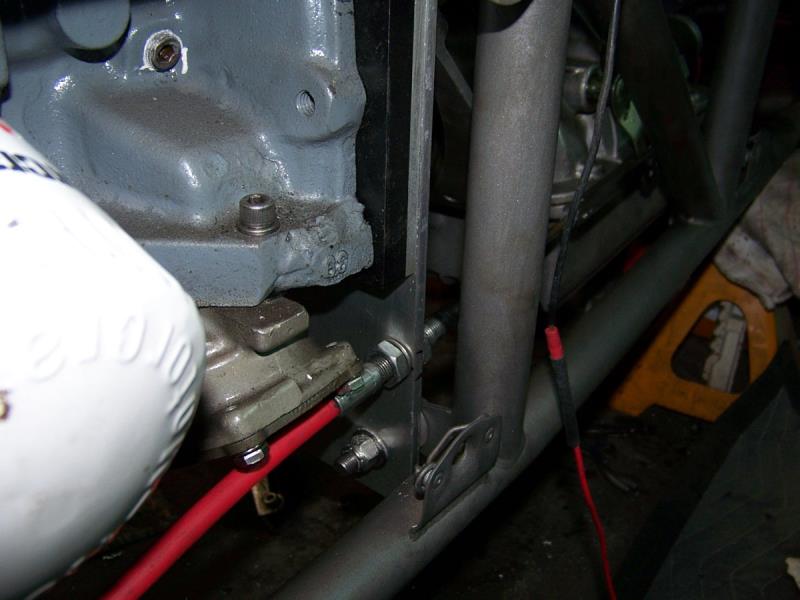 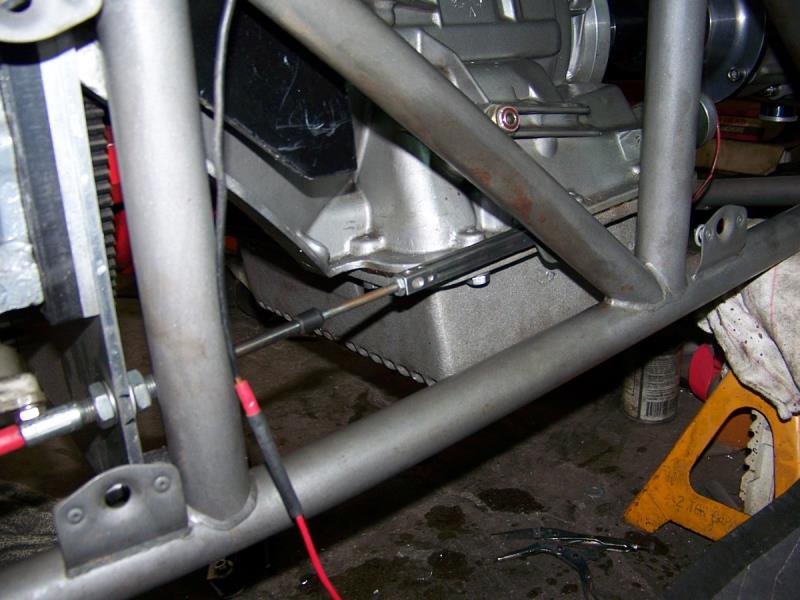 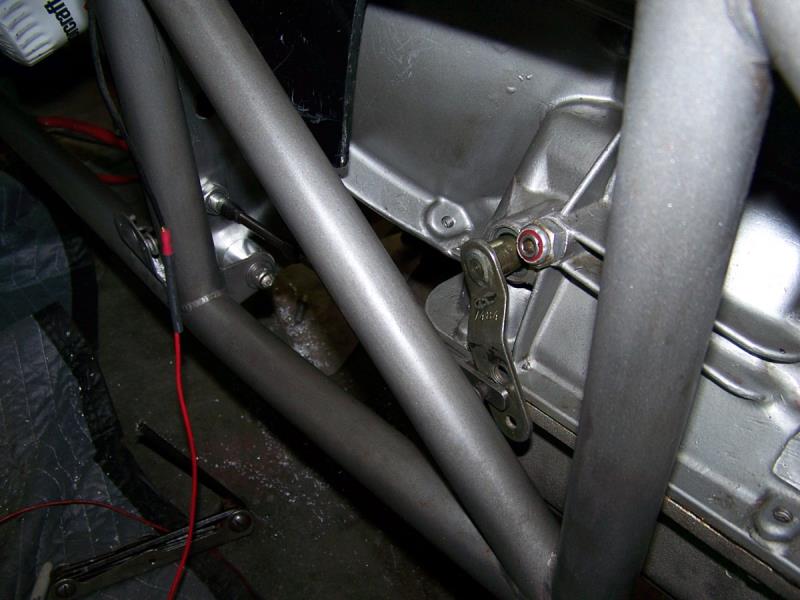
looks like I need to spend time and clean up the car (dirt from sitting)
|
|
By Cliff - 5 Years Ago
|
Starting to make a Lexan intake manifold, this is the start of the flanges, using a old 6x2 manifold as pattern.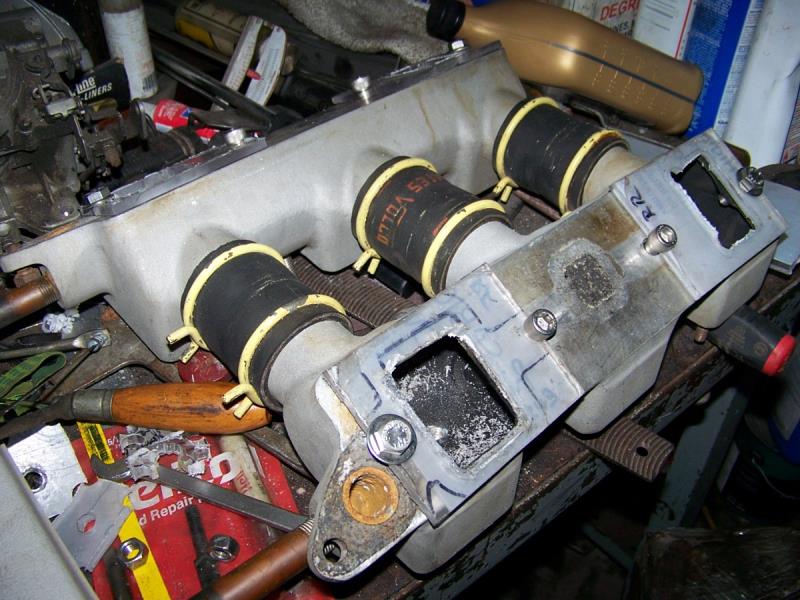
|
|
By Cliff - 5 Years Ago
|
Working today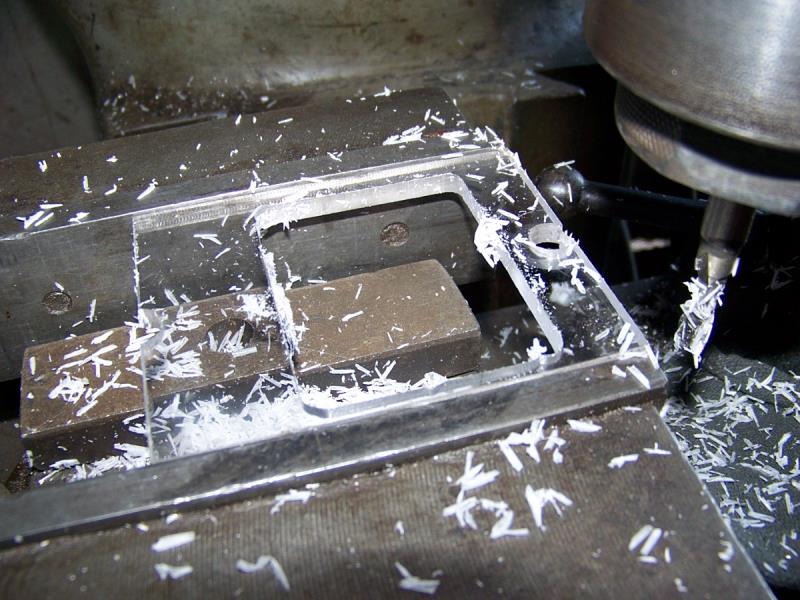
|
|
By Cliff - 5 Years Ago
|
Going home, got the flanges about 90% done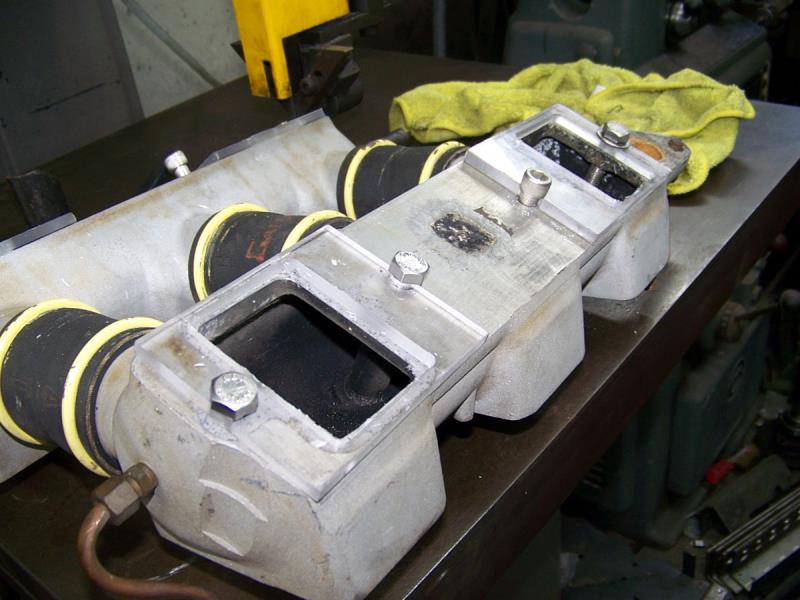 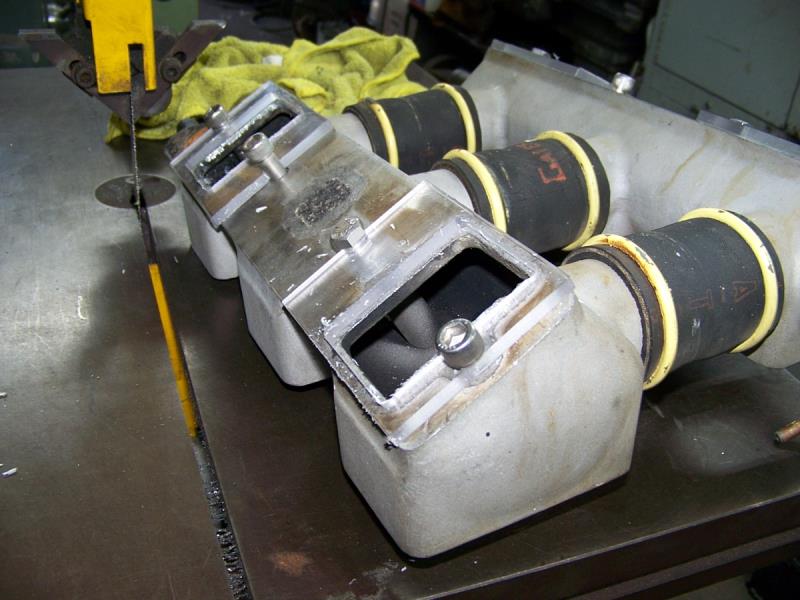 e e
|
|
By Joe-JDC - 5 Years Ago
|
|
Just curious what the manifold will be going on? The dragster? I have worked, modified, tweaked, built, ported, even made acrylic spacers, and I am trying to figure out exactly what your intensions are at this point. Not criticizing, just trying to imagine your intended final product. If you are making a single 4V, or something else, why not use one of Mummert's gaskets to get your dimensions for your manifold bases? They are unidirectional, and a bit larger than the Fel Pro or Best gaskets. Watching with interest. Joe-JDC
|
|
By Cliff - 5 Years Ago
|
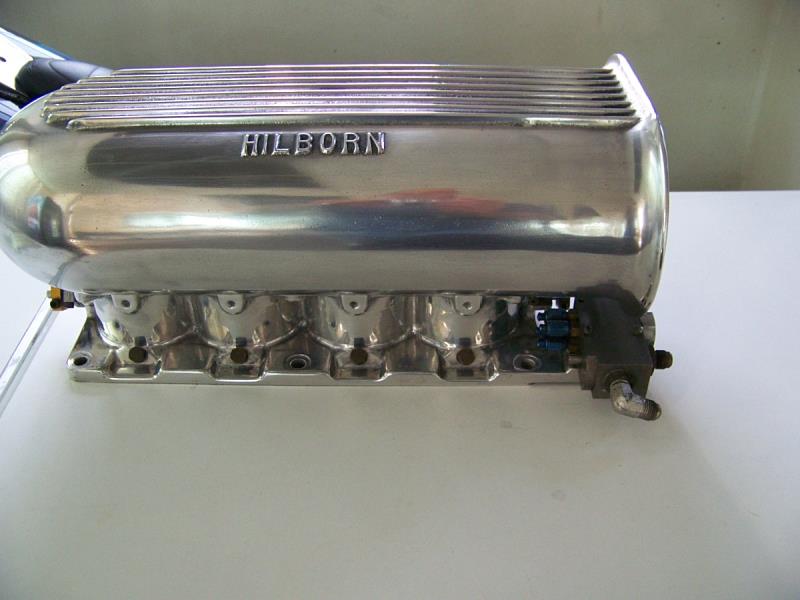 Hi Joe, this is going on my dragster engine, it will mount a Hilborn 4 port 3" short injector, this is Lexan (polycarbonate), I've worked on this for a long time Hi Joe, this is going on my dragster engine, it will mount a Hilborn 4 port 3" short injector, this is Lexan (polycarbonate), I've worked on this for a long time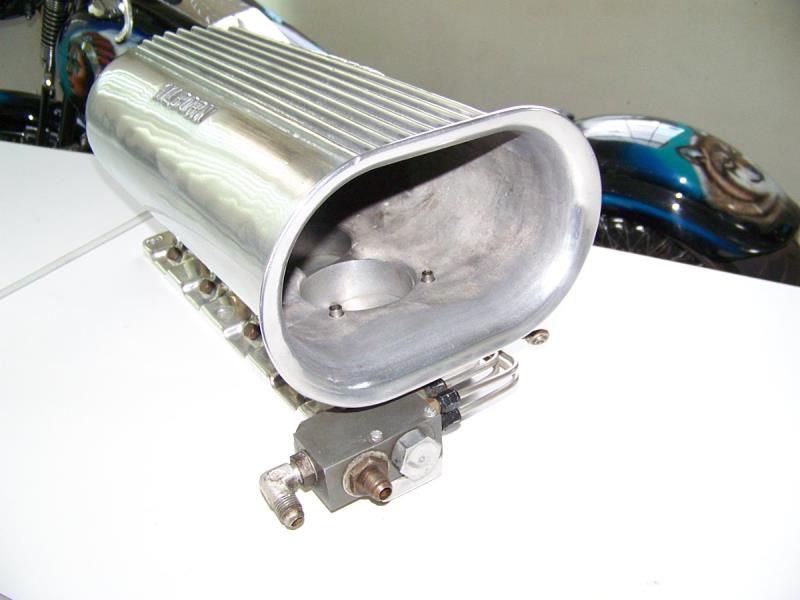
|
|
By John Mummert - 5 Years Ago
|
|
So when is the dyno date Cliff? It looks like your down to the last steps.
|
|
By Cliff - 5 Years Ago
|
|
Going to run it in the car first, working on the intake runners today, I'm afraid to put it on a dyno and have it top out at 300 HP.
|
|
By Cliff - 5 Years Ago
|
This the plug for forming the intake port (not done) this was formed using 3 pieces of wood (mahogany) and about 3 hours of work, it is accurate within .005 on all sides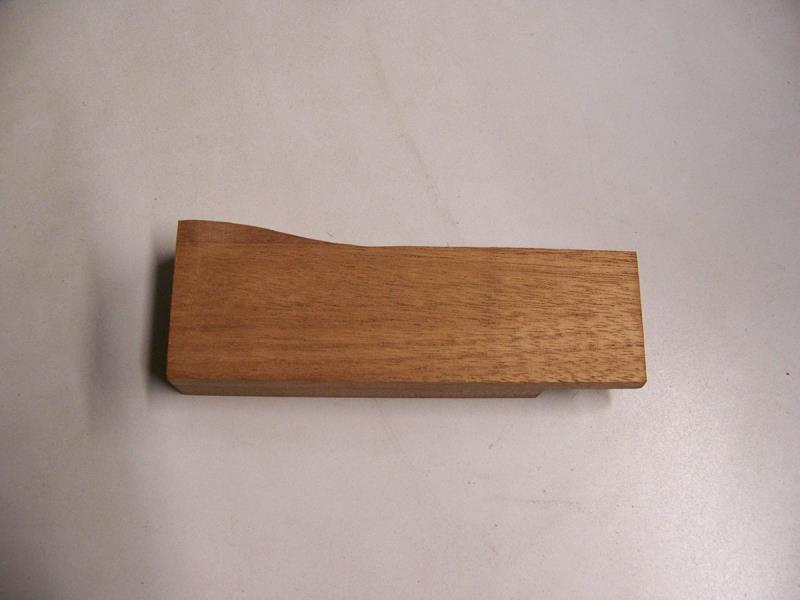 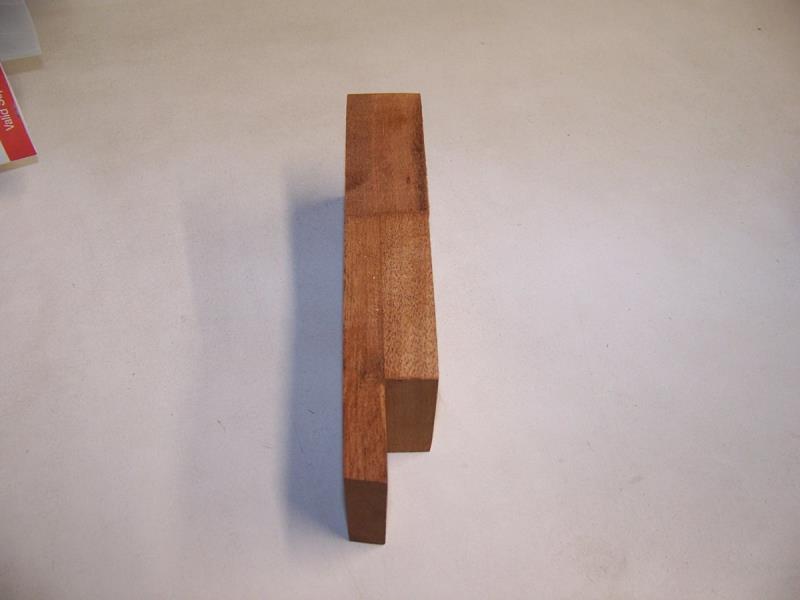 
|
|
By Cliff - 5 Years Ago
|
Here's what happens if you don't balance your engine (funny)
https://www.youtube.com/watch?v=dq6T5BojXc8
|
|
By Cliff - 5 Years Ago
|
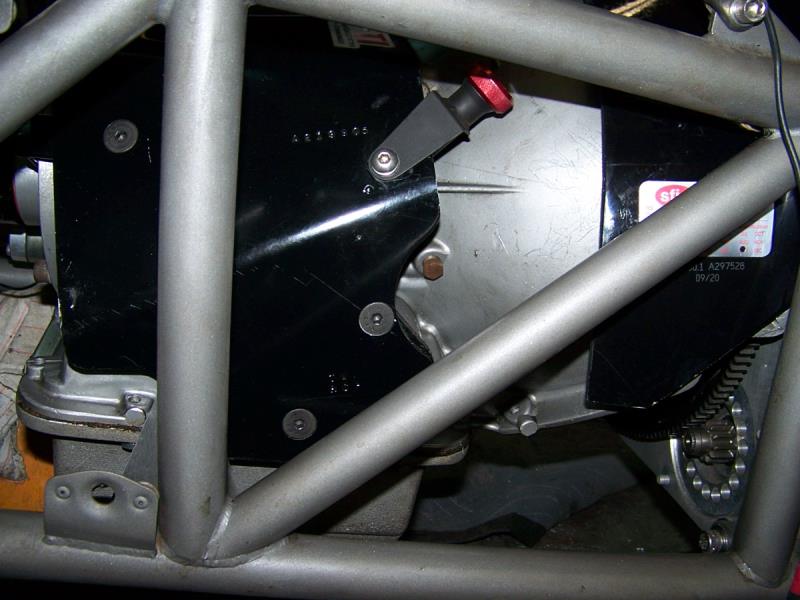 Transmission shields in place, these things are hard to fit. Transmission shields in place, these things are hard to fit.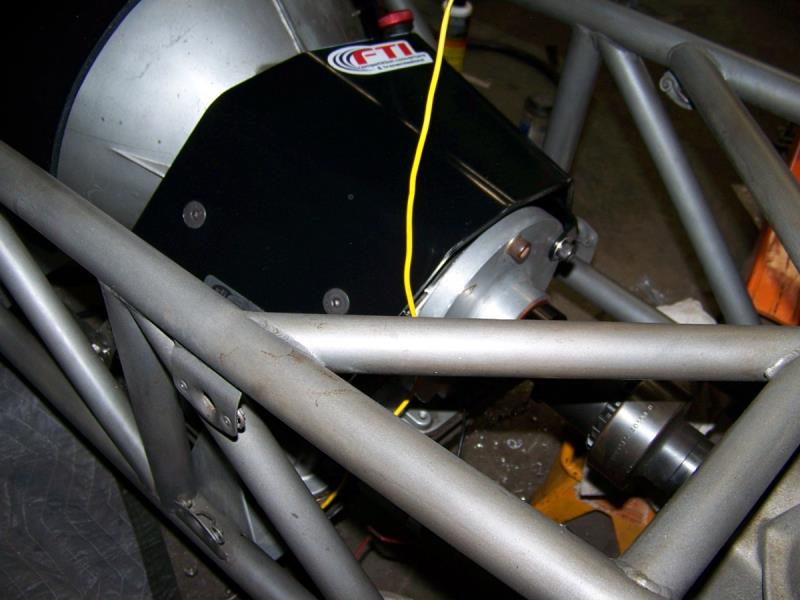 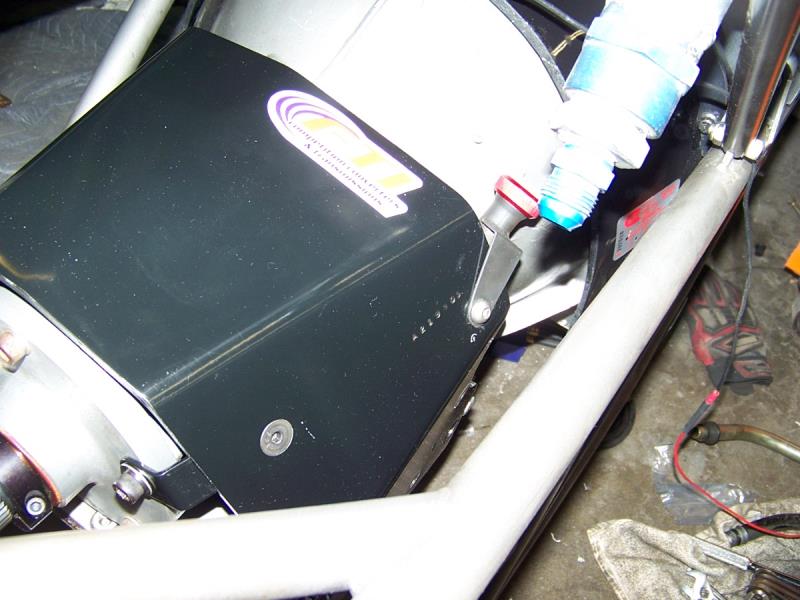 
|
|
By 57FordPU - 5 Years Ago
|
Your doing some quality work there Cliff. I've watched your build from the start and I believe it will be a master piece.
|
|
By Cliff - 5 Years Ago
|
|
Thanks Charley, one of the bolts that hold the shield to the rear of the transmission stripped when I tightened it (3/8 allen), I'm going to helicoil it in the car with out pulling the transmission apart (I hope)
|
|
By Cliff - 5 Years Ago
|
|
What am I doing? well the intake manifold is not cooperating, having a hard time forming the Lexan into the shapes I want.
|
|
By Ted - 5 Years Ago
|
|
Are you using heat to help preform the lexan?
|
|
By Cliff - 5 Years Ago
|
|
Yes, this stuff is strong, when I heat it hot enough to make it pliable and try to shape it it cools fast and gets hard (about 5 seconds). I'm going to try to form it cold (?) I can bend it in a metal brake (cold) and it bends just like metal.
|
|
By Joe-JDC - 5 Years Ago
|
|
If you use a Benzene torch and keep it moving across the lexan, it will not cloud up. Run the benzene across any cuts, and the edges will smooth out and come clear. Just don't over do the heat in one spot. It works on other acrylics, also. Joe-JDC
|
|
By Cliff - 5 Years Ago
|
Working today, here are some failed attempts at forming the intake runners.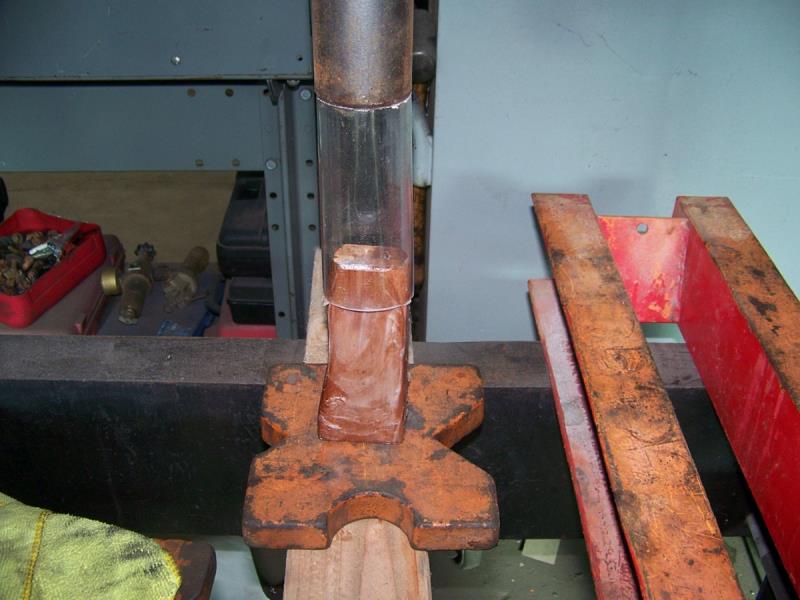 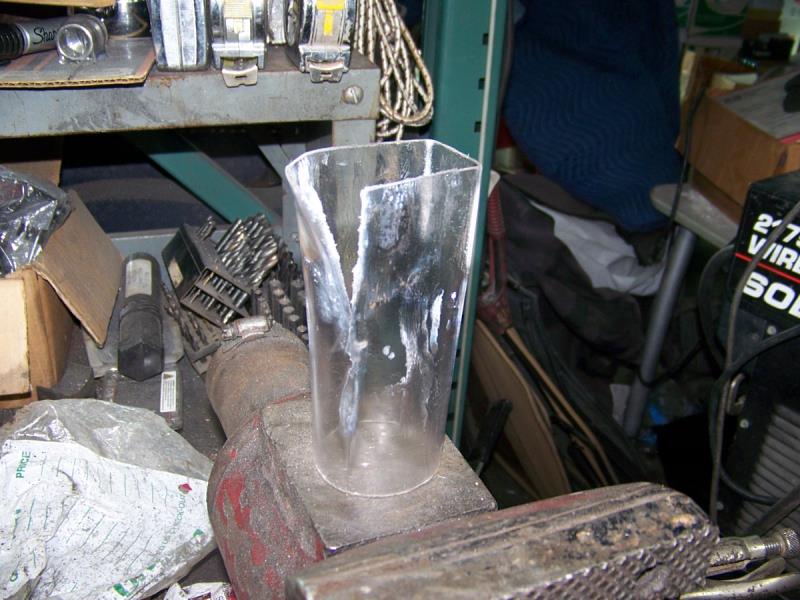 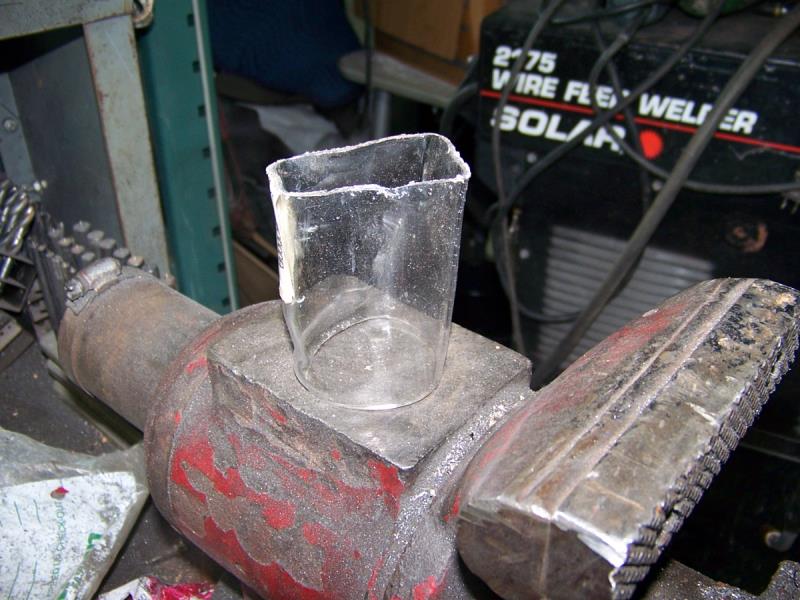
|
|
By Cliff - 5 Years Ago
|
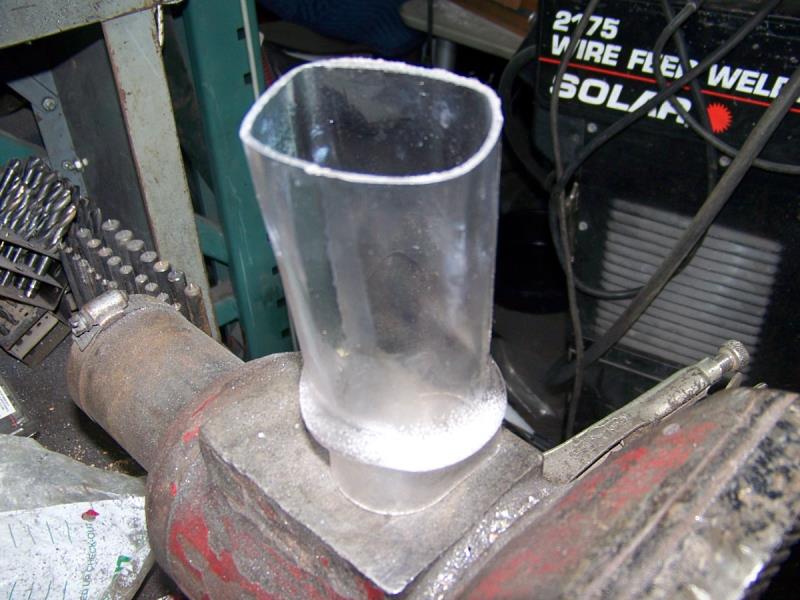 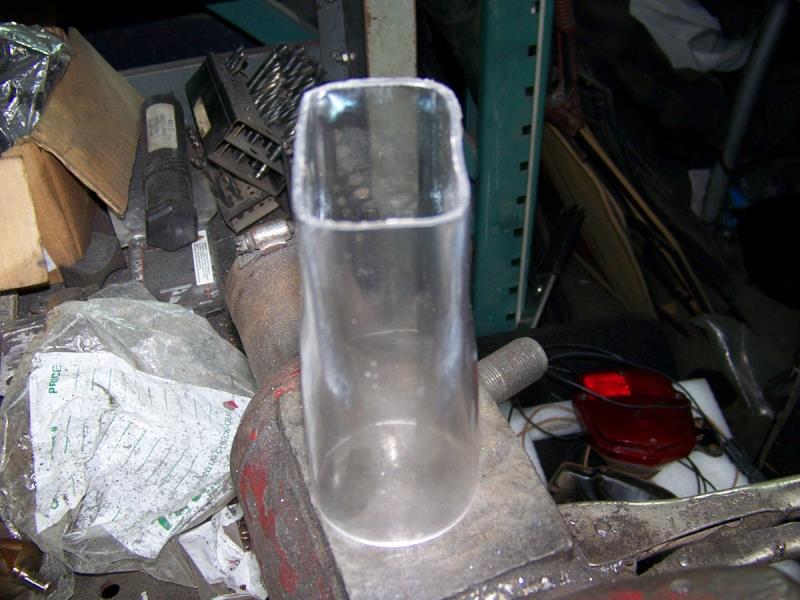 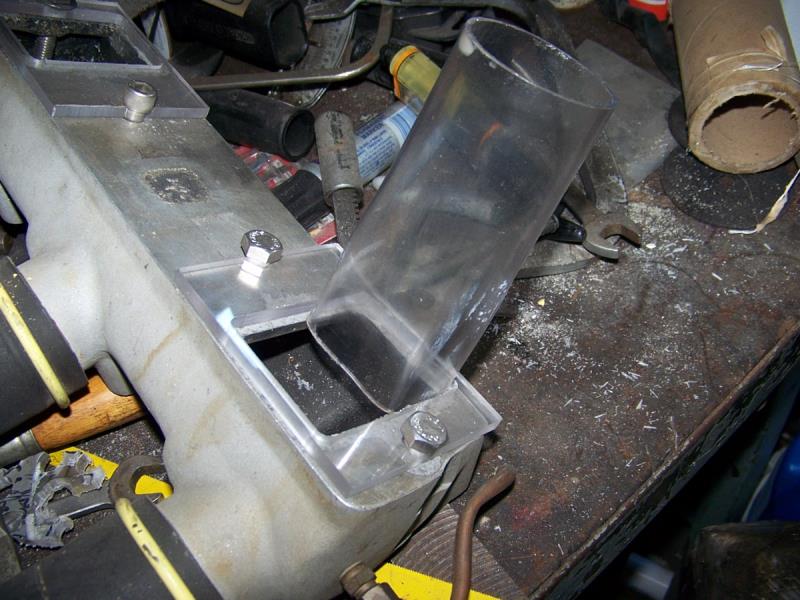 More tries (closer), however after more study I'm going to make a steel forming plug that I can heat up and switch material More tries (closer), however after more study I'm going to make a steel forming plug that I can heat up and switch material
|
|
By Cliff - 5 Years Ago
|
|
Merry Christmas everybody!
|
|
By bird55 - 4 Years Ago
|
You are doing some very interesting work on this Setup. I've been following along and can't wait to see what's next. Good job Clif!
|
|
By Cliff - 4 Years Ago
|
|
Thanks, this manifold is killing me, and I got sick for a week.
|
|
By Joe-JDC - 4 Years Ago
|
Have you considered using clear plastic tubing in 1 3/4" diameter and cutting it to the length you need, and then installing it in a slim container and pouring clear epoxy around the tubing? You could then remove the soft tubing, and mill/sand/file the epoxy to fit your manifold. When I was preparing the tunnel ram for the 2016 EMC Y, I used clear plastic tubing from Lowes, cut it to lengths I wanted, and inserted that into the runners of the tunnel ram box. Next I filled the body of the tunnel ram with epoxy, and let that harden. When everything was cured, I used my heat gun to soften the plastic tubing, and removed them. Blended the epoxy, and sealed it with a ceramic based paint that was fuel/oil/resistant. Joe-JDC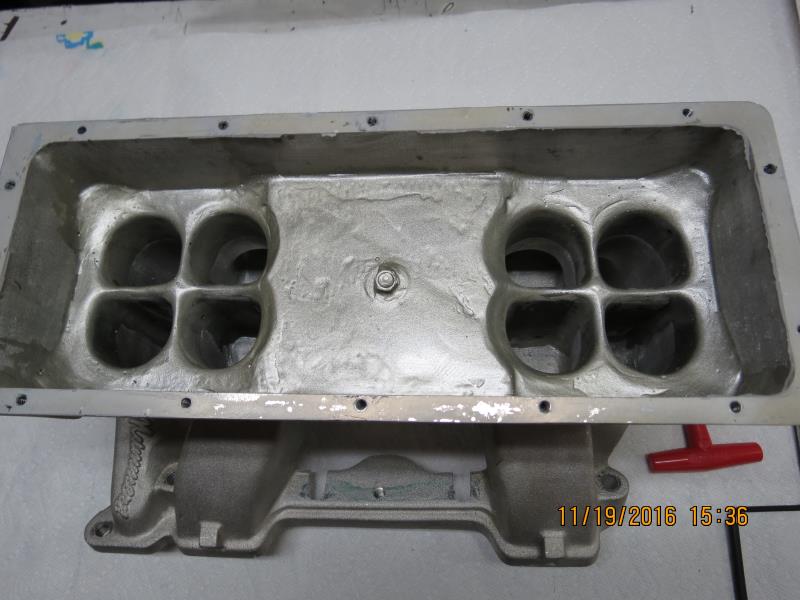 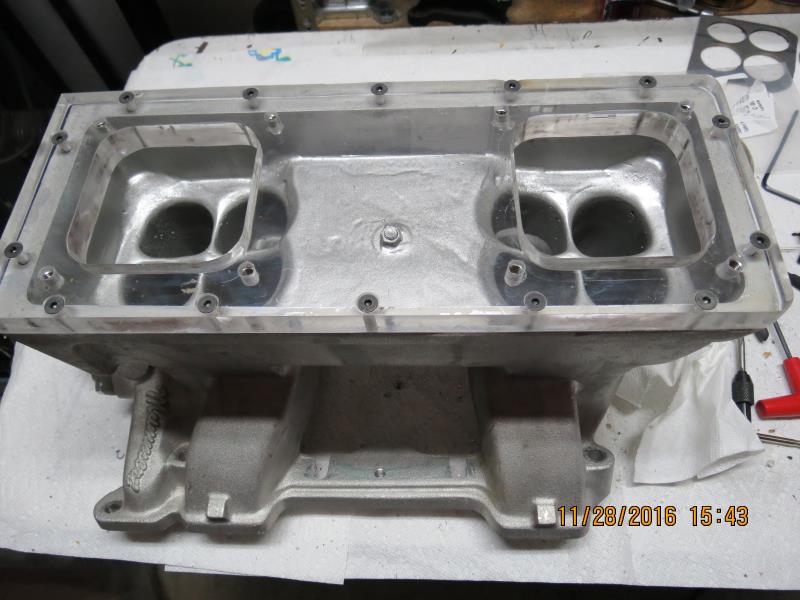 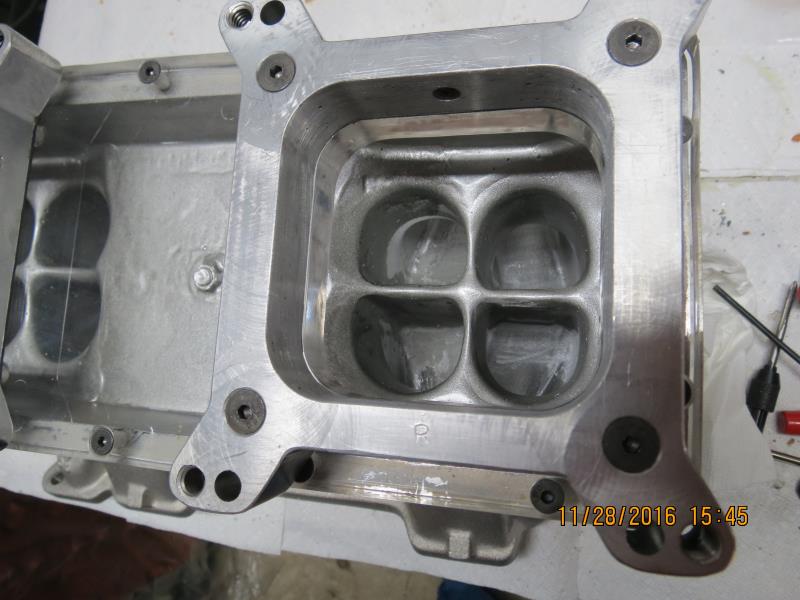
|
|
By Cliff - 4 Years Ago
|
That's a Idea, however I think I got it.
Thanks
|
|
By bird55 - 4 Years Ago
|
Hi Cliff, I sent you a DM, but no response.
T BirdAnyway, would you have any T Bird bracketry for the Paxton or Mcolough Superchargers. I would like to visit with you about it.
|
|
By bird55 - 4 Years Ago
|
I wanted to add that making a manifold is really fascinating and must have some unknown (to me) advantages. But, why not just use the time and effort to TIG one together from aluminum or steel? Again, just asking. I admire your effort, craftsmanship, and resources
.
|
|
By Cliff - 4 Years Ago
|
Hi, didn't get the message, I have all parts, they just cost to much money.
Liqu@aol.com or 714 514 7535
|
|
By Cliff - 4 Years Ago
|
|
OK, to answer manifold questions, The reason I'm making it out of Lexan is so I can watch the intake runner when running, I will be putting a lot of fuel in to the runner, on the flow bench I notice that when there is a vacuum in the port the fuel stays in suspension however open up the butterflies to a no vacuum situation the fuel goes straight to liquid and runs down the side of the port, that's what I'm working on.
|
|
By bird55 - 4 Years Ago
|
Thank you Cliff, I figured it had to be something like that.
|
|
By Cliff - 4 Years Ago
|
What I did this morning, made a peddle pivot and a peddle stop (stops the push rod from pulling out of the master cylinder)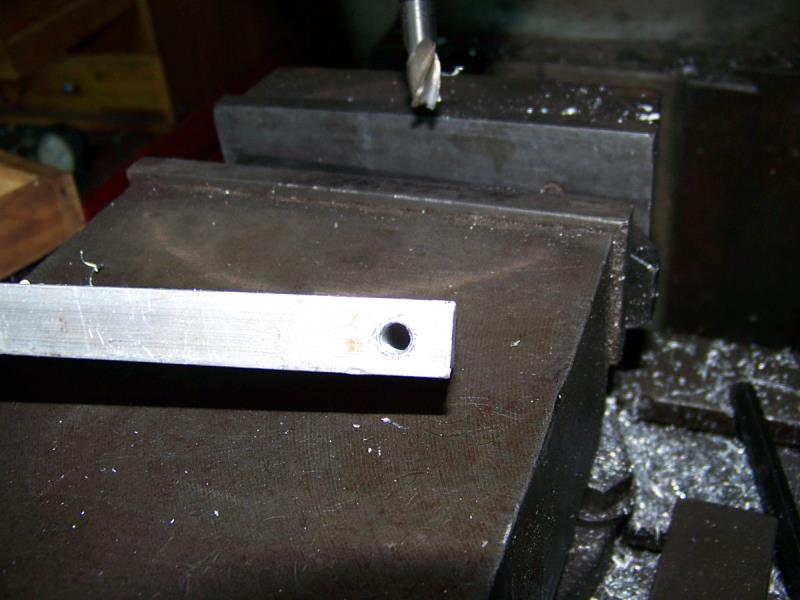 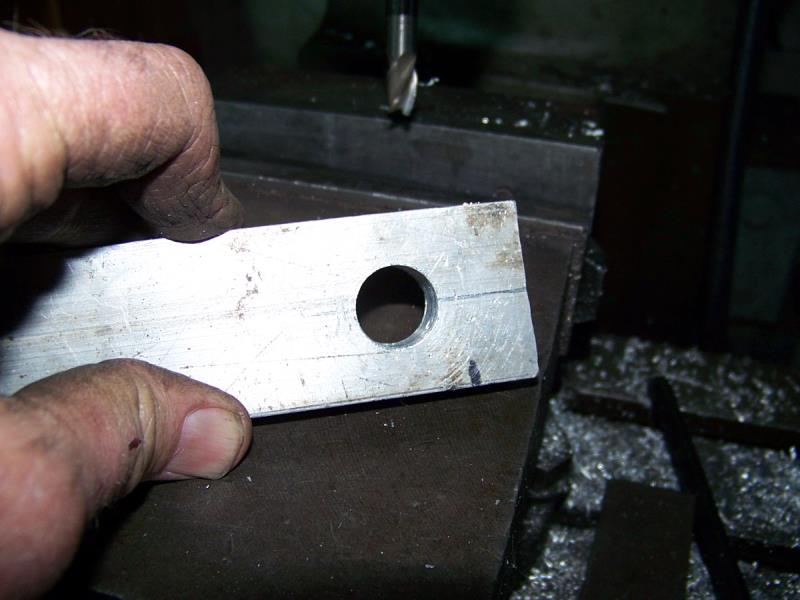 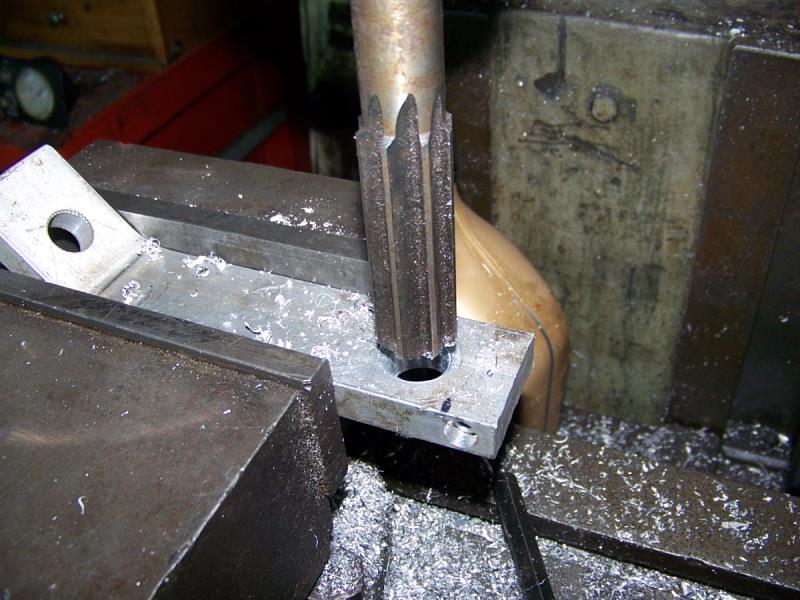 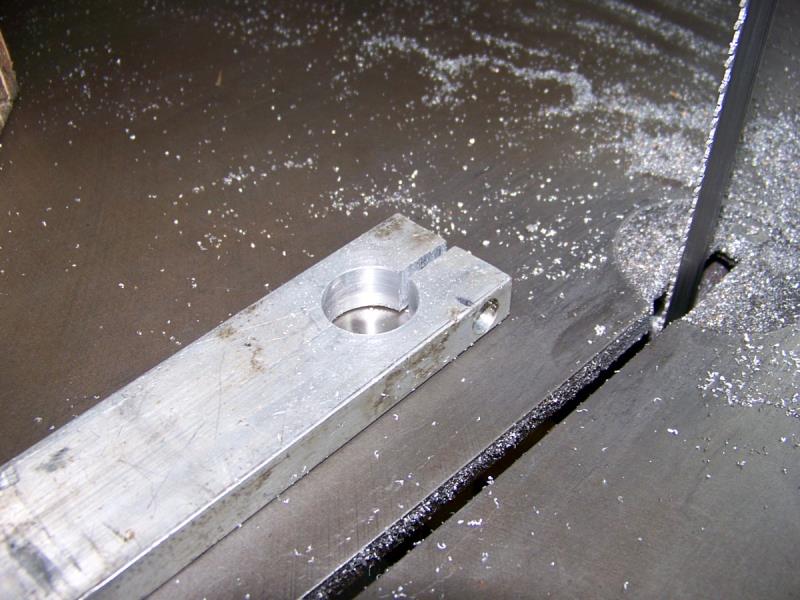 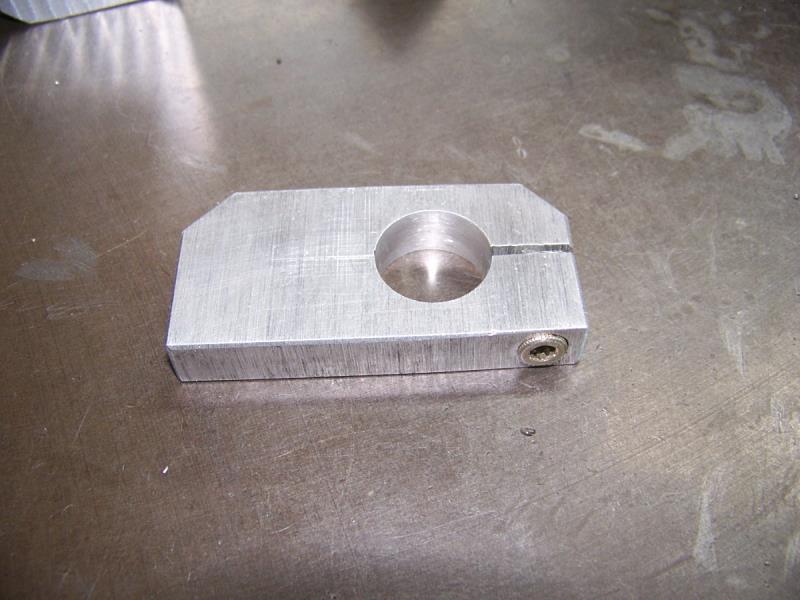 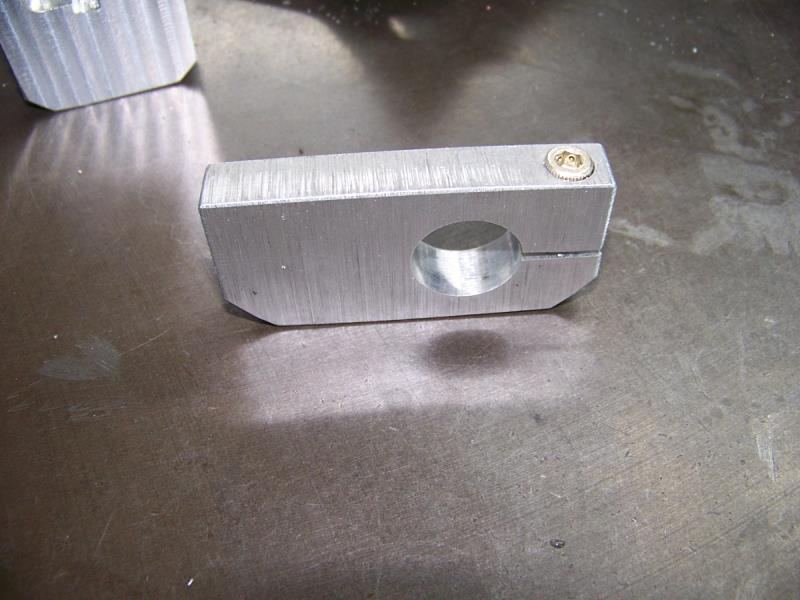 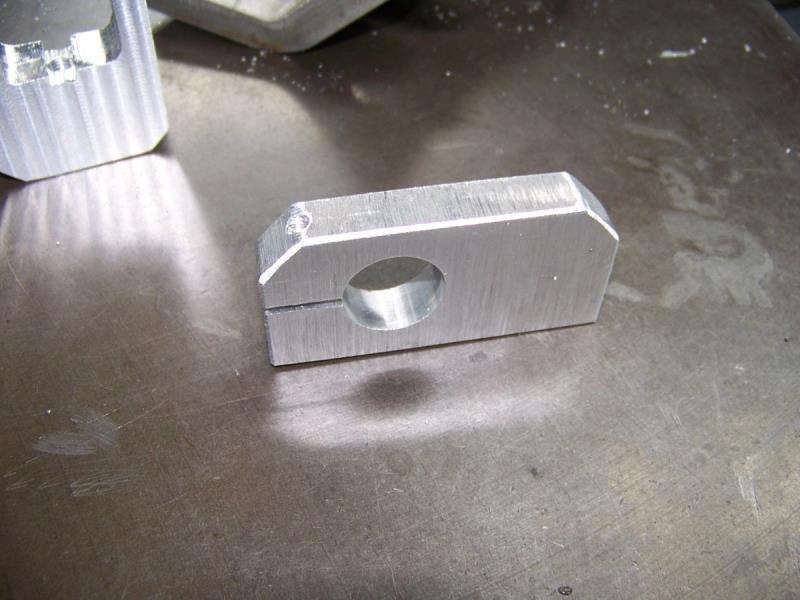 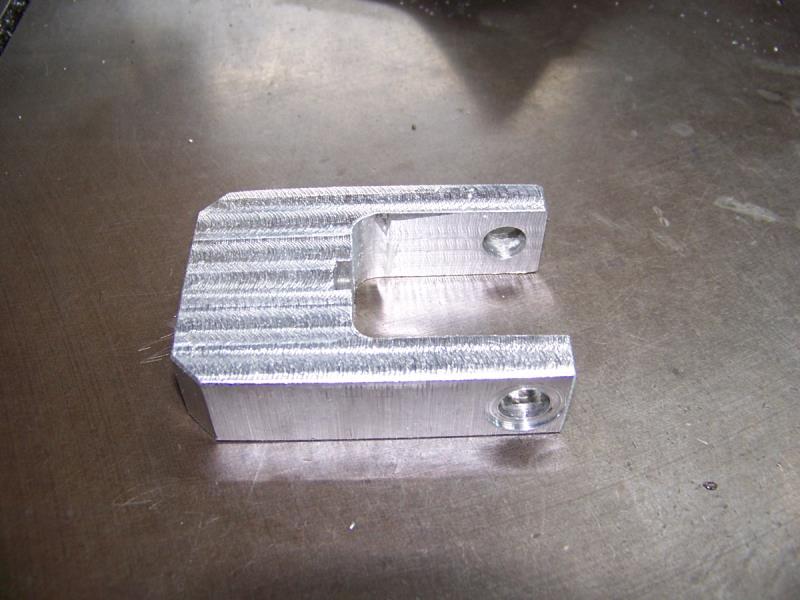 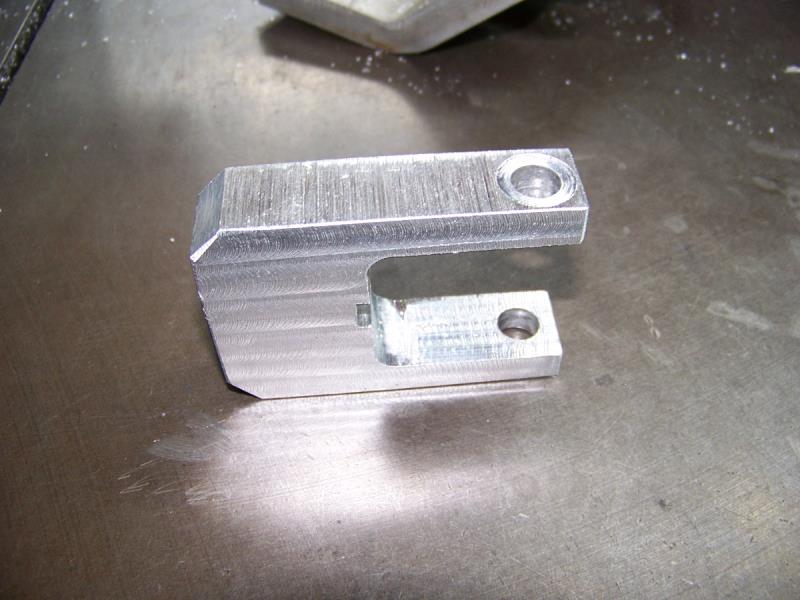 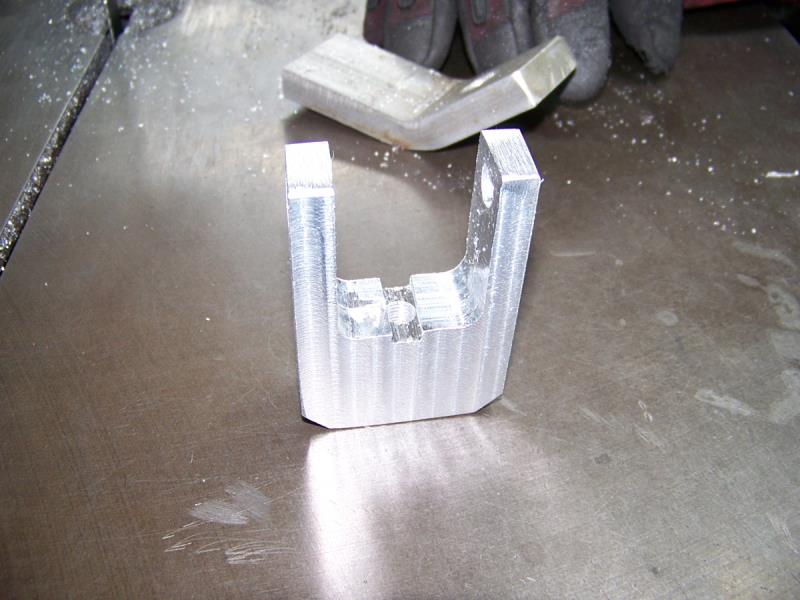 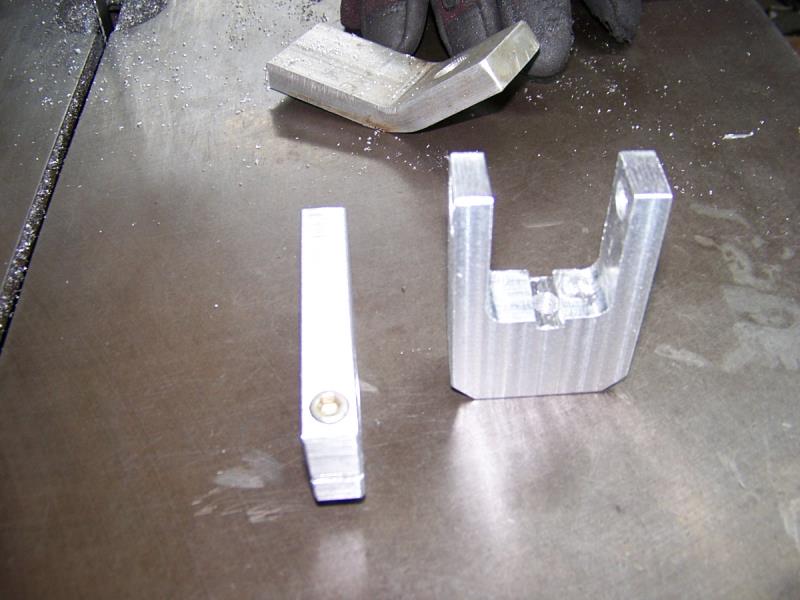
|
|
By Cliff - 4 Years Ago
|
Done for today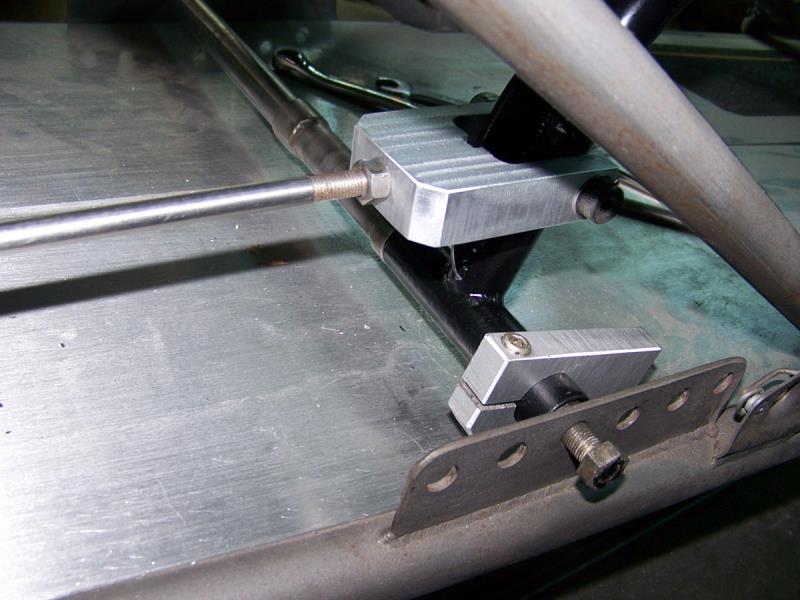 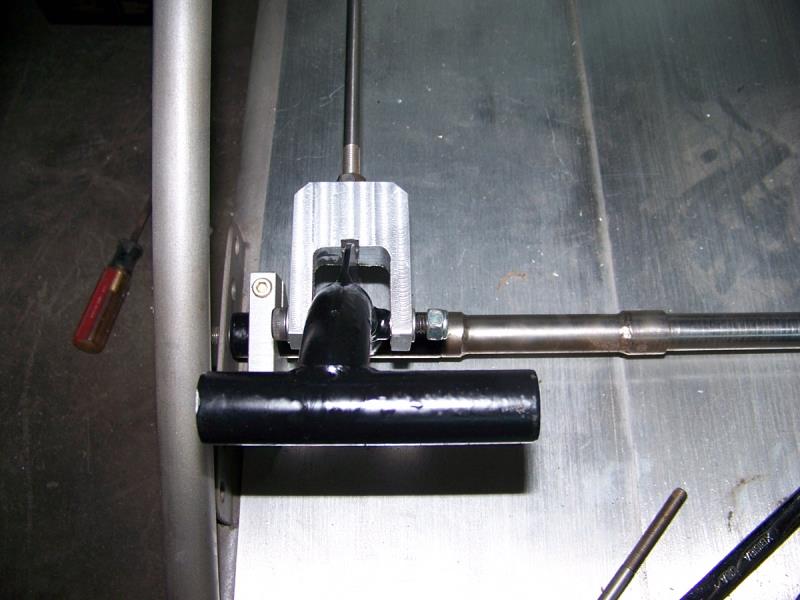
|
|
By Cliff - 4 Years Ago
|
Back to in the intake manifold, I'm getting the hang of forming this stuff, 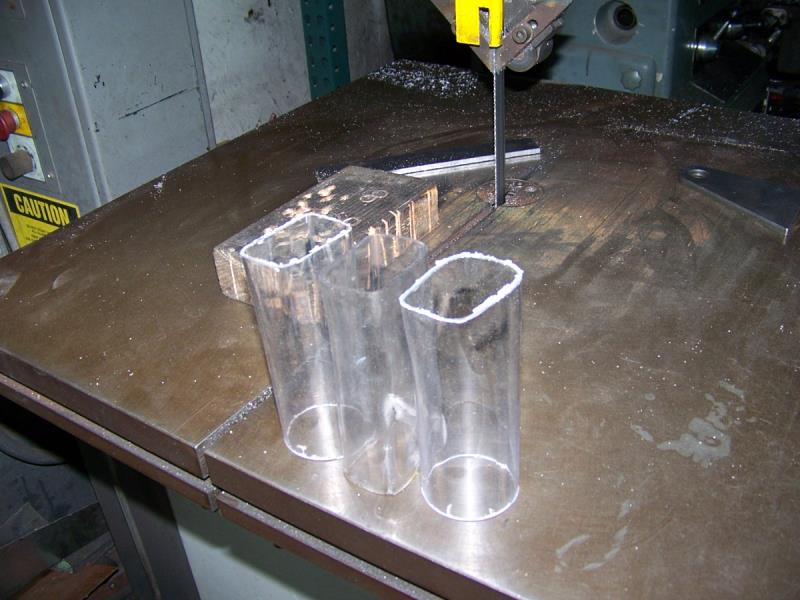 doing it in steps. doing it in steps.
|
|
By Cliff - 4 Years Ago
|
More work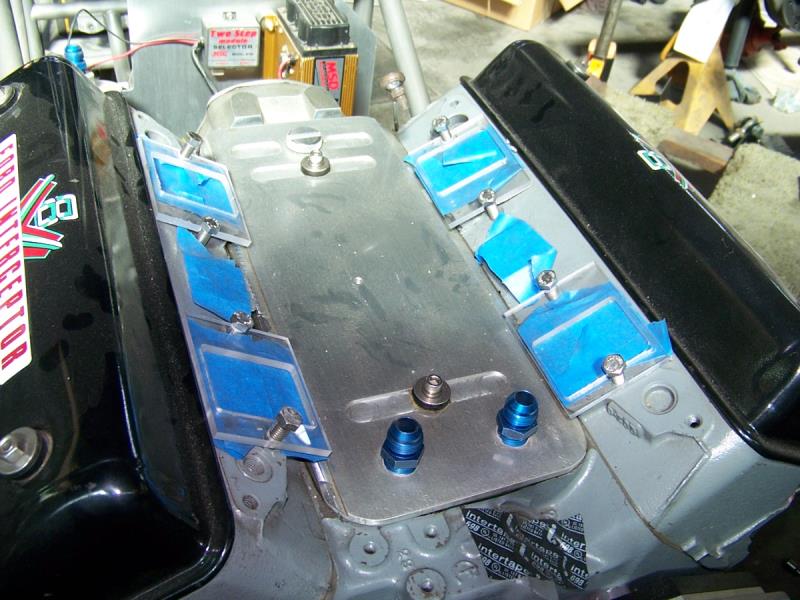 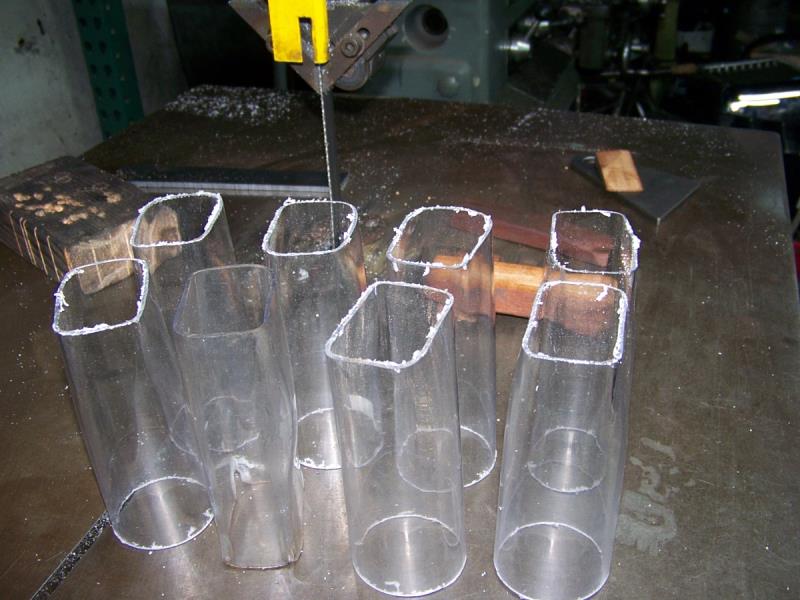
|
|
By Cliff - 4 Years Ago
|
Done for today, here's my crazy jig, I split the forming plug, built a spring jig, added a couple of tapered pieces of wood, the springs hold pressure on the jig wile I heat it with a heat gun.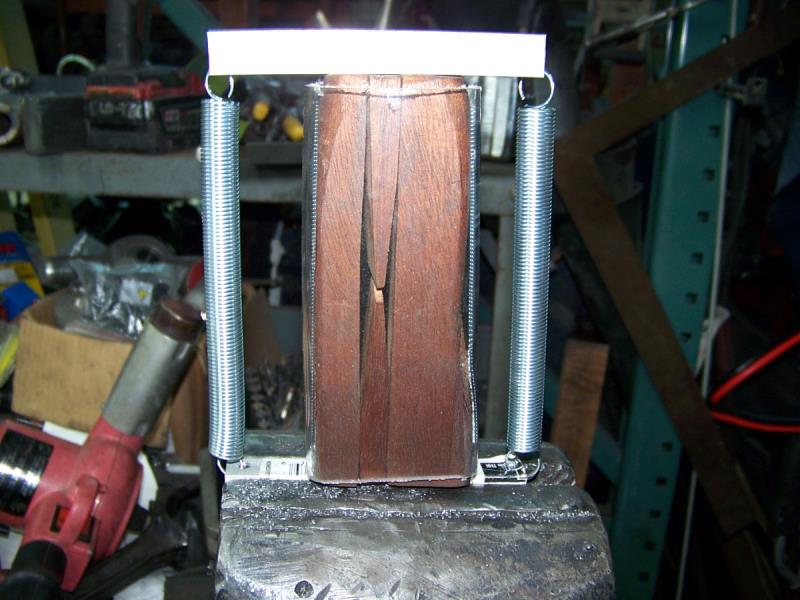
|
|
By Cliff - 4 Years Ago
|
OK back to work, cutting up a set of SBC upswept headers to use on my car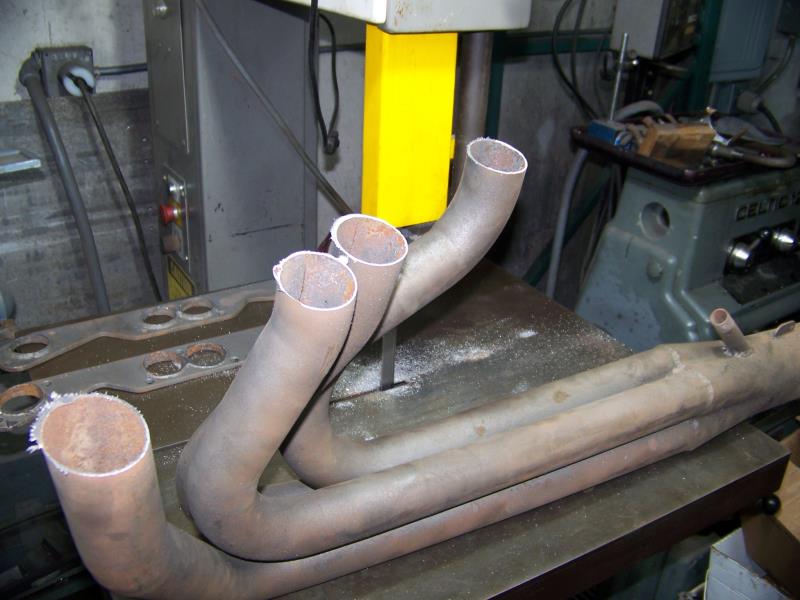
|
|
By Cliff - 4 Years Ago
|
One side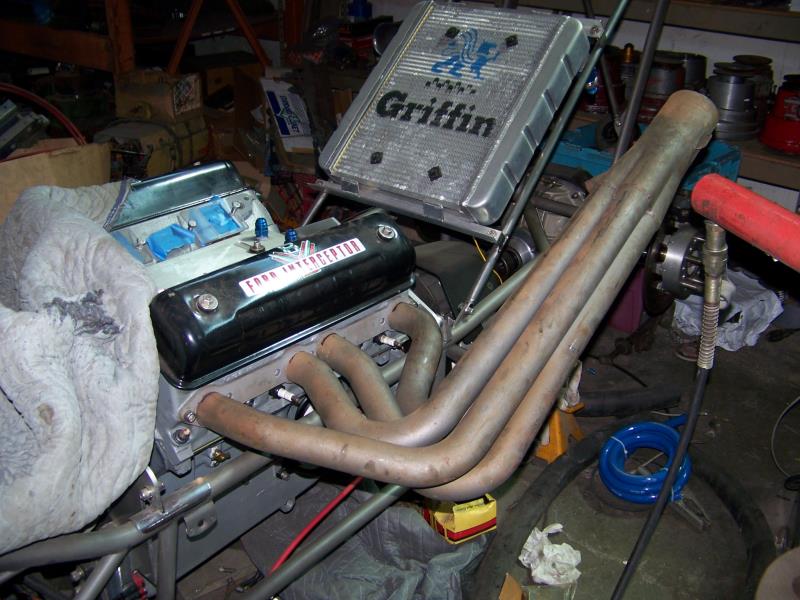 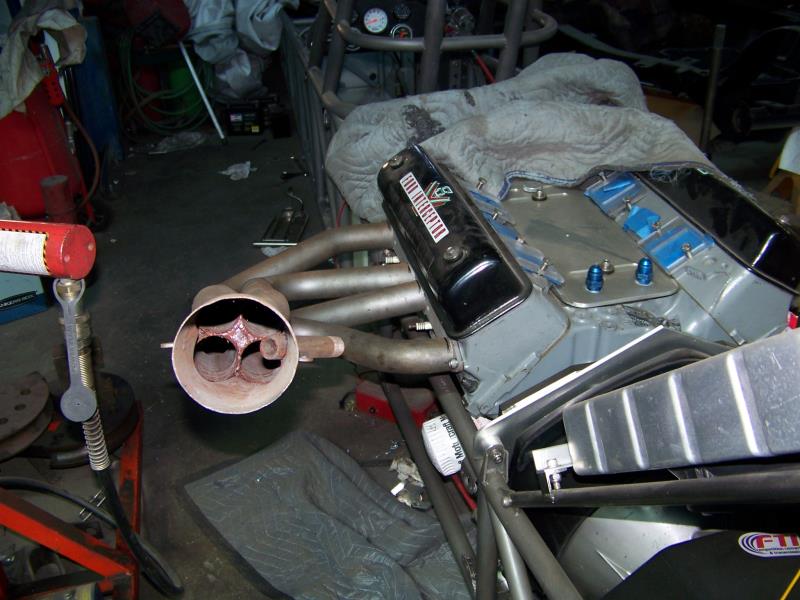 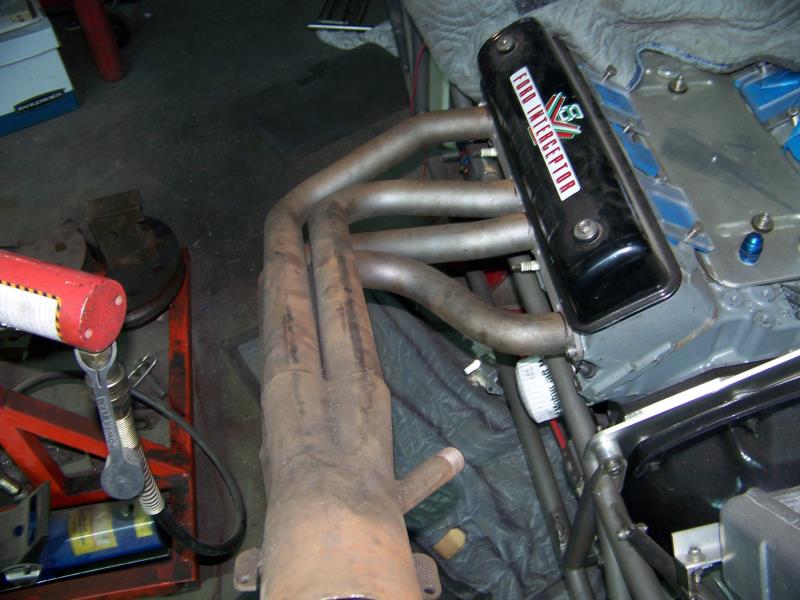
|
|
By Cliff - 4 Years Ago
|
Right Side 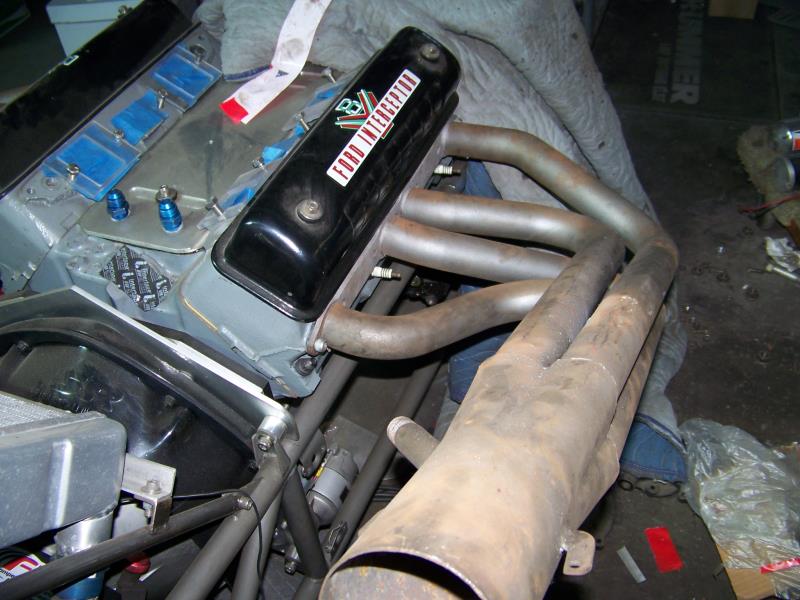 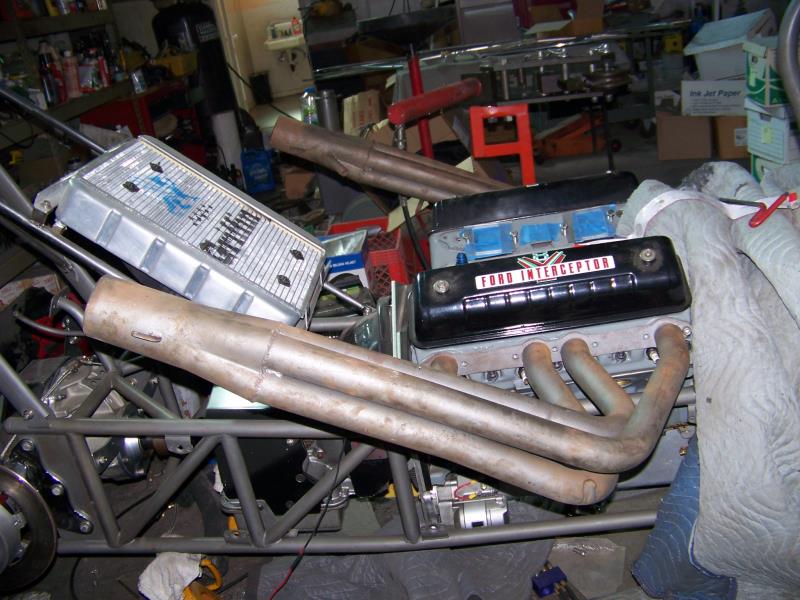
|
|
By FORD DEARBORN - 4 Years Ago
|
|
Cliff, what is the purpose of what looks like a piece of 1/2" plumbing pipe in the collector area? It looks like it would have a tendency to draw air in to the exhaust stream, no? Great workmanship, thanks for sharing............
|
|
By Cliff - 4 Years Ago
|
|
Hi, that's where the evac system I'm making will connect, it will create a vacuum in the crank case (from the valley pan) vacuum in the crank case= more power.
|
|
By bird55 - 4 Years Ago
|
Looking good Cliff. What are your plans for the headers? Will they be ceramic coated?
|
|
By Joe-JDC - 4 Years Ago
|
|
Crankcase evacuation system needs an anti-backfire valve at the headers, or you could blow out your rear main seal or other gaskets. I found the Moroso kit to be the best when I did a flow bench test of the pitot tubes and their positioning in the header collectors. Joe-JDC
|
|
By Cliff - 4 Years Ago
|
I will use a 2 Ford gulp valves (60's smog valve), looks the same as a Moroso valve, yes they will be coated, with what I don't know, I may paint them for the time being, I'm also making extensions (about 15") that I can use to help tuning.
Joe I have always drilled 1/4 holes in the headers close to the flange (about 6 inches from the port) for air to enter and cause after burning (sorta of), but these will have wide band sensors in the collectors and gauges in the dash, do you think the the 1/4 holes in the tube will upset the sensors?
|
|
By Joe-JDC - 4 Years Ago
|
|
I would think so. Also, you don't want the O2 sensors to be too close to the header exit. There is reversion in the headers at part throttle in most instances that can affect the sensor's readings. Joe-JDC
|
|
By DryLakesRacer - 4 Years Ago
|
|
It would be nice so cut those evac tubes at a 45* angle. I’m surprised they were not prior to welding. They are great for a little hp they say.
|
|
By Cliff - 4 Years Ago
|
|
Hey do I see your car at the donut shop once and a wile? (magnolia & adams)
|
|
By Vic Correnti - 4 Years Ago
|
|
I have these valves coming from each valve cover to each header and I had the left one blow out of the valve cover where the tube was held in with a grommet. This happened at the 1/4 mile finish line which soaked my left brake with oil and made for a hairy situation. Car pulled hard right when I jumped on the brakes, I was in the left lane and used both lanes back and forth and I got stopped short of the end of the track. I'm not sure what actually caused this but I'm replacing both valves thinking maybe the left one might have malfunctioned and plugged some how and the pressure blew it out. The valve seems fine but??? So I'm also thinking to make it so the end at the valve cover can't come out (the grommets are 3 years old). These valves have been in use for 10 years and I never had any issues. They will see more often maintenance now. Just some food for thought.
|
|
By Joe-JDC - 4 Years Ago
|
|
Check out the Moroso 25900 crankcase evacuation system at Summit for ~$91.00. You will see the pitot tube has a whistle hole cut into the tube, and when I was installing those on my headers, I tested the angle, position, turned the hole in different directions on my SF-600 flow bench. I found the best/highest vacuum number was actually what they suggested in their instruction sheet. If you can get a print out of the installation sheet, follow it and you will get the best benefit from the system. I don't have the instruction sheet available, or I would print a copy here. Joe-JDC
|
|
By DryLakesRacer - 4 Years Ago
|
|
Cliff….Probably, I am there most Saturday mornings pretty early.
|
|
By Cliff - 4 Years Ago
|
New seat done (snap on cover)
|
|
By Cliff - 4 Years Ago
|
Working a a 302 Ford, this is a gear on a Mallory distributor, only 1/2 of it touches the block, poor part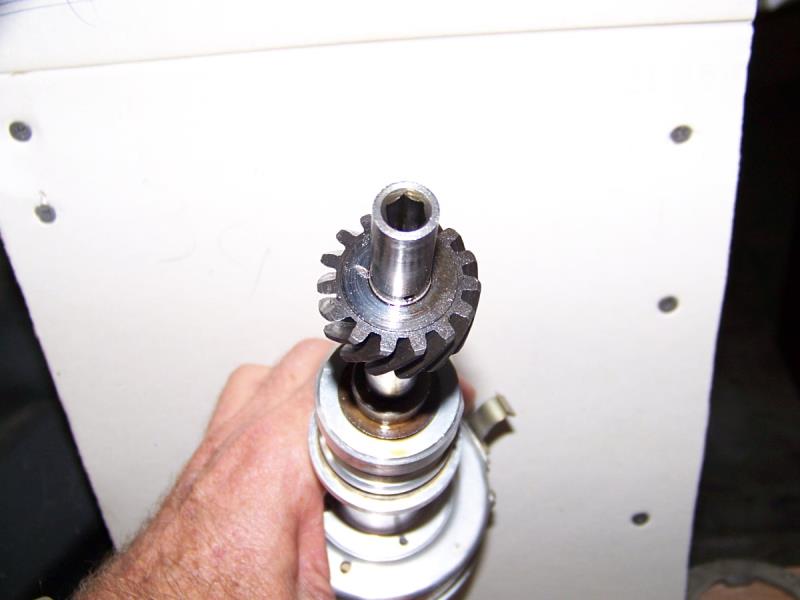 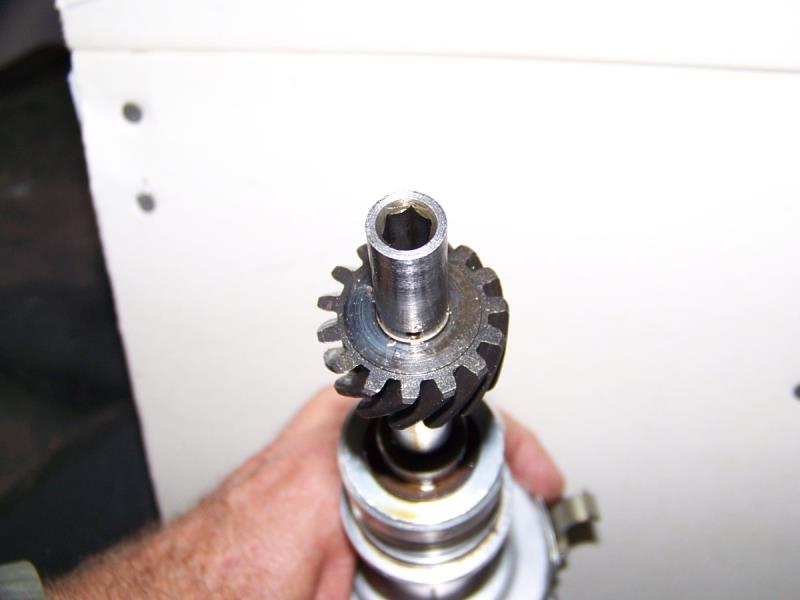
|
|
By Cliff - 3 Years Ago
|
Hi, back working on the dragster, getting ready to run in the engine, making coolant hoses, these are pushlock, however when I assembled them I could still pull out the fitting (I used Earls lube) so I also band clamped them.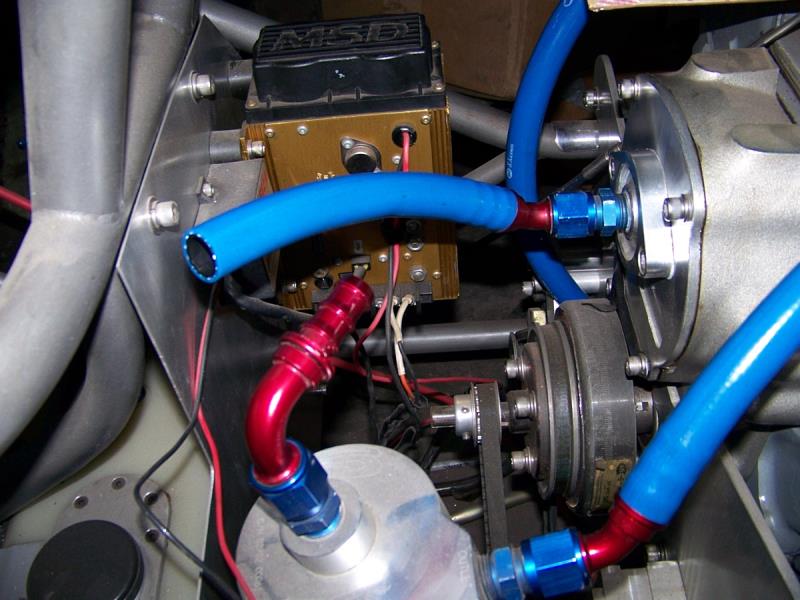 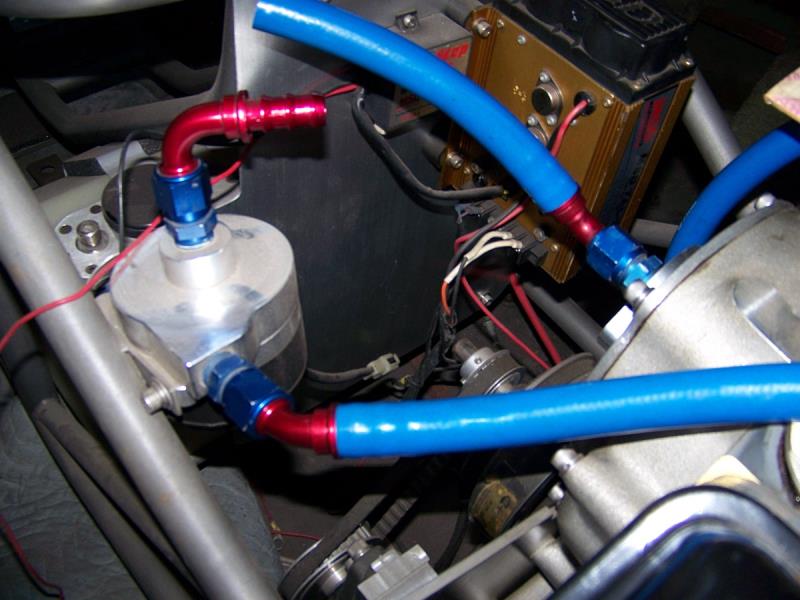  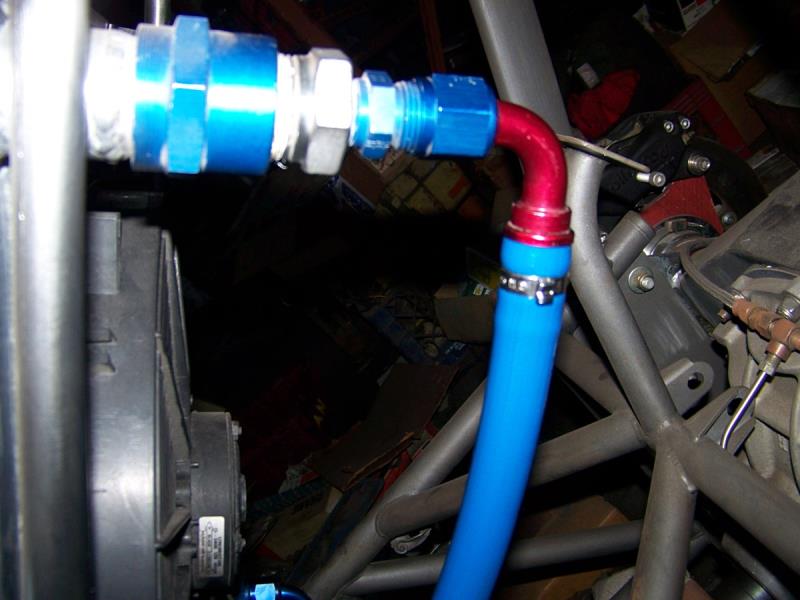
|
|
By Cliff - 3 Years Ago
|
|
Yes I running the coolant backwards (cool heads, hot cylinder walls)
|
|
By FORD DEARBORN - 3 Years Ago
|
|
Very interesting and great work as always, thanks for the update. What moves the coolant? What is the control board and module for? There is a belt from the crankshaft driving something down there but can't see what it is.
|
|
By Cliff - 3 Years Ago
|
|
Electric water pump mounted on the frame, MSD 7AL-2, 2 belts 1 for the fuel pump, 1 for the alternator.
|
|
By Cliff - 3 Years Ago
|
Work today, bracket making and installing the transmission cooler 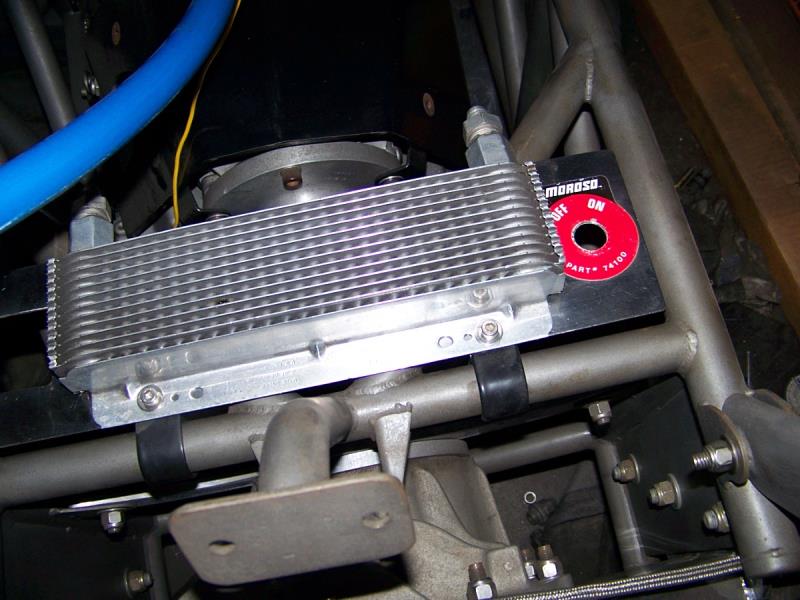
|
|
By DryLakesRacer - 3 Years Ago
|
|
Met Cliff yesterday at Donut Derelicts in Huntington Beach. It seems we have quite a few common friends..
|
|
By Cliff - 2 Years Ago
|
Working again, making a water manifold 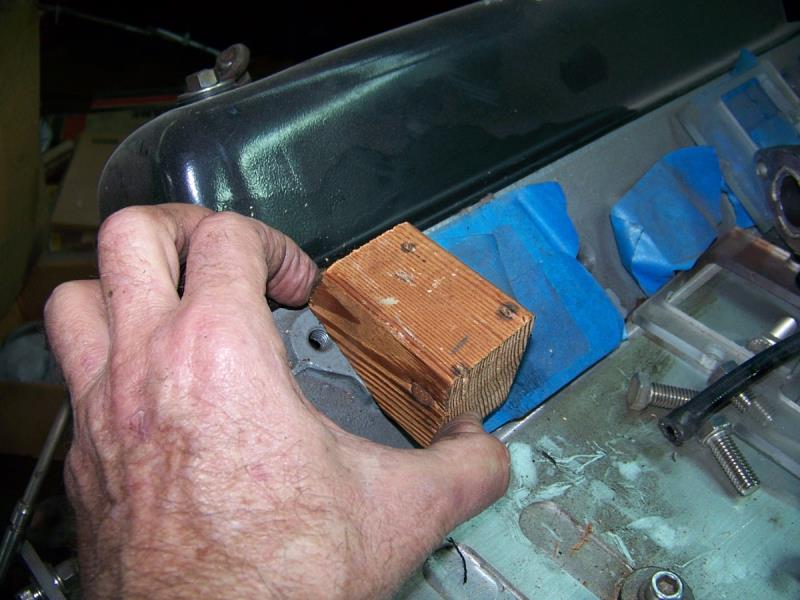 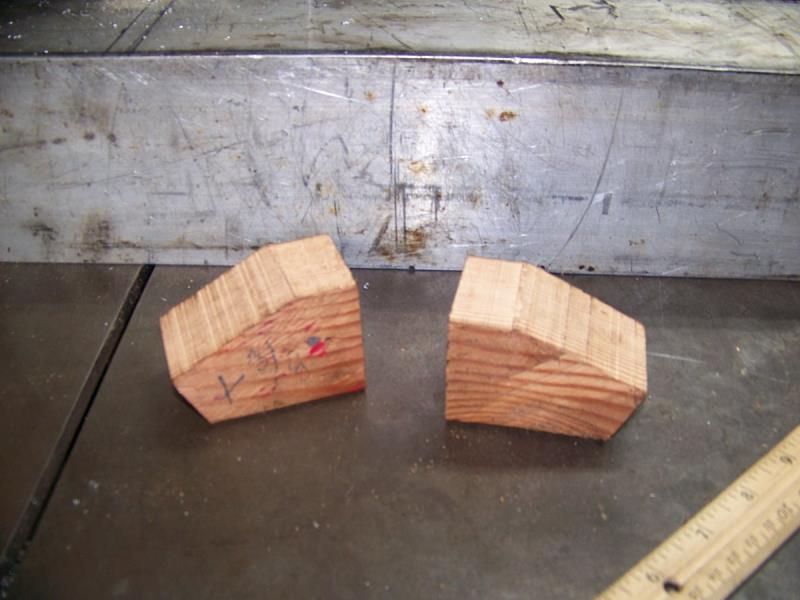 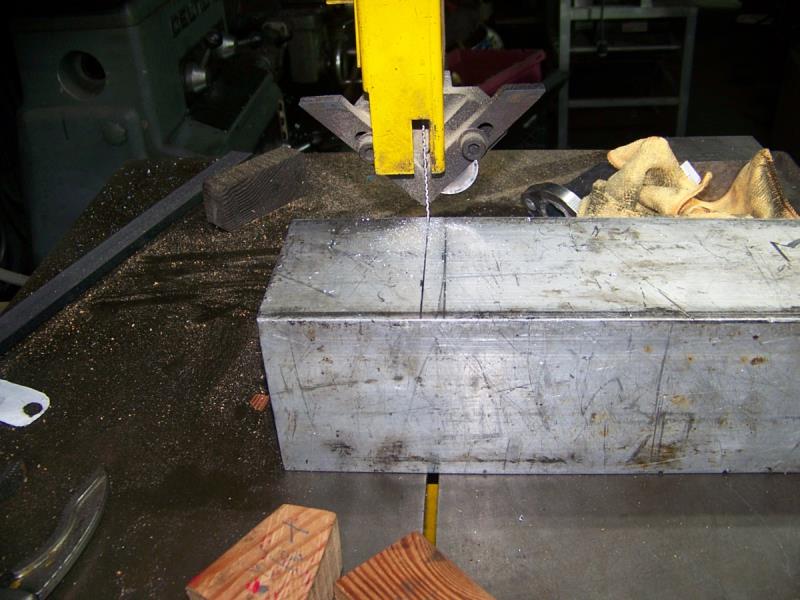
|
|
By MoonShadow - 2 Years Ago
|
|
Could a pair of water inlets for a boat engine work? At least serve as a model for you to adapt? I think Ted has a few around.
|
|
By Cliff - 2 Years Ago
|
|
Hi, what I need will be a lot different than the marine water necks.
|
|
By Cliff - 2 Years Ago
|
More work (I work on this nights and some Saturdays), now to the milling machine.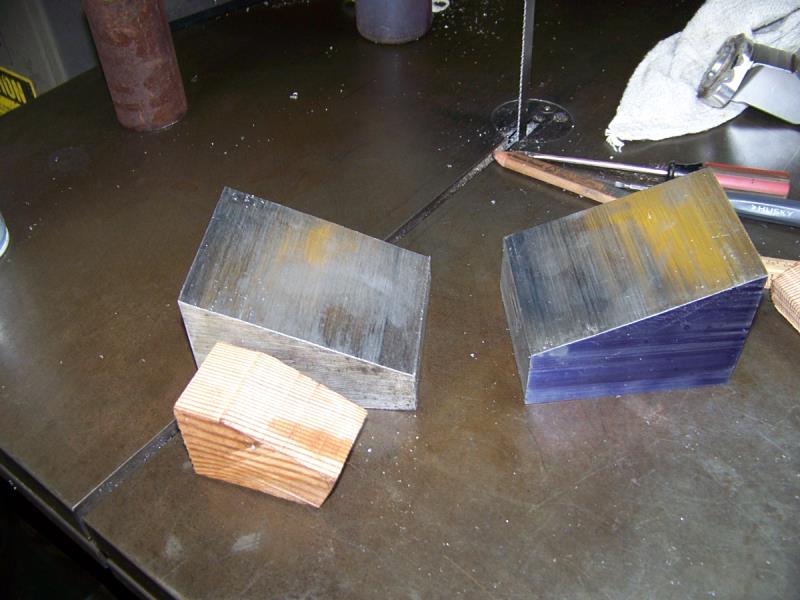 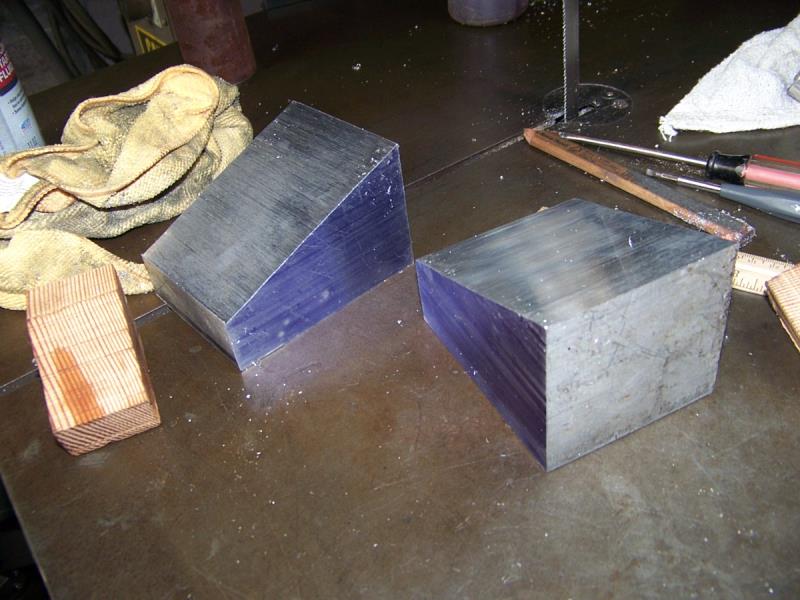
|
|
By Cliff - 2 Years Ago
|
Milled to size (rough) took 3 hours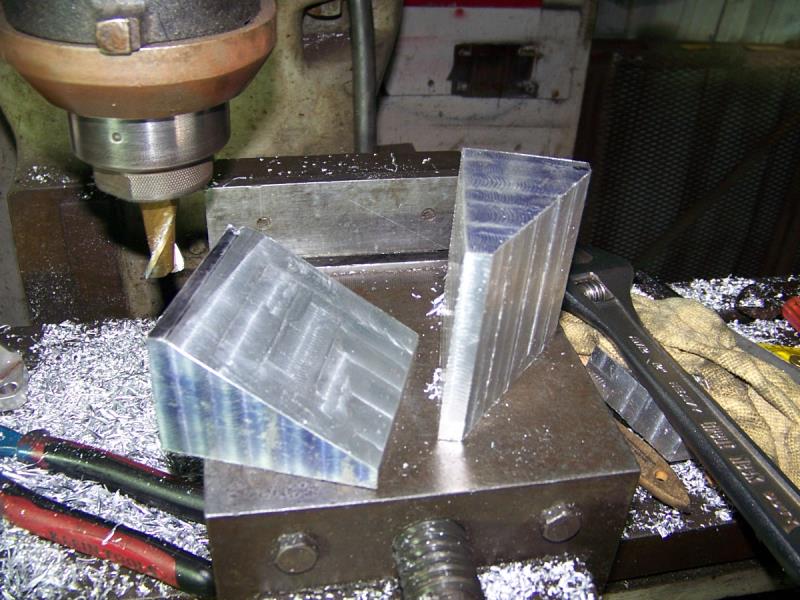
|
|
By Cliff - 2 Years Ago
|
So all the angles are right, however I don't like it so I going to start over.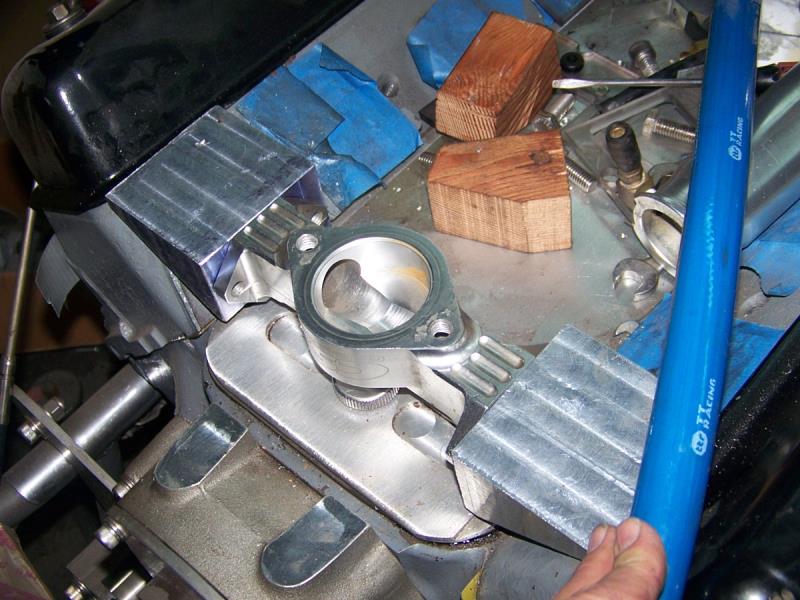
|
|
By MoonShadow - 2 Years Ago
|
Now I see. That looks great.
|
|
By Cliff - 2 Years Ago
|
I guess you guys know I let my car sit, I did this because I bought the property that my business is at, and it's a wreck, I have been here for over 20 years and the landlord would not fix anything, but now it's mine and all my spare weekends have been working on the property, however I getting to the point that I can start working on my car soon, Updates to come.
Cliff Murray
|
|
By Cliff - Last Year
|
Soon to b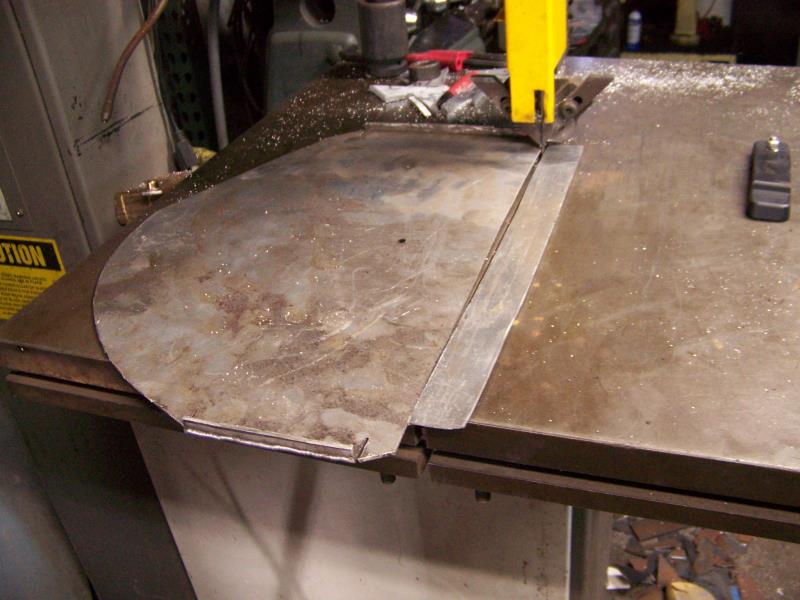 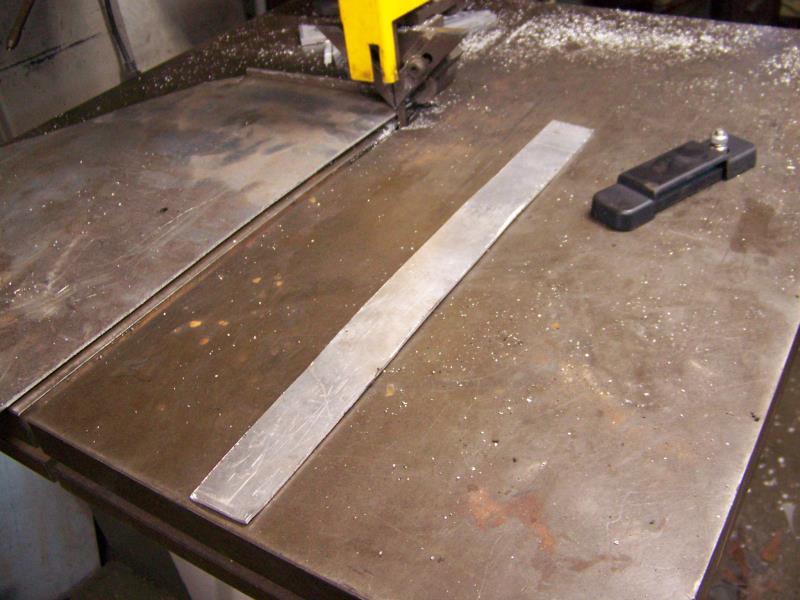 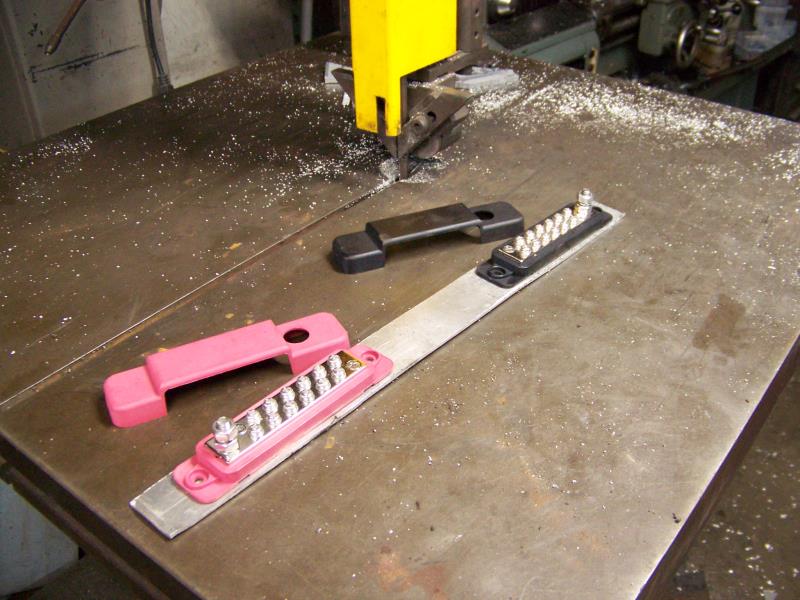 e a wire block e a wire block
|
|
By FORD DEARBORN - Last Year
|
|
Did you produce the red and black enclosures with a 3D printer? Good to see you're back at it....
|
|
By Cliff - Last Year
|
|
No, bought them on E bay, yes I'm back working on my car.
|
|
By Cliff - Last Year
|
Done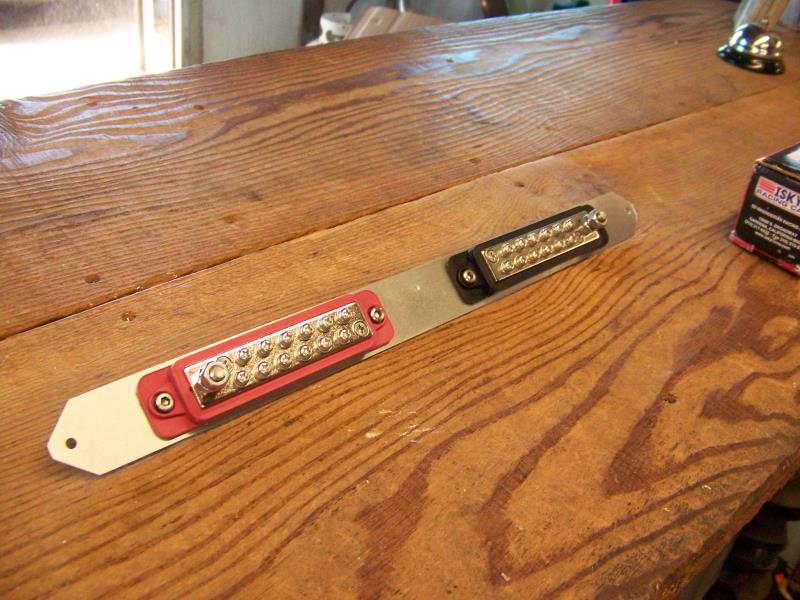 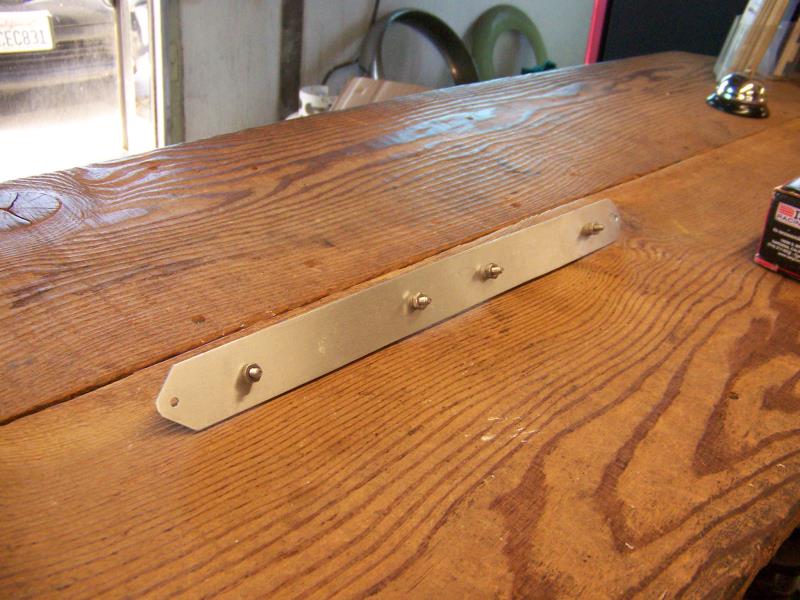
|
|
By Cliff - Last Year
|
Installed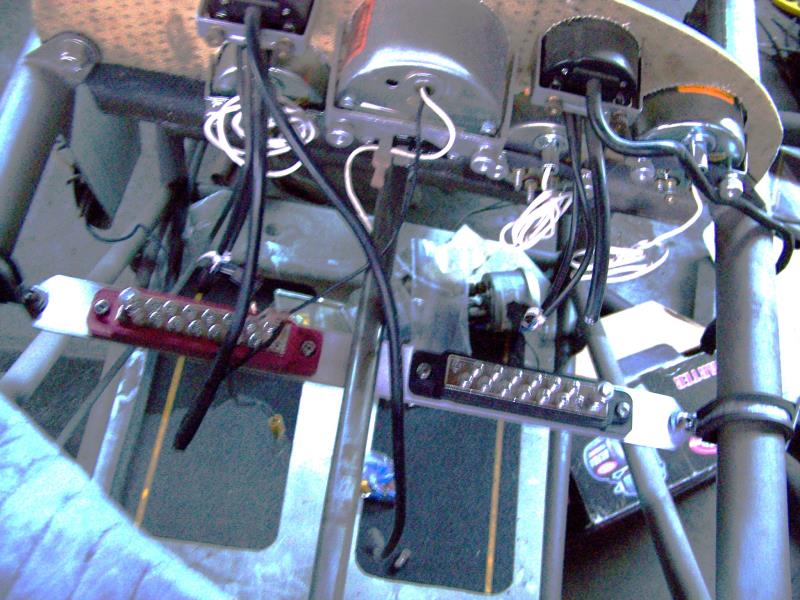 
|
|
By Cliff - Last Year
|
Look what I bought, it's brand new, never mounted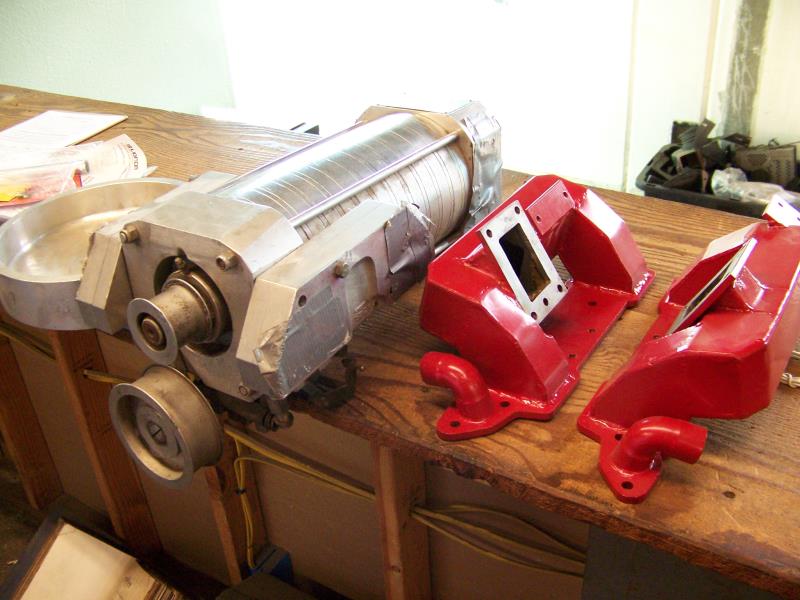 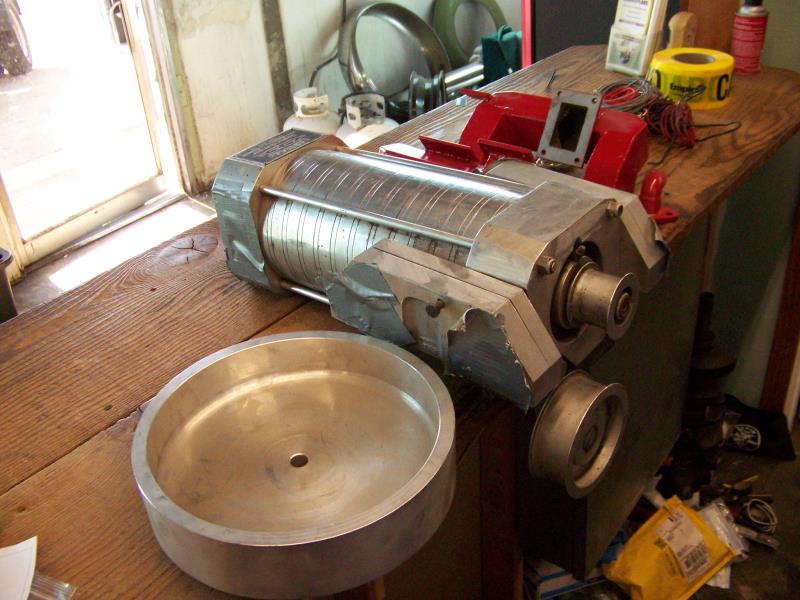
|
|
By miker - Last Year
|
Usually we’re asking for pictures. We got pictures, so how about more information.
Thanks
|
|
By Cliff - Last Year
|
|
Latham Supercharger, setup for a Y Block Ford, it took me 2 years to buy this
|
|
By miker - Last Year
|
|
Thanks Cliff. That quite the set up. An eye catcher for sure.
|
|
By Cliff - Last Year
|
Still working on the dash, lots of wires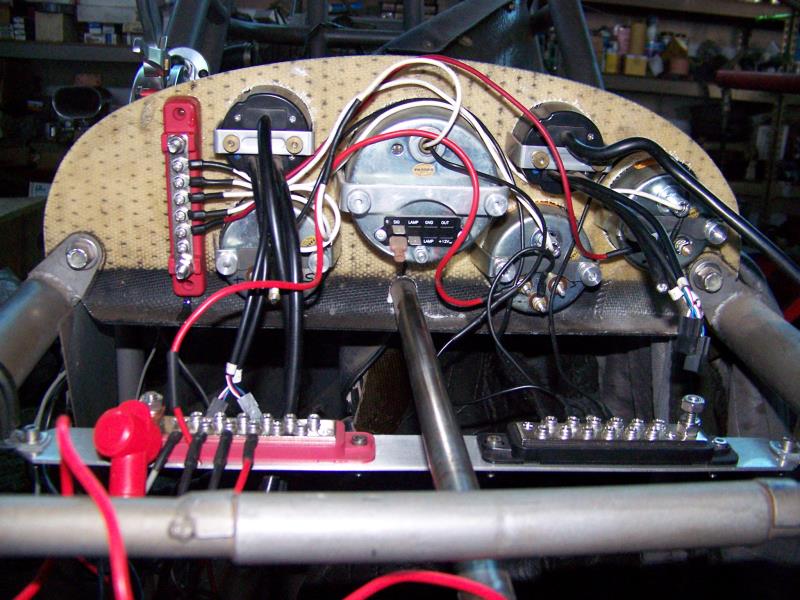 
|
|
By Cliff - Last Year
|
More wiring done 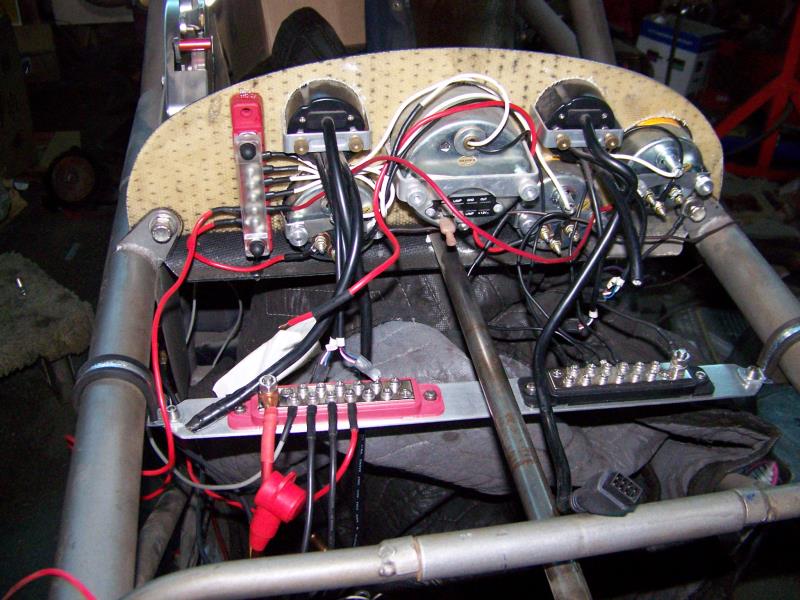
|
|
By Cliff - Last Year
|
So here's what I read in face book today (people complain about 312 Fords)
When rebuilding an LS, you often hear, “Never look at the cam bearings!” That’s mainly because pretty much every junkyard LS engine has what looks to be wiped-out cam bearings. Steeped in much mystery and internet rumor, LS cam bearings have long been a sore spot for DIY builders, but why? The issues go much further than the looks of a stock bearing.The primary issue when rebuilding an LS or LT engine is that when you pull the cam, the bearings look like toast. Every bearing looks worn, often showing copper. In any other engine, this would be a guaranteed sign of failed bearings, likely due to oiling issues. However, this is not the case with LS and LTs, as GM used a different procedure for these engines, and this is actually considered normal.On the cam journals, just a slight amount of core shift in the block's casting can cause misalignment for the camshaft. You don’t want the cam bearing journals to be offset even a thousandth of an inch, which can cause hot spots and premature failure. However, because the LS uses 3 different bearing sizes, align-boring the block is much more difficult. GM decided that instead of trying to line bore every block, they would instead use clinch-style bearings and align-hone the bearings themselves after they were installed, yielding a perfect align bore.  
|
|
By Cliff - Last Year
|
|
It runs! video soon
|
|
By Daniel Jessup - Last Year
|
|
Cant wait to hear it (and see it)! Do you have a YouTube channel?
|
|
By Hollow Head - Last Year
|
It's nice to have lots of gauges. Let's hope you don't have too much time to read them during the runs...
|
|
By Litshoot - Last Year
|
Cliff (6/25/2025)
Look what I bought, it's brand new, never mounted
i didnt even know that was an option! ive got a couple land rover superchargers with intercoolers that with that intake designe would work wonders. was trying to see if top feed would work out well enough. probably need port injection for good fueling though.
Seth
|
|
By MoonShadow - Last Year
|
The Lathem units for a Y-block are very hard to find. You can put a 4-71 blower on it though.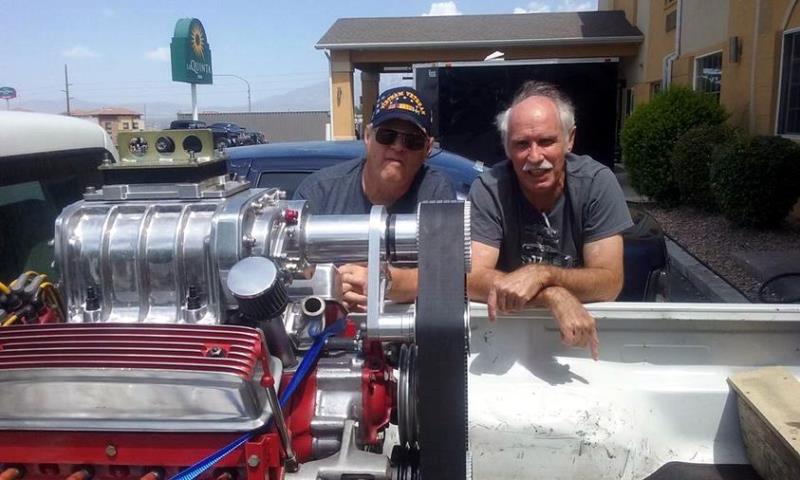
|
|
By Litshoot - Last Year
|
Laid one down while working on another car and piqued my interest. Its dual charge air coolers in factory configuration but could probably line something up and keep lowish profile. Blowers are always nice but id want a shotgun or bird catcher and they dont do well in adverse weather. Love your build so far, its really motivating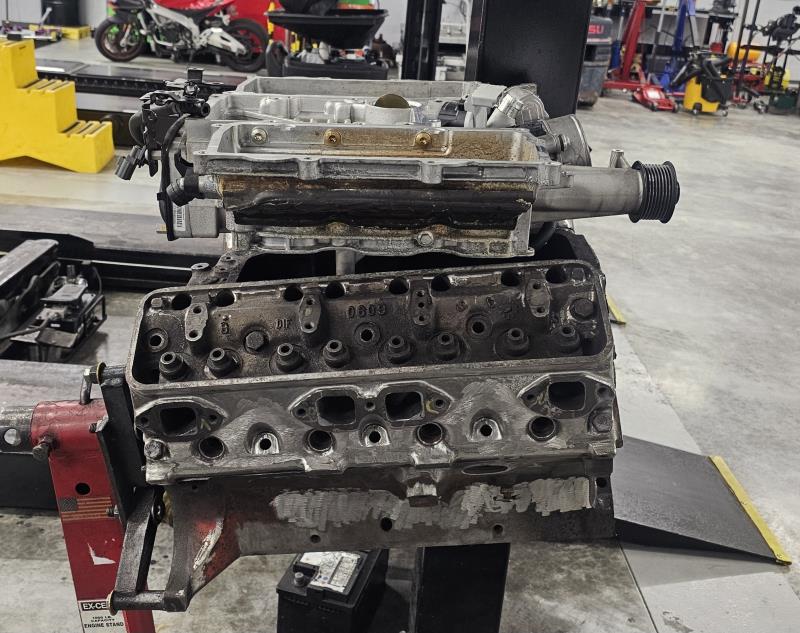
|
|
By Cliff - Last Year
|
Well, Just got back from Hawaii (little over a week) the cam is run in, now time to remove the heads and add the inner valve springs (180 lbs on the seat), the head gaskets are leaking (pushing out coolant), I think the china studs are junk, I ran it in with a make shift cooling system, a 4bb carb and a points dist. will put up a video when it's sorted out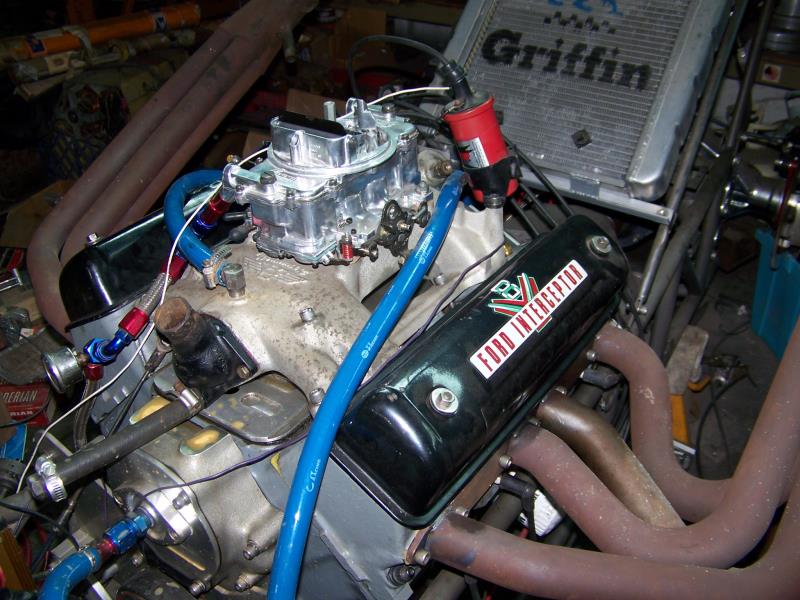
|
|
By MoonShadow - Last Year
|
|
I've seen a lot of adapters made out of aluminum to bolt down to 4bbl or dual 4bbl intakes and take a supercharger. Even seen some where they cut down the top of the intake and welded a flat aluminum plate on. Personally for the money I think the 4-71 adapter from Australia is a pretty good deal.
|
|
By Cliff - Last Year
|
Intake is Lexan ( I'm making it), with a Hilborn four port short injector
|