|
By DryLakesRacer - 12 Years Ago
|
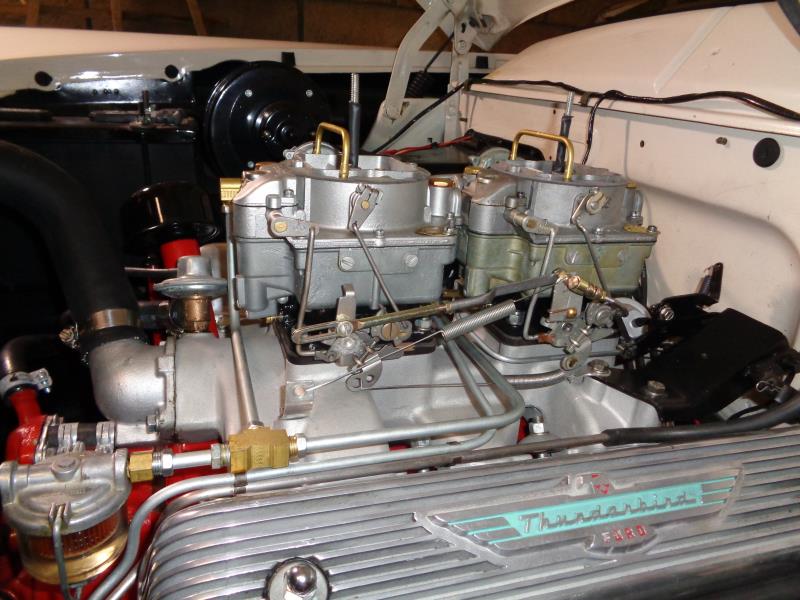
I think my questions concerning this was a way back so I'll post again. Mine are installed and on the 56 Victoria. Oldmics parted with a 56 Ford NASCAR air filter and Ted answered a lot of questions. I used Carter WCFB's and a home bracket for the coil. Fuel and vacuum lines were pretty easy and the linkage was made from a kit used on FE 427's. At full throttle the back barrels on both carbs are a little short but for me its OK. Still just a cruiser.
I know it's not original but I think the "originals" shows I go to won't mind to much since the air filter covers most of the non-original parts and it is an over-the-counter part. Still battling a power steering leak which is next.
s come out
|
|
By pegleg - 12 Years Ago
|
WCFB"s ? Oops, shoulda read it instead of looking at just the photos.
|
|
By Daniel Jessup - 12 Years Ago
|
|
flat out awesome looking setup you have there!
|
|
By mercoupe50 - 12 Years Ago
|
|
What are you using for an intake manifold?
|
|
By DryLakesRacer - 12 Years Ago
|
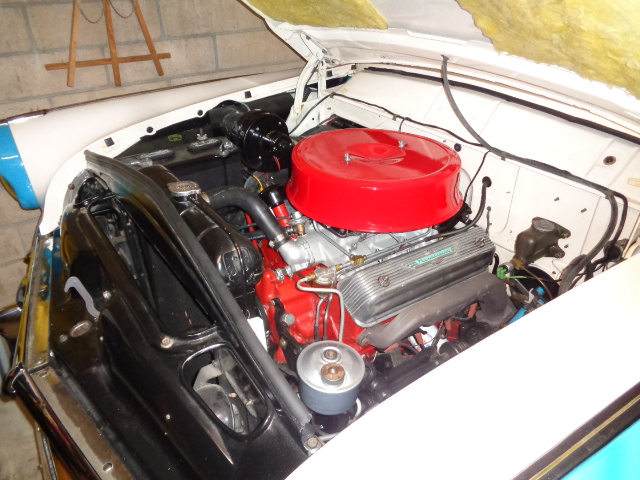
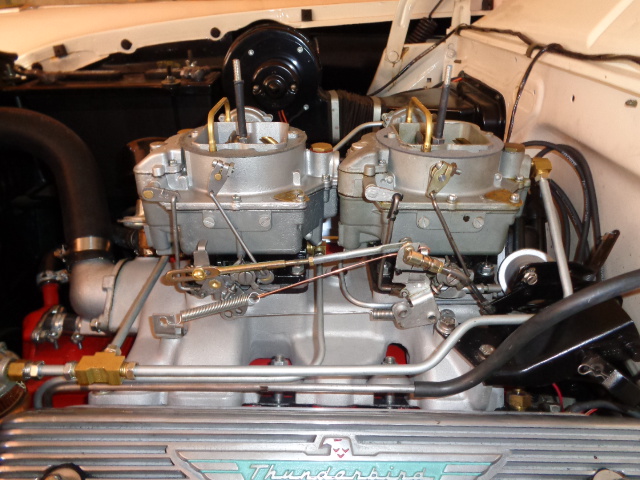
mercoupe ! It is an Edelbrock 257. I removed the "evidence by grinding it off both sides and media blasting it so it would look "stock" even tho the area between the carbs were of a different design on the 1956. I also knew the 257 's rear carb was a little bit farther forward that the one from Ford and was not sure on the Edel 255 and I wanted to run the carbs progressive and it they work find. I port matched the 56 heads with a slight taper for the first 1/4"-3/8"; from old experience that helps velocity.
Gremlins popped up when driving it the first time. Seems like carbs with vacuum secondaries like the Fords work different than the Carters mechanical linkage. The photo shows a 1/4-20 bolt and nut in the stock linkage and I needed to back off the auto trans pressure rod to make it shift proper. I'm not sure what the stock stick shift linkage looks like but the auto trans one has a lot of "monkey motion" which I guess moves when the vacuum secondaries open and it allows the trans to down shift. As I accelerate from a stop it will shift a 17-20 mph normally and if I get on it a little it shifts at 40-45 and a little firmer so I'm happy with that.
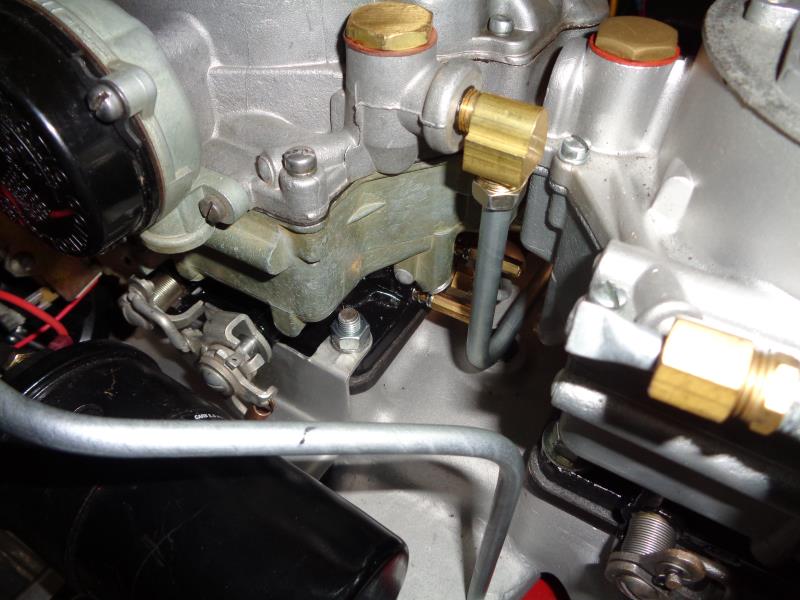
A change is coming as I wanted 2 identical WCFB's but as the photo shows the linkage better they are not. I have however just recieved a NOS WCFB 2080s which is an exact match to the front one. It came in the original Carter box with instructions printed in 1953. They do not come with mixture screws so I'm waiting for them to make the swap. I will install it on the front to make sure it works fine then put it on the rear. I need to check out all the gaskets and the accelerator pump and make put in one for todays gasoline.
I drove the car to my favorite cruise spot Saturday morning (Donut Derelicts) in Huntington Beach and had many questions and lookers. Not to many 1956 Ford NASCAR setups in So Cal...................JD
|
|
By DryLakesRacer - 12 Years Ago
|
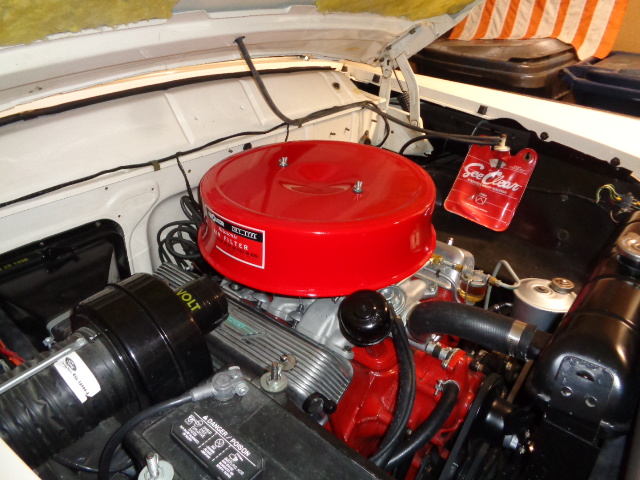
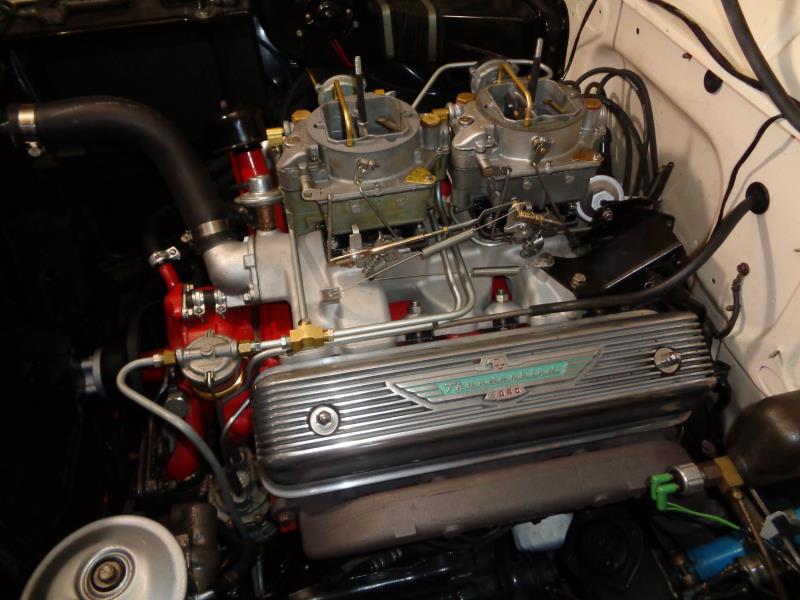
The second Carter WCFB 2080 was inspected new gaskets and accelerator pump installed. I test ran it on the car in the front spot since all the linkage and connections were the same. Worked fine with the typical minor adjustments. I removed the rear WCFB and installed the 2080 which had been on the front. I had to make a new 5/16" feed line since they are both now in the front. I also made a piece of metal I secured to the front of the rear carbs linkage. It made the angles for the throttle better. I believe the carb I had just bought may have been a take off in 1953. The screws had too may marks on them to be from first assembly. There were installation instructions in the box printed in 1953 and they fell apart when I tried to open them.
As others have said, the key to dual quads is matching carburators. Even tho these to are same Carter number they have very slight differences. They do however have the same throttle bores, jet, metering rods, and venturis. They were stock on a 303 cu in engine. I can get different jets but i don't think that will be necessary. I am running on one for the majority of the time. Ted wrote me there is a lot of interest in running these setups on Y-Blocks and I am very happy I did it. The NASCAR air filter is part of the mystic but 2 air cleaners or one oval one like the FE's would look good.

|
|
By Oldmics - 12 Years Ago
|
Looks like the factory did it !!!!!!!!!!!!!
But what do I know ?
Oldmics
|
|
By Ted - 12 Years Ago
|
|
Looks like something you’d find under the hood of a mid-Fifties highway patrol car. Thanks for sharing.
|
|
By petew - 12 Years Ago
|
Ted (11/22/2014)
Looks like something you’d find under the hood of a mid-Fifties highway patrol car. Thanks for sharing.
Or a moonshine car ! Great looking set up and probably a lot less trouble prone then a pair of tea pots
|
|
By DryLakesRacer - 12 Years Ago
|
Time for a update and things learned. A hesitation started after a few days; since both WCFB's were the same I figured a swap was the easiest thing and it solved the problem. As for things learned that was a little tougher. I know Ted had done a lot of testing on the dual quad installation including WCFB's and what I found was it was very difficult to adjust the mixture screws on the rear carb I don't know how much time the tests spent idling..
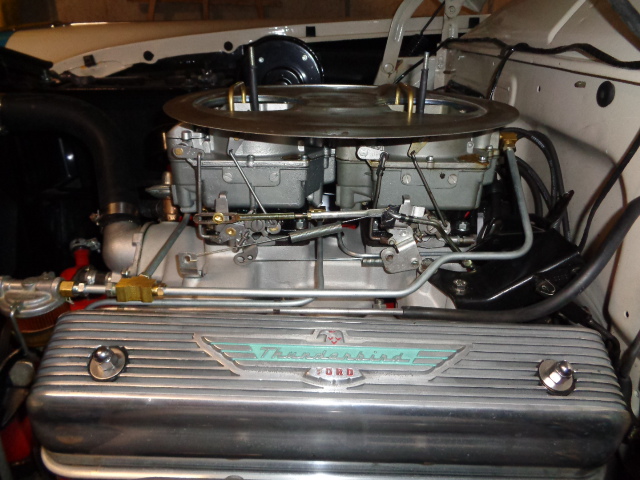
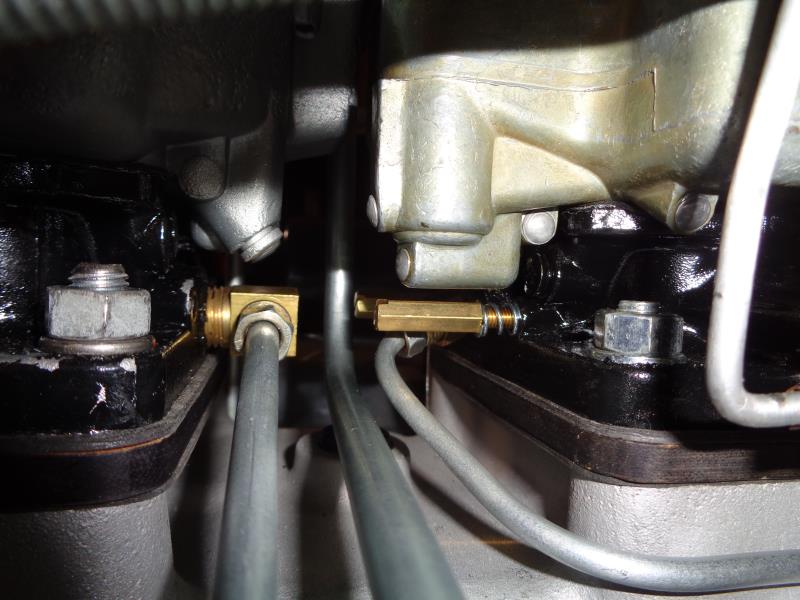
There is an obvious fix and that's to buy Brand "C"s 245/270 HP WCFB's extended screws. They are 6 sided and easily adjusted with 1/4" wrench. Danchuk (a brand "C" supplier) is a few miles from me so I picked up a set along with a center crossover vent tube because they look cool. The earlier WCFB's don't have 2 like the 56-up so one will do. I've included a few photos so you can see how close they are. I love the set up and really glad I did it.......JD
|
|
By DryLakesRacer - 11 Years Ago
|
|
With almost 6 months of running, still the best thing I ever did. Hear it run on You Tube.. Search Ford Y-Block w/dual quads. Made the tape after finally synchronizing the carbs with a UniSyn adapted for the WCFB's. They were a little off and even now.
|
|
By charliemccraney - 11 Years Ago
|
Here it is.
|
|
By DryLakesRacer - 11 Years Ago
|
|
Thanks Charlie...That was my first YouTube (maybe last) so I didn't know how to get it here...JD
|
|
By YBLOCKMERC - 11 Years Ago
|
|
Bravo!
|
|
By Rowen - 11 Years Ago
|
|
Just watched yer video drylakesracer, n all I can say is ... Yeeeehawww!!!!! Very NICE!!
|
|
By RocketsGarage - 8 Years Ago
|
I know this is an older thread bits been an inspiration for the currant motor that's about to go into a '55 wagon. Thank you.
Question. Because the Edelbrock intake doesn't have a factory coil mount provision what'd you do to mount to coil in the stock spot? Off the carb base?
|
|
By charliemccraney - 8 Years Ago
|
|
You could make a bracket to mount it via the carb studs. You could make a bracket that mounts via a couple intake bolts. You could also have bosses welded onto the intake, in the stock location. Or find a place to mount it on the fender or firewall. If you can figure out a way to do it using existing holes or bolt locations, you can mount it without having to drill any sheet metal. For instance, on my truck, I have an alternator so an external regulator is no longer needed so i used the regulator location as a mounting point for a bracket to hold my ignition box.
|
|
By RocketsGarage - 8 Years Ago
|
|
Yes, I'm thinking I'll mount it off the carb base but was just wondering what exactly he did because it looks so good and I have almost the exact same setup.
|
|
By DryLakesRacer - 8 Years Ago
|
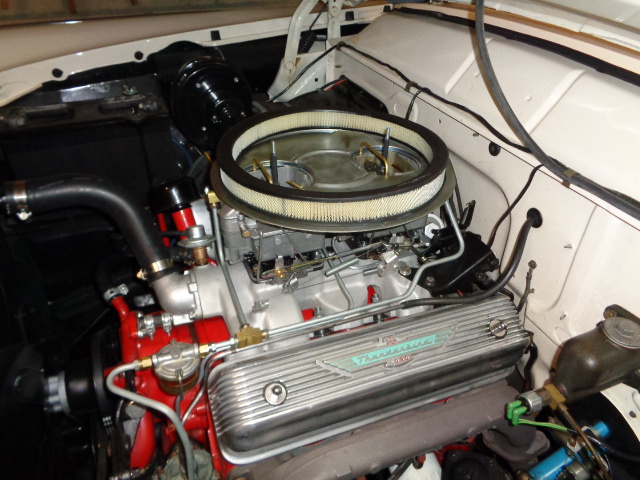
Wow! What treat to see this old post. I cannot believe it's been 3 years since I did it. I have not adjusted the carbs since I set them with the unisyn back then; I've over 6000 miles on this set up.
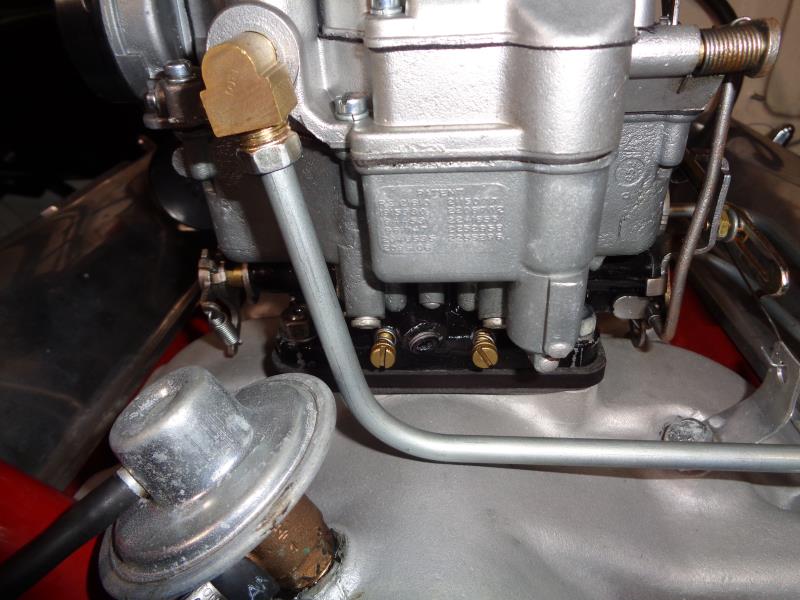
As said, I made the bracket out of aluminum I believe .040" since I have it for my sons oval dirt car. I took a few photos and for the most part it is held on by the rear carb studs. The rear stud is also for the ballast resistor which I choose to run with the Pertronics ll. You can see it has 2 bends 90* each and cut about 1/2 off under the coil. If you look under where the high voltage wire goes in the coil you will see a screw with a nut. That is going into the stock supplied hole that was in the manifold for the coil to stand up. It is the brace to keep the coil mount steady.
Around the edges you see, I took a hammer and with my bench vice bent over the edge on all the sides but ones going up to the carb to make it stiffer. I also thought if it was a stamped steel part they would have made that way.
I painted it silver to kind of make it blend in. The big red air filter hides mast all of it any way. Many times I've wanted the 2 small ones like are buddies at GM used but just can't do it. Rockets show some photos when your done and I hope you have as much good luck as I have had.
My UniSyn is mounted to a Holley carb cover. The adapter is plastic for a WCFB/Rochester 4GC to a larger 7-1/4" air cleaner bottom with RTV. All of it from E-Bay. 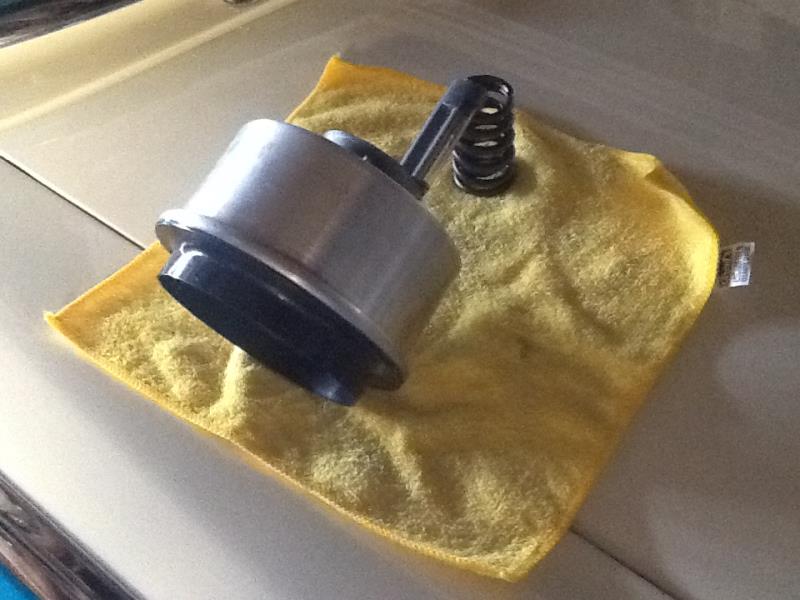 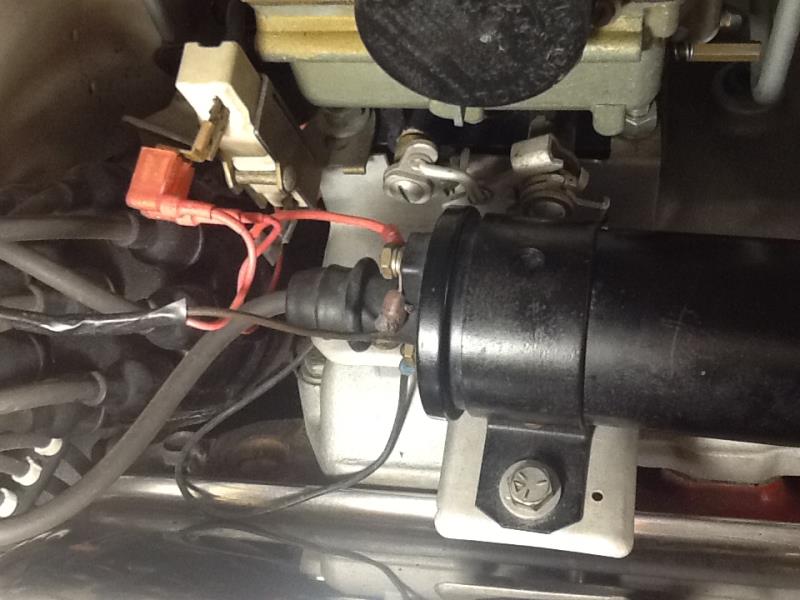 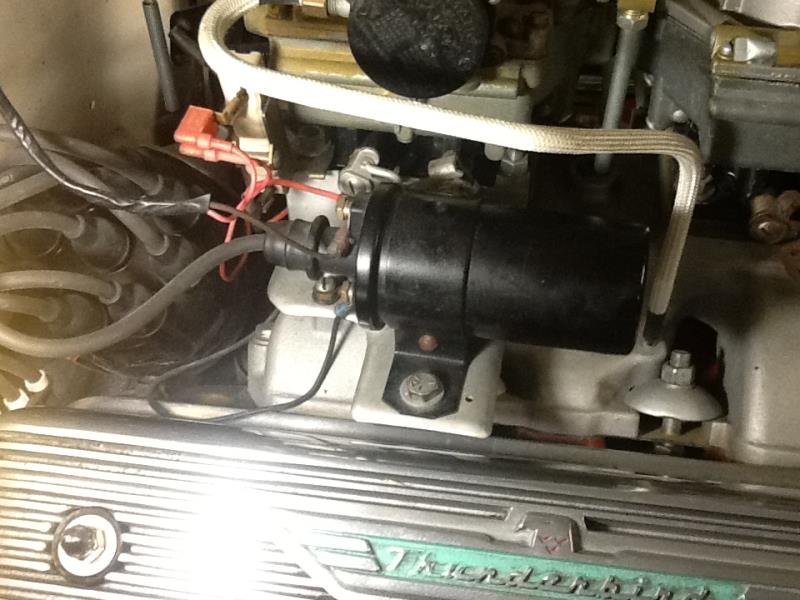
|
|
By DryLakesRacer - 8 Years Ago
|
|
Opps, you need to do a little metal "fine tuning" between the two carb studs to miss all the carb linkage on that side of the carb. I probably had it on and off a few times and did make one out of cardboard to get the heights right.
|
|
By KULTULZ - 8 Years Ago
|

ABSOLUTE BEAUTIFUL DETAIL WORK!
|
|
By RocketsGarage - 8 Years Ago
|
|
Thanks a bunch for the photos and explanation. Our motor is currently being prepped to run on the stand. I'll post a video or something when it's goin'.
|